
Many off-roaders want the reliability of a new truck for hauling their dirt bikes, UTVs, and ATVs. Some hesitate to modify their still-under-warranty trucks to avoid any potential dealer service problems. This limits them to campsites and unloading points that are accessible by a stock truck.
Pro Comp is one company that addresses late-model truck owners’ warranty concerns. Although dealerships must show cause/effect that an aftermarket components contributed to the OE failure (part of the Magnuson-Moss Warranty Act of 1975), many service managers routinely deny warranty coverage if the vehicle has non-factory parts. The truck owner must then go over the service department’s head and detail how the aftermarket part had no effect on the OE failure. Some dealerships know that most customers won’t fight, even if the warranty denial is bogus: The service department makes more by charging the customer full pop compared to its discounted warranty-work reimbursement from the automaker.
Pro Comp’s five-year/60,000-mile Lift Shield powertrain warranty program was created to address factory warranty concerns. Certain Pro Comp suspension systems installed by authorized shops are covered by Lift Shield at no additional cost. Should a dealership decline a powertrain warranty claim based on the Pro Comp kit, Lift Shield covers the repairs, subject to a deductible and a few other details spelled out on Pro Comp’s website. The Pro Comp 6-inch system for current-model Chevy/GMC 1500 trucks is part of the Lift Shield program.
Although Pro Comp recommends professional installation, the company’s knuckle-style ’14-15 GM 1500 6-inch kit can likely be put on by a couple of skilled off-roaders over the course of a weekend. A two-post lift is ideal and saves time, but the job could be done on the ground as long as the truck is secured on jackstands that are tall enough for the front axle to be slid out from under the truck (for 4x4s; the same basic kit is available for 4x2s, deleting the front diff brackets).
No specialized tools are necessary beyond tie-rod and ball joint pullers: The base Pro Comp kit uses front strut spacers, which don’t require disassembling the dampers in a strut vise. (Optional upgrades include Pro Comp ProRunner longer-than-stock monotube coilovers.)
This kit is designed to fit 35x12.50 tires with no fender trimming. However, the front valance might rub if running 12.50-wide tires.
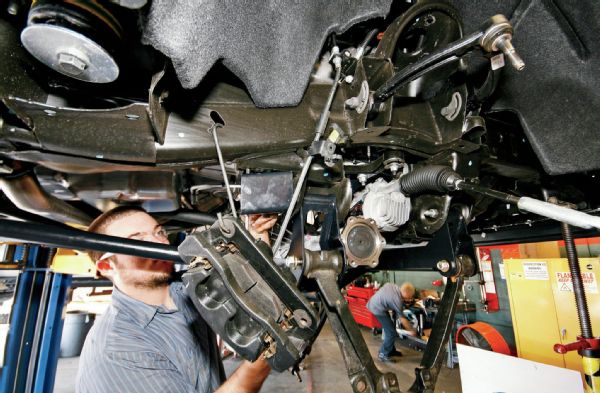
Installation highlights are shown here, as demonstrated by Ryan bushman at 4 Wheel Parts’ Thousand Oaks, California, store. Including wheel alignment and speed-sensor recalibration using a Hypertech tuner, the job took our pro installer a full day.
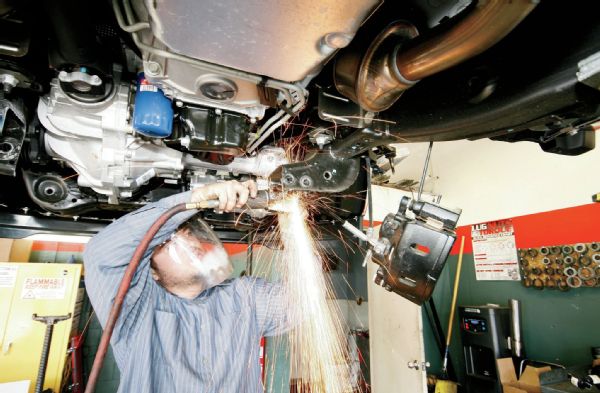
The front suspension is disassembled. Marking the sway bar’s orientation prior to removing it takes the guesswork out of reinstallation. Once the crossmember brace is removed, the lower control arm mounts must be trimmed.
Pro Comp recommends removing the diff prior to trimming the frame. 4 Wheel Parts pro installer Ryan Bushman prefers to cut the frame mounts first to open up more room for diff removal.
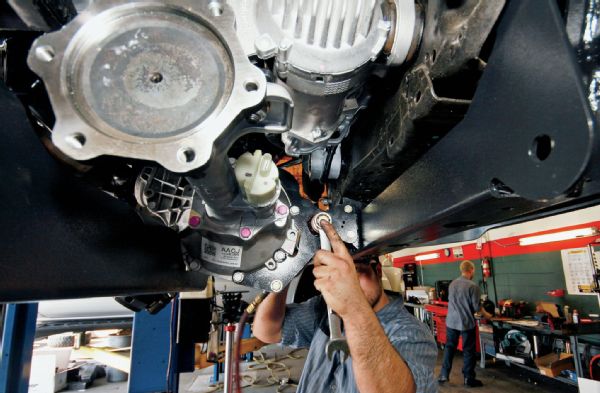
The Pro Comp kit includes a support bracket, complete with a urethane bushing to accommodate suspension flex. The diff fin needs to be trimmed slightly for clearance.
Frame brackets space the diff down. Some of the factory hardware is reused.
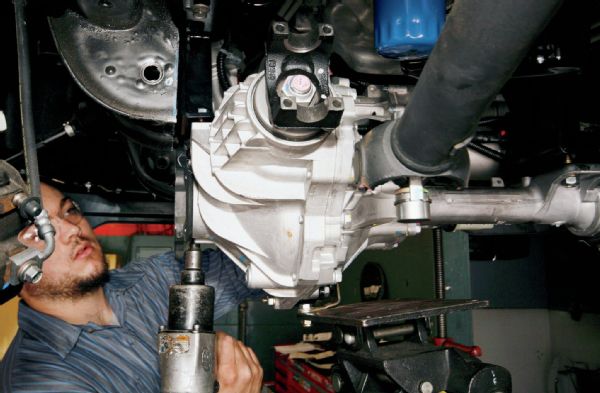
A second person is helpful for jockeying the front diff back into position, even if a jack is available. Bolts are snugged to check clearances at the trimmed areas, then final-torqued once fitment is verified.
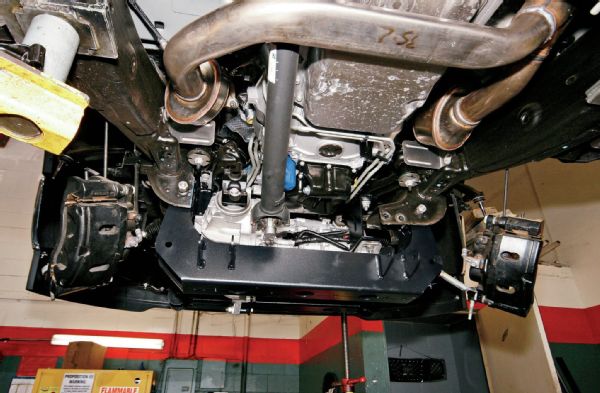
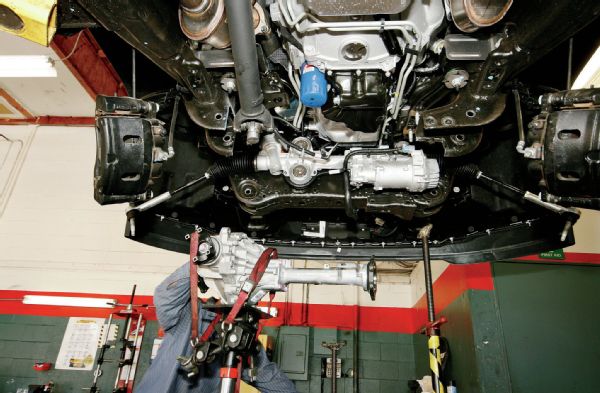
Replacement front crossmembers space the lower control arms down, making room for the Pro Comp knuckles. The kit is engineered to clear the OE exhaust pipes.
The Pro Comp front crossmember attaches to the factory pockets. The kit’s diff tabs are used to secure the diff to the crossmember.
The factory control arms are hung on the Pro Comp crossmembers. Ryan Bushman bolts together all components loosely, then torques the bolts to spec once all of the kit’s parts are in place.
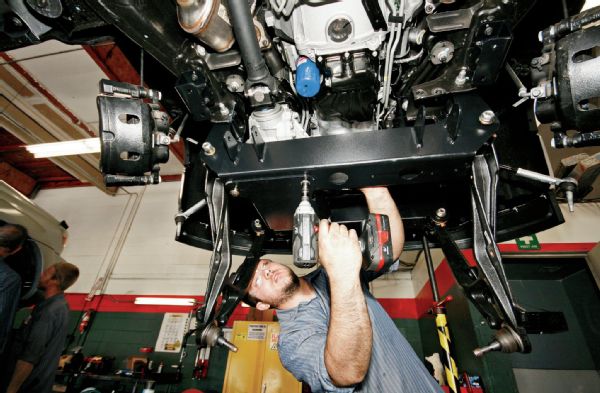
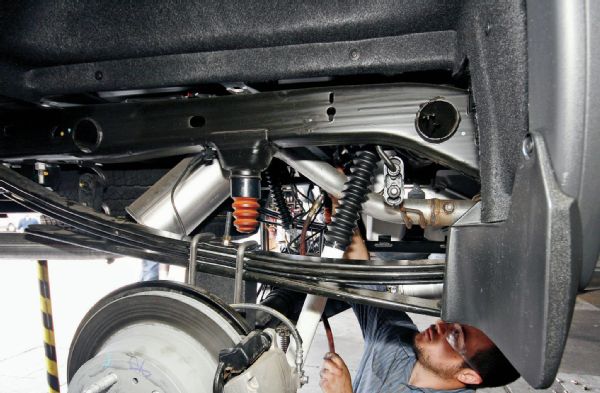
A skidplate piece protects the diff. It also adds rigidity between the two crossmembers.

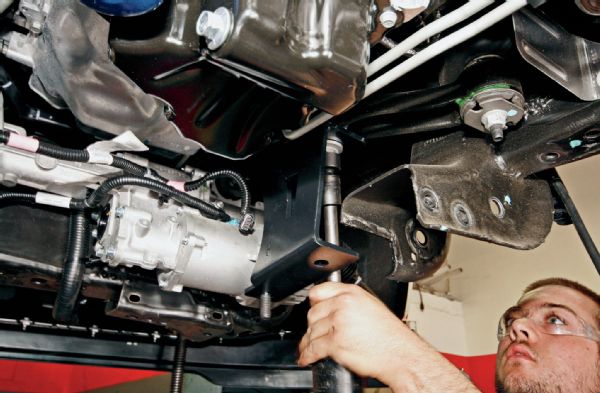
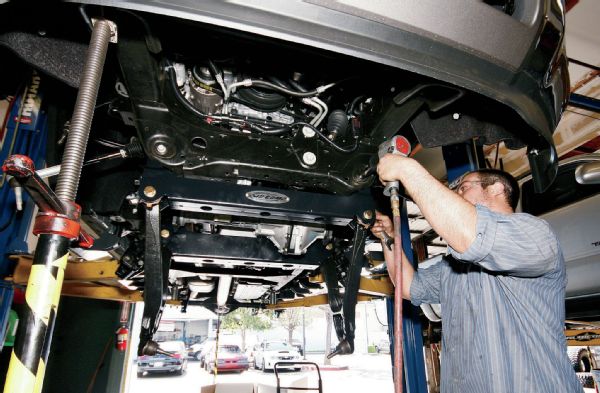
Kicker braces reinforce the Pro Comp rear crossmember to the truck’s transfer case crossmember. Poly bushings allow the kickers to absorb some frame flex.
Frame brackets space down the sway bar. This allows the OE sway bar to be reused—no extended endlinks.
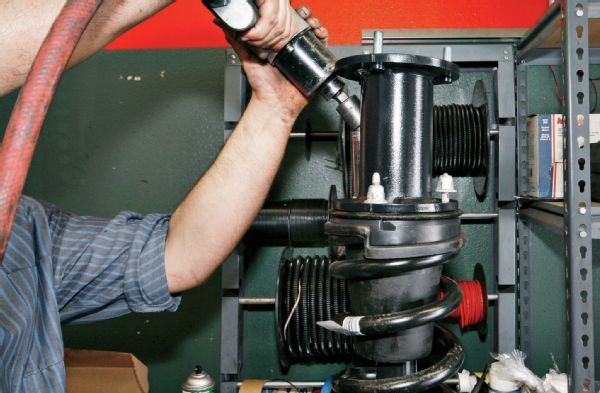
The base kit uses spacers onto the OE struts, no strut compressor required. Pro Comp also offers upgraded replacement coilovers.
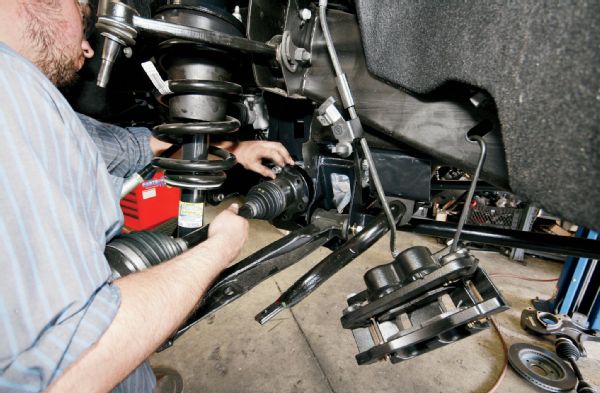
The struts are reinstalled in their OE locations. The kit’s billet spacers mount between the CV axles and diff. The spacers increase track by an inch per side, increasing turning radius but allowing the Pro Comp knuckles to clear the calipers and wheels.
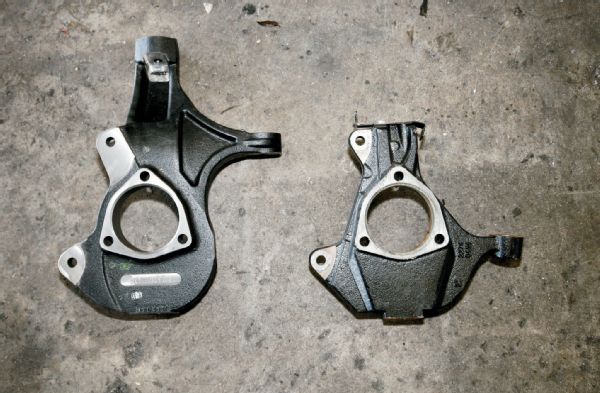
Both the Pro Comp (left) and OE knuckles are cast from ductile iron. However, the Pro Comp knuckles spread the control arms about 6 inches farther apart.

Bushman mounts the knuckles to the control arms and CV axles. Then he swaps the OE bearing hubs and brake shields onto the new knuckles.
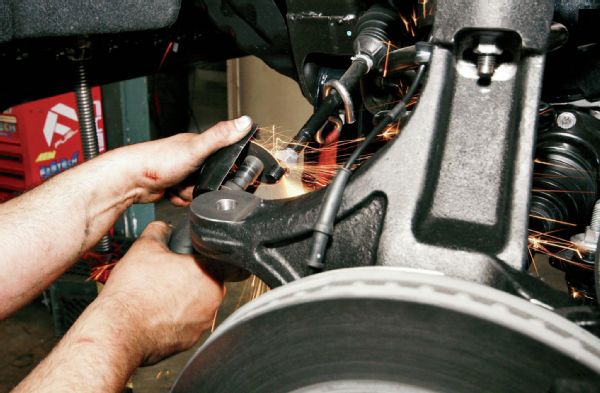
The Pro Comp knuckles are profiled to clear other components and maintain factory geometry. Tie-rods and their ends must be trimmed a couple inches as a result.
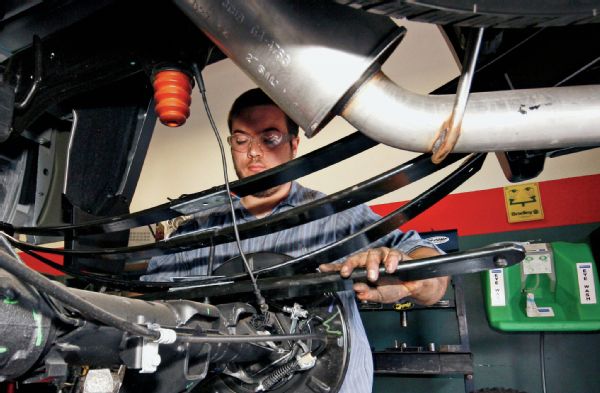
The rear is disassembled one side at a time. The kit’s add-a-leaf is inserted below a longer leaf and above a shorter one. A longer-thanstock center pin is included.
Tapered blocks, bumpstop lowering brackets, longer-than-stock Pro Comp shocks and brake line relocation brackets complete the job. Final details include professional wheel alignment, headlight re-aiming and speed-signal recalibration if the new tires are more than 10 percent taller than stock.
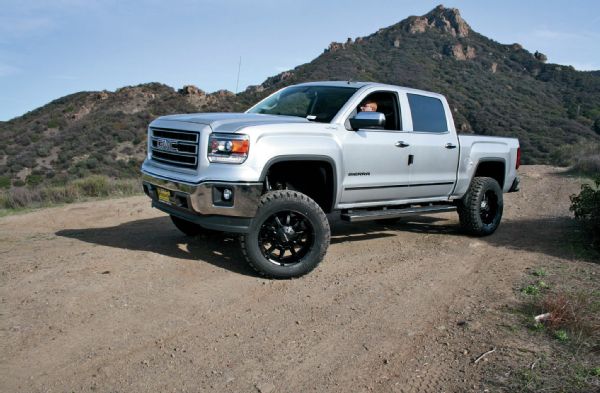
Trimming (or even removing) the front valance provides extra steering clearance. Fresh off the alignment rack, the Pro Comp kit leveled the truck by lifting it about seven inches in the front and six in the rear.
StabiliTrak Compliance
In addition to its powertrain warranty, Pro Comp went a step farther and tested its ’14-15 GM 1500 6-inch kit for compatibility with the factory StabiliTrak traction control system. The National Highway Traffic Safety Administration (NHTSA) mandated that all current-model passenger vehicles be equipped with electronic stability control. Crash data shows that these systems dramatically reduce fatalities caused by vehicle rollovers.
The test for stability control functionality is Federal Motor Vehicle Safety Standard (FMVSS) 126. It requires an evasive lane-change maneuver to be safely completed at highway speeds.
Pro Comp hired an independent testing company to perform the FMVSS 126 maneuvers. Advanced robotics and telemetry verified that the Pro Comp 6-inch lift kit for ’14-15 Chevy/GMC 1500 trucks retains full functionality of the factory stability control system.