
 Ken Brubaker
Senior Editor, Four Wheeler
Ken Brubaker
Senior Editor, Four Wheeler
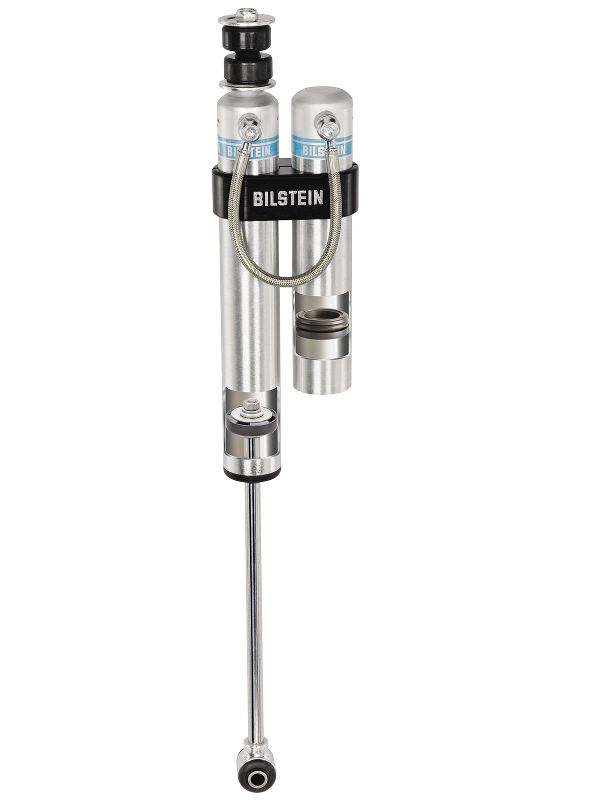
 Here’s what we installed, unboxed and ready to go. For the rear shocks we upgraded from the standard reservoir mounting kit to the optional billet aluminum reservoir mounting clamps.
There wasn't anything noticeably wrong with the shocks on our '05 Dodge Power Wagon, other than the fact that they had been under our rig since it was new. With over 60,000 miles on the ticker we just decided it was time to swap 'em out. Besides, we had been lusting after a set of Bilstein 5160 Series shocks since the company announced an application for the Power Wagon in March of 2011.
The 5160 Series shock is a monotube shock with a remote-reservoir. This reservoir dramatically increases the shocks oil capacity, which results in greater heat dissipation and damping sensitivity. Inside the reservoir is a “floating” dividing piston and since the piston is in the reservoir it frees up the main shock body for more shaft movement, thus more wheel travel. Outside, the shock has Bilstein's exclusive Triple-C technology, consisting of three coatings, which provides easy care and lasting great looks. The 5160 Series shock is designed to be installed in the stock shock mounting location and it's available for a wide range of trucks and SUVs. As a bonus, the reservoir mounting configuration is designed specifically for each application (in other words, Bilstein has done the work for you). The 5160s we installed fit '94-'11 Power Wagon, 1500/2500/3500, and MegaCab Dodge/Ram trucks with 0 to 3 inches of front suspension lift and 0 to 2 inches of rear lift.
 1. In this cutaway illustration provided by Bilstein you can see the dividing piston in the reservoir. In the main shock body there's a one-piece aluminum rod guide and seal, hard chrome piston rod, and large, self-adjusting digressive piston.
For this install we pointed our truck into Attitude Performance in Arlington Heights, Illinois, where owner Matt Dinelli completed the install while we shot photos. He also completed a few other installs on the truck while there and you can read about those in the accompanying sidebar. The shock install on our rig was relatively easy, but there are a few tricks to make it easier, which we'll pass along here. It's also worth noting that to complete this install you'll need a drill, size 7 drill bit, ¼-20 tap and tap wrench, centerpunch, and tape measure. Here's the rundown of how the 5160s installed in our Power Wagon.
PhotosView Slideshow 11. The installation of the rear shocks was easy and a simple bolt-in procedure. We used the optional billet aluminum reservoir mounting clamps, but the kit comes standard with polyurethane isolator blocks and hose clamps to mount the reservoirs. Bilstein provides illustrations of how to orient the reservoirs to eliminate interference.
Our Power Wagon: Beginnings of a Tire Test, Suspension Changes, and the Quest for Better MPG
While we had our Power Wagon at Attitude Performance we made a few changes to the truck. We installed a set of LT285/70R17 (33x11.5-inch) Dick Cepek Radial F-C II tires on factory Power Wagon wheels for testing. We've heard good things about these tires so we're looking forward to the results of this long-term test. The other change was an experiment to see if we could improve our rigs fuel mileage. We've been averaging 11.4 mpg and with fuel at almost $4 per gallon our budget is black and blue. For the last few years our truck has been fitted with a 1-inch front leveling kit and 35x12.50 tires, so we were curious to see if returning the vehicle to stock would improve mileage. For that reason we installed the stock-sized F-C II tires and we removed the leveling kit. Mileage didn't improve. Well, not what we wanted anyway. We now average 11.8 mpg. On top of that, we lost approximately two degrees of approach angle, approximately two inches of front bumper height, and approximately an inch of rear bumper height. Interestingly, there was only 10 pounds of overall weight difference between the 35-inch wheel and tire package (95 pounds per wheel/tire) and the 33-inch wheel and tire package (85 pounds per wheel/tire). Oh well, now we know that for our Power Wagon a leveling kit and 35s doesn't decrease fuel mileage that much.
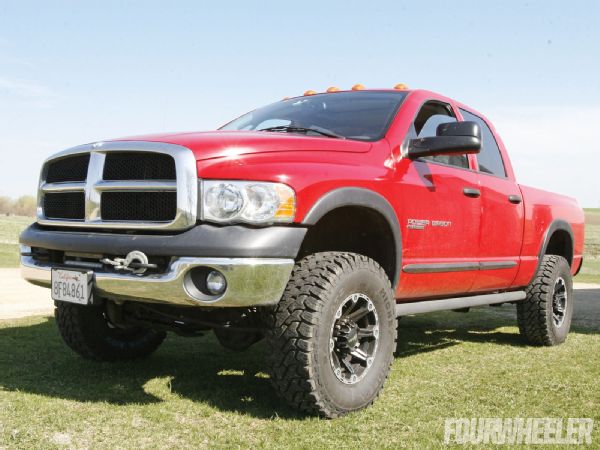 Before: One-inch leveling kit and 35-inch tires, 11.4 mpg
Bottom Line
Bilstein did a great job with the 5160s. The valving is outstanding and both on- and off-road our big Power Wagon is more controlled whether the surface is washboard gravel roads or rough pavement. And the ride is great, too. The shocks seem unfazed by rough treatment and haven't exhibited any sign of fade even after sustained travel on the aforementioned washboard gravel roads that are common where the vehicle is based in northern Illinois. The instructions included with the shocks are concise and easy to follow and help to make installation a breeze. Bilstein's recommendations for reservoir mounting configuration were perfect and we've had no problems with reservoir-to-truck or reservoir-to-tire contact. The street price of a 5160 at the time of print is approximately $190. Do we feel like we got $760 worth of shock improvement? Yep.
 After: Stock suspension height and 33-inch tires, 11.8 mpg


