Ford Super Duty Dually Leveling Kit - Four Wheeler Magazine

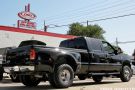
When the time comes to elevate the nose of your '99-'02 Ford F-350 dually, you may discover that options are very limited. It may simply be a case of some manufacturers skipping over certain applications that would be considered low-volume, or perhaps it is the lack of available wheel and tire fitments for dually trucks that makes lifting one harder to justify. Whatever the case, the scenario creates a real dilemma for the dually owner.

129 1012 Super Duty Dually Dynamics 2001 Ford F350 Front Shot Photo 29371748

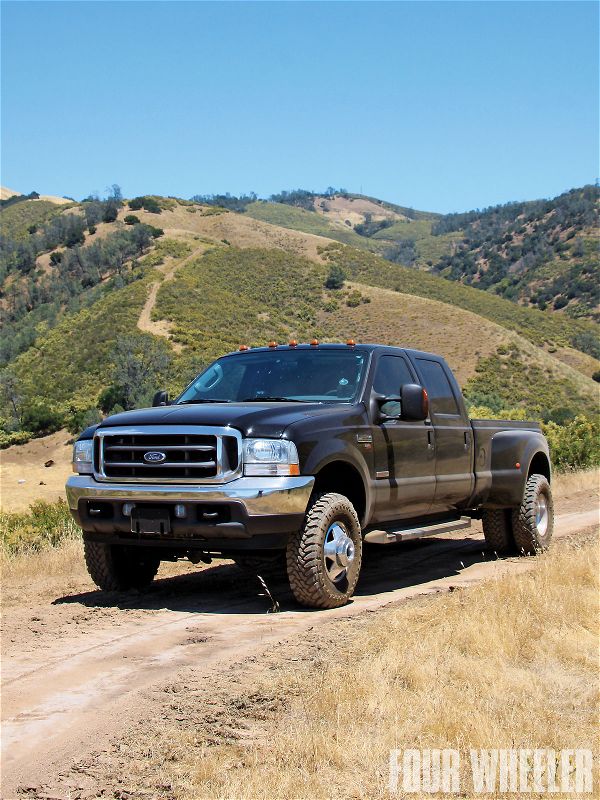
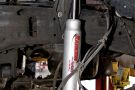
Recently a friend of ours asked us why he couldn't find a kit that would allow him to level the front of his '01 F-350 dually. At the time, we did not have a good answer for him, so we did a little investigation on the matter. Much to our surprise, we found a lot of dead ends. Some companies offered kits for 1-ton single-rear-wheel vehicles, but few actually had part numbers for dual-rear-wheel applications. Fortunately, the folks at Full-Traction Suspension had what our friend was looking for. Full-Traction has been in business for more than 20 years, and they specialize in suspension systems for fullsize pickups, including a leveling system for late-model 1-ton Ford dually pickups. The setup allows all '99-'02 Ford dually owners the ability to install a set of 255/85R16 (33-inch) tires without fender trimming.

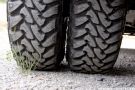
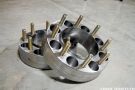
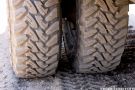
However, as we found with this project, fitting larger tires to a factory dually wheel requires more than just a leveling kit. The scenario also requires a pair of wheel spacers to maintain some very critical tire spacing in order to sustain the appropriate load-carrying capacities. When it comes to wheel spacers and dually pickups, it is essential to maintain the factory's hub-centric wheel mounting method, rather than the lug-centric style that other light-duty applications employ. You may have noticed that dually lug nuts are very different than those found on most other vehicles. Instead of having an acorn taper to help center the wheel, dually lug nuts have a flat surface where the wheel and the lug nut come together. This purposeful arrangement, together with a tighter hub-to-wheel fitment, ensures steady contact between the center opening of the wheel and the outside diameter of the full floating hub. On this setup, all that the lug studs and nuts are required to do is hold the wheel to the axle hub-no lateral forces and no need to center the wheel.

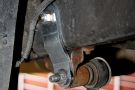
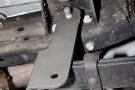
Buyer beware, some dually spacers do not address this critical matter. Without hub-centricity, a dually wheel must rely on the lug studs and the lug nut's ability to clamp the wheel to the axle hub. This setup typically leads to vibrations as the tolerances of the eight wheel lug holes were never intended to center or locate the dually wheel, let alone carry the weight of the truck. These vibrations are usually followed by stud or wheel damage as the wheel tries to move slightly around the outer bore of the hub-not good. So, for this installation we took our project to the experts at Off Road Unlimited in Burbank, California-ORU has a reputation for building lifted dually trucks. Read on as we showcase our results and highlight a few crucial steps of the installation process.

PhotosView Slideshow This is the leveling kit from Full-Traction. It provides 2.5 inches of lift to the front of the vehicle. A durable Docker Gray powdercoat finish protects the brackets from corrosion. Also included is all necessary mounting hardware as well as detailed installation instructions.
BEFORE: We took our donor F-350 to the technicians at Off Road Unlimited in Burbank, California, because they specialize in lifting dually vehicles; the shop's owner, Maurice Rozo, drives a lifted dually every day. As such, Off Road Unlimited knows the idiosyncrasies of lifting a dual-rear-wheel vehicle, and is well armed to handle any unforeseen issues we might encounter. AFTER: As you can see, our donor truck was leveled out up front, fitted with a set of Toyo Open Country Mud-Terrain tires, and ready for a trip to the alignment shop. Prior to installation, we noted the truck's factory ride height. Upon completion, we confirmed a 2.5-inch increase in the front ride height of the vehicle. This is how the factory front spring hangers looked prior to the installation of the Full- Traction spring hangers. Removal of the OE mounts was straightforward; ORU's technician simply removed each main bolt from the spring eyes while the axle was supported from below. Next, eight bolts were removed from each bracket, allowing the spring hanger to be separated from the chassis.
Installation of the new Full-Traction spring hanger was a simple bolt-on affair. This is how the setup looks once installed. Notice how the new bracket features webbing in key areas for added strength. As designed, these brackets protect the heads of each bolt that secure the spring packs to the truck. This feature is ideal for trucks with high-clearance aftermarket winch bumpers that can sometimes leave the area vulnerable to rock damage on the trail.
The Full-Traction system utilizes a small zinc-plated drop bracket to relocate the factory upper sway bar end links. This feature helps ensure that the factory ride quality and the full function of the OE sway bar are retained. As you can see, the Super Duty rear spring shackles are quite short in stock form.
The new Full-Traction lift shackles are easy to install. Notice the longer length. Once the old part was removed, ORU's technician simply set the new bracket in place using the upper shackle bolt to hold it to the frame side. Next, the axle was lowered slightly until the two corresponding holes lined up in each shackle. The lower main bolt (not shown) was installed sandwiching the spring eye between each side of the lift shackle. We thought it was important to mention the fact that ORU removed the front bumper prior to tackling this installation. Doing so makes removal and installation of the front spring hangers much easier.
To improve the factory ride quality, our donor truck's owner purchased two Rancho RS 9000XL adjustable shock absorbers from ORU and had them installed while the truck was on the lift. During this process, ORU's technician noticed an area where a lack of clearance might have prevented operation of the shock adjustment knob. The area in question was near the lower shock mount. To resolve the issue, ORU simply ground a small clearance opening that would allow easy access to the adjustment knob. The modification did not affect the strength of the lower shock mount. To achieve the proper look and maintain the necessary load-carrying capacities of our donor truck, the tires we picked had to be narrow while also sporting an "E" load rating. The Toyo Open Country Mud-Terrain in a 255/85R16 size were a perfect fit. Here, you can see the difference between the factory tires and the new Toyos.
With the new tires mounted and balanced, we sent the truck off for an alignment. After that, we hitched up a trailer with a heavy K5 Blazer on board to check to see if the spacing between the rear tires was adequate or not. This photo shows just how close the new Toyo tires were to each other when loaded. To us, this was simply too close for comfort, especially when you consider that the vehicle's owner typically hauls three times the weight that we conducted our test with. To resolve the issue of tire clearance, we went back to ORU to pick up a set of their billet steel dually spacers. These spacers add two inches between dual rear tires and are machined from a solid chunk of steel for unrivaled strength. They can accommodate tire size's up to 37 inches tall (12.50-inch max tire width), and include all necessary mounting hardware. We like the fact that these spacers maintain the factory hub-centric mounting method and that they were designed to use the stock metric lug nuts. Here you can see the gap afforded by the ORU dually spacers. No worries of sidewall contact here, even when loaded to capacity.