 Ken Brubaker
Senior Editor, Four Wheeler
Ken Brubaker
Senior Editor, Four Wheeler
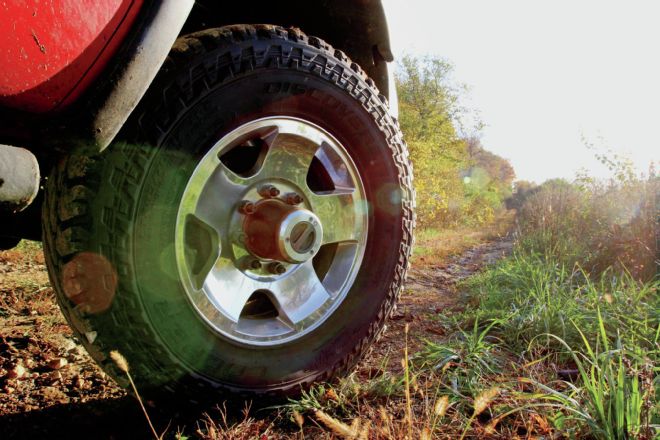
Our ’05 Dodge Power Wagon is a great truck, but there are a couple things that have bugged us for a while. First, like many other modern 4x4s, the front axle was designed with sealed unit bearings. These unit bearings are non-serviceable, and they don’t hold up well to abuse or larger tires. When they fail, the entire unit needs to be replaced. For our truck, OE replacement unit bearings cost as much as $450 each when purchased from a dealership. Nabbing one from a parts house is far less expensive, about $120 each, but could be of dubious quality. The second thing that drives us nuts is that if the truck is moving, so are the internals of the front axle. This means if we have a ring-and-pinion problem, axleshaft damage, or axleshaft U-joint failure, the truck may be unmovable. And, the spinning internals absorb engine power and thus decrease fuel mileage.
What do we want? Well, we want tougher wheel bearings, and we want a way to disconnect the axle’s internals from the wheels. There’s a way to do that? Yep, it’s called the Dynatrac Free-Spin Heavy-Duty Hub Conversion Kit, and we installed it.
The Free-Spin kit for our Power Wagon came with everything needed to ditch the factory unit bearing setup for tougher, serviceable wheel bearings, races, and seals. The kit also includes hubs, spindles, outer stub shafts, ABS tone rings, and ABS sensor mounts. Also included are manual locking hubs, which will give us a way to unlock the axle’s internals from the wheels. You remember manual hubs, right? They’re a great invention that have mostly been abandoned by vehicle manufacturers. The Free-Spin kit ($1,989.99 at time of print from 4wheelsparts.com) comes with Warn Premium manual hubs, but we went all-Dynatrac by upgrading to the DynaLoc manual hubs for a few more bucks. Dynatrac says that the DynaLoc hubs are three times stronger than other locking hubs and are the first truly new locking hub design in two decades.
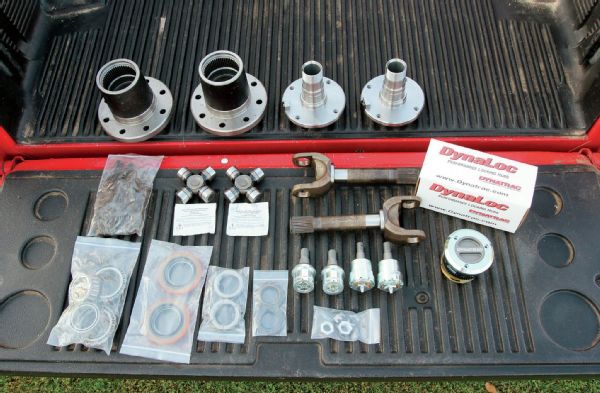 Here you can see most of the contents of the Dynatrac Free-Spin kit, as well as the Dynatrac ball joints. There are also detailed, easy-to-follow installation instructions included. The Free-Spin kit doesn’t include new axleshaft U-joints, and since ours had been spinning for over 70,000 miles, we figured it was a good time to install new ones. Spicer offers an application for our AAM axle so we had the company send a pair.
Our Power Wagon has over 70,000 miles on the ticker, and it’s still fit with all the factory front axle components. Since we were going to have the ends of the axle disassembled anyway, it was a no-brainer to replace the ball joints as they are a common failure item on this axle (as a matter of fact, our truck had a bad driver-side lower ball joint). For this, we again turned to Dynatrac for the company’s ultra-beefy ball joints ($659.99 at time of print from 4wheelparts.com) that are greasable and rebuildable.
The install was completed at our friends shop, R and R Repair in Rock City, Illinois, in about five hours on a Sunday. While we shot photos and generally pretended to work, shop owner Rick Jacobson and our buddy Cory Kraft took turns doing the wrench work. Like we said, the front axle on our Power Wagon has not been apart since it was assembled at the factory. We’ve tried to avoid driving our rust belt-based Power Wagon on winter road salt, but there have been instances where it has been immersed in the evilness. Point is, rust factored into the project in a couple of instances, and we’ll tell you how. With that said, read on to gather some tips, tricks, general info, and results on the install.
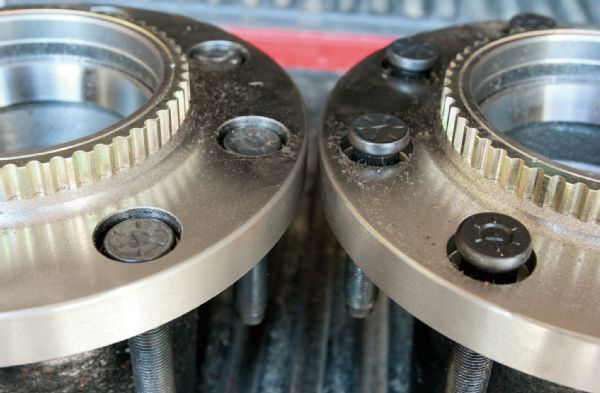
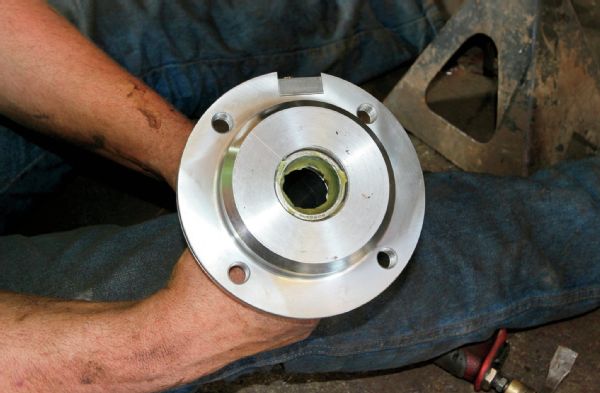
The ABS tone rings were already installed to the short side of the new Dynatrac hubs. If yours come uninstalled, tap them into place with a soft-face, dead-blow hammer. The new wheel studs are not installed in the new wheel hubs. Tip: Don’t pull the studs through with the lug nuts. Drive or press them on until fully seated. On the right, you can see the studs in the hubs but not seated. On the left, you can see what the studs look like when fully seated correctly in the wheel hub.
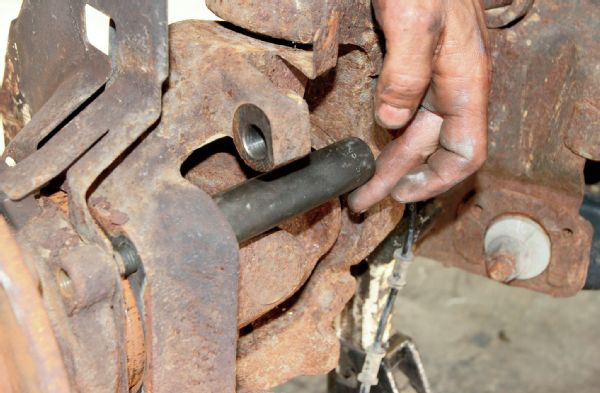
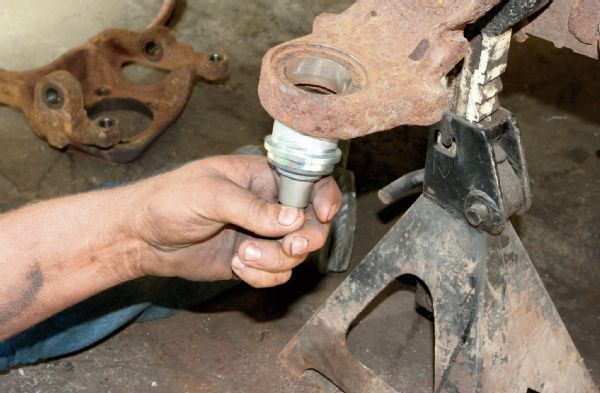
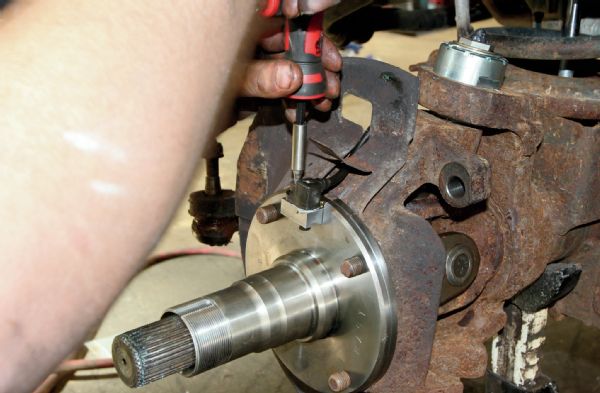
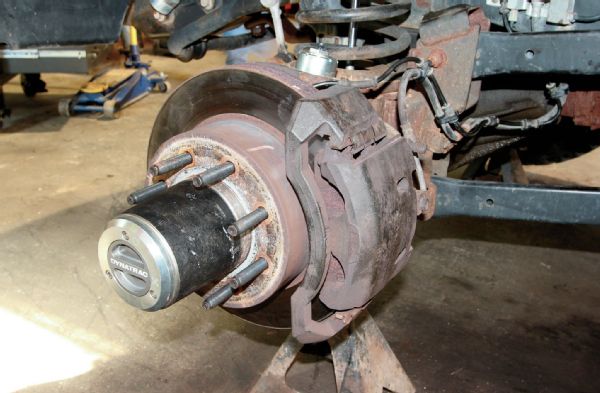
During axle teardown we encountered a common problem on Dodge trucks where the unit bearing assembly had become fused to the knuckle. This can be a time-consuming, frustrating problem, but it wasn’t for us, because Rick had a Snap-on DHP1 Dodge Wheel Hub Removal Adapter. To use, two of the four unit bearing mounting bolts are removed and then the two remaining bolts are backed out about ¼-inch. The tool is similar to a socket. One end is fit over the bolt head and the other presses against the inner “C” when you power up the truck and turn the steering wheel. We jockeyed the tool from bolt to bolt a couple times while turning the steering wheel and the force of the power steering broke the unit bearing free from the knuckle.

The ABS sensor found in each unit bearing is reused. Rick and Cory knew from experience that removing the ABS sensor from each unit bearing can often result in damaging the sensor. In the rust belt, it’s common that these sensors tend to corrode to the unit bearings. Instead of trying to remove the sensor in each unit bearing while the unit bearings were still attached to the vehicle as the Dynatrac instructions directed, Cory disconnected each ABS sensor from its wiring at the nearby plug, removed each unit bearing, and worked on removing each ABS sensor with the unit bearing on the bench. With careful coaxing, he was able to remove the sensor from each unit bearing without damage. This saved us from having to make an 18-mile trip to a parts store on a Sunday morning.

Here you can see how much corrosion was on one of the ABS sensors. Keep in mind, this corrosion existed on our 10-year-old truck with limited salt exposure. If your rig has been subjected to a lot of road salt, you may want to have new sensors on hand. Our local discount parts store quoted us about $55 per sensor, so it’s worth taking time to carefully coax the sensors out of the unit bearings.
The Dynatrac Free-Spin kit has been designed to work with the stock axleshaft U-joints. If you’re going to reuse your U-joints, take care not to damage them when removing them from the outer axleshaft. With over 70,000 miles on our truck, we were replacing rather than reusing, so we had Spicer send us a pair of U-joints (PN 5006813). Yes, Spicer makes U-joints for the AAM axle. Best of all, at about $60 each (street price at time of print), the beefy Spicer U-joints were a bargain compared to the $150 the dealership wanted for each U-joint.
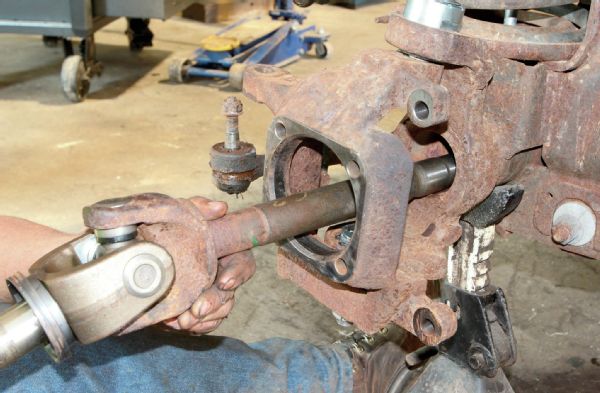
Here you can see one of the new cold-formed, high-quality steel Spicer Life Series U-joints installed between one of the stock inner axleshafts and one of the new heavy-duty Dynatrac induction-hardened alloy outer axleshafts. These are 35-spline, 1.5-inch-diameter ’shafts. Note that a pair of spacers are required between the U-joint and the outer axleshaft.
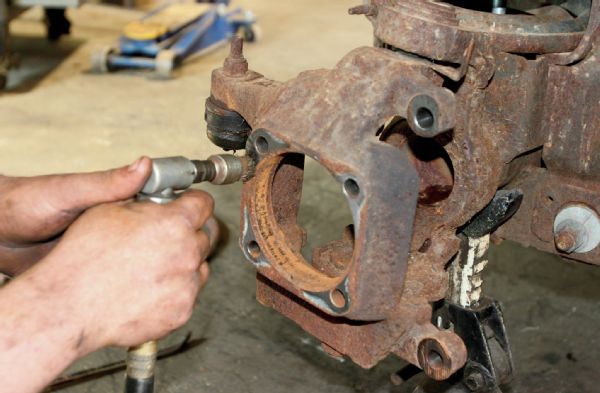
Tip: Prior to reassembly, clean everything. This includes the axletubes and the surface of each knuckle where the spindle will attach. Here you can see the driver-side knuckle being prepped for the spindle.
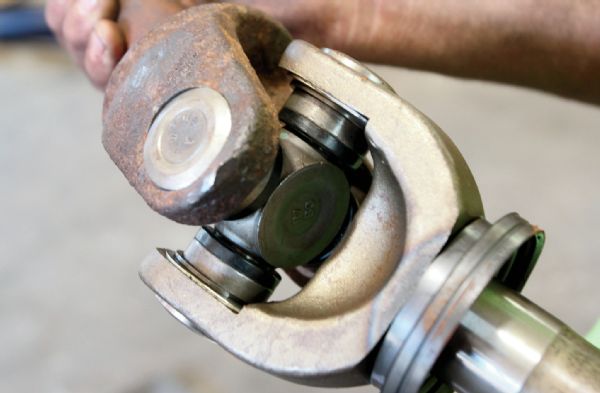
Replacing the factory ball joints with the beefy new Dynatrac ball joints was no different than installing OEM ball joints. Tip: When removing the knuckle from the ball joints, loosen the nuts on the shafts of both ball joints about five threads. This will prevent the knuckle from falling off during disassembly. This photo was taken after the knuckle was removed and shows the hammer we used to break the knuckle free of the tapered ball joint studs.
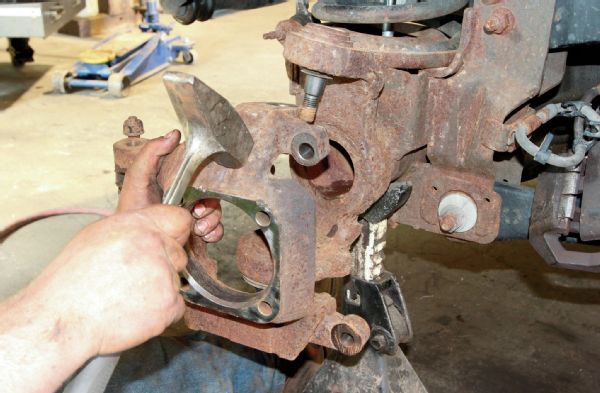
Dynatrac recommends using a ball joint press kit to remove the old ball joints from the end forgings. Once the old ball joints are out, it is very important to clean the bores in the knuckles and end forgings to ensure that the new ball joints seat correctly. We used a wire brush to prep the bores. During installation of the new ball joints, Dynatrac recommends using a press tool and installing the lower ball joint first. Tip: The Dynatrac instructions give the proper torque specs and procedure for tightening the nut on the shaft of each ball joint.
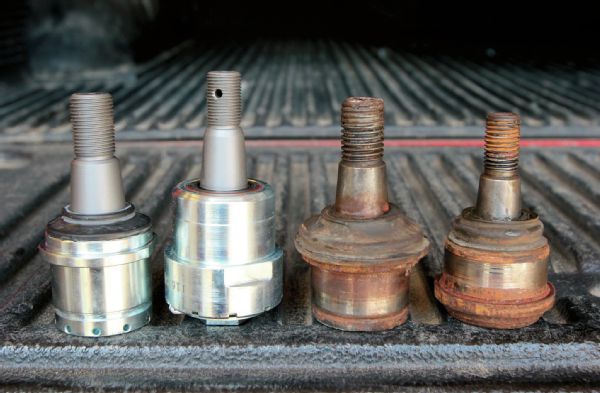
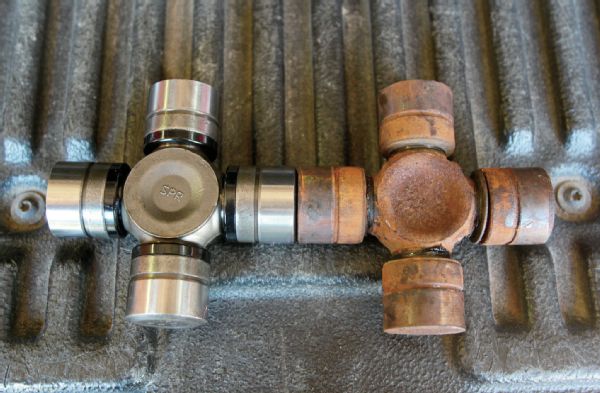
On the left you can see the new Dynatrac ball joints pictured next to the factory ball joints. The Dynatrac ball joints are significantly stronger than the factory units. The Dynatrac ball joints are made from high-strength billet steel and they have heat-treated bodies. The stems are made from super strong chromoly steel and they’ve also been heat-treated. In addition, each ball joint is well sealed, has Teflon-coated internal wear points, a heat-treated, precision-ground stainless steel ball that conforms to military specifications, and a fully adjustable cup support that protects against severe road impacts. Bonus: Each ball joint is fully greasable and rebuildable.
During reassembly, the first step is to insert the axleshafts into the axlehousing. It’s important not to get contamination on the ’shafts as they’re installed, because it could damage the bearings and seals.
Tip: Have lots of wheel bearing grease on hand. Prior to installing each spindle, the inner spindle bearing must be generously packed with wheel bearing grease (shown). Also, fill the boot seal on each outer shaft with grease and coat the area around each thrust washer with grease.
Torque specs for the spindle mounting bolts are provided in the Free-Spin instructions and the bolts should be tightened in a crisscross pattern. Tip: When installing the new spindle to the knuckle, put a light coat of anti-seize compound on the shoulder surface of each spindle. This will help ensure that future disassembly will be much easier. We also used anti-seize on the contact area of each ABS sensor prior to installing the sensors to the spindles so they can be removed easily in the future.
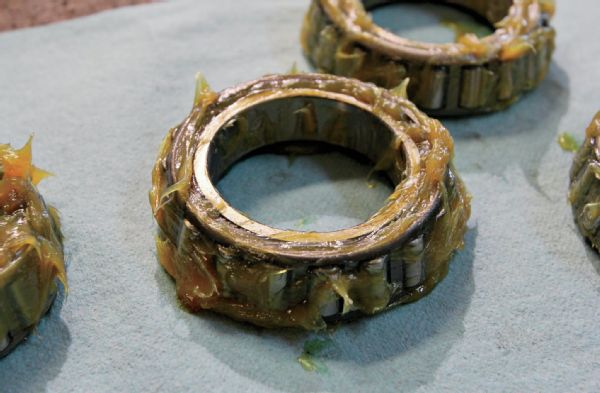
If you’ve never packed wheel bearings before, Dynatrac can provide a one-page guide for the asking. You can use your hands or a commercially available bearing packer. Either way, it’s critically important to make sure that grease thoroughly and completely fills the voids between each roller, especially under the roller cage. Here you can see one of our bearings packed with grease and ready for installation. The inside of the hubs are also filled with grease, and Dynatrac says don’t be skimpy with the grease.
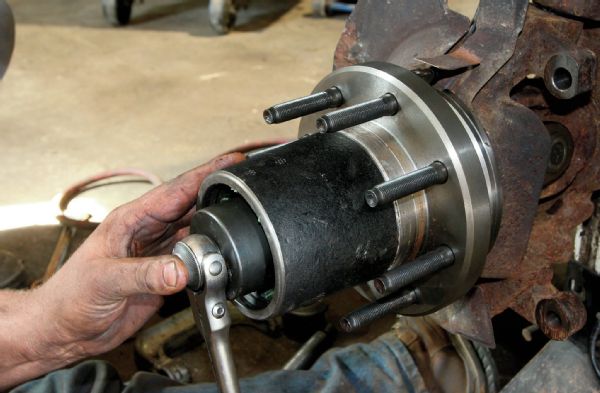
When installing the wheel hubs, care must be taken not to damage the hub seals as each hub is slid over the threaded end of each spindle. The wheel hubs are held in place on the spindles by spanner nuts. It’s important to use the correct hub socket to tighten the spanner nuts. Don’t plan on using a punch to tap the nuts tight. It’s also very important to tighten the nuts to the recommend torque.
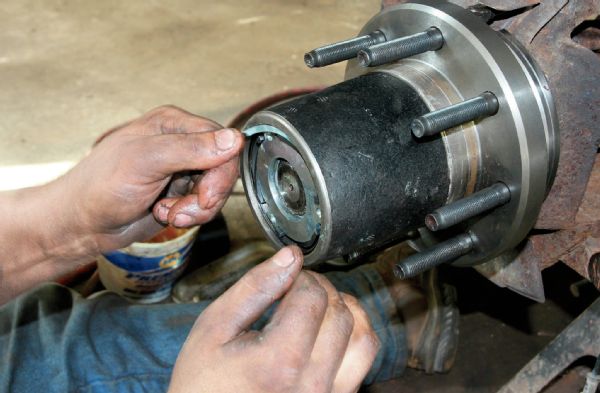
The DynaLoc hubs went together easily, thanks to very detailed instructions provided by Dynatrac. Not only do the instructions tell you what to do, they also have an excellent collection of photos so you can see how everything should look as the installation progresses.
Here’s what the driver side of our AAM 9.25-inch axle looked like after installation of the Dynatrac Free-Spin kit and ball joints.
Results
The Dynatrac Free-Spin kit didn’t disappoint. Everything went together perfectly, and the results exceeded our expectations. We’re ecstatic knowing that our Power Wagon now has much tougher bearings, we can disconnect the axle’s internals from the wheels, and we love that it takes only 1⁄8 turn of the DynaLoc hub dial to lock and unlock. We also like that the bearings, races and seals used in the Free-Spin kit are readily available from a run-of-the-mill parts store. And speaking of parts, everything included with the Free-Spin kit and DynaLoc hubs is super beefy. We also like that the Dynatrac ball joints are rebuildable.
We’re currently running stock Power Wagon wheels on our truck with stock-sized tires and the new hubs stick out 15⁄16 inches past the tire face, so we have to be mindful of obstacles to not damage the hubs. If you’re running aftermarket wheels with a negative offset where the track of the vehicle is wider, the hubs may tuck into the wheels. It’s also worth noting that the wheel studs included with the Free-Spin kit are a little over 1⁄2-inch longer than the stock studs, so if you’re using closed-end lug nuts, they may bottom out on the studs before they contact the wheel. Our closed-end lug nuts bottomed just as they contacted the wheel so we swapped on a set of factory open-end lug nuts.
We’re also ecstatic about the mpg increase we’ve seen with the truck. Now that we can unlock the wheels from the front axle’s internals, the engine doesn’t have to spin that mass so it isn’t working as hard. We noticed right away that the truck wasn’t downshifting as often on grades. Our average mpg for the last 10 tanks of fuel prior to the Free-Spin install was 10.6 in mixed city/highway driving. Our first tank through the truck in city/highway driving with the Free-Spin kit installed returned 12.5 mpg. This translates to a 17.9 percent mpg improvement. That’s icing on the cake.
PhotosView SlideshowMore Applications
The Dynatrac Free-Spin kit, DynaLoc hubs, and ball joints are available for specific vehicles and you can peruse what’s available at dynatrac.com
Special Thanks To:
R and R Repair
815/238-1261

