As a rule we in this industry are a self-sufficient group. We build our own engines. We do bodywork for ourselves. We build frames. We paint our own cars. A few of us have even taken to trimming our own interiors. But there's one frontier we can't seem to conquer: chrome.
For good reason, really. Chrome plating solutions contain strong concentrations of sulfuric acid. The process relies on hexavalent chromium and produces lead chromate and barium sulfate, three toxic chemicals that'll kill you in time. One solution will kill you immediately: it contains cyanide. No wonder it costs so much to have parts chromed.
So for that reason I sort of knew what to expect when I asked Don Meth at Show Quality Metal Finishing what it would cost to have a few pieces made bright. But what I wasn't prepared for was the cost if I prepped the parts. While not as inexpensive as having a part powdercoated (frankly nothing is anymore), it wasn't much more than it would cost to finish something in a modern two-pack paint.
As ironic as it seems, it's not just the cauldrons of potentially gene-altering solutions that make plating so expensive, it's the preparation. You see, highly reflective surfaces amplify flaws so the scratch that goes into a tank emerges a canyon, or so it seems anyway. And to work a part to that sort of finish takes time. And time costs money. So reduce the time a plater spends on a part and the price comes down dramatically.
My eyes sort of glazed over as I pondered the things I suddenly could afford to plate. But I came out of the ether pretty quickly. I don't have a buffer much less the wheels and compounds they require. Meth interrupted me, "I don't even use any of that stuff to prep parts for chrome." As he explained the methods he uses I realized that I already had most of the tools to prep parts for plating. "Just come down to the shop one day and I'll show you," he offered.
Here's metal finishing in a nutshell: reduce the surface flaws with a series of abrasives, each step finer than the last. Take a cast part for a start. Eliminate the casting grain with 80-grit abrasive. Replace the 80-grit marks with 150-grit abrasive. Then rub out the 150-grit marks with 220. And here's the jaw-dropper: at that point you're done prepping for chrome. "Anything finer than 220 is usually a waste of time," Don reveals. "If we're doing a really critical part for a show car we might go to 400 but only so we can see if we left any marks coarser than 220. But 220 is just right." As our good fortunes would have it, nickel and chrome build enough surface finish to fill the fine scratches left by 220 abrasive.
In other words, take the notion of using a polishing wheel and a bunch of compounds and throw it right out the window; that stuff is totally unnecessary according to Don. Though he uses a wheel to achieve that finish, understand that it's a 220-grit grease wheel (often referred to as a setup wheel) and not a polishing wheel (we'll show you how to make one too). What it takes to work up to that 220-grit surface is your prerogative. Be it a cartridge roll or a surface-conditioning disc on a die grinder or just a sheet of sandpaper wrapped around your finger, whatever it takes to work up to a 220-grit finish is just fine. "You got a DA sander, right?" Meth asked. "That's all you need for some stuff."
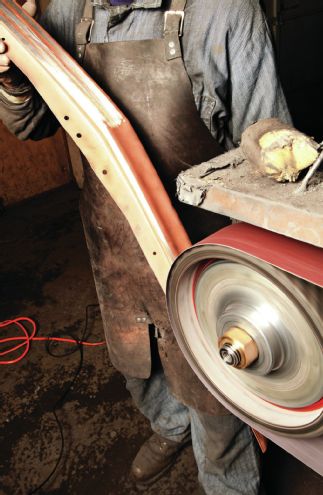
1. Chrome and nickel plating are removed electrochemically, but not the copper. That’s a mechanical process. Don Meth says 150-grit abrasives work quickly but won’t gouge the base metal.
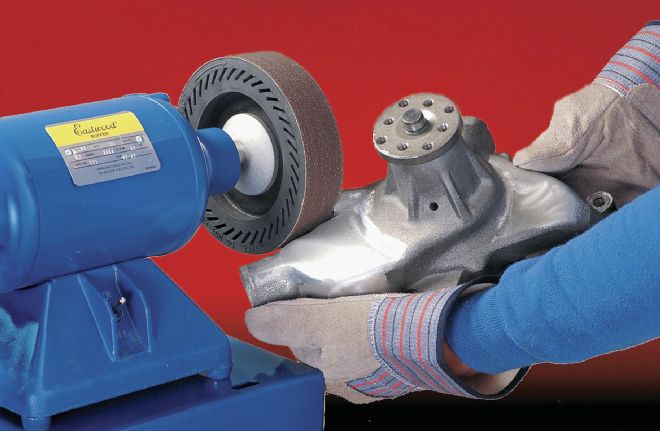
2. Meth’s belt setup is a monster but The Eastwood Company’s expander wheel (PN 13079) fits common grinders/polishers and accepts abrasive bands and Scotch-Brite belts. Its face conforms to complex shapes to prevent gouging.
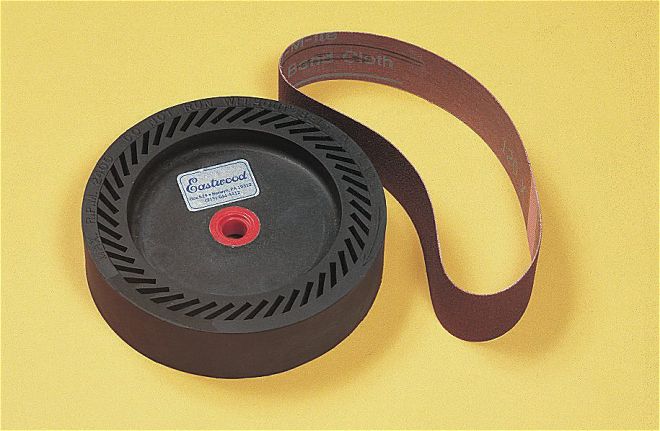
3. Meth’s belt setup is a monster but The Eastwood Company’s expander wheel (PN 13079) fits common grinders/polishers and accepts abrasive bands and Scotch-Brite belts. Its face conforms to complex shapes to prevent gouging.
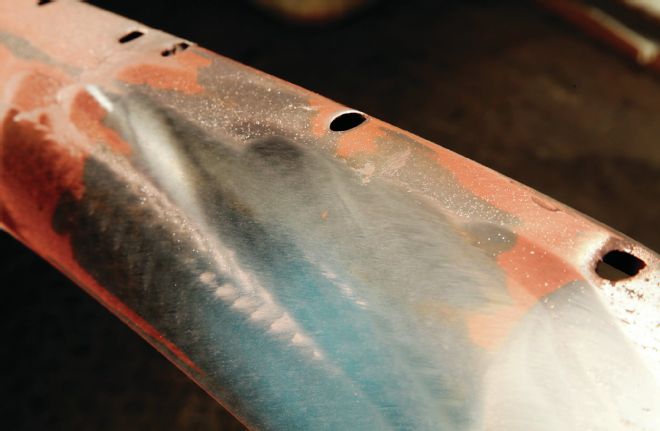
4. Removing plating reveals numerous flaws. In this case a spot of copper revealed a low spot, a dent. Plating will only amplify such flaws. It has to go.
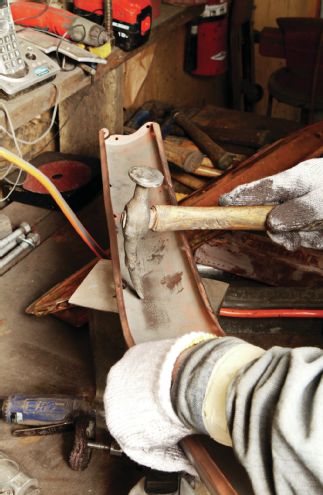
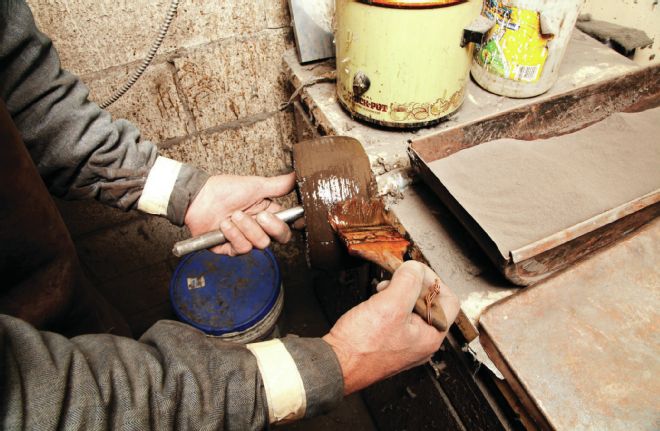
5. Metal finishing, whether body panels or bright work, relies on the same principles. Don uses a chunk of I-beam as a dolly and using the off-dolly method raises the dent from the backside with a pick hammer.

6. Dents stretch metal so raising one creates a slight ridge. Confident that the dent sits flush Meth knocks down that ridge and the tool marks with 150-grit paper on an orbital sander.
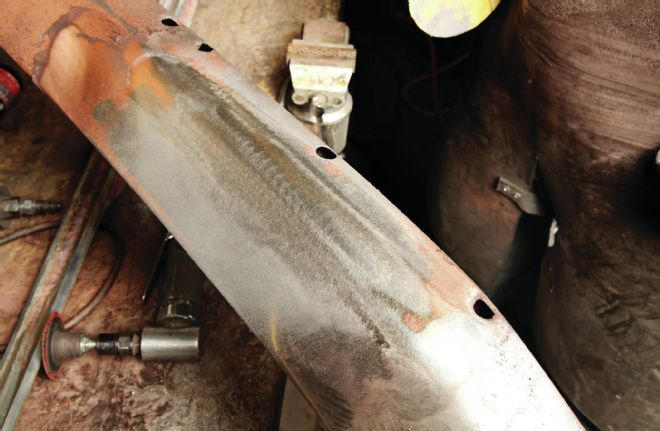
7. After a few moments under the sander all traces of the dent disappear. It would take heaps more time but Meth could use the orbital to remove the copper and then make the part plate-ready with the 220.
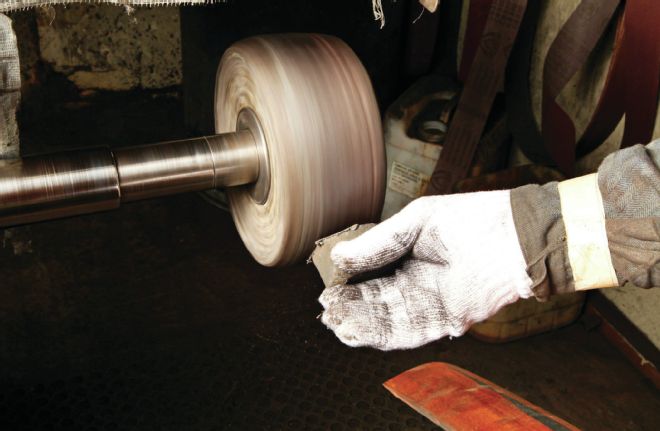
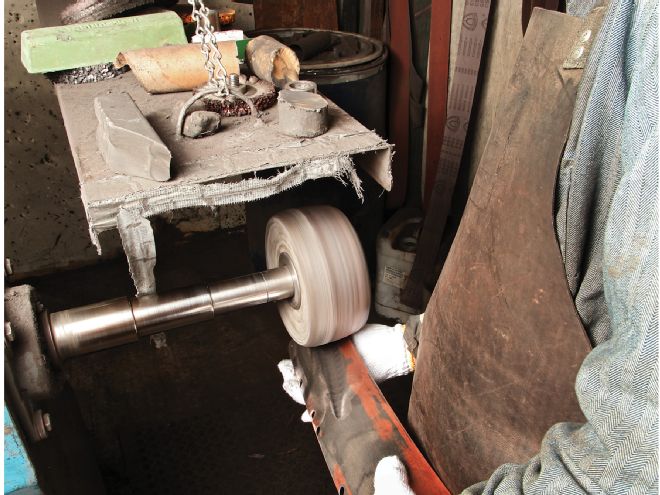
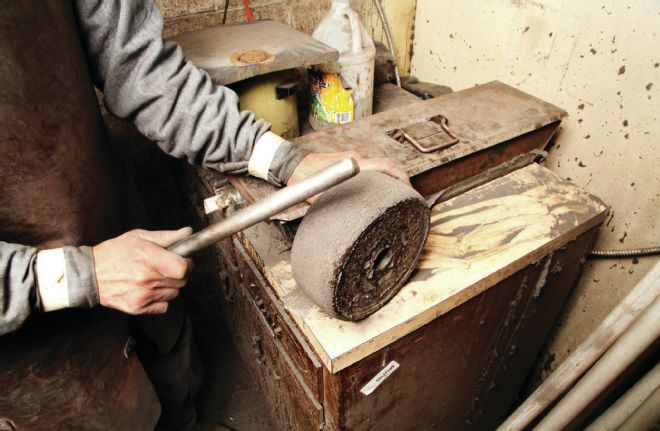
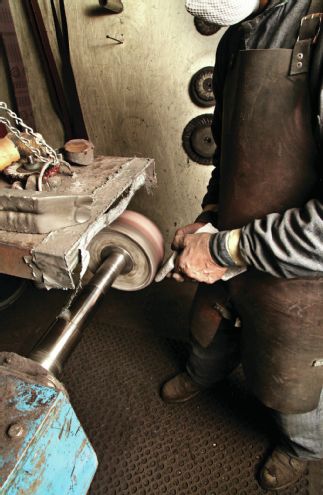
8. Meth then fires up his grease/setup wheel. Refer to page 32 to learn how to make one of these incredibly powerful sanding tools. They require a lubricant (tallow—the stick he’s applying) to stay clean and not overheat the metal.
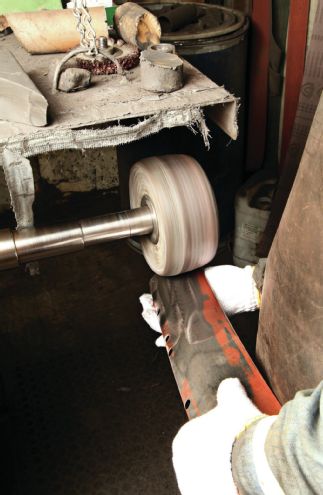
9. The grease/setup wheel behaves like a cross between a buffing wheel and a sander. Though he didn’t do it here Meth recommends alternating sanding directions with each grit, say lengthwise with the 150 then diagonally with the 220-grit grease/setup wheel.

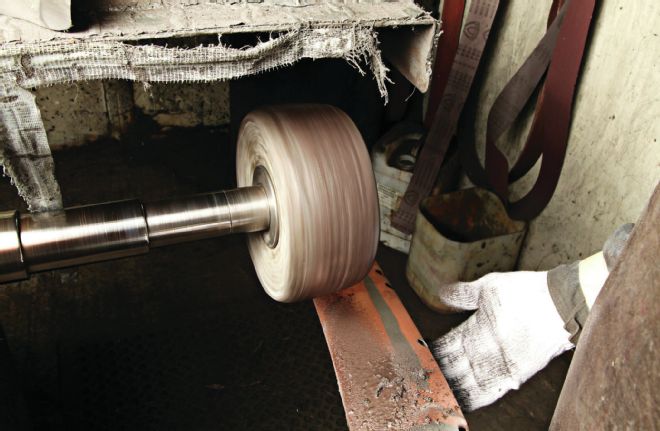
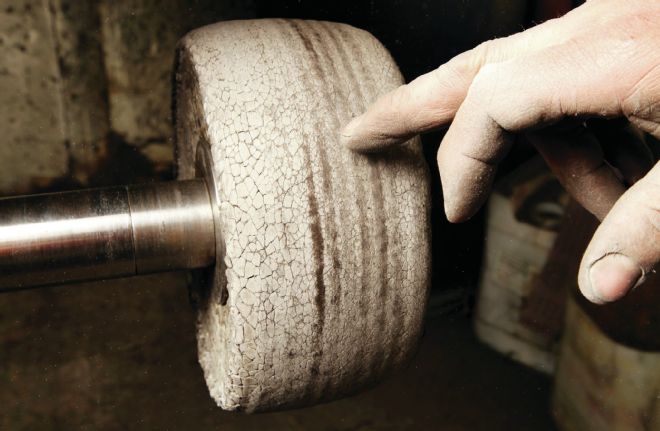
10. Displaced metal loads up the grease/setup wheel and diminishes its action. Meth ran it across a big patch of copper that he usually would’ve removed with the 150 belt to show how a loaded-up wheel looks. It barely worked at this point.
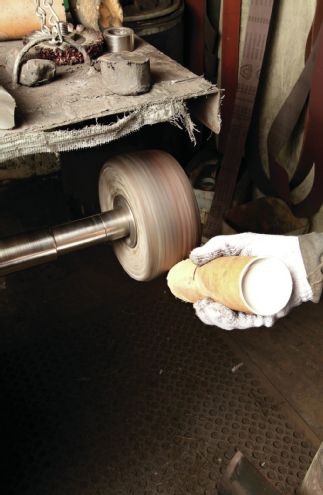
11. So Meth once again ran the tallow stick across the grease/setup wheel’s face. Warning: the stuff smells like a bucket of tripe under a porch after a county fair.
12. The heat generated by friction melts the tallow, which dislodges the metal impacted in the abrasive (and develops the full scent profile). The grease-laden metal particles fling pretty much everywhere thereby broadcasting the fragrance.
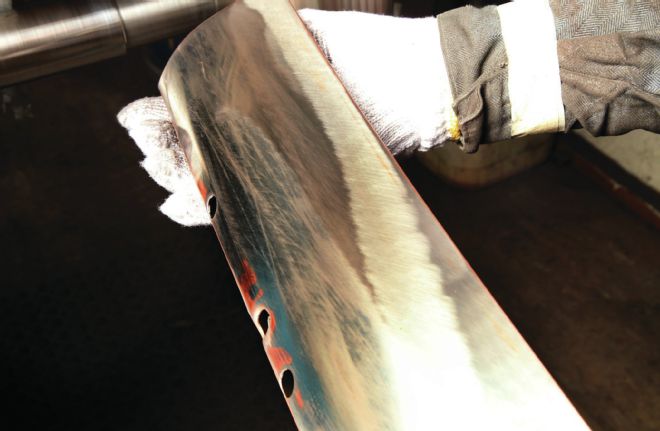
13. It still has traces of copper and abrasive schmutz all over it but the presence of nothing but 220-grit sanding marks indicates that at least a small patch of this part is ready to go into the plating bath.

14. The only difference between these control arms is that the left one hasn’t taken its bath. Meth’s guys took this one to 400-grit just to guarantee that they hadn’t missed any sanding marks coarser than 220.
That's not to say there are no rules. Because even the tiniest bit of oil can render plating solution useless (and because it's a hazardous material it's insanely expensive to dispose of); cleanliness is next to godliness. If it's greasy, hot tank it. If it's threaded, run a tap through it. If it's rusty or painted then strip it. Naturally all finishes must come off, prior plating jobs included. "I won't plate anything if there's a trace of old plating.
"It's just like painting over a really old paintjob," he continues. "You don't know what's under all that paint; something could react under there and it can cause problems down the road." And the only way to prevent that is to go right down to the base metal. "So it takes a little more time up front to strip a part totally, but if you get a problem it takes a lot more time in the end. Problems are expensive—you have to strip off all the plating you just put on then start all over again."
That said, note that Meth temporarily set aside his cardinal "strip everything" rule to demonstrate the steps. The shop was cranking busy but the part he used to demonstrate the procedure wasn't a priority. So he did just enough work to show us the ropes. Understand that he fully stripped all of the copper before he plated it. So don't think that he granted himself a dispensation from the punishing task and he urges you to hold yourself (or your metal finisher if you elect to farm out the work) to the same standards.
We might not be able to chrome plate our own parts, and frankly most of us wouldn't if we could (even Meth prefers to work in the prep room), however, a little bit of elbow work can dramatically reduce the cost to chrome plate parts. But investing yourself in your work has probably an even more important implication: you and not some stranger, who doesn't even know what shows when a part mounts to a car, determine the location and the level of preparation. And it's tough to put a price on that kind of value.
How To Make A Grease/ Setup Wheel
Don Meth—most metal finishers in fact—regards the grease/setup wheel as one of the most versatile and powerful tools in the arsenal. It serves the same purpose as sand paper; however, because it fits on a high-speed buffer, it does the job so much better.
At its core it's nothing more than a spiral-sewn cotton buff like the ones Eastwood sells. In fact Meth makes his by gluing together multiple spiral-sewn buffs. Only unlike a conventional buff that requires a frequent reapplication of abrasive compound, a grease/setup wheel wears a semi-permanent abrasive coating. And it's up to you to apply that coating. Here's how.

15. Grease/setup wheels are seriously old school. How old school? Remember the old jokes about sending horses to the glue factory? Well this is what they become.
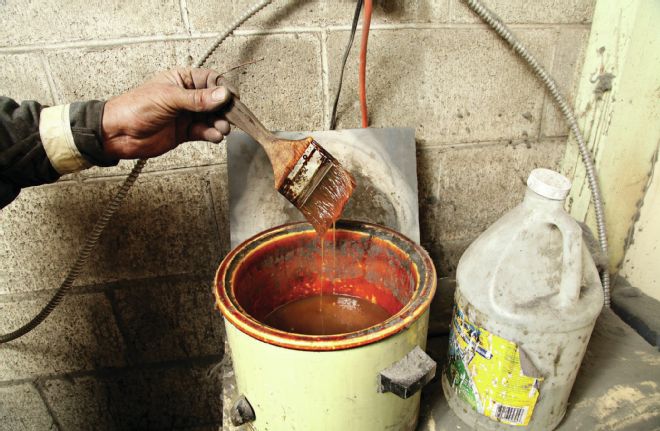
16. Hide glue needs two things: water and heat. Because Meth uses hide glue all the time he keeps a crock pot simmering. You can brew a saucepan’s worth at a time but Meth says you won’t want to keep it around. It stinks to hell.
17. Brush a nice wet layer onto the buff. He's refreshing a worn buff but the procedure is the same for a new one. Note the “spindle” made from a metal rod.

18. Fill a trough with your emery of choice. Meth uses belts for his heavy-cut processes so he reserves the wheels for 220-grit emery. Roll the wheel through the trough until fully coated.
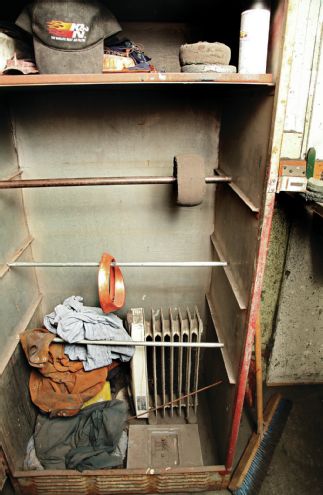
19. Coat the wheel three times using the preceding two steps. "Bake" the wheel in a warm place between layers. Meth uses a space heater in a chemical cabinet. Then dry the wheel for at least 24 hours before using.
20. Even when dried for 24 hours the wheel won't cut well. The surface needs to be broken up. Meth taps around the entire wheel with the steel rod from before.

21. The tapping breaks the uniform surface into thousands of facets. Each will deflect slightly to better conform to the part's shape.
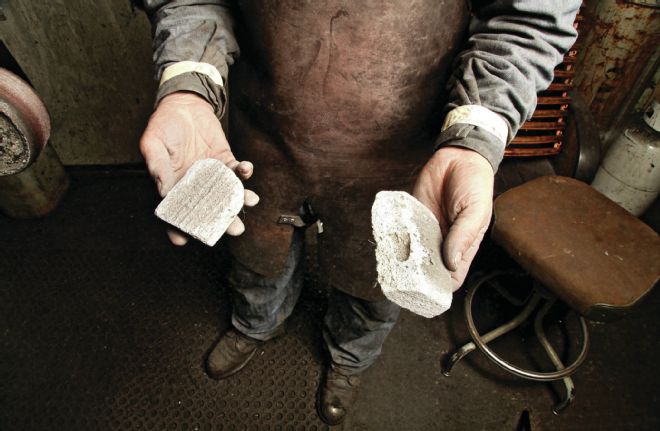
22. Grease/setup wheels last for a long time—often days for Meth and he uses them extensively. The first step to restore their power is to strip the surface. That requires a pumice block.
23. Because it's more abrasive than the emery and stronger than the glue, the pumice wears away the surface of the grease wheel/setup wheel.
24. The dark stripes represent the sections of the underlying cotton buff. The light side still needs stripping. Once fully stripped a grease/setup wheel will be re-dressed and put back into service.