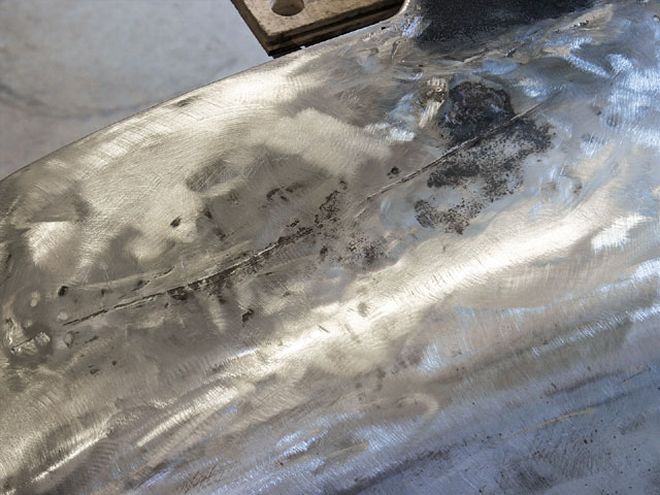
 The gouge on our fender is easily seen here; what can't be seen, though, is the amount of distortion throughout the area that was filled with Bondo sometime in the past. We elected to replace the entire area with a fresh patch panel.
Some of you guys have asked about my '29 roadster, Project Potvin, and why it hasn't been featured lately in any tech stories I've done. The truth is I've been building a Hemi-powered '52 Ford F-1 pickup for the past few months, and we've been splitting stories up about my progress on it between STREET RODDER (see the Hemi story on page 192 in this month's issue) and Classic Trucks magazine. The project is coming along great, and it should only be a few more months until I can jump back on the roadster. My first plans are to convert the tube chassis from transverse springs to torsion bars, so keep your eyes on these very pages.
In the meantime, I've been tackling the sheetmetal on the F-1, which has proved to be a very tedious and time-consuming process. If you recall the sandblasting story I did on the '29 (July '07 STREET RODDER), you'll remember how I tried to remove the old paint and body filler on the car myself, got frustrated, and ended up getting the entire kit and caboodle sandblasted. Well, here we are again, roughly a year later, and I still haven't learned a thing.
 This gauge from Miller was used to measure the thickness of the fender, so the patch panel could be made from the same gauge sheetmetal. Eighteen-gauge is typical for most body panels, such as hoods, doorskins, fenders, and the like.
The entire truck was covered in three coats of paint and, in some cases, up to 1/4-inch of body filler, of which I decided I could sand off myself and save the trouble of taking it all to the 'blaster. The good news is, most of the sheetmetal has been sanded down to bare metal and actually wasn't all that laborious. The bad news is, some of the steel is worse than I thought.
All four fenders need at least one, and in some cases two, major patch panels, as well as a fair amount of hammer and dolly work. That will all be followed by a skim of body filler and then a fill primer. For now, I decided it made the most sense to start with the front fenders and work our way back, that way we could hang all the front sheetmetal if need be to finish fabricating the inner fender panels, and the like.
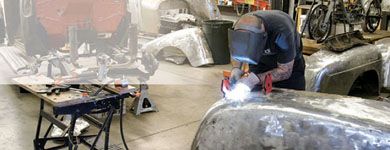
The damaged area that needs replacing first is the upper side of the passenger front fender, where it looks like it had a slight run in with something that created a gouge down the side. For the most part, the area could have been skimmed with filler and fixed; unfortunately, the sheetmetal was extremely thin, due to fatigue and stress to the area, and started to split when a hammer and dolly was taken to it. With that, it was decided to replace the entire damaged area with a new piece of steel.
Sources
Eastwood
(800) 345-1178
www.eastwood.com
Miller electric mfg.
(920) 734-9821
www.millerwelds.com