Despite the well-intentioned goals of the sharpest hometown hot rodders, there seems to be a collective knowledge deficit between what happens at the front brakes and what happens at the rear brakes. It's as if we get to the rear axle, and there's a barbed wire fence, a snarling Doberman, and a big ol' sign saying "Keep Out!" Some parts of our cars and some skill sets just do not invite our full attention as they should. Perhaps it's because there is no clear engineered division between where the rear axle parts end and the rear brakes begin. They are truly tied together from an engineering and functional standpoint in ways some guys don't understand. It's not an insult; it's actually a confession of sorts.
Our story here is ultimately about how to install a set of Baer SS4 disc brakes on a '73-77 GM A-body 10-bolt rear, but Baer offers their SS4 kit for practically all muscle car brands and models. The important thing to take away from this is that the SS4 kit is a “floater” design, and so before we even talk about the SS4's four-piston S4 calipers, 12-inch one-piece rotors, and integral parking brakes, we need to explain why a floater-type kit is so special at the $1,295 asking price.
In a typical fixed-mount-caliper rear disc conversion, at some point in the installation you'll be asked to center the caliper on the centerline of the rotor by means of shims. This will maximize the function of the brakes and reduce pad wear while keeping the brake pedal relatively responsive. If you're braking in a straight line, it works reasonably well, but during hard turns such as encountered on a road course or autocross, the entire system flexes—rotors, calipers, pads, brackets, axletubes, axles, wheels, and tires all bend and move around. During the course of a lap, whenever the rotor comes in contact with the pad and piston—especially when you're not braking—it pushes, or knocks back, the piston into the caliper. When you apply the brake, it feels like the pedal goes all the way to the floor because the rotor has pushed the piston(s) back into the caliper bore(s). (Think how it feels the first time you push the brake pedal after changing pads.) You have to take up the slack before any braking takes place, and that often means stroking the pedal twice. It's scary, and in a high-speed braking zone, it's unsafe. The loss of brake pedal—pad knock-back—is even worse in cars with C-clip axles. Here, the axles translate in and out of the axlehousing under cornering, and that movement can exceed .030 inch. Even at a nominal .015 inch of axle endplay, that equates to a lot of brake pedal drop out.
Pro race teams and high-end Pro Touring car builders solve the issue by installing a floater rearend, which isolates the job of driving the rear wheels from handling the cornering load and braking. It's thousands of extra dollars in parts and pounds of added unsprung mass, but hey, who are we to argue if they want to spend more cash? It turns out that the guys at Baer are also racers, and they have a simpler, more elegant solution that is much less expensive than a floater rear. The S4 four-piston caliper is designed to ride on a sleeve—also called a “pin”—that allows the caliper to glide back and forth on the mounting bracket to follow the rotor. When combined with a 5-psi residual pressure valve, the slider design results in zero pad knock-back, no more disappearing brake pedal, and no more double pumping in the brake zone. And you get to keep your existing 10-bolt rearend and enjoy the braking performance that only a four-piston caliper on a 12-inch rotor can provide. Currently, Baer is the only company that offers floater technology at this price in combination with a serious four-piston rear disc conversion. If you plan on running your car hard on track but don't see yourself spending big dollars for a floater rearend assembly, the SS4 kit from Baer is the best way to go.
More Video Online!
To get a closer look at how the Baer SS4 rear disc brake installation went down, go to the Popular Hot Rodding YouTube channel (www.YouTube.com/PopularHotRodding) and watch the video "How To Install Baer SS4 Rear Brakes."
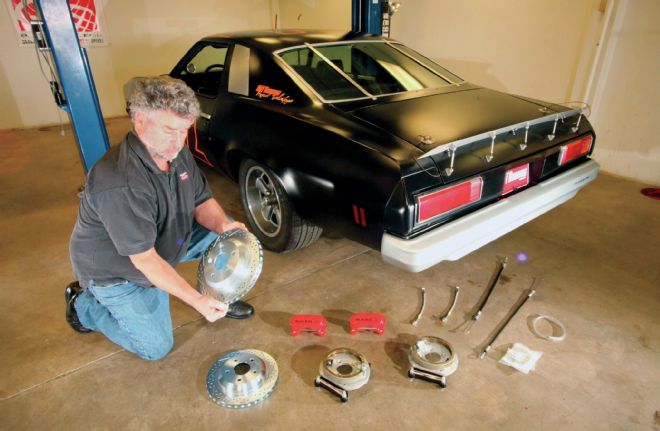
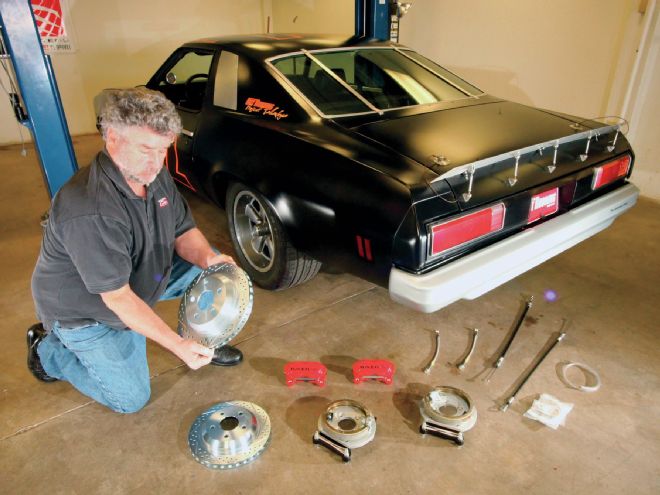
It's time to take off the training wheels with Project Laguna, our '75 Chevy S3 Laguna. We're saying goodbye to the stock drum brakes on our 8.5-inch 10-bolt corporate rear, and installing Baer's SS4 floater rear disc brake conversion—with help from Baer's tech guru, Dutch Miller.
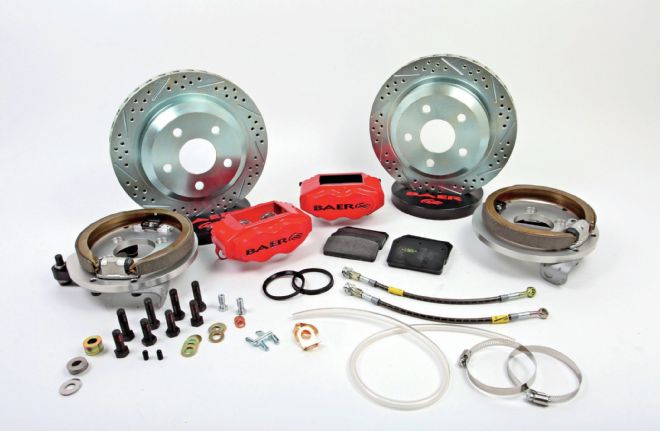
Baer's SS4 rear disc brake conversion for '73-77 GM A-body 10-bolts (PN 4302308, $1,295) includes one-piece 12-inch rotors with integral parking brake, S4 four-piston calipers that take DR1-style pads, parking brake cables, brake lines, C5-derived backing plates with parking brake shoes, and all fasteners. Baer also makes a two-piece 11-inch version (sans parking brake), and a 13-inch two-piece rotor kit (SS4+), all using the S4 caliper.
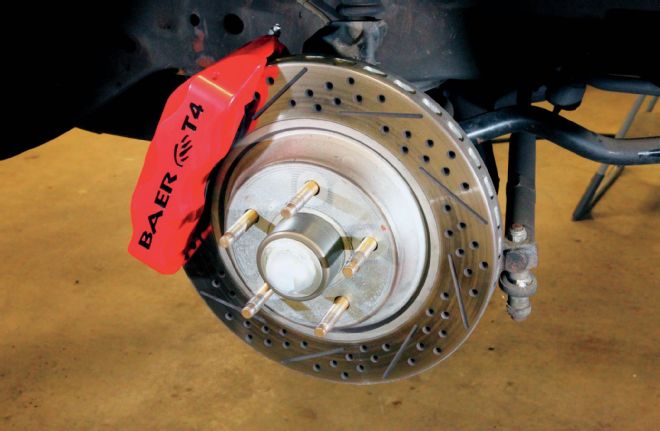
Our Baer Track 4 front brakes were installed back in the Feb. '11 issue. These feature Baer's large four-piston T4 calipers and 13-inch rotors. Of note is that they come preassembled with new hubs on new spindles—just unpack them and bolt them to your ball joints. Our rear SS4 kit with one-piece rotors was chosen to match the Track 4 fronts.
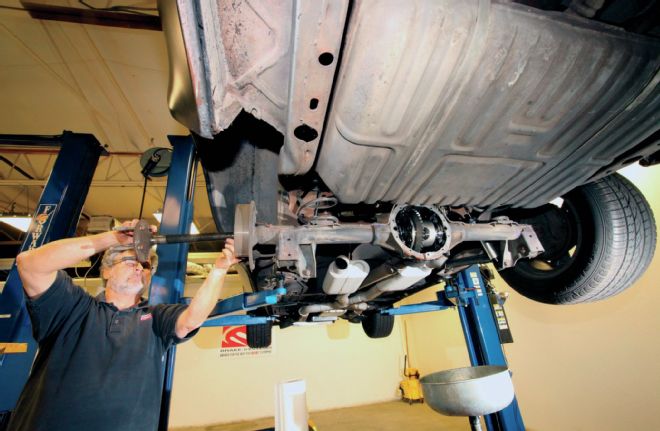
Upgrading your rear brakes means pulling the rear cover, pulling the C-clips and axles, disconnecting the parking brake cables, and unbolting the drum brake backing plates (four 9/16-inch bolts). This is a great time to inspect and/or replace axle bearings and seals, upgrade your differential, or swap gear ratios. Our 8.5-inch 10-bolt already has a 28-spline Detroit Truetrac diff with 3.73 gears and a main support girdle from Summit.
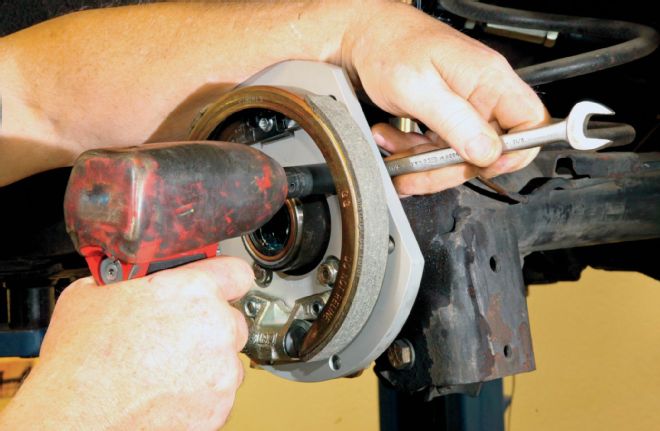
Reusing the OE T-bolts (if you still have them—we didn't), bolt the new Baer backing plate assembly to the axle flange. The SS4 kit uses a C5-derived parking brake/backing plate assembly, making future maintenance easy.
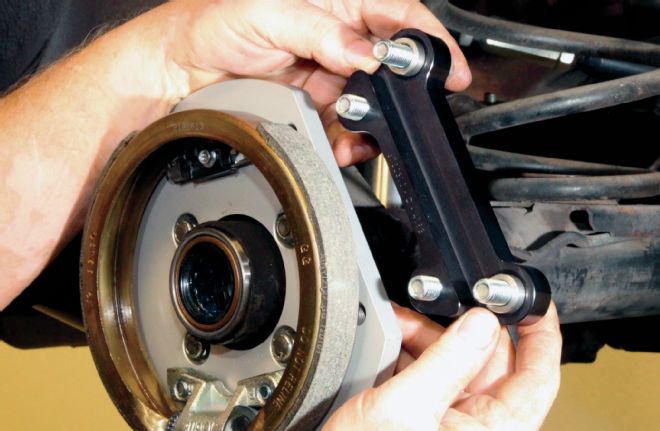
Right here is the genius of Baer's SS4 rear disc conversion: the mounting bracket and slider sleeve assembly. The inboard bolts attach the bracket directly to the backing plate (the new 19mm bolts take 85 ft-lb of torque), but you'll notice that the caliper mounting bolts pass through stainless steel sleeves. The sleeves insert into the hard-anodized bracket and allow the caliper to follow the rotor as the axle moves in and out of the rearend assembly.
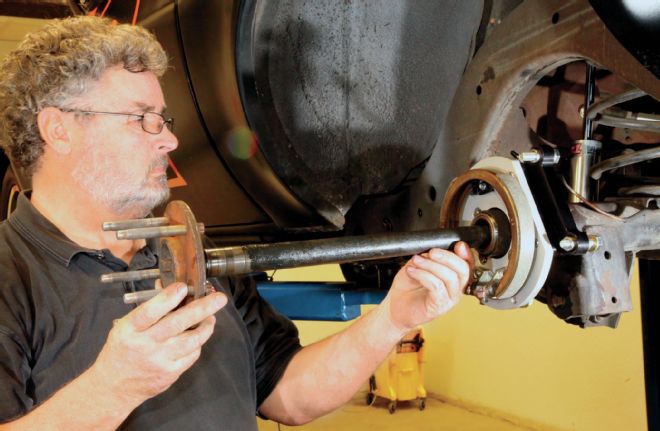
With the backing plates and caliper mounting brackets attached, slide the axles back in, put the C-clips back in, bolt the rear cover on, and fill it with fresh lube. We used this opportunity to upgrade our separate axle bearings and seals with new Timken one-piece bearings. Check out PopularHotRodding.com for a web-exclusive story on this operation.
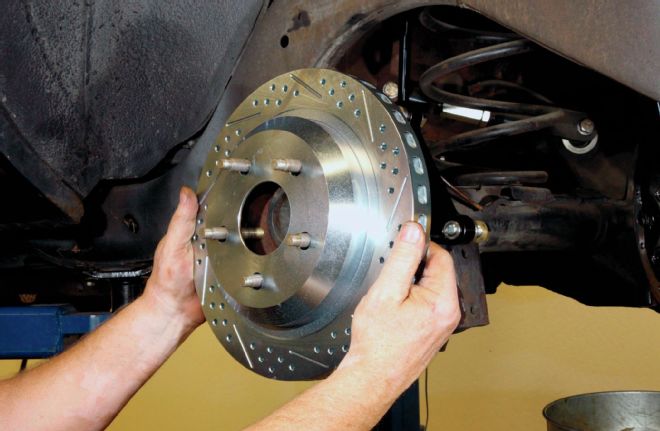
The SS4 rotors are zinc-washed cast iron, and are slotted, cross-drilled, and directionally vaned for cooling. They measure 12 by 1.1 inches, and are a good cosmetic match to the 13x1.1-inch Track 4 rotors up front. Baer also offers a kit with smaller 11-inch two-piece rotors for smaller 15- and 16-inch wheels, and a kit with 13-inch two-piece rotors for 17-inch and larger wheels.
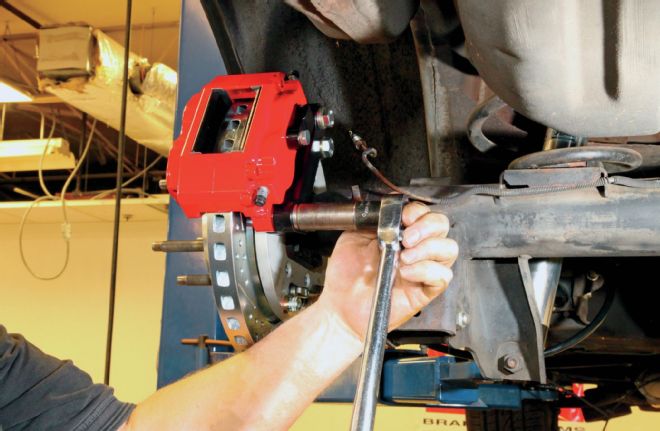
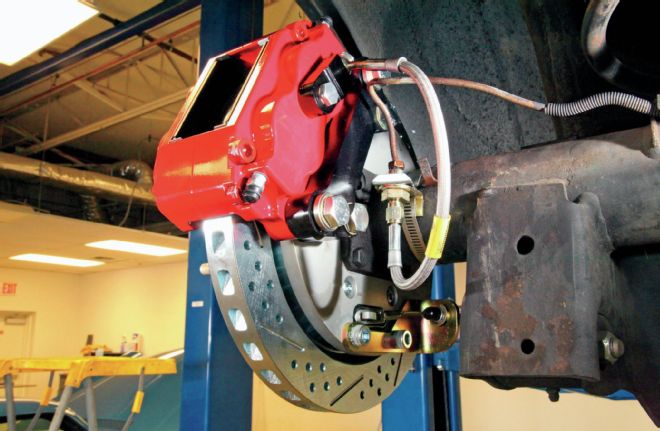
Baer's S4 caliper is made of 6061-T6 billet aluminum and has four stainless steel pistons. It takes a common FMSI-size DR1 pad (the SS4 comes with Hawk HB100 pads), and can be mounted on either side, since there are bleeders at both ends. The brake line attaches to a billet 5-psi residual pressure valve (shown in black on the side), which helps maintain the pad in close proximity to the rotor. The S4 calipers mount to the brackets with two included 19mm bolts torqued to 85 ft-lb.
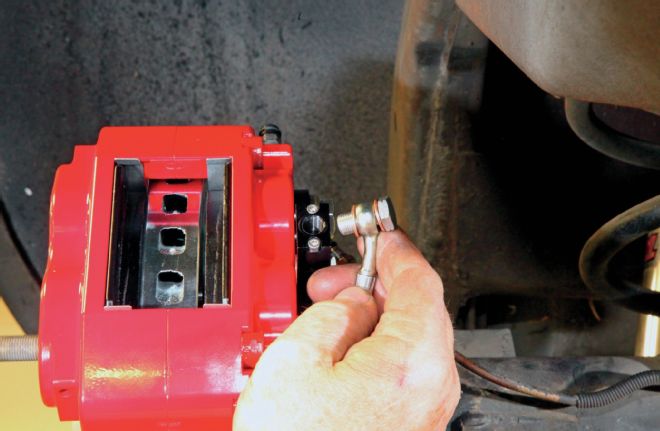
Baer includes quality Goodridge braided stainless steel hoses in its kits. The caliper end terminates in a banjo fitting, which must be attached to the residual pressure valve via a hollow banjo bolt and two virgin copper crush washers. It's critical to orient the hose and banjo fitting correctly (i.e. away from any possible interference) on the first attempt because the crush washers may not be reused.
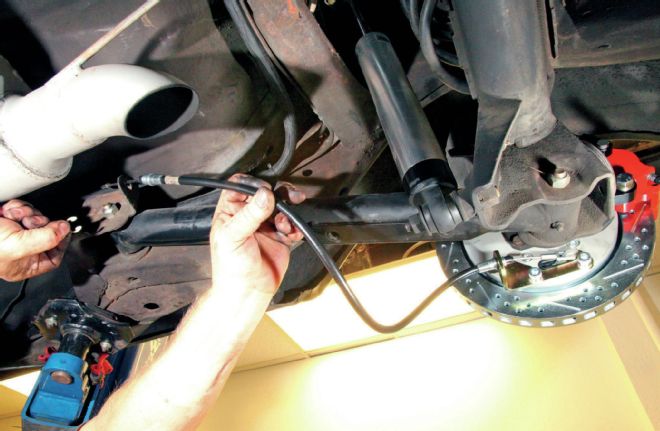
Take note of the completed plumbing; the factory brake line has been bent to meet the new braided stainless brake hose at the mounting clip, which has been attached to the axle with a new hose clamp. While the factory line was disconnected, it had been capped with a small rubber nipple provided by Baer in the kit. This prevents fluid from draining out and soaking the floor.
The parking brake cables attach to the backing plates and hook around the parking brake levers on both sides, and into the factory brackets on the chassis end. They attach on brackets at either end with a circlip.
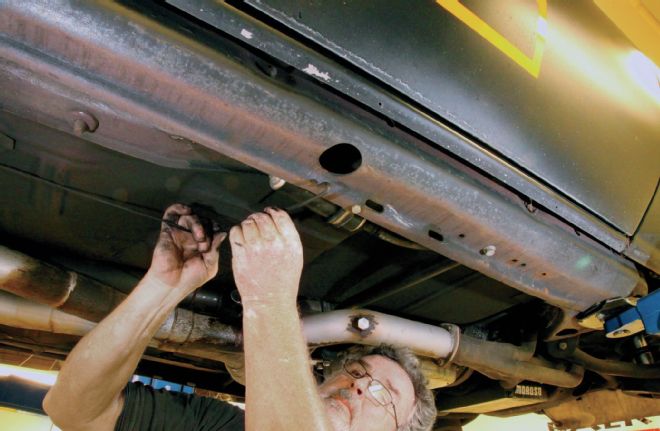
Although the parking brake cables in Baer's '73-77 GM A-body kit are ostensibly the same ones in their '64-72 GM A-body kit, they also work on the longer late-model A-body wheelbase by moving the tension cable hook farther down the perimeter frame. (We moved the hook from the thin slot to the large circle in the foreground.) This frees up enough cable to allow both sides to be connected and subsequently tightened.
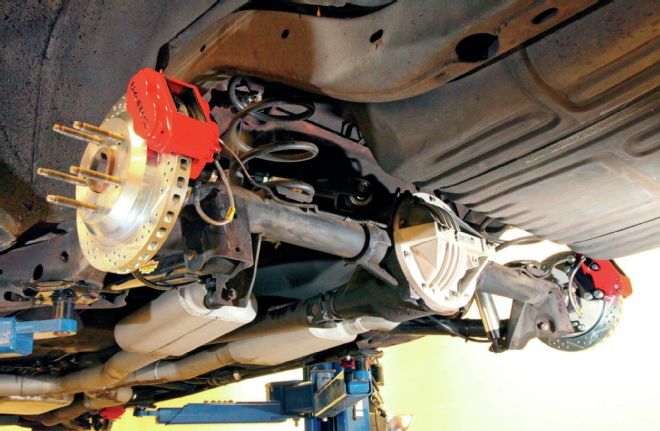
All bolted up to our 8.5-inch 10-bolt rear, our SS4 kit is ready for the street and the track—all we had to do is bleed the system with fresh DOT 3 fluid. It's important to note that we upgraded our master cylinder back when we installed the Baer Track 4 front brakes. The stock 1⅛-inch master was swapped for a smaller diameter 15/16-inch CPP master cylinder (PN 6150012, $115) in preparation for the rear disc conversion. The smaller master will generate the higher pressure we need for more aggressive stopping.