In the continuing saga of Car Craft's project Mustang, with all the new Global West Suspension components on the car, the next step in the resurrection of our grandma-abused '67 fell to new binders. The original four-lug drum brakes had to go, so we contacted Stainless Steel Brakes for a simple conversion kit that would allow us to use our existing six-cylinder spindle but install something a little more aggressive. What arrived in the mail a few days later was everything we needed to do the conversion.
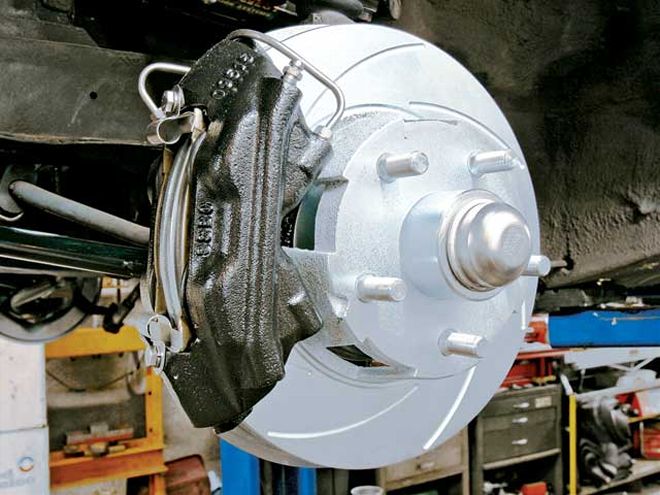
We swapped over to a performance-oriented four-piston caliper disc-brake system with an 11 1/4-inch-diameter rotor that simultaneously upgraded the Mustang to a more wheel-friendly, five-lug pattern. We haven't gotten far enough yet on the rearend to finalize the wheel backspacing and sizing, but we're already planning on a set of Toyo 245/45R16 skins on all four corners. As soon as we finalize the rear axle, we'll order a set of wheels. For now, we rounded up a pair of stock rollers to get us around until we can attack the rear-axle question. While a big, beefy 9-inch would be nice, we're looking into alternative axle assemblies that would be less pricey.
We ran our little ponycar over to Tim Moore's shop for the conversion, mainly because we'd rather use his hoist than bend over to do the conversion on our concrete floor. The hardest part of the entire swap was deciding where to place the adjustable proportioning valve and bending a line or two to make it all fit. The conversion took perhaps three hours to complete, and we didn't even have to break out the flaring tool. It doesn't get much easier than this.
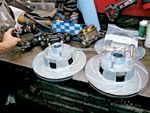
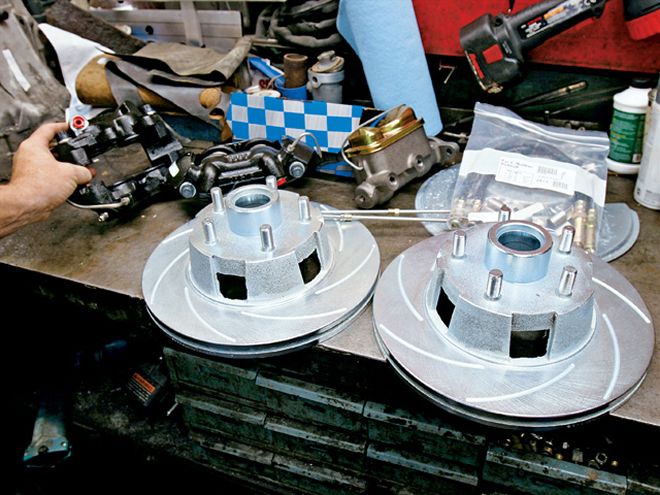
The main parts of the kit include the caliper brackets, calipers, rotors, new wheel bearings, all the necessary hardeware including new flexible hoses and new pads.
The Kit
The kit is so simple, even the part number only has three numbers and one letter: A121. This particular Stainless Steel Brakes (SSB) kit is similar to the factory disc system on '67-'69 Mustangs. The critical components in the kit include the factory-style, four-piston caliper that mounts rigidly to the caliper bracket; an upgraded pair of slotted, zinc-washed rotors; and a cast-iron master cylinder. The kit also includes adapters for the rubber flex hoses so they bolt up to the existing hard lines. All the bolt-on hardware is included, as well a set of performance SSB pads.
Bolt-On Brakes
We've outlined the steps we went through on the driver side, with the understanding that the same procedure be followed on the passenger side.
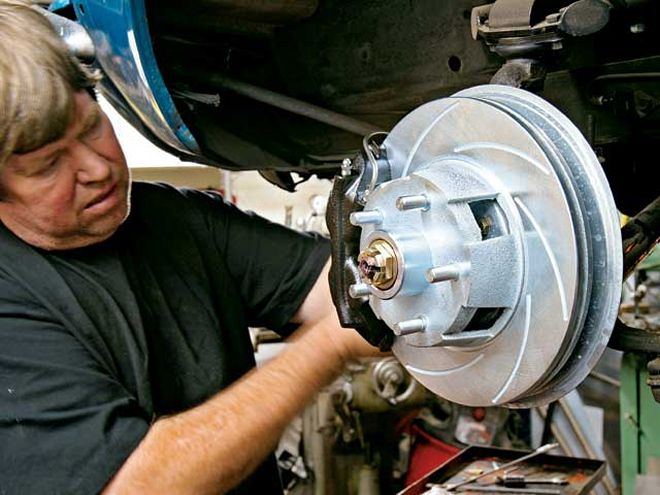
Once we had the Mustang off the ground, Moore removed the front wheels, yanked the spindle nut, and pulled the drums and backing plate, revealing the bare spindle. From there, it was a simple procedure to install both brake assemblies in a couple of hours. It's really pretty simple.
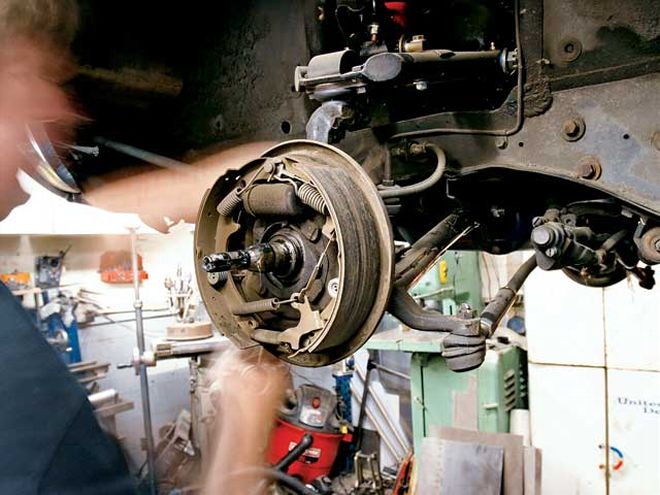
With the stock drums removed, Moore unhooked the flexible hydraulic line from the body and plugged the line so brake fluid wouldn't drip all over the floor. The only thing left to do was remove the four T-bolts that attach the drum backing plate to the spindle and remove the brake assembly.
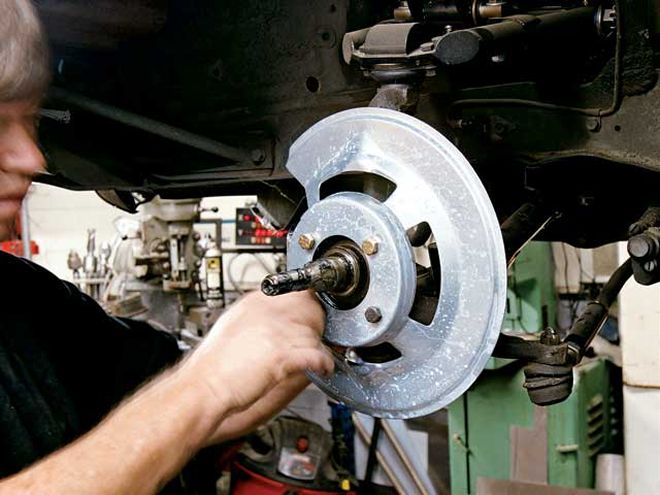
Each caliper bracket is clearly marked left (driver) and right (passenger). This is important, since the brackets position the calipers. New Grade 8 bolts are included. Note that the lower righthand bolt is longer, since it runs through the steering arm. Position the splash shield on the bracket and bolt the whole mess together. The splash shields are also marked L and R.

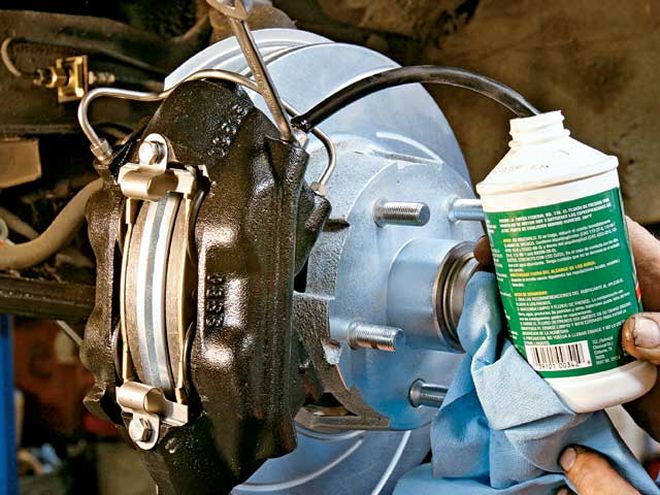
Moore used high-temp, Mobil One, synthetic grease to pack the new wheel bearings for our Mustang, but any good disc-brake wheel-bearing lube will suffice. The new races are already installed in the rotors. Moore then installed the seals and mounted the rotors on the spindle.
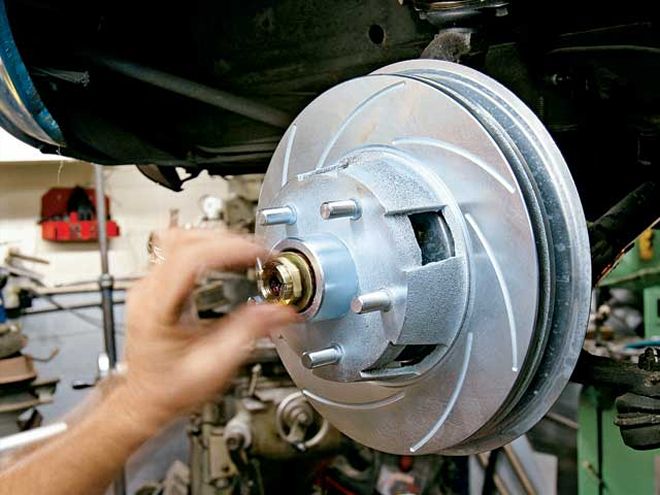
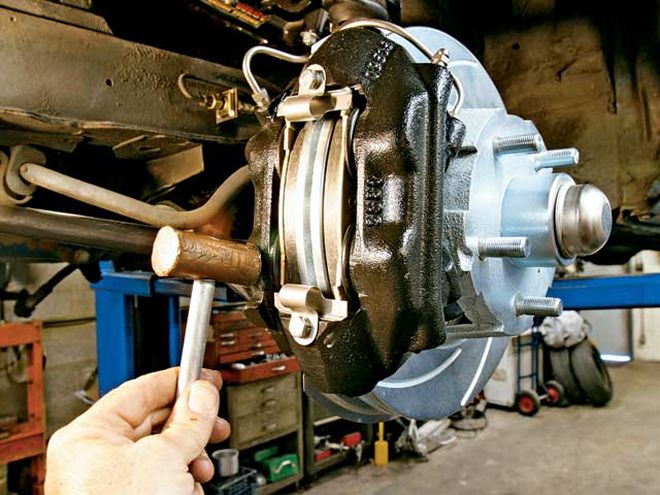
The rotors are slotted, and they're also directional. Install the new washers and spindle nuts finger tight for the moment. You'll adjust the preload on the bearings after the calipers and pads are in place.
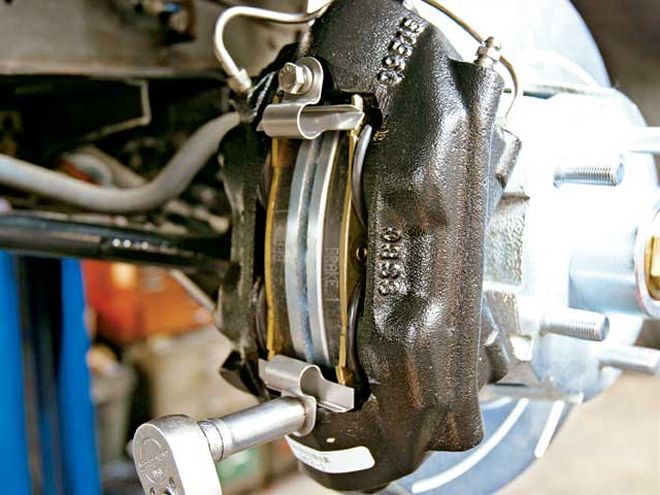
The calipers are the next to install. These parts are also side-specific, but the easy thing to remember is that the caliper bleeder screws must always be at the top. This allows air to escape during bleeding. If the bleeder screws are on the bottom, the calipers are installed incorrectly.
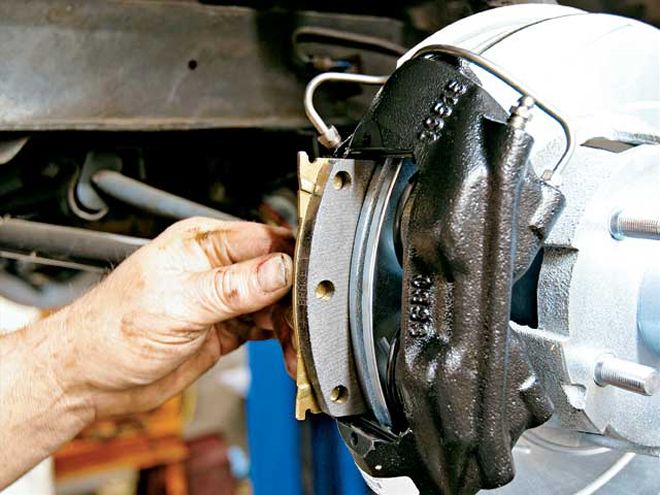
Moore elected to install the calipers without the pads and then slip the new pads in once the calipers were torqued in place. One nice feature of these four-piston calipers is that the pads can be replaced without unbolting the calipers.
The pads are retained with these stainless steel clips and small bolts. A little antiseize on the threads will help prevent thread galling.

The kit comes with new, rubber, flexible lines and requires this adapter between the original hard lines and the new hoses.
Moore only had to loosen the factory clamps to make the new fittings line up with the original factory hard lines.
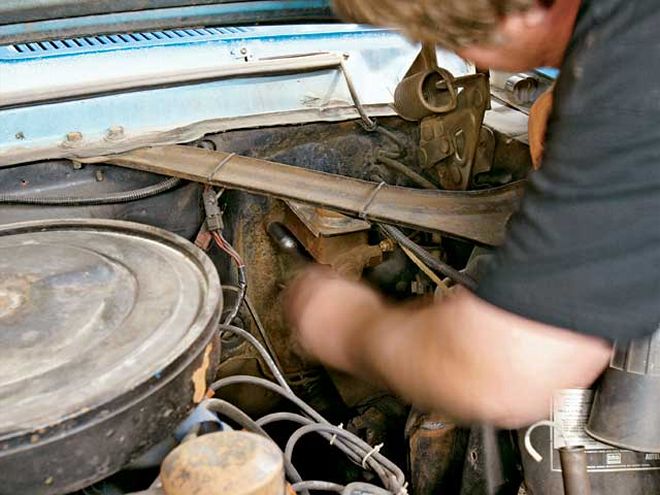
Next, Moore removed the original master cylinder. This also required removing the clip from the brake pedal. Our Mustang had manual brakes, so we were able to reuse the original brake rod in the new master cylinder.
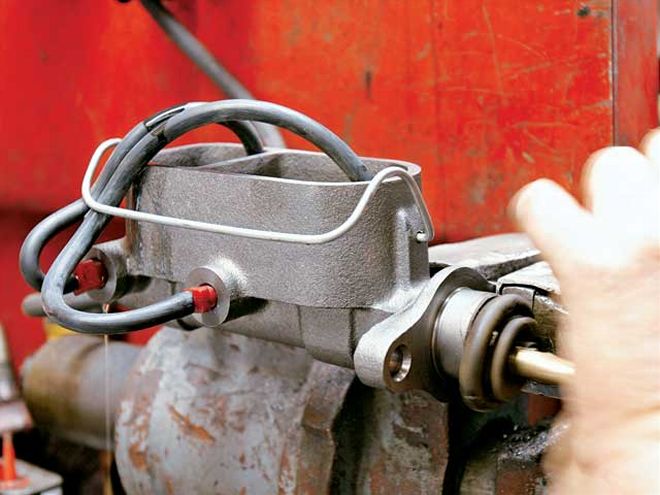
The proper way to install a new master cylinder is to bench-bleed it before bolting it on. The SSB kit comes with the pieces necessary to do this job. Moore had his own adapters, which circulate the brake fluid back into the reservoir. Just make sure to keep the lines well below the fluid surface so all the air is purged from the master. This may require several full plunges on the piston to ensure all the air is removed from the circuit.
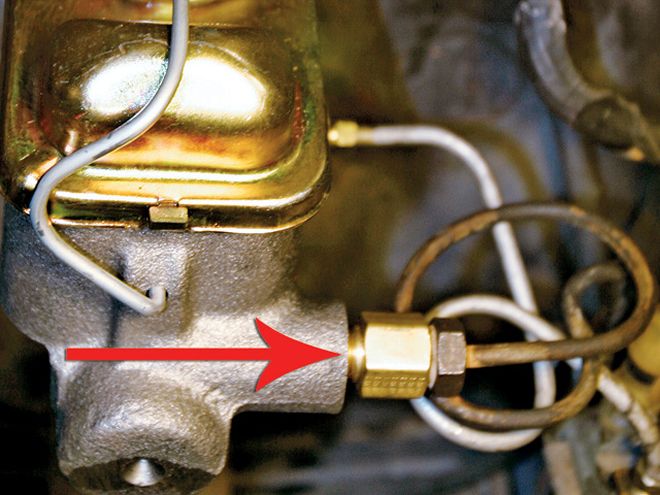
Once the master cylinder is bolted back up to the firewall and the pushrod has been clipped back into the brake pedal, one adapter is needed to connect the stock hard lines to the new master cylinder.
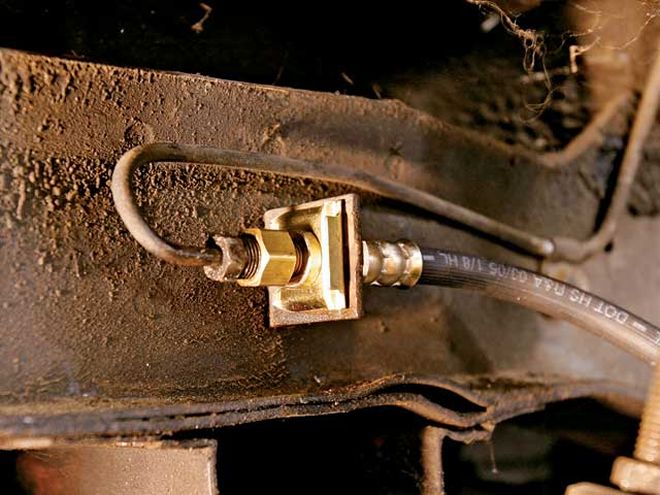
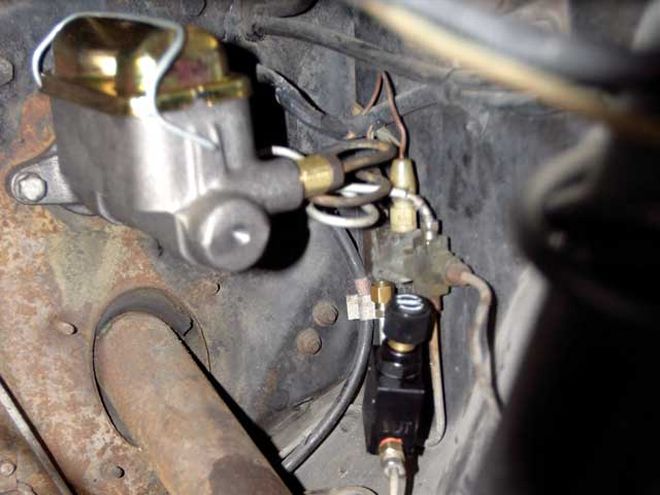
These early Mustangs come with a factory brake warning-light switch. The SSB kit includes a short length of hard line to splice the proportioning valve into the line between the warning-light switch and the rear brakes. Be sure to install the proportioning valve downstream of this switch. By carefully bending the original factory line, Moore was able to plug it directly into the outlet side of the SSB proportioning valve.
With all the hydraulic fittings secure and leak-free, we bled the front brakes. Moore started on the passenger side and then went back to the driver side using a pressure bleeder. If you have a friend help by doing it manually, pump the pedal gradually about four strokes to build pressure.
It's also a good idea to lightly tap the caliper with a plastic or brass hammer to help dislodge any bubbles trapped in the caliper. Even with a solid pedal, you may want to bleed the brakes again after a couple hundred miles to ensure all the air has been removed. After the fronts have been bled, bleed the air from the rear brakes starting with the right rear.
To finish the installation, Moore adjusted the wheel bearings and popped on the new SSB dust caps. Remember that these new semimetallic pads will need to wear in for at least 50 to 100 miles of easy driving before you attempt any aggressive, hard stops. This will allow the pads to burnish and will also remove the zinc plating off the friction surface.
 Stainless Steel Brakes also makes a brake-pressure test kit with multiple adapters that allows you to actually measure the amount of hydraulic line pressure present in your calipers or wheel cylinders. This kit is not necessary to adjust your rear proportioning valve, but it does help with diagnostics.
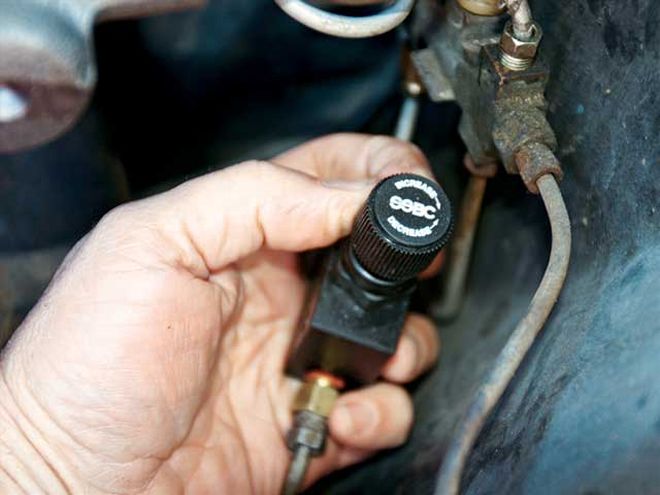
Adjusting the Proportioning Valve
Turn the adjustment knob completely counterclockwise from full in and count the number of turns. Ours was just under 6 1/2 turns. Then turn the knob inward to place the valve halfway in as a starting point. Discs require more line pressure than drums to operate effectively, hence the need for a proportioning valve. This means the rear drums need less pressure. In addition, weight transfer under heavy braking moves weight to the front tires and unloads the rears. To determine the proper rear pressure, find a safe area where you can drive the car up to various speeds and then brake quickly. If the rear does not lock up before the front, adjust the prop valve clockwise to increase the line pressure to the rear brakes. Continue this procedure in small steps until the rear brakes lock up before the front. If you value the life of your tires, avoid locking the brakes for more than an instant. Locking the brakes slides the tires on the pavement and will only flat-spot your tires, which is not good unless you like riding on square tires. The optimal adjustment will be when the rear brakes lock up at the same moment the fronts do. Avoid premature rear lockup because this creates a loss of control and also increases total braking distance.
Parts List
SSB '67 Mustang disc kit
PN# A121
Price: $969.95 Summit Racing
Adjustable prop valve
PN# A0707
Price: $49.95 Summit Racing
Brake-pressure gauge kit
PN# A1704
Price: $39.95 Summit Racing