
Tech Center
Have you ever seen an exhaust system that hung way too low? The kind of exhaust that drags on every speed bump or every driveway you encounter. Well I can say I have seen it, and in fact, I've owned several vehicles where the exhaust was damaged from dragging.
Dragging on the ground is not the only thing that I've had issues with. What about exhaust noise? Have you ever been in a vehicle with a bad exhaust leak from the headers or cracked muffler, etc.? I sure have and I can tell you that it is one of my pet peeves. Exhaust leaks drive me crazy, and even more so, is when an exhaust system is too loud for street usage.
When I looked into building an exhaust system I didn't want to run down to the local muffler shop and have them install whatever brand muffler they had in stock that day. So I asked around at local shows, and more importantly, I listened to hot rods, classic trucks, and muscle cars to hear what exhaust sounds I liked. Turned out I liked something somewhere on the upper middle side of where exhaust notes are rated.
At this time a co-worker was also installing an exhaust on a similar engine combo and I waited to see what the vehicle sounded like before I decided what mufflers were OK for me. When my co-worker was finished with the exhaust we drove the vehicle several miles and I listened to the mellow tones during the cruise, but when stomping on the gas the muffler really woke up. I then looked into the muffler and I found out it was a Flowmaster Hushpower-2 (HP-2).
That solved looking for a quality muffler because Flowmaster has a rich history within the performance aftermarket and makes excellent parts. The rest of the exhaust was going to be a little tricky since I installed the CPP trailing arms and performed a lot of frame modifications.
I looked at the Summit Racing website and found a Flowmaster exhaust kit (part number 15936) that I could adapt to fit any application. The kit has a 21/2-inch-diameter exhaust system that is designed to go from the headers back. It uses steel tubing that has been aluminized and also comes with an H-pipe that helps reduce off-throttle popping. I decided to use 21/2-inch dual exhaust because of the way it sounds and is less restrictive than a single 3-inch single exhaust system - plus I really didn't have the room to route the larger 3-inch single exhaust.
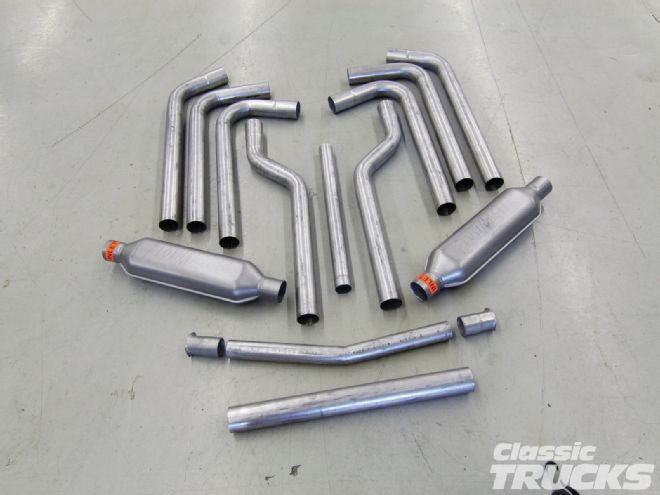
01 Here is an overview of most of the exhaust tubing that comes in the Flowmaster tubing kit. I ordered the HP-2 mufflers separate from the exhaust kit.
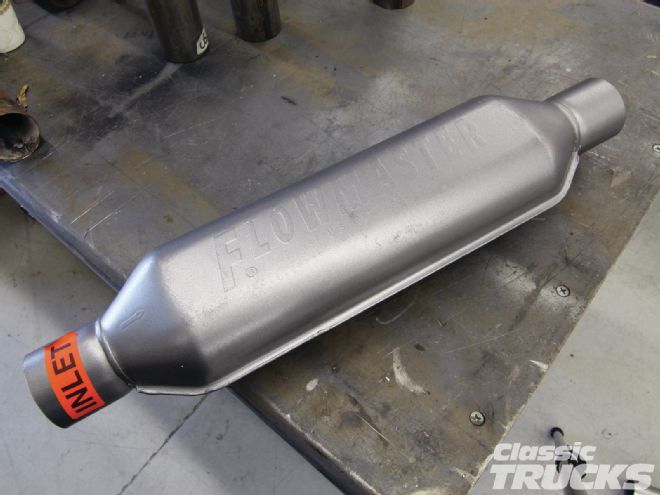
02 Speaking of mufflers, look how small these Flowmaster HP-2 muffers are. I like the size because they are easier to mount in tight spaces and still offer great performance. The muffler is made from 409 stainless tubing so longevity is not going to be an issue.
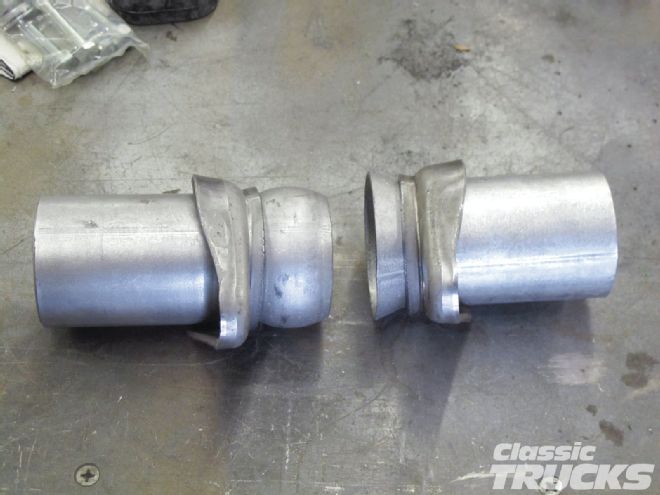
03 Since I have a tight area to fit everything in I wanted to remove the exhaust if needed by simply unbolting it. I also ordered the Flowmaster ball flange kit (part number 15938). Depending on your application you may need more than two of the ball flanges. I used four total because of the complex frame structure.
04 With any exhaust, the header collector is usually a good place to start. In this case I was using a set of Patriot Headers for my 383 small-block that were mid length and followed the contour of the floorboard. I started by trimming off the collector flange to fit the 21/2-inch exhaust tubing.
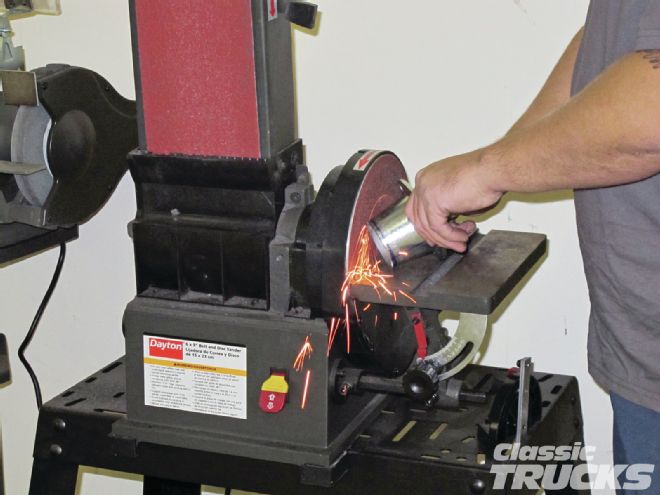
05 A little trick is to use a permanent marker on the exhaust tubing so that you can trim or grind the tubing without taking too much off.
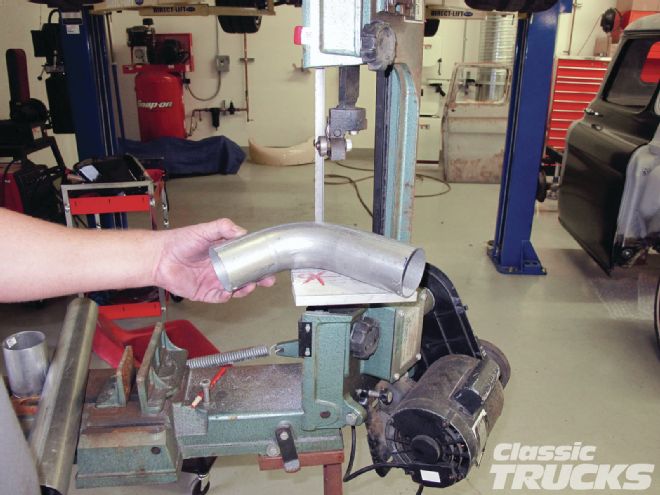
06 After looking over the tubing, I laid out in my head what pieces I would need to complete the job. Using a slight bend from the kit, I cut the tubing down until the tube was close to where it needed to go.
07 Instead of using a chop saw, I tend to like a bandsaw because I can cut the tubing at any angle and hand-hold it. Plus I don’t have much luck cutting straight on a chop saw and I really don’t like the dust a chop saw makes.
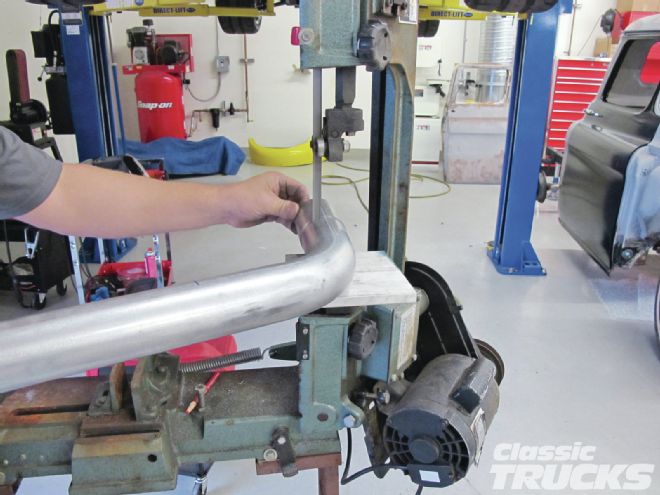
08 Trim a little at a time and test fit the tubing over and over because you can easily take too much material off.
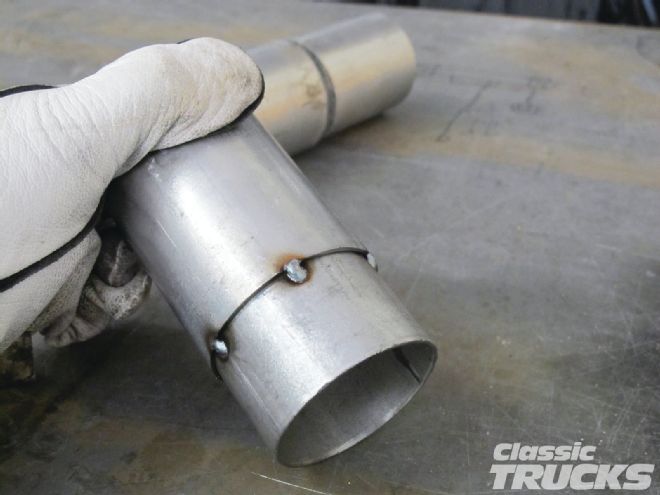
09 Now that you are satisfied with some of the fitment you can go ahead and tack weld some of the tubing together. Make sure you tack four areas around the tube to make sure it does not move during mockup.
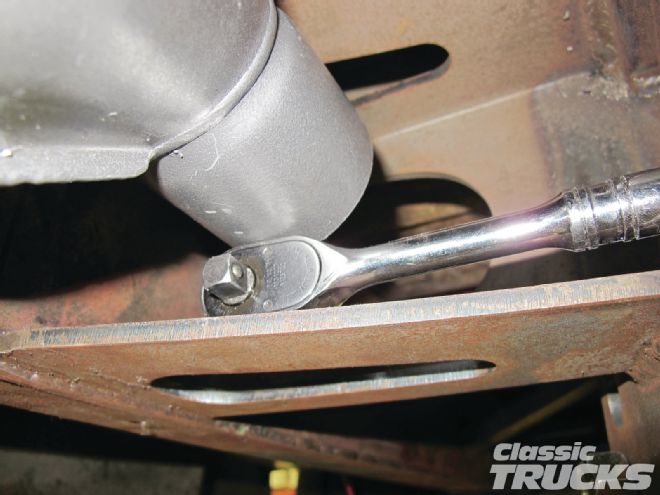
10 Here is a cool trick when mocking the exhaust system. I used a ratchet to hold up the muffler while fitting the tubing. If you think about it, tons of stuff can be used to help prop up the exhaust, but be careful not to ruin the ratchet by welding near it.
11 Since I was tight on space I cut off the muffler inlet and welded the ball flange on the end of both HP-2 mufflers. This worked out great because I have a place to unbolt the exhaust system if I wanted to service the transmission or engine.

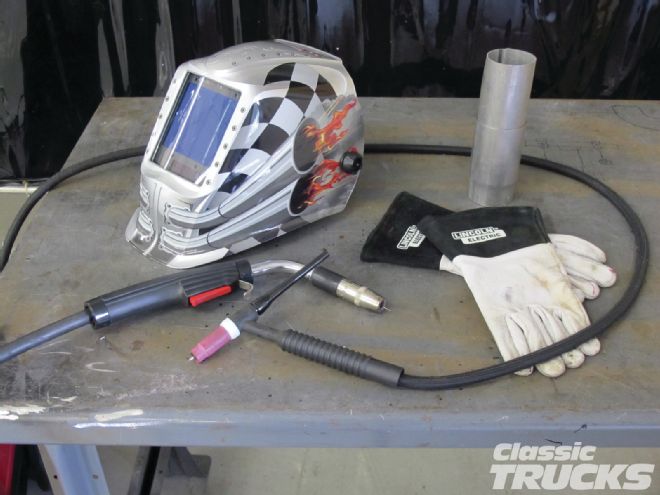
12 Now when it gets down to safety, I usually use a pair of TIG welding gloves when working with any kind of metal. It saves my hands and I can work faster because I am not worried so much about burning or cutting my hands. Same goes for using a welding mask to tack weld because I don’t like to burn my eyes or face while welding.
13 If you are able to TIG weld everything together then it will look great when finished. Notice how small the weld area is and how well TIG welding blends the two tubes together. If this were a stainless-steel exhaust system then I would have used the TIG process on all the tubes, but since it is aluminized steel, MIG welding will be easier and still look great.
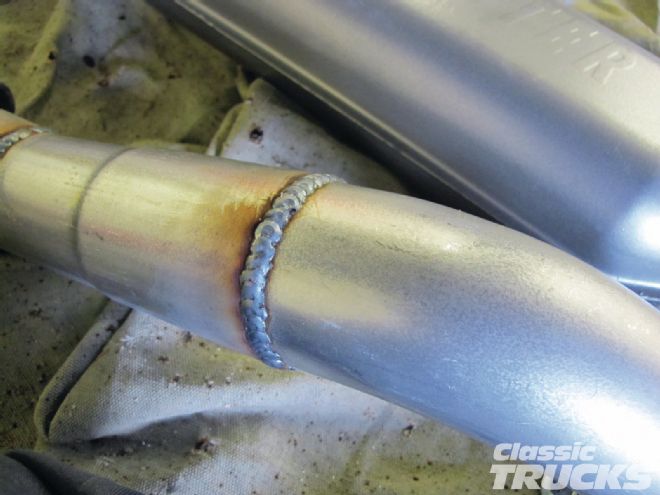
14 With tubing this thin I like to turn the welder’s voltage up just a little and spot-weld the tubing. So instead of one constant bead I will lay one spot weld over the other. This will give the stack of dimes look if you get the hang of it.
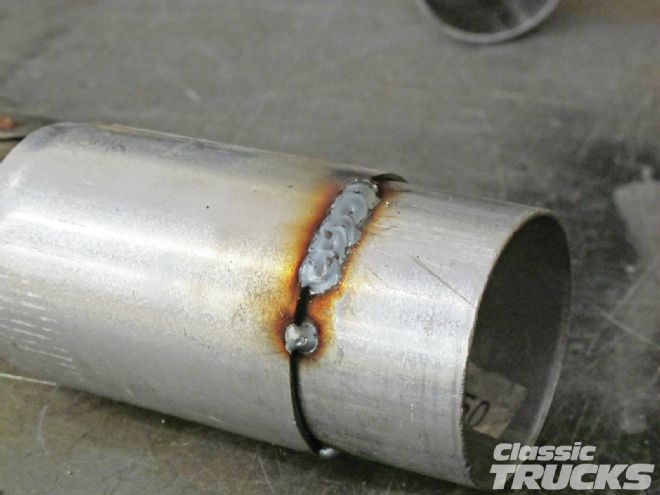
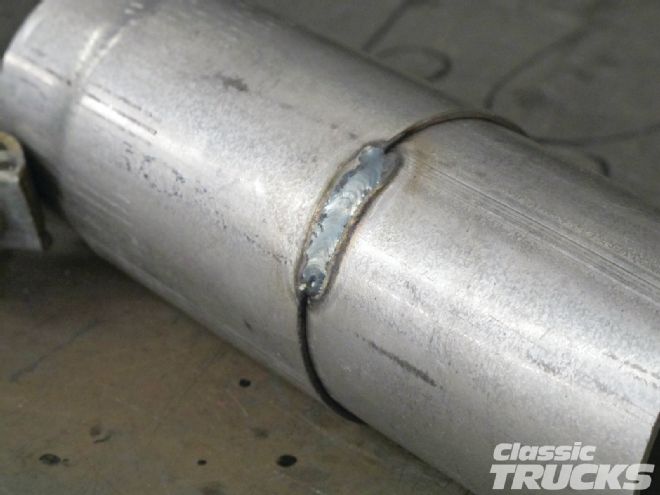
15 Voltage and wire speeds are important when welding tubing. Notice on the upper part of the tube the weld was not penetrating enough and the weld is on top of the tubing. This is caused by either too low of voltage or too high of wire speed. On the other hand, look below toward the middle and see a case of borderline too much penetration. In this case the welder’s voltage was set way too high and/or the wire speed was really slow.
16 Notice how the weld lays somewhat flat on the tubing, but has a slight bump in it. This is about how I like the weld to sit on the tube – nice and flat.
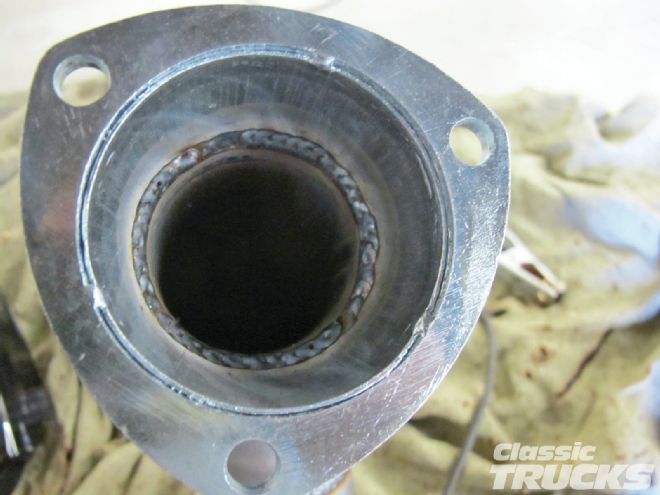
17 To help with exhaust flow I welded the inside of the collector where the tubing entered the collector.
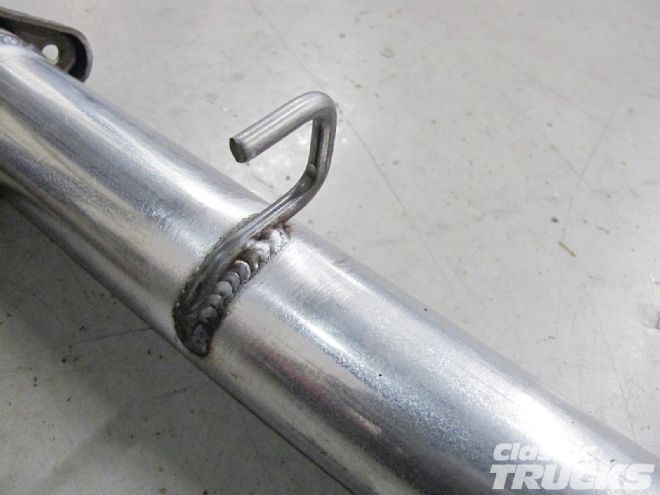
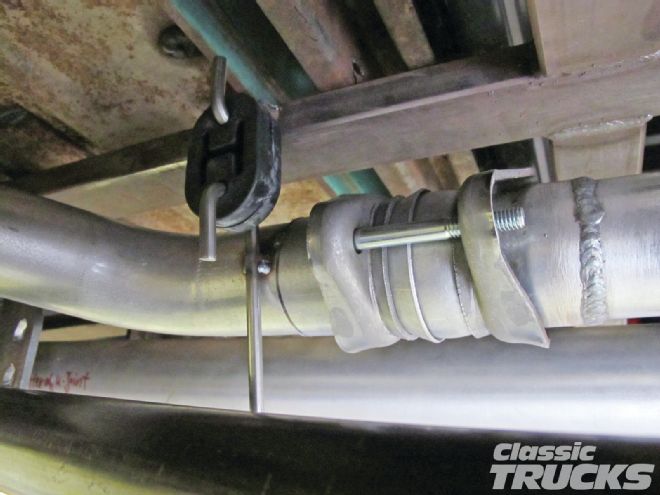
18 The exhaust hangers were also ordered through Summit Racing. The next step was to properly adapt them to the frame and the exhaust. Notice how the rod is bent to contour the tube, I was able to weld the corner of the hanger and then bend it using a hammer while it was still hot.
19 The other ends were attached to the vehicle’s frame and a slight tension was pulled on the rubber grommets while I tacked it on. This way the rubber can spring back and hold the weight of the exhaust.
20 I will have to think about how to attach the H-pipe because of the tight area around the transmission. Without using an H-pipe the exhaust will sound raspy and or make popping noises when letting off the throttle.
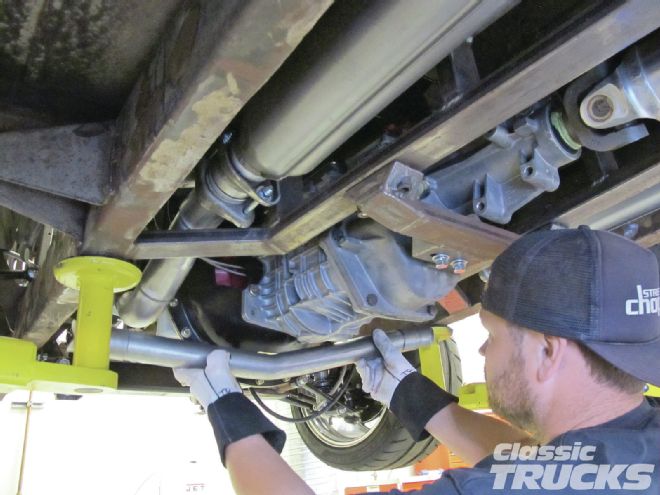
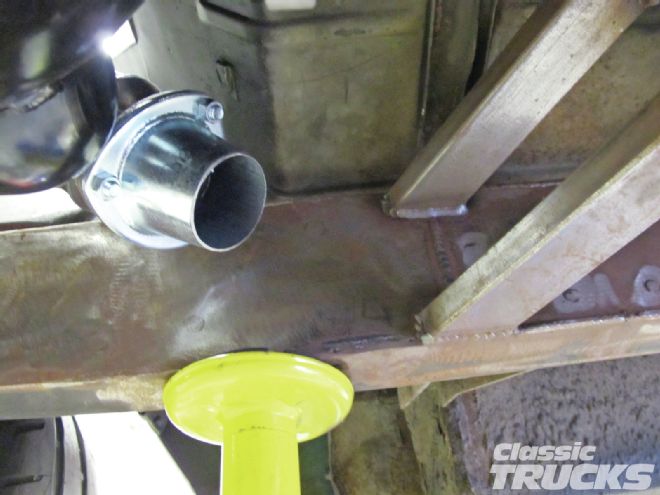
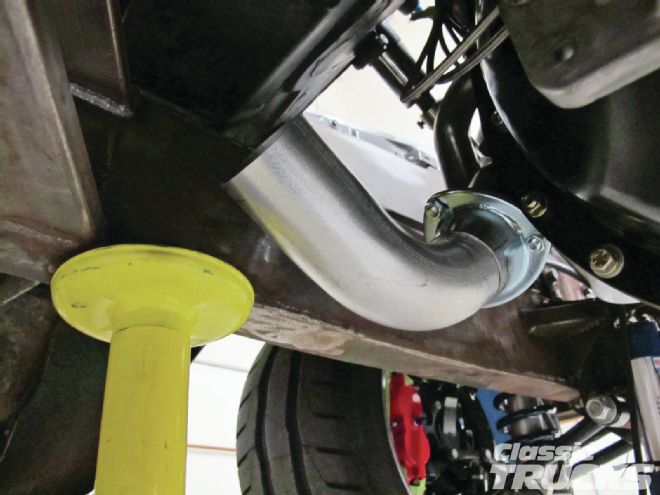
21 Now everything is tucked neatly inside the framerails so that it will not drag or scrape on speed bumps. The sound is just right at cruise, plus my ears and right foot really like the WOT tones the mufflers make.
