Whether you race on dirt or asphalt, competition can be rough on parts, especially radiators. Flying rocks, chunks of dirt, bits of asphalt, and rubber can easily bend, clog, and damage the critical aluminum fins of a radiator. Not to mention the constant bumping playing havoc with mounting points, welds, and more. Your radiator is the most critical component of your cooling system, and with the summer months just around the corner now is the perfect time to do a little cooling system evaluation to make sure yours is up to snuff.
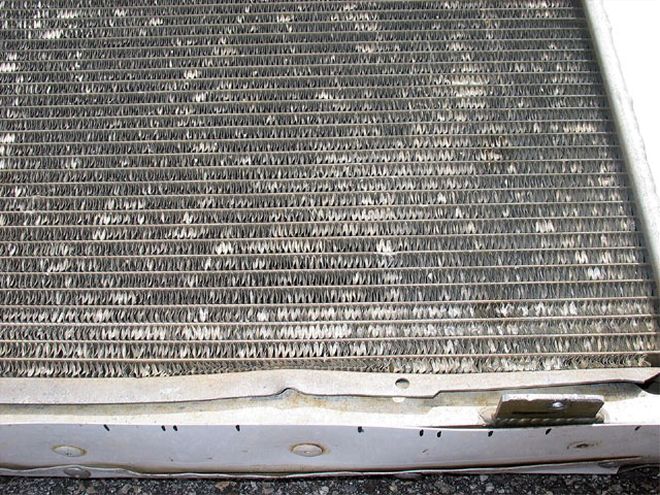 Note how the aluminum fins are folded over, bent, and damaged. No doubt the result of flying chunks of dirt, rocks, and mud. Fins bent over in this fashion cannot do the job of circulating the air.
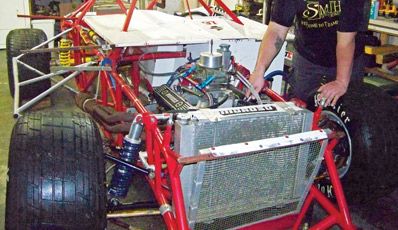
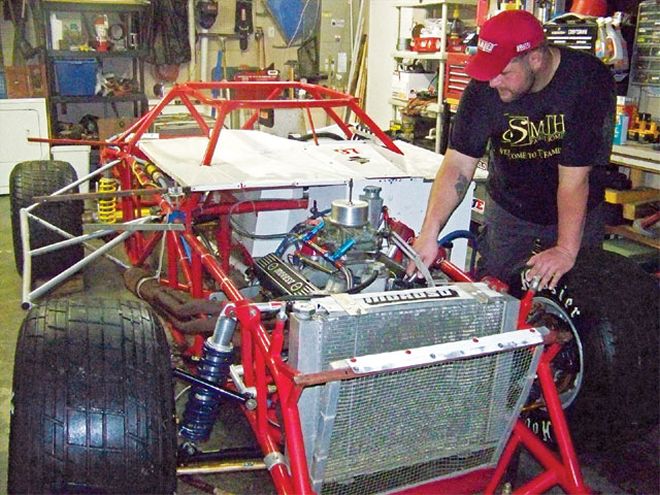
Our Dirt Late Model project offers the perfect testbed for his story. It is a standard Saturday night racecar, 2002 Rayburn chassis, 362 open motor class Chevy. Bobby Clark, our driver and occasional freelance contributor, bought the car four years ago. The car had the radiator and cooling system in it when he bought it. Bobby has raced it at least 30 times so we know that the radiator has seen quite a bit of action. Class rules for this car dictate distilled water only, so there's nothing fancy floating around inside.
We began our process with a good inspection of the current radiator and all the hoses, couplings, and mounts. What we found could be classified as typical in the Saturday night market. The mounts looked fairly good, if not a bit worn, but the front of the radiator, as well as the housing and shroud, was pretty beaten up.
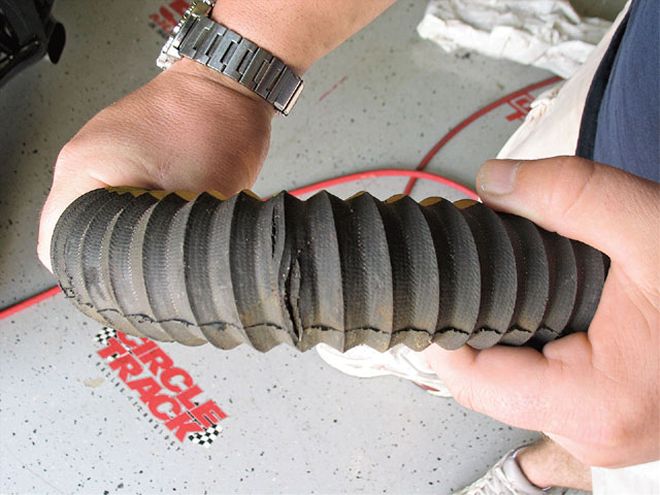 Clearly this hose is shot. The crack did not go all the way through, so the system performed fine when it raced last, but if we didn't do the inspection this crack would eventually spell disaster.
Knowing full and well that we were going to need a new radiator, we turned our attention to the hoses. Considering the age of the system we were not all that surprised to find cracks in both hoses. But even if we didn't find anything outwardly wrong with the hoses we would still advocate changing them. Hoses, particularly the push-on type that we are using, are not that expensive. So there is no reason to put old hoses on a new radiator and risk missing a brewing problem not caught by a naked eye inspection.
While we're on the subject of hoses, let's take a quick look at radiator fittings. We talked to David Bridges at C&R Racing and he said that the majority of their Dirt Late Model radiators are built with a 1 1/2 inch push-on hose fitting. "We do build special radiators for a few guys like Scott Bloomquist with a -16 AN male top hose fitting," says Bridges. "It's a cleaner and more sanitary look than using a rubber push-on hose. It's also a little safer because you eliminate the possibility of the push-on hose blowing off, the hose clamp cutting the rubber hose, and the braided line can take a little more wear and tear."
But the custom set ups for the Bloomers of the world are not necessary for the Saturday night racer. Bridges says that they build the DLM radiators with the 1 1/2 inch push-on hose in an effort to make them less expensive to build which translates into a more cost-effective product for the customer.
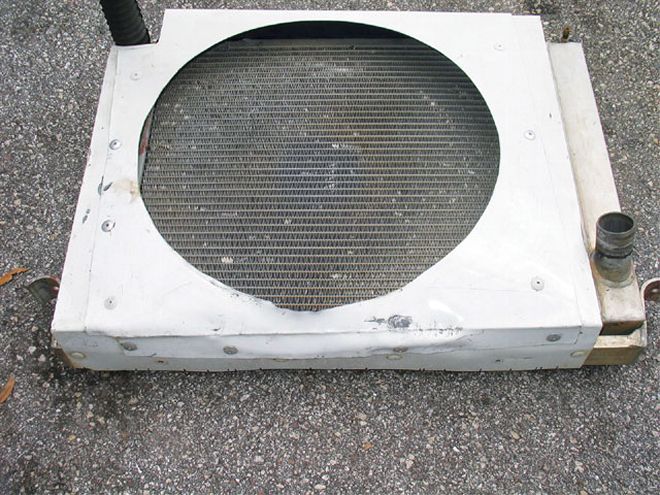 The housing which holds and protects the radiator has some damage to the bottom side. The origin of how the damage got there is not important. What is important is that the hard jolt that caused it could have had an effect on the internals of the radiator. The shroud was in rough shape, too.
The purpose of this Dirt Late Model project is to rebuild a real world racecar and then race it in a regional series (The United Dirt Late Model Challenge) as well as at other tracks in and near Florida. While we will use the project to showcase and test new products from manufacturers, we are stressing the fact that this is a real world build. In other words, we will look at parts decisions from a competitive/performance angle as well as its cost-effectiveness.
That being said, we had a decision to make when it came to the radiator. A quick review of radiator tech first will help us make those decisions. First and foremost, almost all racing radiators are constructed of aluminum because aluminum efficiently transfers heat from the water flowing through it to the air outside. Of course this only happens when the water is in direct contact with the aluminum. Consequently, manufacturers maximize the cooling effect by increasing the surface area of the radiator tubing (which holds the water). Typically, these tubes are very wide from front to back but slim from top to bottom. Dozens of these slim tubes are stacked on top of one another with small air spaces left in between. As the hot water or coolant flows from the motor through these tubes it is cooled down before returning through the motor's water jacket.
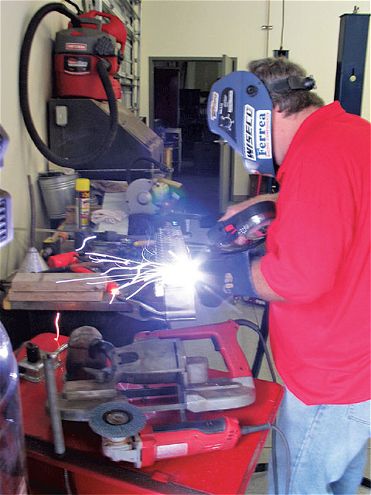 Bobby's father, Robert Clark, welds up the brackets for the new radiator mount.
When the water/coolant moves across the radiator one time, it is called a "single pass" radiator. Obviously when the water flows across one set of tubes and then comes back across a second set, you have a "double pass." The second set of tubes is placed right behind the first, which makes the radiator a two-row core or dual core. Now you can have a dual core single-pass radiator or a dual core double-pass radiator.
While you can also purchase three- and four-row core radiators, they are not a good alternative for Saturday night racing. The more rows of cooling tubes stacked one behind another, the harder it is for the air to get through, which is a key to cooling. A Sprint Cup car running 200 mph at Daytona would have no problem pushing air through a three- or four-core radiator but that's not the case in our project Dirt Late Model. Dual core is the way to go. The only question we had to answer was single or double pass.
While many pit experts think that double pass is the way to go, much of that decision rests with your particular motor combination, where you run, length of race, etc. Also important is the past history. Our DLM has spent all its life in Florida and has always run the current motor with a dual core single-pass radiator never once experiencing an overheating problem. In fact, the engine has never seen the "danger zone" of 220-plus degrees even in the longer features. Dual core, single pass has worked fine for us in the past and it should in the future.
 The additional length on these brackets will help stabilize our new radiator.
As this story is being written, our engine is sitting over at Southern Style Racing Engines in Pinellas Park, Florida, getting a refreshing by master engine builder George Pils. While this process will be featured in another CT story, it is relative to this article. The motor is being cleaned and serviced. But the only raceday change we are making is a new Quick Fuel carburetor. Everything else is staying the same...for now.
While discussing radiator options with George, he made the very valid point that the motor only has to push he water through a single-pass radiator one time. In a double-pass radiator you've essentially got that water coming and going and something (horsepower) has to help it move. Our goal is to maximize the horsepower and torque of this engine, so we want to spend as little horsepower as necessary on ancillary things like pushing water through a double-pass radiator. Therefore, we settled on a dual core single-pass radiator from C&R Racing. Keep in mind that this philosophy works because we already know that our present engine package successfully ran multiple years with a dual core single-pass setup.
This all-aluminum radiator uses hand formed tanks with an aluminum billet neck and 1 1/2-inch inlet and 1 3/4-inch outlet. The radiator is heliarc welded with two row furnace brazed cores. C&R does not use epoxy which reduces the efficiency of the radiator thanks to its insulating properties. The factory core mounts will allow us to easily install the radiator.
 When we moved the radiator mounting points forward we made sure that the new location would clear the hood, using the pins and a straight bar as a guide.
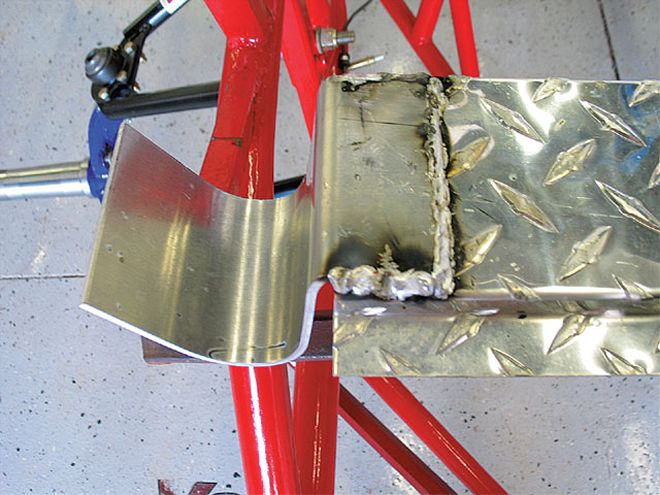
Our new C&R radiator is slightly larger than our old one, so we'll have to fabricate a new housing and mounts for it. We used aluminum diamond plate because, frankly, it looks cool. After fabricating the housing we took an 8 inch by 3 inch piece of flat aluminum plate and formed two brackets that wrap around the tubular frame. On one side of each bracket we put a 90 degree bend that will allow the bracket to continue for another two inches. This gives added support to the radiator housing and once the whole unit is in place and bolted together the radiator will not move.
We moved the radiator from its original location forward by one inch and up by one inch in order to give some additional clearance between the steering rack and the bottom of the radiator. When we did this we were careful to take into account the line of the hood, note the location of the pins in the top picture.
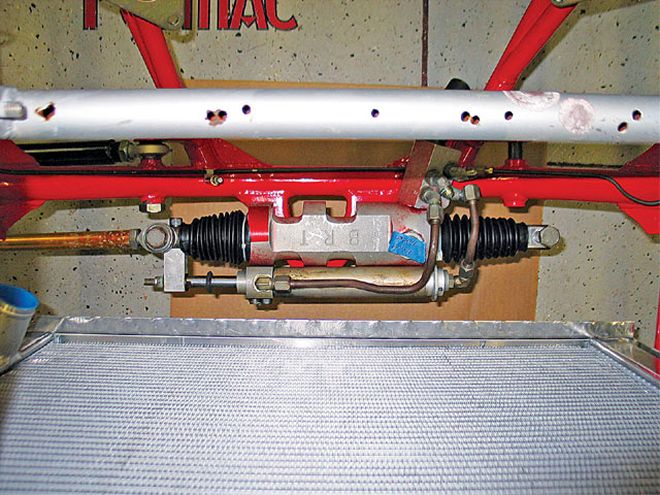 By moving the mounting points forward and up from their original location, we gained additional clearance between the steering rack and the bottom of the radiator.
Dirt Late Models do not use electric fans. Therefore, the only other thing that will need to be done once the motor gets back from its refreshening is to attach a fan shroud to our assembly. A brand new set of Earl's hoses will complete the package.
Now that our radiator is in the car, we're ready to get going. As the rules state, we'll be using distilled water as our coolant choice and absolutely no additives. Since we want to maximize our performance on the track week to week, we need to make sure we maintain all aspects of the car including the cooling system. Here's a basic outline of what we'll be doing to keep the cooling system in tip-top shape:
Inspect & Clean - The first thing we'll do after every race is inspect and clean our radiator. We'll look for damage from trash, chunks of dirt, and rocks that have been thrown up into the radiator that could have caused bent fins, breaks, and/or cracks in any part of the radiator, housing included. In addition, we'll be inspecting all of the hoses for cracks, scrapes, or pinholes. Obviously racing on dirt means we'll have to wash down the car each week, but it is not a good idea to use pressure washer on the radiator. High-pressure water can bend the cooling fins and bent fins will block airflow and do some serious damage to the radiator's cooling efficiency.
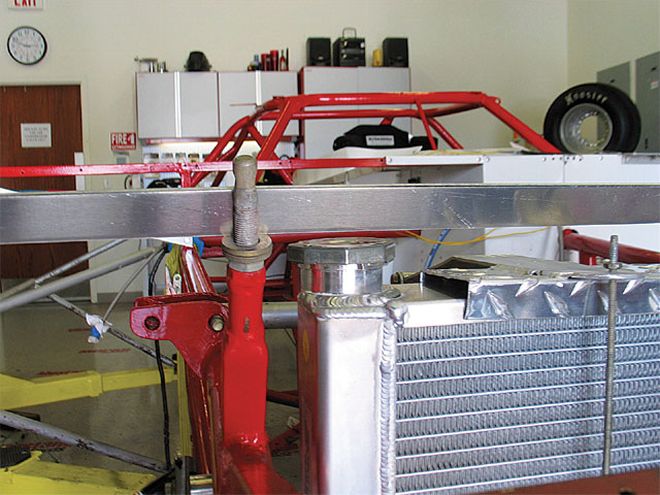
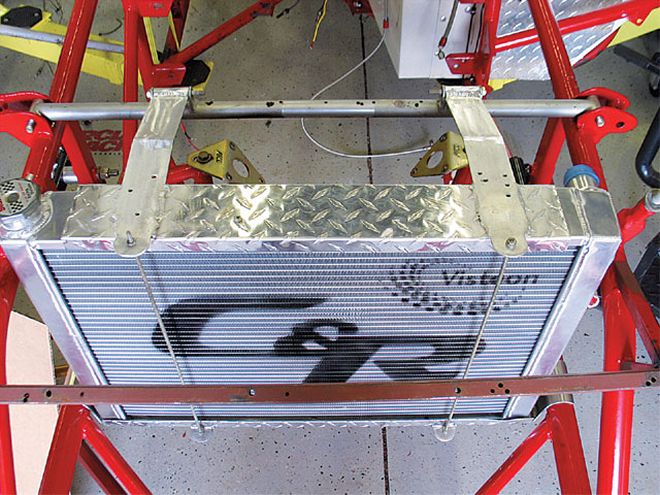 Our new dual core single-pass C&R radiator in place.
Pull It Twice - Twice this season we will pull the radiator from the car for a more thorough cleaning. Since we're racing on dirt, we'll soak the radiator in a solution of soapy water and then rinse it with clean ater straight out of a garden hose (without a squirter nozzle). That will help remove any dust and mud that has collected between the fins. If we were racing on asphalt, we'd have to use something a little different.
Radiators on asphalt cars will collect chunks of rubber which won't come out in a soap-and-water bath. In this case, Chris Paulson of C&R Racing recommends soaking the radiator in a solvent solution instead of soap and water. This will help dissolve away some of the asphalt and rubber and make it much easier to remove. Before soaking your radiator, however, make sure to cap the openings so that you do not allow solvent inside the cooling tubes. After soaking the radiator, pull it from the solvent bath and rinse it with clean water from the back to the front. This way you do not push any track debris further into the radiator. When reinstalling the radiator, make sure that your hoses are not breaking down.If they show signs of collapsing, it is time for them to be replaced.
When the racing starts, we'll put these maintenance tips into practice. And, as always, we'll be reporting on the results. Stay tuned.
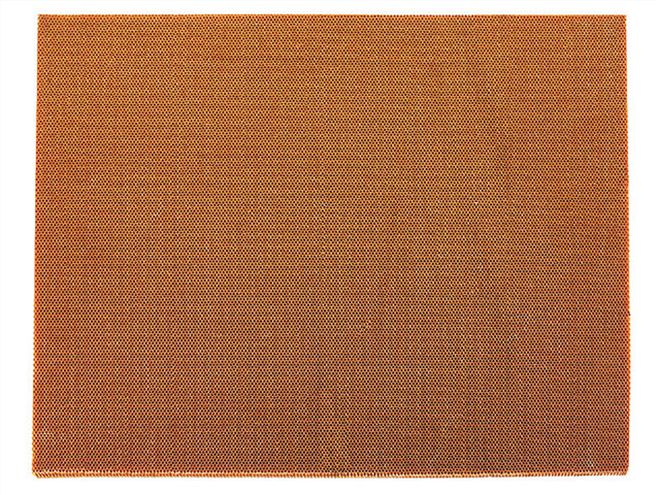
Radiator protectors are a good way to add an extra layer of protection for your cooling system. These protectors mount in front of the radiator and absorb the impact from debris, rocks, and dirt instead of those aluminum cooling fins. The one pictured above, the Tru-Kool Radiator Protector, is from Speedway Motors. Its Nomex honeycomb construction is very strong and extremely lightweight offering excellent protection.

The protector is disposable and is designed to be replaced as it absorbs various amounts of damage. Naturally, how often you race, the type of track you race on, and other factors will determine how often you have to replace the protector, but some racers have reported running an entire season on just one honeycomb. The Tru-Kool Radiator Protector comes in four different sized sheets that can be easily trimmed to fit any radiator.