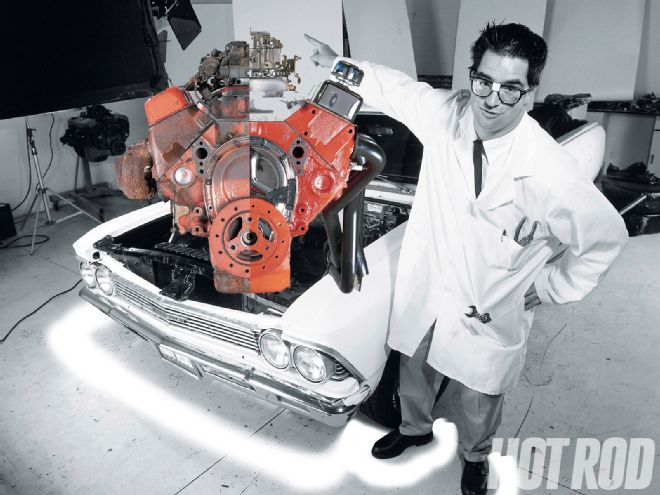
Why do so many rodders feel that any and all performance engines require nothing less than the finest of whiz-bang, go-fast parts backed by a host of indestructible innards to qualify as a "proper" powerplant? Do you really need that tungsten air-cleaner wing nut just to go to the local cruise? Does a decent streeter really need to make 800 hp and have the ability to withstand 8,000 rpm to be functional and enjoyable? And perhaps more importantly, does the entry-level hot rodder need a Kryptonite Visa card to join the ranks? We think not.
These questions spawned a challenge: Build a respectable street motor with a bargain price tag. But what's respectable? We felt that any engine that could theoretically propel a 3,300-pound car into the 13s would qualify, and a nice round 300 ponies should do it. What's cheap? We were stoked to do a 300 hp for $300 deal, but that proved a little too thrifty, so we set the high water mark at five bills. Of course, if you're pondering economical horsepower, you're probably already thinking small-block Chev, since the "As Low As..." catalog claims almost always cite the mouse motor pricing.
Outside of believing that it simply couldn't be done, some skeptics felt that attempting to make power on the cheap was just an unsound practice and claimed that we would be doing more harm than good by instructing readers to build their own grenades.
We say they're dead wrong, and here's why: There are tons of sound, used engines out there just waiting to be plucked from heaps that have turned their last mile. Find one, freshen it, and then upgrade it with some low- and no-buck speed tricks for cheap thrills. After all, Chevy cranked out a slew of 300hp 350 engines from '69-'70, so why couldn't we?
Key Factors
The condition of the core engine is crucial to this project. The single most important aspect of the short-block is the ring seal; trying to restore the seal once it has deteriorated dictates reboring, which involves new pistons. The need for new pistons generally means a complete rebuild, and a rebuild can thoroughly blow the budget.
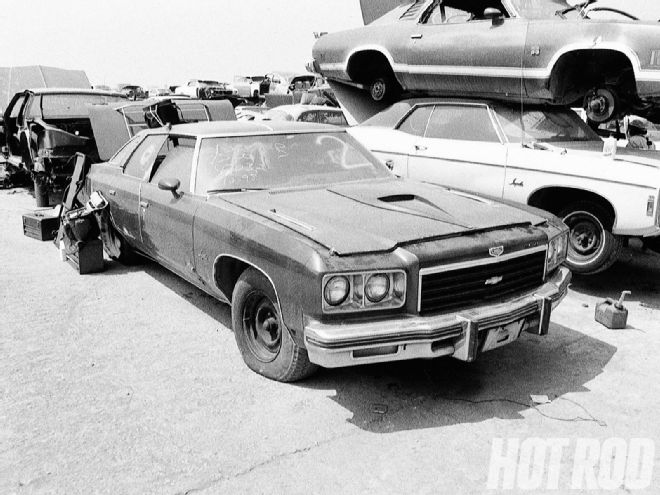 After picking through dozens of derelict Chevys at Pick-Your-Part in Sun Valley, California, we came across this clapped-out '76 Impala. The '79 Z28 hoodscoop was a nice touch (gag!), and frankly, we were amazed to find that the 350 four-barrel underneath appeared unmolested.
The problem with most used small-blocks (and most American V-8s in general) is that the bores wear significantly as the engine racks up miles, usually resulting in a ridge at the top of each bore, which will damage the rings if the pistons are removed. The obvious answer would be to simply install a fresh set of rings, but there's more to it. Although you could cut the ridge at the top of the bore with a ridge-reamer, the ridge is an indicator of the wear that has occurred in the bore. Even if you could get the pistons back in without damaging the new rings, the relationship between the piston and the bore is no longer the same as it was when the engine was originally assembled. The shape and size of the bore is inconsistent and possibly much larger in some spots than factory spec. These factors mean that although your reringed engine will run, the ring seal will most likely be inefficient.
Despite the wear common to small-block bores, it is not unusual to find high-mileage engines that still maintain adequate ring seal. Wear to the bottom end (crank, connecting rods, and so on) is often correctable. Here, the condition of the crank journal surfaces is the determining factor. Even an engine that has worn its bearings to the point of poor oil pressure often displays unmolested journal surfaces and requires only a fresh set of bearings to restore proper clearances. An engine that has been run with an audible bearing knock or without oil pressure for any length of time will most likely have scarred journals, requiring machine work to correct, which again points to a complete rebuild.
You've probably gathered that you need to avoid machine work to pull this low-buck missile off. If you can locate an engine with decent ring seal and no catastrophic damage to the rotating assembly, you freshen the bottom end and move upstairs.
Core Search
We wanted absolute garden-variety stuff that anyone could find, and ideally, we'd start with a virgin piece, thus eliminating the possibility of faulty machine work and/or exceedingly cheap parts. Anyone can go to a salvage yard, and the best of these facilities are the pull-your-own-part variety. This is the scrounging ideal, since pricing is often based on the type of part, not the specific make or design and not the condition of the stuff you want. In our case, the price for a complete V-8 engine, including core charge, was $149.95.
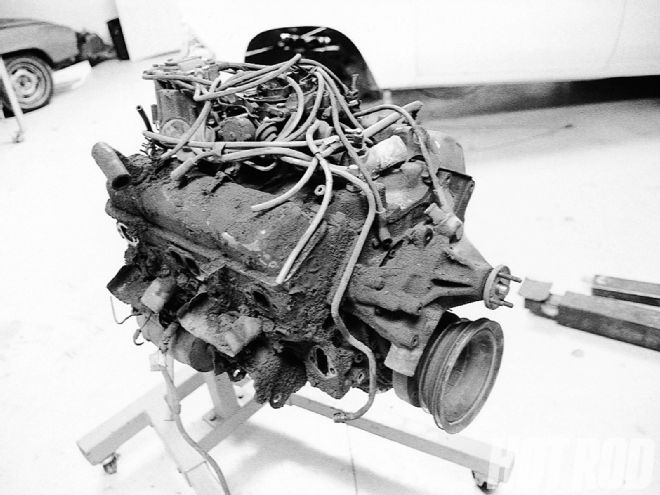 Back at the shop, we put our filthy small-block on a stand; a few hours of cleaning and dismantling turned this...
We went to our local Pick-Your-Part in Sun Valley, California, a place where fresh meat arrives daily. As a bonus, Memory Lane-another salvage business dealing only in older specialty vehicles-is right next door. Although we wouldn't be needing any rare stuff for this project, these guys are very good at locating parts, and that just might come in handy.
One of the negatives involved in this kind of shopping is the lack of background on the cars. Pacing the aisles in the Chevy section revealed plenty of 350-equipped cars, but no one on the premises had ever heard them run, nor could we. Ideally, we wanted an engine that looked unmolested, and we finally found it under the hood of a very hurt '76 Beirut Edition Impala. Not only were all of the little factory wiring tabs and hose routing ties in place, but the deep black filth that covered the entire motor was virtually undisturbed.
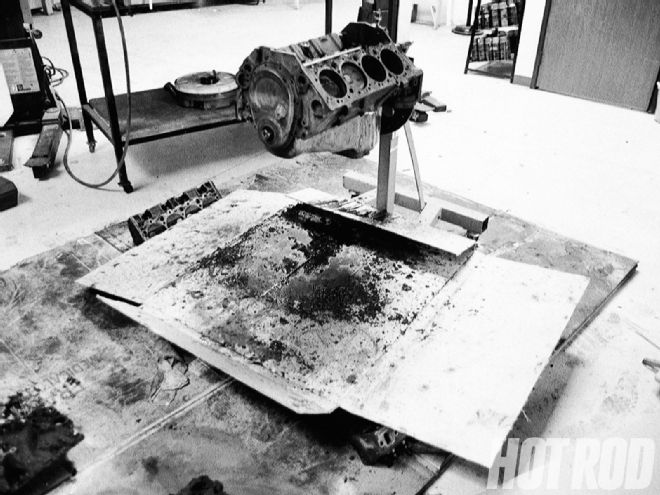 ...into this...
We proceeded with a series of tests and checks to further verify the chugger's health. First, we pulled the spark plugs and compared them. All were a nice even shade of light brown, indicating a clean burn on each cylinder. If one or two had been oil-fouled, a ring or piston problem could have been responsible. Next, we put a socket on the crankshaft pulley bolt, turned the engine over, and found that its rotation was smooth. If you can find an engine that still has the ability to crank over, now would be a good time to do a compression test. We put a battery in ours and hot-wired the starter (check with the yard personnel first). Readings showed a nice, strong 150-160 psi across all cylinders. Consis-tency, rather than a certain pressure, is what to look for. Then we pulled a valve cover and found very little sludge beneath. It seemed we had found our subject. We pulled the engine from its moorings, but accessories such as the power-steering pump, the alternator, and the exhaust manifolds were left behind. By shedding the stuff we didn't want and providing a blown-up 302 Ford as a core, we knocked the price of the 350 down to $89.95. Taking the carb and distributor bumped us up another $40.
The Autopsy
After mounting the engine on a stand, we peeled off the crud. Removing the intake manifold revealed a surprisingly clean lifter valley. We yanked the heads and were flat-out amazed to find ridgeless cylinder bores. Did we get lucky, or what? A check of the bore diameter verified a factory-original 4-inch bore, and the pistons displayed factory markings. So far, so good.
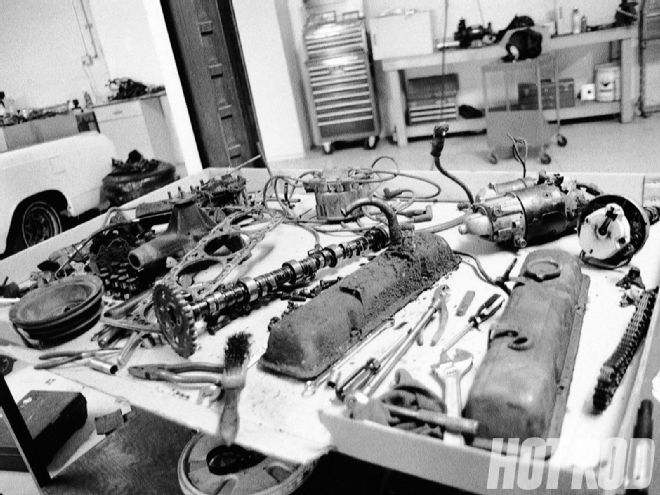 ...and this. Although it looks like junk, much of this stuff, such as the fuel pump, distributor, water pump, valve covers, and carb, was cleaned and reused.
We attempted to remove the lifters but found them particularly stubborn. Rather than forcing the lifters out and scarring the lifter bores with their mushroomed bottoms, we simply pulled them up until resistance held them off the cam. That allowed us to slide the stick out so that the lifters could be pushed down through the bottoms of their bores.
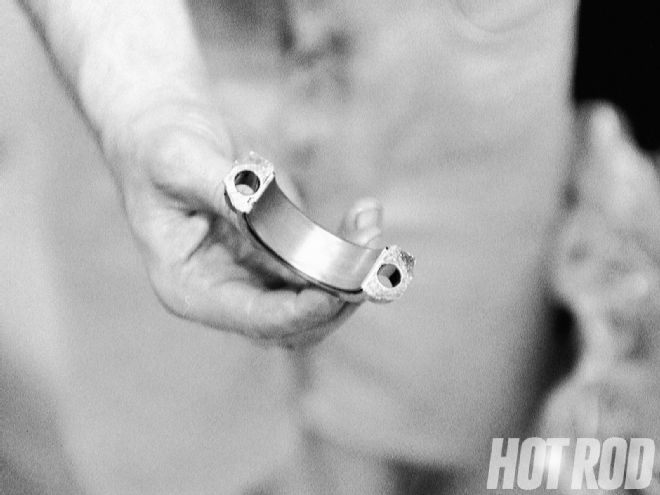 The moment of truth came when we pulled a rod-bearing cap. The bearing looked great, and Plasti-gauge verified that the clearances were well within factory specs. We checked all the rod bearings but replaced none of them.
Then, the moment of truth: We buzzed out the oil-pan bolts, broke the seal, and quickly unfastened a rod cap. Hah! The bearing within was a beautiful shade of gray and exhibited minimal wear. We checked clearances with a Plasti-gauge, which revealed fairly consistent 0.0019-inch clearances on all the rod journals. Chevrolet specifies 0.0020-0.0025 inch as acceptable for high-performance applications, and since ours were even tighter, we left the original bearings intact.
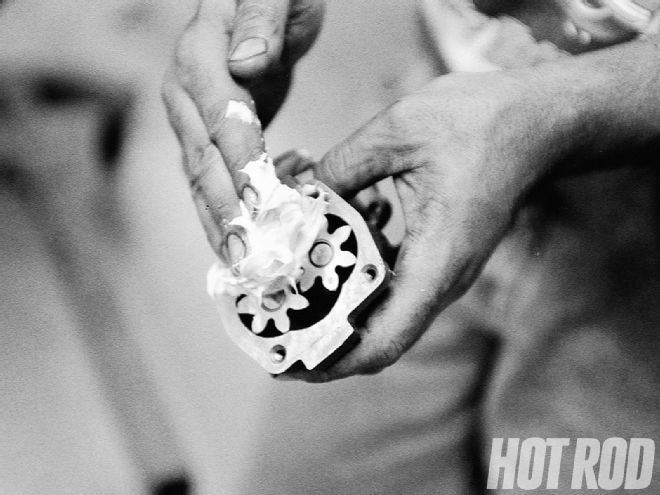 A new stock oil pump set us back $14 and provided cheap peace of mind. Many builders are quick to install a high-volume pump, but they rob horsepower that our delicate application couldn't afford to lose.
We were psyched. The autopsy had proven that our junkyard refugee was amazingly sound, paving the road to dirt-cheap horsepower. Now, we had some shopping to do.
The Grocery List
To get the most for our money, we had to plan carefully. In almost every case, the key to power is the cylinder heads. While modern port and combustion chamber designs can yield big gains, new heads would cost more than the entire budget. The heads that came on our Chev were typical of mid-'70s 350s: 1.94/1.50 valves and 76cc combustion chambers. The valve sizes are respectable, but the chambers posed a problem; when combined with the factory dished pistons, these castings create a static compression ratio of 8.5:1-lower than we'd like.
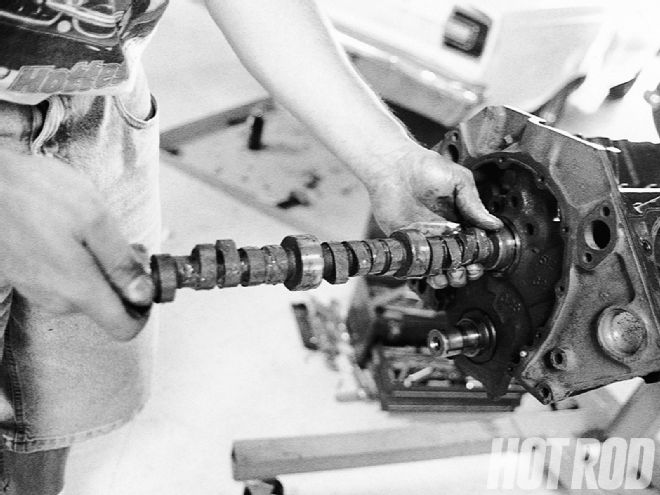 Since we were dealing with a low-compression engine, the camshaft was paramount to success. We needed to stay below 5,500 rpm and make good torque as well. We chose a Summit cam and lifters with 214/224-degrees duration at 0.050 lift and 0.442/0.465 inches of lift, based on a 112-degree lobe separation. A Cloyes double-roller timing set from Summit keeps it in time.
We could have sought out heads with smaller chambers, but most of those castings are prized by street rats and weekend warriors, making them pricey if not downright rare. We stuck with the originals, put a basic three-angle valve job on 'em, and had the deck surface milled to shrink the chambers and raise the compression.
For headwork, we looked to the local classifieds, which listed numerous budget-oriented engine rebuild shops. After making some phone calls, we selected United Engine Cores in LA. For a mere $125, United Engine Cores would hot tank the castings, surface mill them, and perform a three-angle valve job. We asked if they could mill the surface 0.030 inch, and they happily obliged.
Next, a list of items was needed for reassembly. The most important item to consider was the camshaft, especially when we realized that the best possible compression ratio would be about 9.0:1. To be street-friendly, our junkyard jewel would need to produce torque over a broad rpm range, and spinning it to 6,000 rpm would likely shorten its life span, perhaps dramatically.
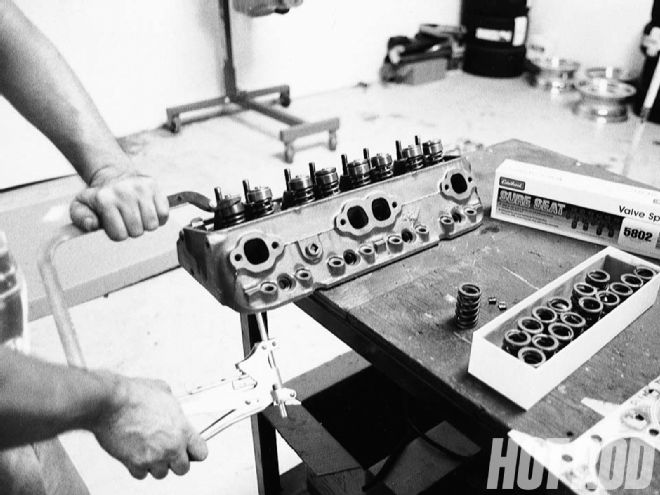 Our miniscule budget wouldn't allow for trick heads, so we sent the stockers to United Engine Cores in LA for a basic three-angle valve job and surface milling. We had extra meat taken from the deck surfaces to shrink the chambers from 76 cc to 70 cc but still would up with 74cc volumes, leaving our compression less than 9.0:1. We also installed Edelbrock Sure-Seat valvesprings; a wicked $38 upgrade.
With these criteria and a self-imposed 5,500rpm limit, we needed a grind with mild duration, decent lift, and a fairly wide lobe separation. We also wanted to run a split pattern, favoring the exhaust side slightly to help evacuate the cylinders, which would help to build power in lieu of higher compression. Of course, we also needed budget pricing, but many of the economically priced cams feature old-school grinds. Then we found our perfect cam in the Summit Racing catalog; its "house-grind" profile measured 0.442/0.465-inch lift and 214/224-degrees of duration at 0.050-inch lift. It was based on a 112-degree lobe separation, and best of all, it cost just $79.95, including lifters.
Just as we were about to order the $14 stock timing-chain set from Summit, we found a Cloyes double-roller job with a three-way adjustable cam gear just a few pages away for only $3 more. Since we were stepping up the cam, we wanted new valvesprings, something only slightly better than stock-heavy springs would be unnecessary for our mild-cam/low-rpm recipe and would only serve to stress the lifters and rob power. Searching for reasonably priced replacements proved difficult; even "budget" stock replacement springs were between $50-$60. Believe it or not, the killer deal wasn't generic stockers but Edelbrock's Sure-Seat springs. These single-coil units are intended for its Performer series of cams and feature the mild improvement over stock we were looking for, and a paltry 38 bucks was the asking price. Sold!
While we were at it, we ordered a $26 no-name engine gasket set and a stock-spec oil pump for another $14. Our low-rpm range and basically stock componentry simply didn't require more than a stock-type oil pump could deliver-high-volume pumps eat power, and we couldn't afford that.
We wanted to use the Quadrajet that came on our engine, so we disassembled it, soaked it in parts cleaner for a day, and then put it back together with a $24 kit. The Q-jet is a very capable performer when tuned properly, and all ours needed was a slightly higher float adjustment and (probably) more aggressive secondary metering rods. We installed our original secondary metering rods and planned to fine-tune the piece once the engine was up and running on the dyno.
The stock cast-iron intake manifold just would not do, so as a cheap alternative, we searched the boneyard for an aluminum GM manifold of the sort found on mid-'80s 305 H.O. engines. This casting is a low-rise design but has respectable flow capabilities. We scored one for $15.
To light it all off, we reenlisted the HEI distributor that came out of our 350. The HEI is another excellent piece; its only downfall being a lousy factory curve that the factory used to cope with smog regulations, but that wouldn't affect total output. We also swapped in a $26 cap and rotor kit, and a $12 set of stock Autolite plug wires.
Frankenstein
There were no tricks involved in assembling our 350. We retorqued the rod bolts to 45 lb-ft, packed the new oil pump with a little white grease to ensure quick priming before bolting it down, and sealed up the bottom end. We coated the cam with break-in lube (included) and installed it "straight up," using the marks on the new timing set. The heads were the only glitch; we measured combustion-chamber volume and got 76 cc on the nose. When they came back from the machine shop, we retested and got 74 cc, not the 70 we had expected. The valve job may have sunk the valves deeper in the head, thus negating the reduction in chamber volume, but whatever the cause, the lack of compression was going to make it tough to make 300 hp. We installed the heads along with the original rockers and pushrods and buttoned up the top end of the engine.
Putting It To The Test
To proof the package, we went to Westech Performance Group in Mira Loma, California, for a dyno session. Proprietor John Baechtel had given us some coaching during the buildup, and we felt his tuning experience would be helpful in extracting everything the JJ 350 had to offer. The small-block was fitted with 1 3/4-inch headers, which were connected to 3-foot lengths of 3-inch pipe feeding Flowmaster 3-chamber mufflers and 3-foot, 3-inch-diameter tailpipes. We thought the primary tubes were a little large for our mild mouse, but Westech's 1 5/8-inch headers don't have provisions for exhaust-temp probes, and we wanted to monitor the EGT. Baechtel felt that the larger tubes might cost a little torque but would have little or no effect on peak horsepower output.
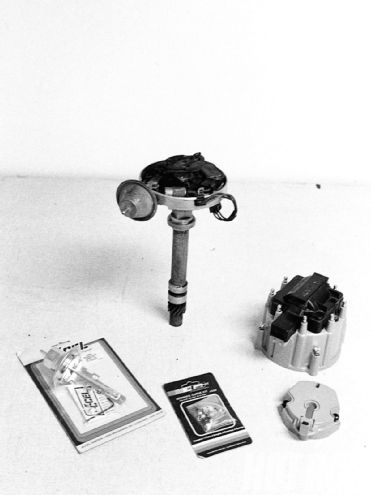 The original HEI distributor was tuned up with a new cap and rotor and a new stock coil, all of which we scored at the local Pep Boys. An ACCEL recurve kit would have enhanced the power curve, but we held off on installing it. A set of $12 Autolite wires and used Bosch Platinum plugs round out the ignition.
Baechtel primed the oiling system with a drill motor and then fired it up. To break in the cam, he set the revs at 2,000 rpm and held them for approximately 25 minutes. Then he replaced the break-in oil with Mobil 1 synthetic 5W-30 and added a fresh filter. The synthetic would help to free up an extra 5-10 hp while providing extra protection. Baechtel set total timing at 36 degrees and made the first pull.
The dyno was programmed to take the engine from 2,500 to 5,500 for each pull. It sounded like champ all the way to 5,500. The readout told a different story: 251 hp at 4,700 rpm, with peak torque of 320 lb-ft at 3,250 rpm. We were a long way from 300 hp.
Baechtel seemed unconcerned. He took two degrees of timing out and tried again. Horsepower came in at 260 at 4,700 and continued to five grand. Torque went to 323 at 3,500 rpm. Unfortunately, we were still a long way from the magic 300, and we were running out of tuning tricks, since the Q-jet seemed right on, displaying 12.7-13.0 air/fuel ratios.
We had an ace up our sleeve: a used Weiand Action-Plus dual-plane intake that a staffer had picked up at a swap meet for $25 ($86 retail). Minutes later, we had scored 12 more hp! Torque was now 331 at 3,500, but the EGT told us we were now running fat; leaning out the fuel mixture would up the figures. We asked Baechtel for three more hp, and he gave us five with a metering-rod change, though we were still fat. Being greedy, I requested two more to get us into the 280s. We installed the leanest set of rods and made 283 hp, still a touch on the rich side.
We missed the mark but came pretty damn close. What may be more impressive than output is the fact that after 25 pulls, many of which were back-to-back, our junkyard jewel never missed a beat. After thrashing the poor thing, the oil pressure was as good as when we started, and volumetric efficiency figures improved over the course of the tuning session, indicating that ring seal hadn't suffered a bit. Even the minor blow-by from the open valve-cover breather was consistent with the first pulls. This engine had endured considerable abuse and seemed no worse for the wear.
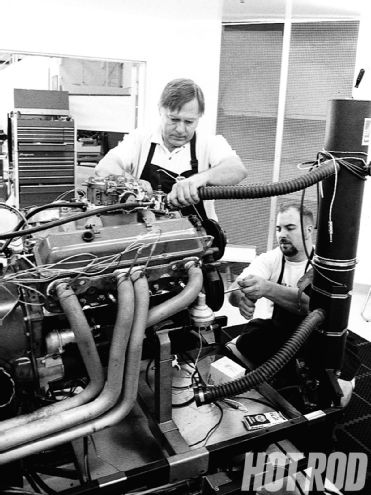 At Westech Performance Group in Mira Loma, California, Proprietor John Baechtel and staffer Steve Abbruzzese mounted the motor on the pump and handled tuning. Although our first pull generated only 251 hp, some tuning and a swap to a Weiand Action Plus (PN 8004) brought us up to 283. Our best torque reading was 343 lb-ft at 3,700 rpm.
Next Time...
Ideally, we would have milled more from the cylinder heads. Baechtel figured our ratio to be much closer to 8.5:1 than the 9:1 we desired. In addition, we would have investigated some basic bowl blending. We avoided port work because we wanted this engine to be easy to reproduce by the inexperienced rodder.
In the July '98 issue, we ran a story on building a crank scraper for $2 ("Free Power"). We wanted to make one for this engine, but ran out of time. Baechtel advised that scrapers don't provide gains until the engine sur-passes 5,000 rpm, but even if we had gained 5 hp, this little trick would have been worth it. We should have installed the ACCEL curve kit to improve low-end power, too. Finally, a little more cam profiling might have helped push us over the top. Our grind was arguably conservative. Since "The Little Engine That Could" still lives and breathes, there may just be a sequel. Stay tuned.
Dyno Results Engine Speed STP Power STP Torque rpm hp lb-ft 2,500 146.4 307.5 2,600 153.7 310.6 2,700 161.3 313.7 2,800 169.2 317.3 2,900 178.5 323.3 3,000 186.0 325.7 3,100 195.9 331.8 3,200 203.5 333.9 3,300 213.5 339.8 3,400 220.5 340.6 3,500 227.2 340.9 3,600 234.9 342.7 3,700 242.0 343.5 3,800 246.3 340.4 3,900 253.5 341.4 4,000 257.4 337.9 4,100 260.7 333.9 4,200 268.9 336.3 4,300 270.2 330.0 4,400 273.1 326.0 4,500 276.1 322.2 4,600 277.6 316.9 4,700 281.4 314.5 4,800 282.8 309.5 4,900 280.7 300.9 5,000 282.9 297.1 5,100 283.1 291.6 5,200 280.2 283.0 5,300 283.1 280.5 5,400 283.3 275.5 5,500 277.7 265.2
Balance Sheet Item Source Price Chevy 350 long-block Pick-Your-Part $130 Valve job United Engine $125 Engine gasket set Summit $26 Cam and lifters Summit $79 Cloyes timing set Summit $17 Edelbrock valvesprings Summit $38 Stock oil pump Summit $14 Cap and Rotor Pep Boys $26 Plug wires Pep Boys $12 Carb kit Pep Boys $24 Mobil 1 synthetic oil NAPA $17 Used Weiand intake Swap meet $25 TOTAL: $533