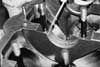
There's no doubt that a successful race-engine program requires enormous attention to detail. With so much at stake, you simply can't overlook the smallest operation. In taking a look at some engine assembly operations, Circle Track thought it would be helpful to take a close look at installing crankshaft and rod bearings.
The Process
The accurate installation of the crankshaft and rod bearings requires the completion of two primary operations. First is a complete check of bearing clearances for proper fit, and second is bearing preparation for final installation. There is much detail in between, but these two serve as the major operations in the installation process.
According to Jackson, it's important to follow some basic rules when undertaking bearing installation. To achieve optimum results, it's imperative this complete process takes place in a temperature-controlled environment. Variation of temperature causes expansion and contraction of parts, which produces inaccurate measurements and results in incorrect bearing installation. All measuring devices should be properly calibrated, and the same instruments should be used throughout the process. Use of the same tools in this procedure promotes consistent and accurate measurements. Lubricants are an important detail as well, and use of a high-quality lubricant is strongly recommended. Jackson also stressed the importance of using the same procedures and fastener lubricants from the beginning to the end of the bearing installation process. Following this guideline will assure a more successful bearing installation and will help ensure repeatable measurement values.
As we move into the process of checking and installing the crankshaft and rod bearings, we work with the assumption that block-machining operations are complete and the housing bore is correct. Jackson also indicated that the acquisition of a new or used bearing manual is very useful throughout this process for specification reference.
Main-Bearing Clearance
Before the actual clearance check begins, a small amount of block detailing is recommended. Deburring and chamfering the edges of the main caps and journals permits an accurate bearing fit during the clearance check and final installation procedure. This is a recommended standard practice in the bearing installation process.
The first step is to check the bearing tang for proper depth. According to Ninneman, inaccurate tang depth is not a common problem, but an accurate tang depth is an important detail for precise bearing fit. Tang depth is checked by seating the bearing and pressing it past the block mating surface. If this maneuver is possible, it indicates the tang depth is correct. This procedure is carried out on both the crankshaft and rod bearings.
While inspecting for proper tang depth, this is the time to check the bearings for correct end-to-end length. Checking bearings for proper length leads to attaining correct bearing crush. With the bearings seated, the bearing mating edges should be slightly taller than the mating deck surface. This can be checked by simply feeling the elevation difference or by placing a straightedge across the mating deck surface for a visual reference. Both the tang depth and bearing length procedures are carried out on the main and rod bearings.
Oiling System
The next step is an inspection of the oiling-system passages for any flow restrictions caused by bearing overlap. Because of differences in machining methods in manufacturing, bearing oiling holes often don't line up properly with the oiling system passages in the block.
While we were on the subject of oil flow, Taggart demonstrated a technique used on the mains with extended oil feed grooves. The bearing is marked at both ends of the groove, and during the prep process a 0.060- to 0.090-inch hole is drilled at those locations. The additional openings promote better oil flow and help to eliminate temperature increases in the bearing.
Clearance
Next we verify that the bearings have correct clearance to the crankshaft. This operation begins by taking measurements around the crankshaft journal. When the crankshaft measurement is set, it is directly transferred to the dial bore gauge. Using this method assures a specific crankshaft to main-bore measurement comparison for correct clearance.
Now, the bearings are set into place and the main cap is torqued down. Jackson noted that the main cap should be seated by tapping it into place with a mallet. Use of a mallet to seat the main cap is important, since seating the cap by torquing the bolts can result in a broken main cap. Once the cap is in place, it is ready to be torqued down.
With the bearings in place and the main cap torqued down, diagonal and vertical measurements are taken in the main bore. For complete accuracy, readings are taken in the vertical location as well as 1-inch diagonally right and left of vertical. This check determines that both the correct bearing clearance and correct bearing eccentricity exists. Jackson noted that if a decreasing number is obtained in the vertical to diagonal measurement, it is an indication of incorrect eccentricity. Should this condition exist, it is imperative to double check the housing bore and the bearings to determine the source of the problem for corrective action. Once the clearance and eccentricity are determined to be correct, this checking process is repeated at each main bore.
Crankshaft Placement
The next step is the placement of the crankshaft into the block. This step is taken to check the bearings for proper fit and to determine correct crankshaft endplay. Prior to starting these checks, Taggart demonstrated a recommended method JAE uses to prevent damage to the journals when the crankshaft is placed in the block. Before the crankshaft is put into place, tubular plastic sheaths are positioned over the main-cap studs to prevent any damage caused by accidental stud-to-crankshaft contact.
The thrust bearing is positioned in the block, the crankshaft is installed, and an endplay measurement is taken. This is achieved by moving the crankshaft back and fourth and reading the movement on a dial indicator. In this example, the endplay is determined to be a satisfactory 0.004-0.006 inch.
A check for main-bearing side clearance comes next. This begins by applying a black marker on both sides of the crankshaft main journal. Next, the crankshaft is rotated to acquire a pattern for analysis. In this case, the pattern suggests the bearing is too close to the crankshaft radius on one side. This condition can lead to bearing radius-ride and premature bearing failure. During the bearing prep operation, a slight chamfer will be applied to the side of the bearing to correct the problem.
Rod-bearing Clearance
The rod-bearing check starts by verifying the manufacturers' rod specifications. Out of the box, each rod-housing bore is measured to confirm published specifications. Next is a check of the rod bolt-torque and rod bolt-stretch values. Ninneman noted the importance of properly supporting the rod during torque operations to the rod caps. With the rod properly supported, the bolt-stretch and bolt-torque specifications are determined.
Rod bolt-stretch is checked by taking two bolt measurements, before it's torqued and while it's torqued. Then, when installed, the bolt is torqued until the rod bolt-stretch specification is reached (this is checked by a remeasure of the rod bolt under torque load). The torque required to reach the bolt-stretch value becomes the bolt-torque specification and is used throughout the bearing installation process. Once the torque value is determined, the rod bore is rechecked to verify it has remained within the bore specifications. Both the bolt-stretch and bolt-torque process is repeated on each rod.
With the manufacturers' specifications confirmed, Taggart indicated this is a good time to perform some detailing to each rod. Deburring and rounding the square edges promotes a clean and effective bearing installation process.
Once the rod is detailed, each rod is checked for bearing-to-journal clearance. With the bearings installed and the rod cap torqued down, rod-bore measurements are taken. As is the case in the main-bearing check, these measurements are taken in the vertical location as well as 1-inch diagonally right and left of vertical. When the measurements are made, they're checked against the rod-journal measurement for proper clearance. Like in the main-bearing process, this check also determines that correct bearing eccentricity exists.
The next step is a check of the bearing-to-radius clearance. Taggart indicated that even though the bearing shows no radius lift in this case, the rod bearings will receive a slight chamfer on the crankshaft radius side. This assures the bearing-to-radius clearance is maintained during engine operation.
The final step is a check for rod side clearance. This is accomplished by taking a measurement across the rod journal. Next a measurement of the width of a pair of rods is made. The difference between these measurements is the rod side clearance. In this example, the side clearance is determined to be 0.016-0.020 inch.
Bearing Prep
Before the bearing preparation begins, Taggart recommends numbering the bearings in the order they were removed. Numbering the bearings assures that they will be returned to their original checking location during final installation. This method induces repeatability of the dimensions obtained during the clearance-checking procedure.
The first step is drilling the 0.060- to 0.090-inch hole in the bearings marked for this operation. Then, all the bearings receive a light deburr on the edges. Next, the chamfers required from the checking phase are applied to the rod and main-bearing edges. For a clean bearing assembly, a chamfer is also applied to all of the rod and main-bearing mating edges.
Next, the main-bearing oil holes are altered to eliminate the overlap problem observed in the checking procedure. Following the line scribed on the back of the bearing, material is removed to obtain the desired opening.
The final step at JAE is the treatment of the bearing surfaces. The back surfaces are lightly sanded with 320-grit sandpaper to remove any high spots and impurities.
Cleaning
Once all the bearings have been prepared, it's time for a complete bearing cleanup. The first cleaning is accomplished with the use of a standard parts washing solution. After all of the parts are thoroughly dried, they are cleaned again. This cleaning takes place with the use of brake clean, which has high-evaporation characteristics. This final cleaning removes any remaining residues.
Installation and Final Checks
Before the start of final installation, Taggart noted that maintaining the bearing measurements and clearances relies on returning the bearings to their original checking locations. It was also pointed out that a quality installation requires the use of a premium assembly lube.
As a final examination of crankshaft bearing clearance, the thrust endplay measurement is reverified. First the rear main-thrust bearing cap is seated and the endplay measurement is checked. Then, starting at the rear main, the bearing cap is seated and torqued to the required specifications. Now, a check is made confirming that the endplay value is maintained. This method is repeated as each main cap is put into place. Maintaining the endplay measurement throughout the final check indicates proper bearing fit and the absence of bearing or main-cap bind.
Next is the final assembly of the rods. When the rods are being torqued down, a feeler gauge is used to separate the rods. A check of correct rod separation is repeated at all of the rod locations to ensure complete and successful installation.
Sweating the Details
In the end, it's clear the bearing installation process demands a lot of effort and attention to detail. Jackson noted that the time and effort put into this procedure will yield big payoffs in the performance and life of an engine, and it can't be overstated that there's no substitute for sweating the details.