
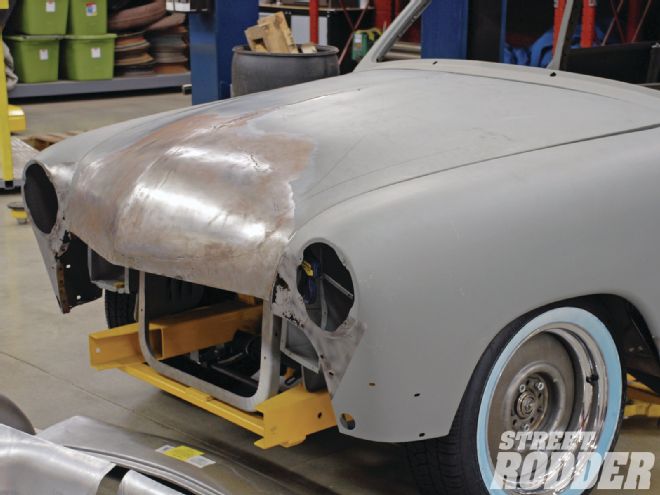
Our 2013 AMSOIL/STREET RODDER Road Tour '51 Ford is moving closer and closer to the vision Eric Black provided for the car. With the car chopped and channeled it has taken on a whole new profile, sleek and lowered, but still avoiding the radical custom look.
The shoebox Ford used a strong, peaked hood as part of its original styling, but with the top chopped and the custom stance the stock hood now looked more like a parrot beak than a hood. It was obvious the front of the hood should be re-contoured to flow better with the new lines of car. This is not a particularly new modification, as customizers have been "pancaking" hoods for years, most often in combination with sectioning a car. For this '51 Ford the team at Honest Charley Garage opted for more of a "nose job" than a full pancake treatment, as the reshaping of the hood would be limited to the very front contours. Since the '51 Ford hood does not rise much above the fenders, there really was no need to cut the hood all the way to the cowl, rather they opted to cut out the front center of the hood and reshape that profile.
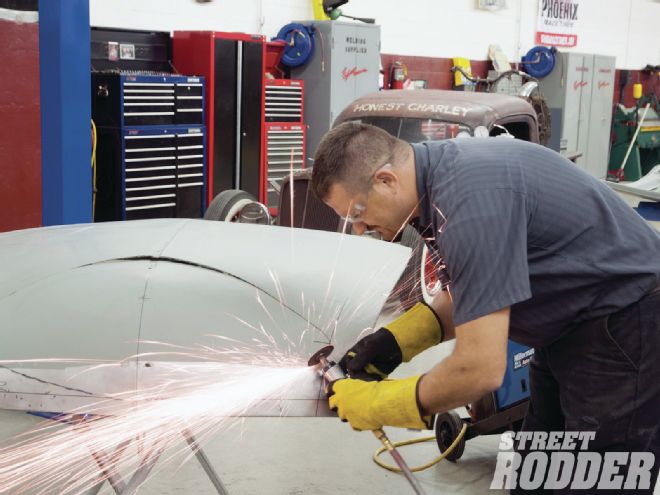
After some careful measuring and marking, the nose of the hood was removed with a cut-off wheel and set aside. With the leading sheetmetal removed, the hood was flipped over and the spot welds holding the inner hood brace were drilled out so the hood brace could be removed.
For the average home builder it would probably be easier to trim off some of the original hood "nose" and lay it back before welding it back into the hood on a laid back, lower profile. Careful trimming and fitting would deliver the desired profile.
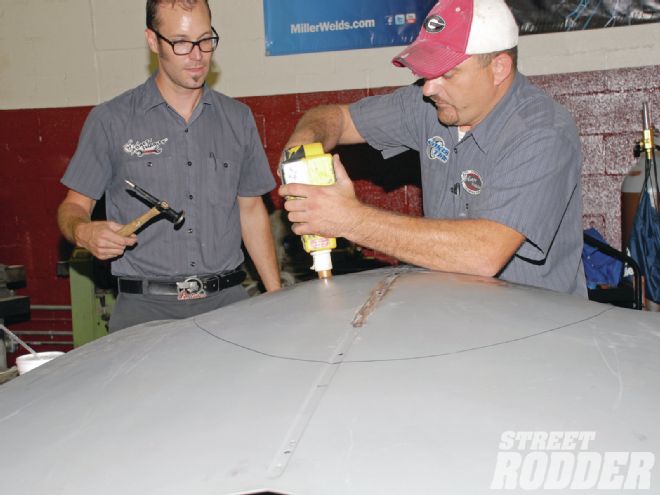
However, when you have the tools and talent you can also opt to build a whole new panel to weld into the hood and that is exactly what team at Honest Charley Garage chose to do. Actually the new nosepiece was fabricated from three separate pieces. Having an English Wheel, planishing hammer, and other such niceties in the shop help to make that decision an easy one. Once again Delton Scott and Richard Marter would be performing the surgery, with Honest Charley Garage headman Greg Cunningham handling some of the finish lead work.
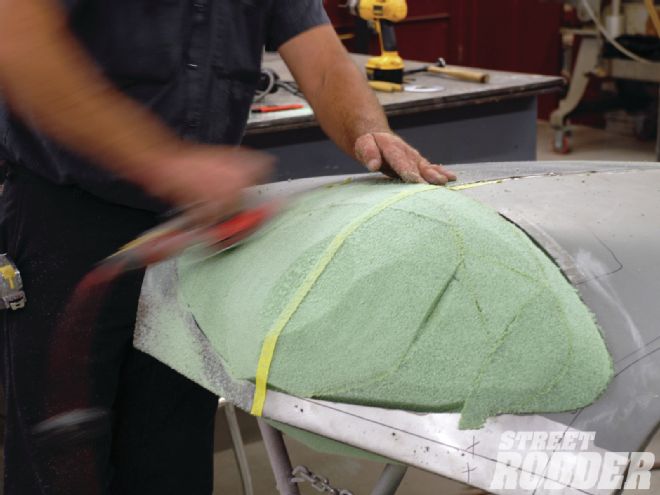
To fabricate a whole new profile you must first establish what the new profile is. To that end a large block of foam was formed and fitted to the gaping hole in the hood. A temporary network of braces was installed to maintain the hood in shape. These same braces would hold our block of foam. This green foam can be purchased at your local hobby store.
With the block of foam protruding through the opening it was a simple matter of forming the foam to the desired shape using an orbital sander. Work slowly and carefully to shape things as you sand away at the green stuff.
After an hour or so the hood was sporting a brand-new green nose that was noticeably lower and cleaner, the "parrot beak" was gone, replaced by a clean line that flowed perfectly with the fenders, while the leading edge was now laid back a bit.
Using the foam as a template, a guide was formed to work as a profile board. Then Richard Marter, an accomplished woodworker, took over and built a wooden buck that perfectly replicated the shape of the foam.
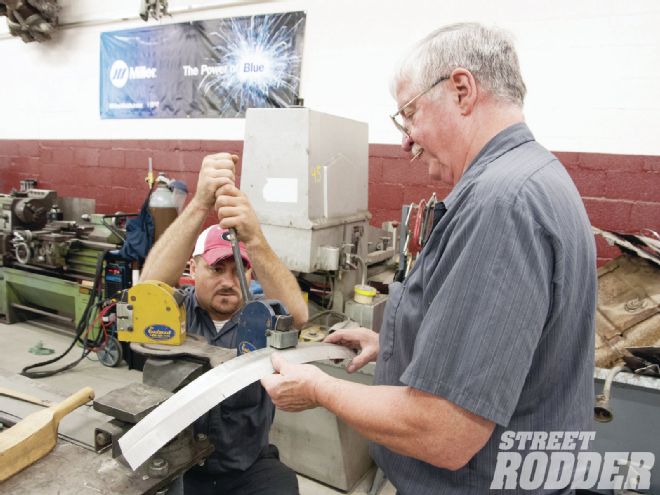
With the buck formed it was time to turn their attention to forming sheetmetal to fit the buck, and then trimming that piece to fit the opening in the hood. As the metal forming process proceeded the buck was used to check the shape and then for some of the final hammer-forming. The new hood panel was actually formed from three pieces. The center piece with the peak was formed as one piece, then the two respective side panels were formed to mate to the center strip.
The two sidepieces are quite tricky to make as they incorporate compound curves in two directions, in the end you have a piece of sheetmetal shaped much like a vintage shoe horn. Use of an Eastwood shrinker and stretcher helped shape the new panel and the team also used Eastwood hammers and dollies to hammer weld the seams as the three pieces became one.
After the new panel was welded in place Cunningham used his vintage Eastwood "Stinger Plus" stud welder. Commonly used to spot weld studs to a panel for pulling dents, Cunningham instead used it as a heat source for shrinking the panel. The stud welder was used to heat a circle the size of a dime to a dull red, then it was hammered and quenched to shrink the metal. It worked like a charm.
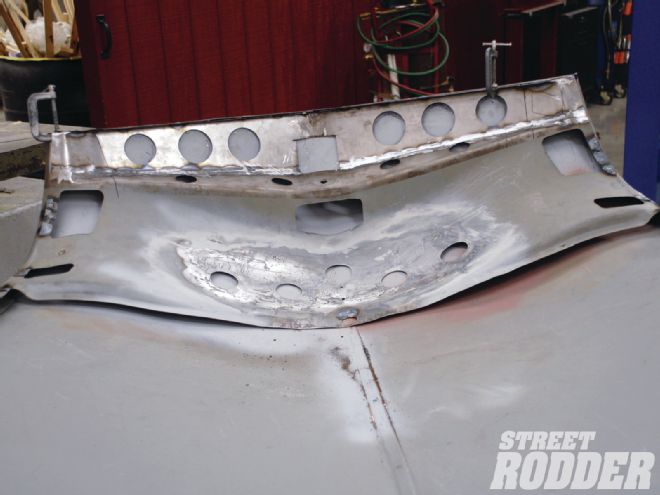
After the sheetmetal portion of the hood was completely welded in place a new inside hood brace was formed to repair the rusted-out brace. After matching the holes perfectly you would never suspect the brace had been reconstructed.
Once the hood was braced the welds were worked, more Eastwood hammer and dolly work ensued before Greg Cunningham stepped in to lead the hood seam along with the recess that once held the center hood strip. Honest Charley Garage uses Eastwood products exclusively when doing lead work and this old-school method is perfect for filling seams and recesses after welding. Paddling lead takes a special touch, but you'd be surprised how quickly you can learn this skill, particularly on flat panels.
In the end we had a hood with a very pleasing profile that fit the custom perfectly. Much like the rest of the car, the hood profile was not a radical change, but by combining it with a conservative top chop and moderate channeling the old '51 is taking a whole new personality. Chopping, channeling, pancaking, and leading ... it doesn't get more traditional than that! Follow along with the photos for a detailed step-by-step process of pancaking the shoebox hood.
1. To attain that sleek custom look, the “parrot beak” on the leading edge of the ’51 Ford hood would be reshaped into a sleeker and lower shape. The first step was to mark the offensive area and remove it with a cut-off wheel.
2. Here’s the piece of the hood removed, this piece could be reshaped, leaned back, and refitted to the hood, and Honest Charley Garage opted to form a whole new panel.
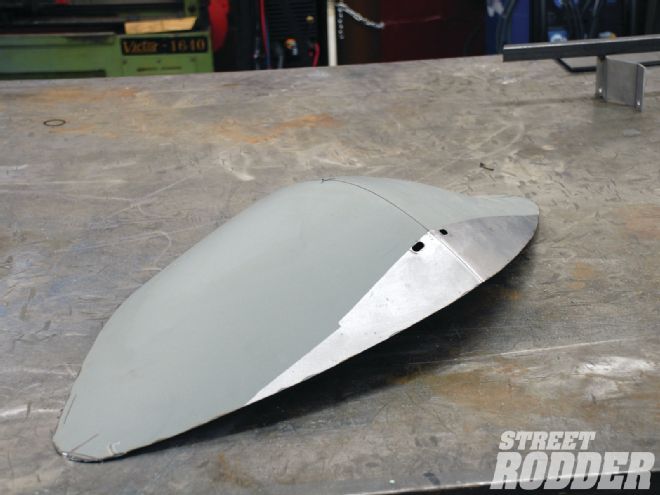
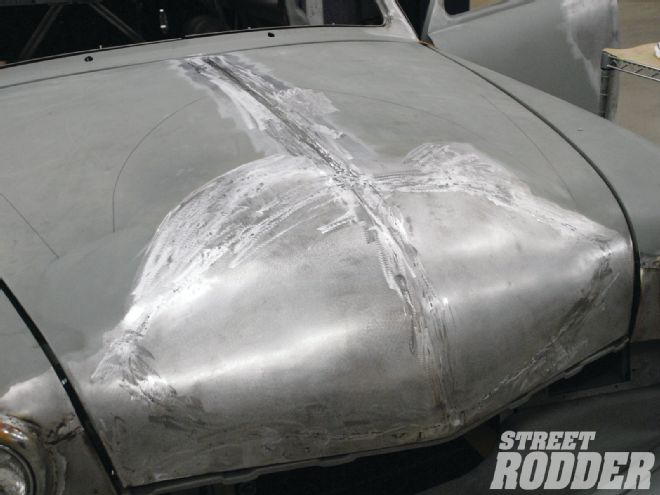
3. The gaping hole in the leading edge of the hood is a little intimidating, but the work will be worth the effort. Note the hole is cut perfectly symmetrical from side to side, this is imperative to keep the contours identical.
4. Inside the hood the old hood brace is removed and new box tubing braces are tack-welded in place to temporarily brace the hood during surgery.
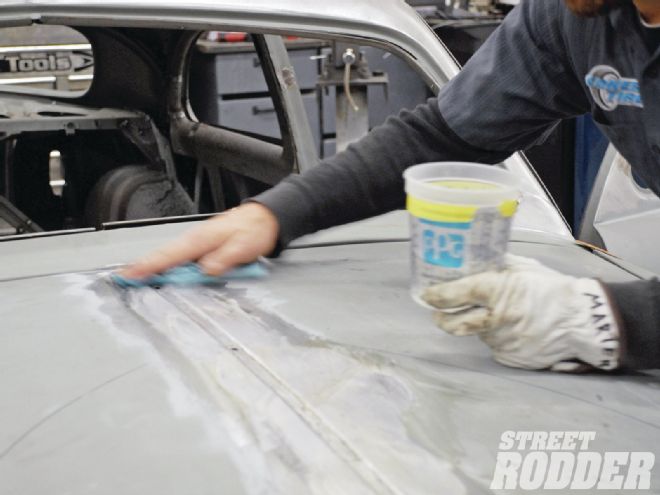
5. Green foam blocks were glued together with contact cement and held in place by the temporary hood braces. Then Richard Marter carefully formed the new shape using a DA and 80-grit paper. Work slowing to achieve the same contours on both sides of the peak.
6. After achieving the desired shape we held up the profile of the original hood. As you can see the reformed hood is only a couple of inches lower but it makes a dramatic change.
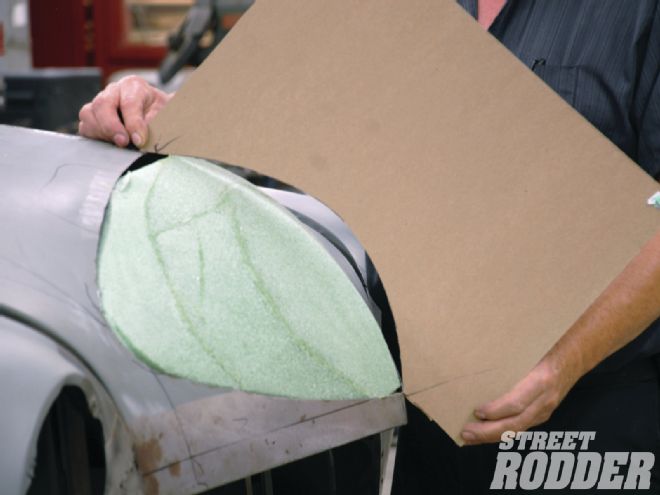
7. Using the foam block as a guide, Marter built a wooden buck that matches the contours of the foam perfectly.
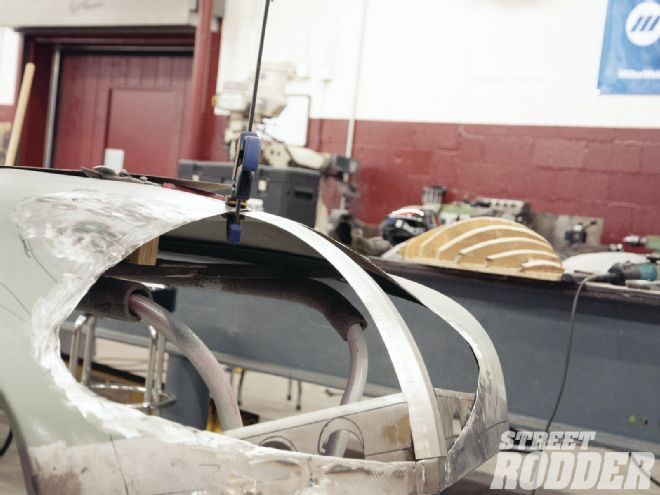
8. The wood buck fits inside the hood and will act as a guide while the panels are being formed. There will be some light hammer work against the buck too, but the buck is designed to be used as a gauge, not an anvil.

9. The center peak was formed from a 3-inch-wide strip of 18-gauge steel that was first bent in a sheetmetal brake, then, using Eastwood shrinker and stretcher tools the radius was formed in the center piece.
10. With the nosepiece fitted to the center of the hood it was time to check the profile before forming the two side panels. Obviously this piece must be perfectly centered.
11. The side panels were formed by gently bending over a large piece of pipe to begin the radius, and then an English wheel was used to finish the compound curves. Bend a little, test-fit, and then shape a little more until you have the desired shape.

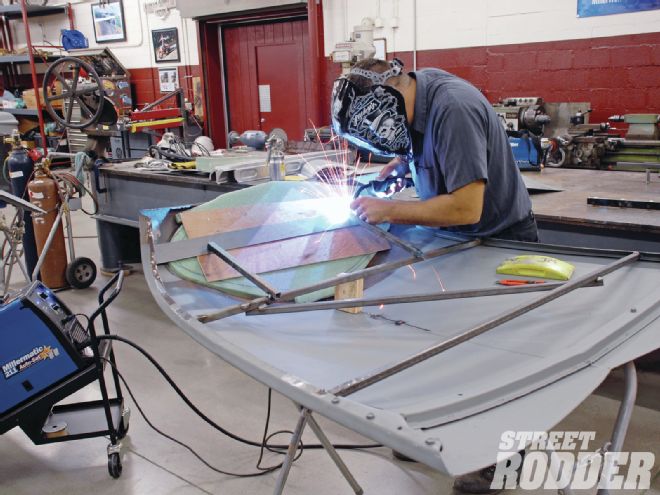
12. After both side panels were fit and matched to the buck they were tack-welded to the center strip. All welding on this panel was done with a Miller TIG welder.
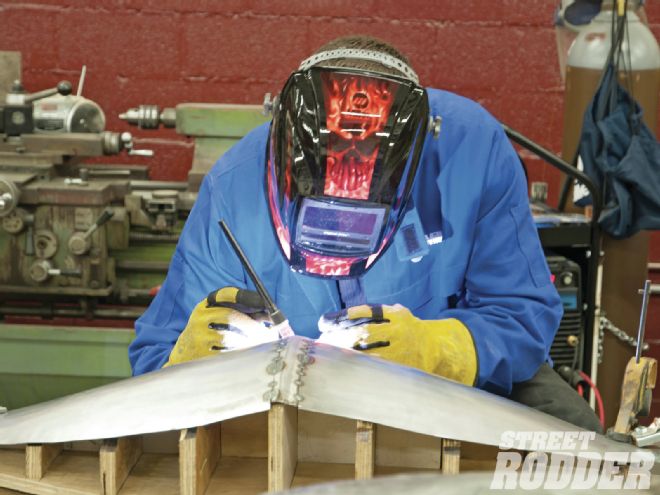
13. With all three pieces tack-welded together it was time for one more test-fit on the buck. Satisfied with the fit it was time to finish-weld the pieces and install the panel in the hood.
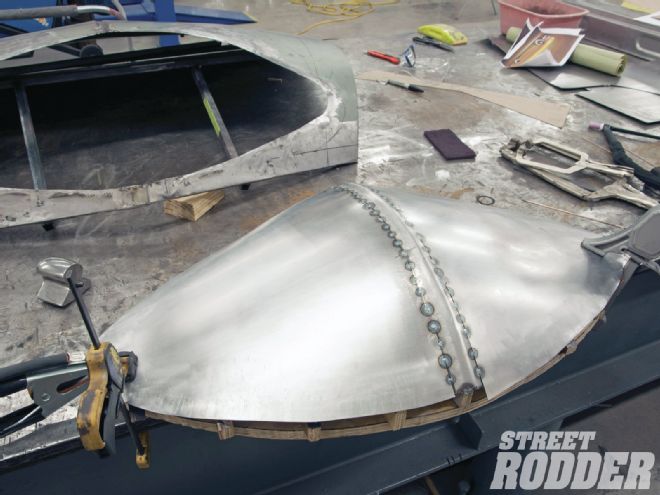
14. Here’s the reformed hood nose welded in place. Alternating from side to side and welding in 1-inch beads helps minimize warping. Note the welded seams at the center of the hood have already been sanded smooth.
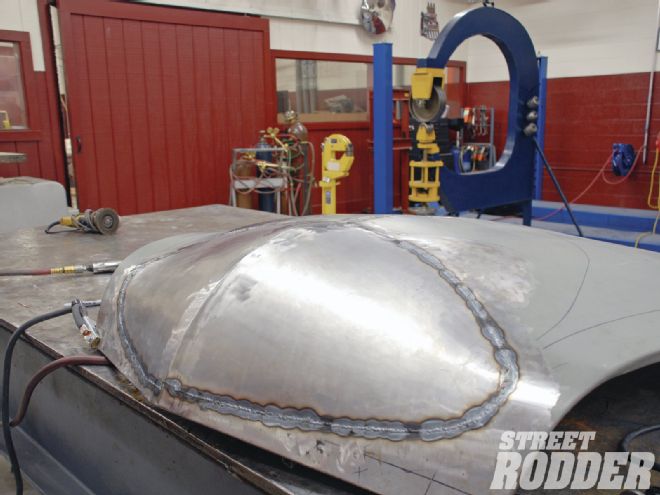
15. Marter continues to carefully grind down the welds. Care must be taken not to thin the base metal or to generate too much heat while grinding as this can cause warping or cracks.
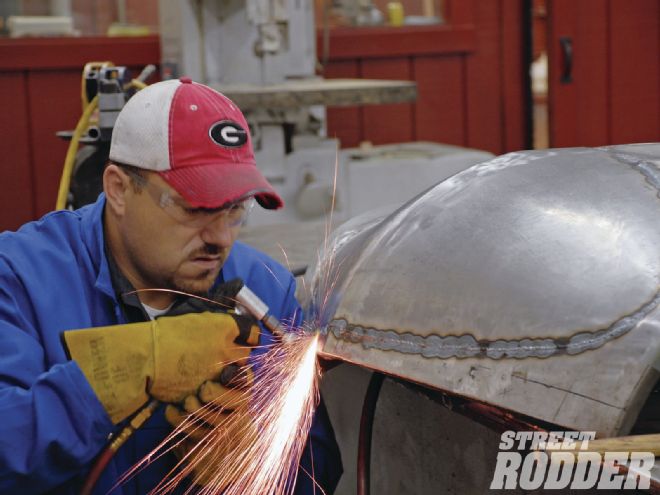
16. As the welds are being finished with the grinder it is easy to find the high and low spots. A little hammer and dolly work during the finishing process produces a nice flat panel.
17. The hood is a long flat panel and after welding it was apparent some metal shrinking would be required. Rather than use a torch as the heat source, Greg Cunningham broke out his vintage Eastwood Stinger stud welder. This generated the heat for the shrinking process perfectly.
18. After the Eastwood stud welder had heated an area the size of a dime to a soft red glow, Cunningham employed hammer, dolly, and a wet rag to shrink the desired area.
19. Meanwhile Delton Scott was busy fabricating a repair panel for the inner hood brace, hopefully the last bit of rust repair to be done on the car.
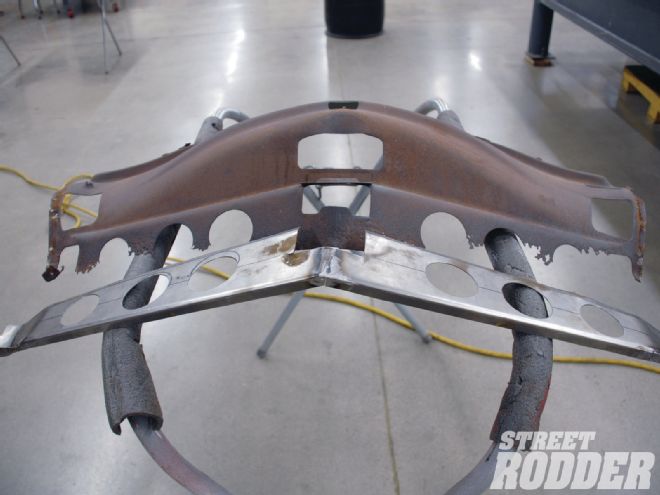
20. After the new nose was completely welded in place and all the welds had been dressed the new brace was reinstalled in the hood. By matching all the holes perfectly the inner brace looks better than new.
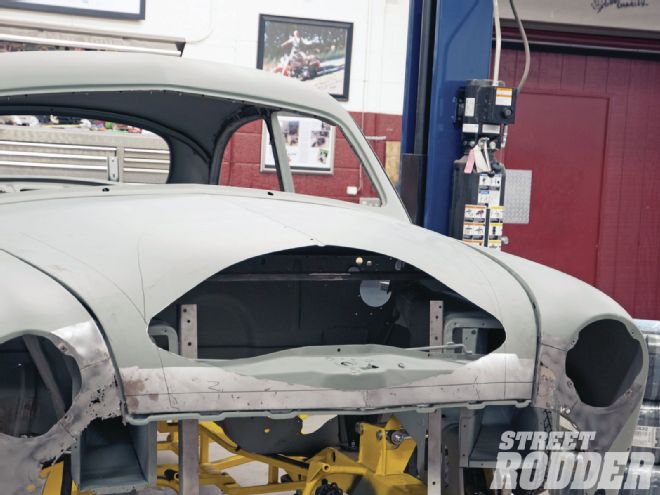
21. Slipping the hood back on the AMSOIL/STREET RODDER Road Tour car it was instantly clear that this modification made a huge difference in the front and side view of the car. The new contours are perfect.
22. The welds and recessed areas were given one final pass with the grinder to ensure perfectly clean metal for the tinning process to follow.
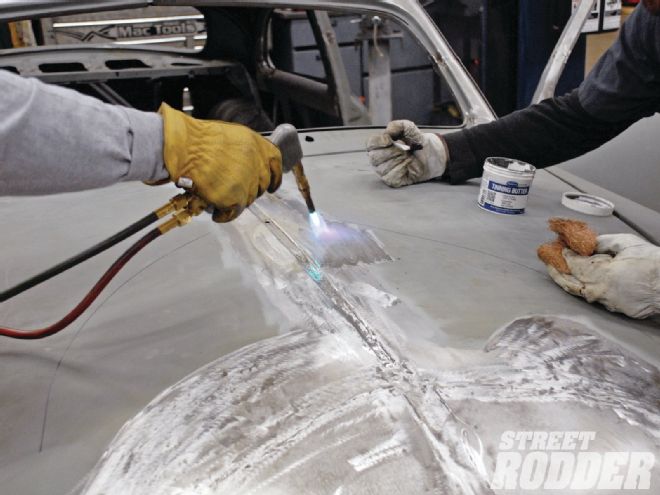
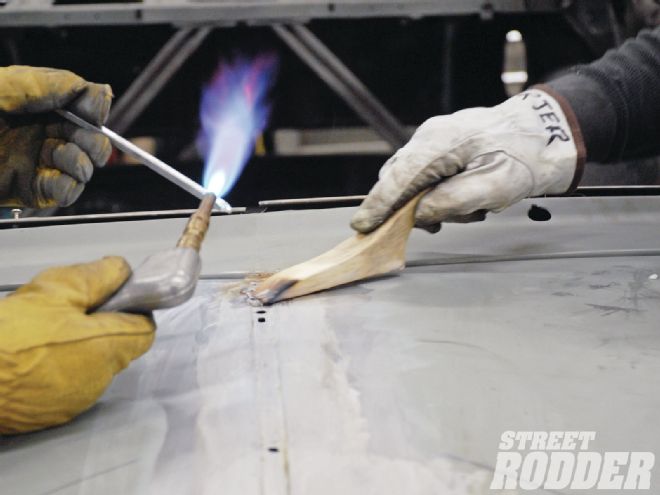
23. Of course there is still bodywork to do and to that end we broke out a couple pounds of Eastwood’s finest 30/70 body solder along with a can of Eastwood tinning paste, copper wool, and tallow wax.
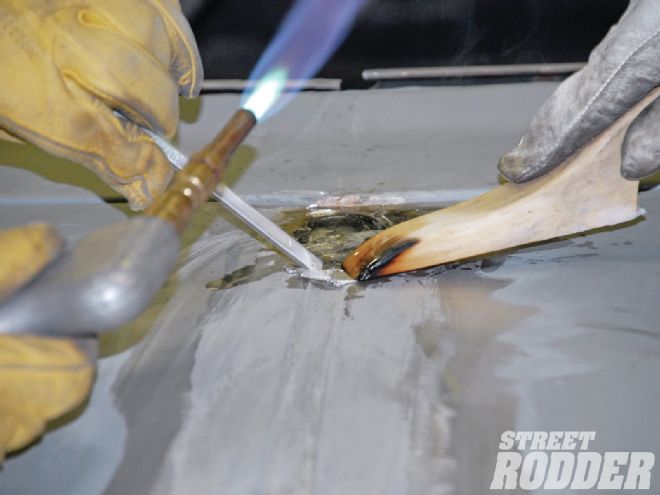
24. After adjusting your torch to an acetylene-rich “feather”, gently heat the panel. Keep the torch in motion to prevent warping the panel and test the tinning paste until it achieves a temperature high enough to melt the tinning solder. Wipe the tinning compound over the panel using copper wool.
25. After tinning, the panel it is cleaned with a mixture of baking soda and water to neutralize the acids in the tinning paste. The tinning solder adheres to the base panel and then the lead adheres to the tinning layer.
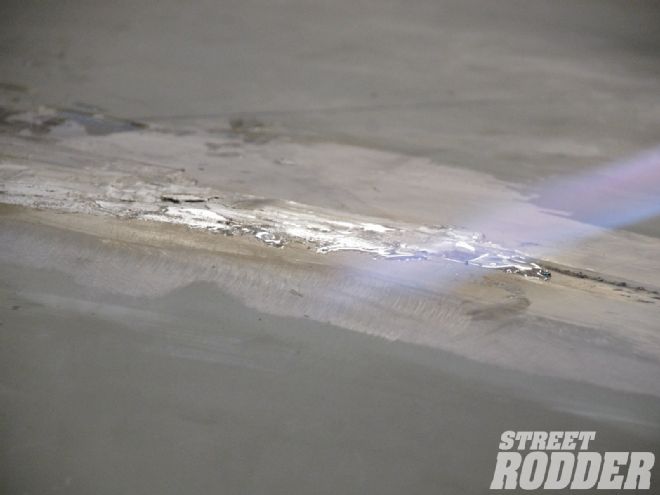
26. Once again carefully heat the panel and preheat the lead solder sticks so that the lead will flow onto the panel. The lead and the tinned panel will then melt together when they both reach the melting point of the solder.
27. As the lead melts we used our Eastwood lead paddle to shape the lead to fill the recess. The paddle is dipped into the tallow wax to prevent the lead from sticking to the paddles.
28. The lead can be gently reheated and then re-paddled to achieve the desired shape. Having two people working is a great help, one maintains the temperature and applies the lead while the other person does the paddling.
29. After the lead has cooled we shaped the panel with a Vixen file from Eastwood. This heavy-tooth file shaved the lead to shape easily. Like any body filler, remove material slowly so you don’t have to go back and add more lead.
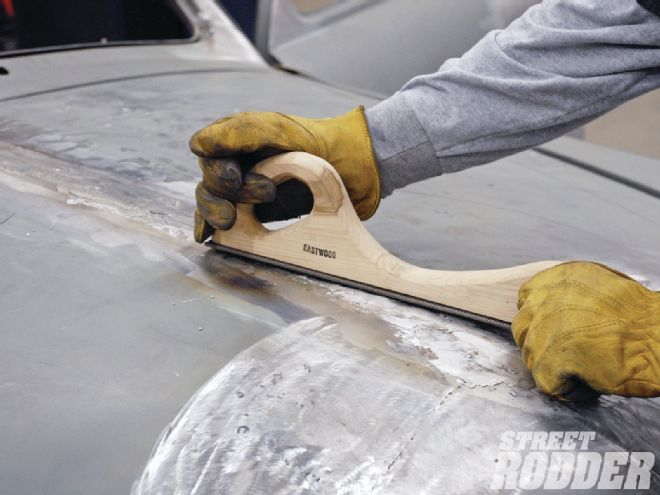
30. After some careful filing the center seam is perfectly filled. Besides being old school and just plain cool to work with, the lead provides a strong, long-lasting filler.
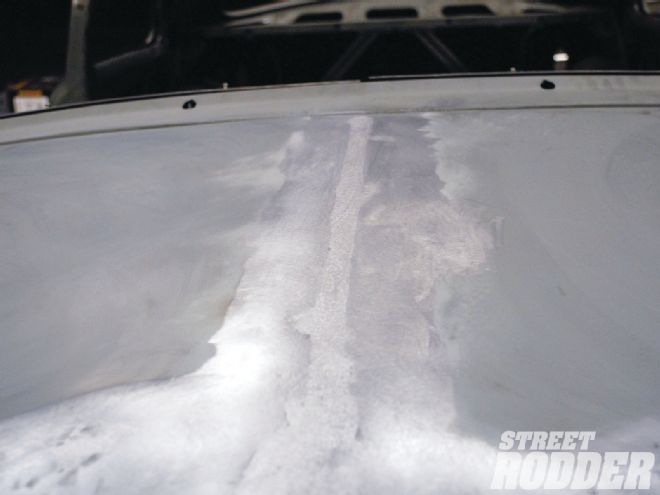
31. The final step was to sand over the filed lead with a DA. Wear a respirator when sanding lead. After this step we’ll wipe the panel down with some Eastwood pre-paint prep solvent and apply primer.

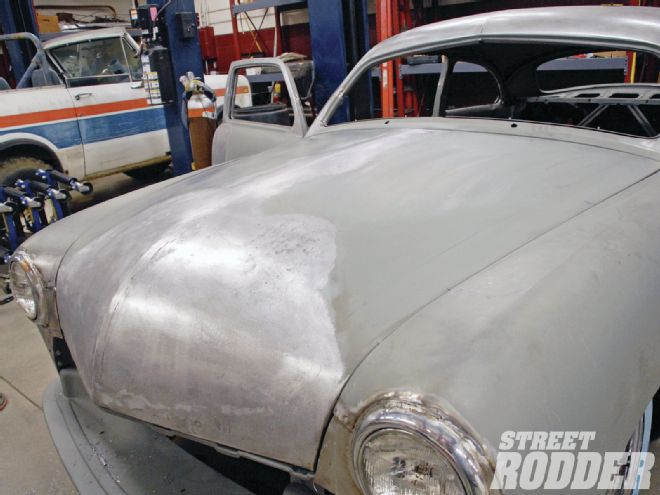
32. Here’s the finish-sanded hood. After a skim coat of body filler and a coat of JP205 polyester primer the hood is looking good, the lines are clean, crisp and simple so they blend perfectly with the rest of the car. After blocking, K36 urethane primer will be applied to the hood.
Check out this video of the guys over at Honest Charley Garage pancaking the hood on our '51 Ford Road Tour car.
To see more videos covering the build of the 2013 AMSOIL/STREET RODDER Road Tour '51 Ford, click here.