There are numerous chores involved in the assembly of a street rod that many of us think are beyond our skill level. Rightly so, many are (especially those that are safety related), but there's still a myriad of fabrication requirements that almost anyone can perform if only they'd give them a try. The following is yet another sample of an uncomplicated weekend fabrication job, replacing a firewall this time, that requires very little true technical expertise.
In this case there was more than one reason why the replacement option was chosen. The original firewall had been chopped up pretty well at the trans tunnel, it had been drilled with a slew of holes during the course of its long life, and it had also been treated to a rather raggedy distributor recess as well. And, to add insult to injury, the larger dimension of my inline engine choice required firewall modification of some sort anyway. So with all these factors in mind, I wandered out into the garage one Saturday morning and got down to it. It really ended up being an easy task, and one that nearly any moderately skilled hobbyist should be able to complete in a day. That said, take a peek at how I approached the task and see just how simple it was.
Fabricating a simple flat firewall is a pretty easy task. All that's required is a bit of measurement and a few common tools found in most any street rod hobbyist's home shop.
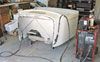
This is what I started with, and though I've seen and dealt with much worse examples, this one still needed either a lot of help or replacing. I obviously opted for the replacement route after making the comparison of the time needed to make the repairs versus the time needed to fabricate a new one. I started the job by marking and trimming off the face of the firewall.
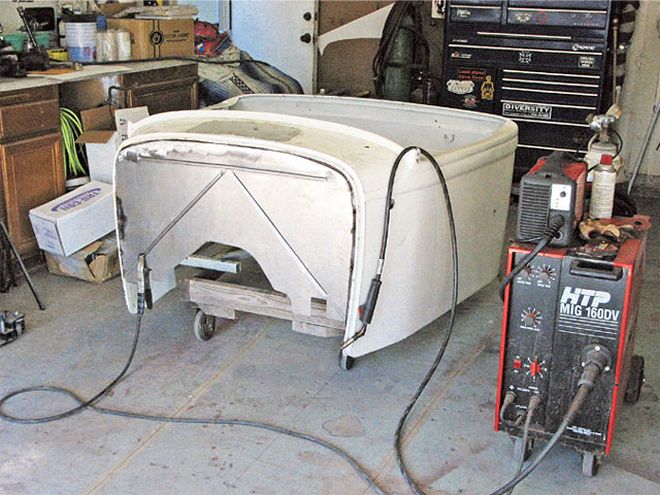
With the help of my trusty HTP plasma cutter and dear ol' dad, it only took a couple of minutes.
The removal of the face allowed me to correctly locate the body on the frame and in relation to the newly installed inline-six. I had initially planned to fabricate the new firewall using the original '32 three-plain face, but the added engine length would have required a rather complicated recess that I ultimately decided against.
So, again came the plasma cutter and I re-trimmed the firewall, leaving a 3/4-inch flange of original firewall to which I mated the new flat wall.
With the flange cut and smoothed with a small grinder, I then began to make a template that I'd use to determine the shape of the new firewall face. Starting at the left bottom corner of the opening, I pieced together individual sections of poster board across the bottom so it would fit uniformly around the framerails, bellhousing, and other protrusions.
With the rather intricate lower pattern completed, I then laid it on a larger, thicker piece of cardboard, traced it out, and trimmed it to match.
Next I slid the large piece into place, climbed into the cab, and traced the shape of the cowl onto the backside of the cardboard template. With that done, I then removed it and trimmed it as shown.
I then transferred the outline of the pattern to an adequately sized piece of 20-gauge sheetmetal. In my case, I trimmed the sheetmetal with the aid of an air-powered nibbler-a good pair of tin snips or a bandsaw would work as well. Heck, if push came to shove, a die grinder and cut-off wheel would work too.
After the piece was trimmed and the edges deburred, I slid it into place to check the fit and mark the piece for any needed additional trimming.
It was at this point that I decided to roll a couple of beads into the new firewall face to add a bit of rigidity to it and also to enhance its appearance. I decided on a simple pattern that would both lend strength to the panel and hopefully please the eye.
Over time, and as I've gained the confidence to attempt more and more in the way of fabrication, I purchased and built quite a collection of specialized tools. This bead roller is one example. These days, tools of this nature are readily available in an affordable price range for the hobbyist. Though they may not be up to the task in a professional environment, they're usually more than adequate for the home shop. I purchased mine from The Eastwood Company four or five years ago and have used it extensively.
Here's the finished firewall in place and ready for welding. If you don't own or have easy access to a bead roller you can still reinforce the new firewall by tack welding some strap steel or rod to the backside as stiffeners (that's how I did it before getting a bead roller).
At this point, the last part of the job was to weld the new firewall into place. A repeated series of tack welds will get the job done without any massive warpage. Never run long beads when working with thin sheetmetal, as the concentrated heat warps the heck out of it. A bit of time with a grinder will blend the new face into the existing firewall flange and, presto chango, fresh new firewall.
When it comes to working with sheetmetal and a bead roller, there are two important things I learned the hard way: Always begin a bead in the center and work out toward the edges, and it takes two people to roll anything close to a straight line in a large piece of sheetmetal. I tried guiding the metal and turning the crank handle myself the first time and accomplished nothing other than ruining the first firewall. After making a second one (thankfully I had another sheet of metal on hand), I gave Pop a call and asked for a bit of assistance rolling the beads-it came out fine with his help.
The Eastwood Company
800-343-9353
www.eastwoodco.com
HTP America
800-USA-WELD
www.usaweld.com