Every performance-oriented car person, whether on the street or at the track, knows the prowess of the Dana 60 rearend. Sure, some might say the Chrysler 8 3/4 is a little lighter, the Ford 9-inch is almost as strong, or the GM 12-bolt has slightly less rolling resistance, but when it comes to brute strength, even the brand-X guys know the Dana 60's reputation as indestructible. Generally considered a truck rearend because of it's massive 9 3/4-inch ring gear and stout construction, the Dana 60 only found its way into two brands of musclecars during the late '60s and early '70s, and both those brands were Mopar. So why did both Dodge and Plymouth offer this brutally strong rear differential in their musclecars? We say it's because they were the only two manufacturers whose engines made enough power to warrant the burly Dana 60. But what if your car, like our project Charger, wasn't equipped with a Dana 60 from the factory? Not to worry, you can build one yourself.
If you're lucky enough to own a car that came equipped with a Dana 60 then you are aware of the benefits of this rear differential. Most Dana 60s will outlive the car, the transmission, the driveshaft, several engines, and maybe even the driver without any maintenance at all.
So when we were ready to get Project Brazen Charger rolling, there was really no choice other than a Dana 60. Since there are many sources for the Dana 60 rearend, we had to decide which avenue to take. There are a couple of companies that manufacture new "Dana" 60 housings, and it sure would have been nice to get a complete rearend to just bolt in, but, unfortunately, our budget dictated that we look elsewhere. Though not as easy to come by, original Dana 60s that have been removed from cars are still available. A quick check of prices on our favorite internet auction site, however, eliminated this from our realm of possibilities as well. Fortunately, if you don't mind a little work, there is another source for the Dana 60 rearend.
While very few cars came equipped with the Dana 60, literally hundreds of thousands of trucks utilized this beefy differential. Nearly all 3/4-ton and larger trucks-be it Dodge, GM, or Ford-came equipped with this rearend, and many are still available in scrap yards today. When we put the word out to our friends that we were looking for a truck Dana, it only took a day to find someone parting out a Ford F-250, and we purchased the rearend for $50!
While some truck housings are a few pounds heavier than the units used in cars, the internals are basically the same. Externally, however, there are several differences. The truck rears usually don't have a provision for a pinion snubber, so the housing has to be machined for one if it's needed. Since our application will utilize aftermarket bars to prevent axle wind-up, we won't bother with a pinion snubber. Also, truck housings are too wide for any car, and the axle end tubes are incorrect. This will be remedied by cutting off the ends of the axle tubes, and welding on proper Mopar ends that we obtained from Moroso. Mounting pads on truck rearends are also generally mounted on the top of the axle tubes, so we'll cut those off as well and replace them with a new set of Competition Engineering perches.
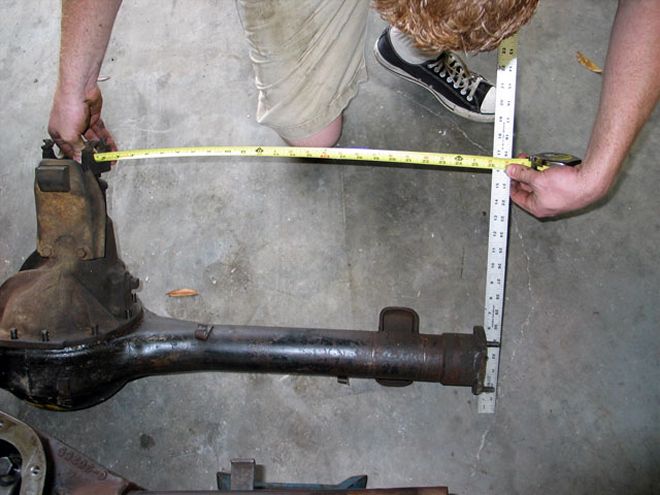 Using a straight edge from the end of the 8 3/4, we measured the distance from the center of the pinion yoke to the ruler. This measurement was then transferred to the Dana 60.
Of course, aftermarket axles are recommended, and actually a requirement for us since we plan on racing this car on a regular basis, so we called the guys at Randy's Ring & Pinion for a set of hefty Yukon Units. Since our truck rear had an open differential and undesirable gear ratio, we also had the guys at Randy's set us up with a limited-slip unit and a set of 4.88s for hard launches. We considered a spool, but since this is a street car, the all-around drivability of a Sure Grip made more sense. A bearing and shim kit and high-performance pinion yoke completed our order from Randy's, and we were ready to begin fabricating our housing.
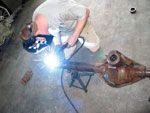
Narrowing a rearend housing, while evoking thoughts of complicated geometry and mathematics, is actually easier than you think. The tooling consists of a large piece of solid bar stock and three aluminum discs. Since we're cheap, and because our friend Lonnie over at Harrell's Automotive already had the tool, we just borrowed it from him. After cutting the ends of the truck housing to length, two of the aluminum discs are bolted where the carrier bearing races would go. The bar is then inserted, and the third disc fits into the Mopar axle tube end, keeping it square as it's welded in place.
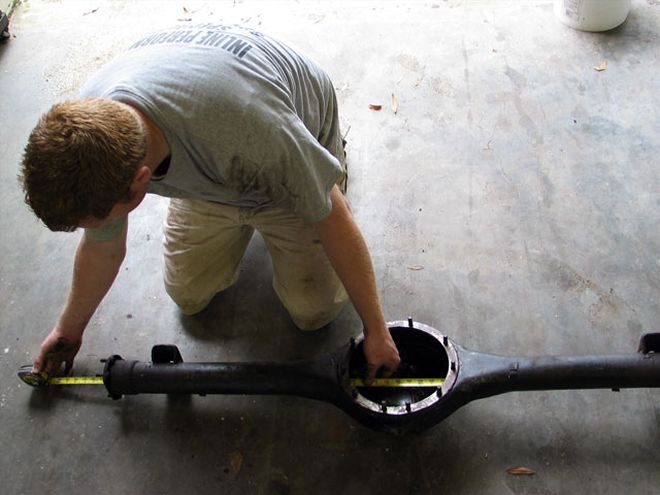 We measured the total width to obtain the length of the other axle tube. This will be used when one end is welded to the Dana housing. By measuring in this manner, the offset of the pinion yoke will be correct.
The only problem we encountered was when Associate Editor Kevin "Hacksaw" Shaw inadvertently cut one of our axle tubes too short. While this did suck, it was quickly remedied by ordering a length of axle tubing from Randy's Ring & Pinion and welding it in place. Lesson? Measure twice, cut once!
After measuring and welding our new housing together, it was time to set up the Dana 60 with new bearings, gears, and our Sure Grip differential. If you've never set up a set of gears before, our recommendation is to get help from someone who has. Since improperly installing any of the components in a rear differential can lead to accelerated wear, noise, or, worse yet, catastrophic failure, we enlisted the help of friend Tod Struck at Inline Performance Specialist. Tod's company specializes in heavy-truck maintenance, so he is familiar with the procedures and has all the tools necessary to properly set up a Dana 60. In a short time, Tod had our Dana assembled and ready to install with all our fresh internals. This rear should easily handle the abuse we'll give it and should be the last rearend we ever put in our Charger.
Now if we just had a motor in our project car, we'd head to the track for some testing.