
| air Zenith Compressor rendering
When it comes to air compressors, there's so much confusion about which choice to make and how to properly set up your air system. There are plenty of options out there, but how do you know which compressor is best for your particular application? While there's no single way to answer this question for every situation, we still want to provide some education on the newest high-output compressor available so that as you narrow down your options the headaches of improperly installed compressors or slow fill times won't be anything you'll have to deal with.
The Air Zenith compressor has hit the market hard with a true 200-psi, 100% duty compressor that has quickly become one of the top-rated compressors in the mini-truck world. After very extensive R&D the brand new Air Zenith has been completely revamped, with new features that no other compressor can offer. Even the internals are made of the highest quality parts, which includes every nut and bolt being switched to expensive Nylocks to reduce motor vibration, durable billet aluminum piston, and very expensive high-performance bearings - proving that beauty is no longer just skin deep! A redesigned inline check valve offers greater airflow, and their patented Interchangeable Piston Technology is sure to prolong air pump life for worry-free use year after year.
In this article we'll teach you how to properly install your high-output compressor to get the most out of it so you'll no longer have to wait forever to lift up your truck using the same old compressors. You'll also see just how easy it is to rebuild your compressor's piston ring (which is the weakest link in ALL compressors). There's nothing to be worried about. All compressors have some sort of cheap plastic piston ring (it's a necessity), and Air Zenith is the first to make a fix. They went through extensive design and R&D costs to make it easier than ever to make sure you can rebuild your compressor every few years, rather than trashing it and buying another. For more information, contact the company listed in the source box.
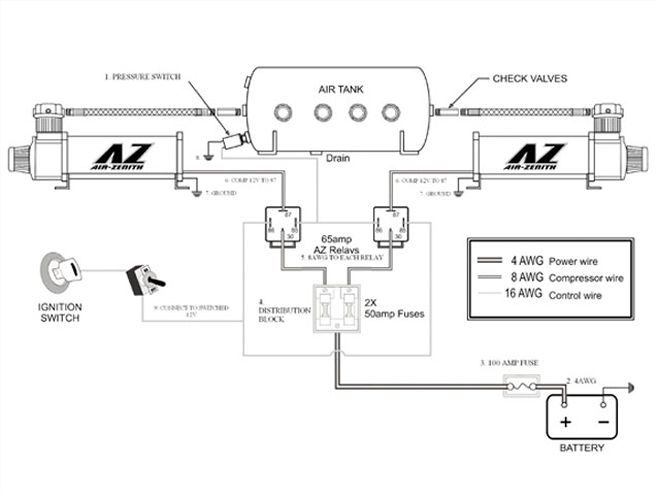
| air Zenith Compressor diagram
Selecting the Best Mounting Location1. To maximize compressor performance, mount the compressor as close as possible to the battery. This will lessen the length of wire needed to power the compressor and improve overall operation.
2. Choose a mounting location that is as cool as possible and away from any source of heat. The cooler the ambient air, the less chance the compressor has of overheating.
3. The Air Zenith compressor is moisture-resistant and dust-resistant but not waterproof (just like all mechanical electrical components). Don't mount the compressor in a location where it is likely to come in contact with water.
Instructions for WiringUsing the installation wiring diagram you'll save yourself time and money by doing things right the first time. All the steps are numbered accordingly.
1. Never directly connect your pressure switch to your compressor. A pressure switch MUST connect to a relay. Think of a relay as a floor jack for a vehicle. If you had to lift a car by hand every day, it would simply wear you out. But if you use a jack to relay your control to lift the vehicle, you only have to do a small amount of work and you can do this for much longer. Same principle here: The pressure switch will tell the relay when to turn the compressor on or off with-out any harm to the pressure switch. (Pressure switches are the most commonly replaced piece in the air system due to improper connection.) Every compressor in your system must have its own relay. A single pressure switch can control ALL relays.
2. Find a suitable location to run a length of 4AWG power wire from the 12V+ terminal of your battery to your compressors. Keep this wire clear of any heat sources, sharp edges, or sharp bends.
3. Install a 100-amp fuse and holder as close as possible to the 12V+ terminal on your battery.
4. Terminate the 4AWG power wire to a distribution block (with two 50-amp fuses). This will allow you to attach the smaller 8AWG wires in the next step.
5. Run a single 8AWG power wire from the distribution block to the #30 prong on each relay. (Try to keep this as short as possible.)
6. Connect your compressor's red 12V+ power wire directly to the #87 prong on the relay.
7. Find a suitable location to ground your compressor. You will want a place clear of paint and debris. Drill a mounting hole for your fastener. (Make sure to check below where you will be drilling for any obstacles, wires, or fuel lines.) Attach your ground and apply a light coat of grease or paint to keep the connection clean.
8. Mount the pressure switch into your system (directly plumbed to a spare port on your tank is recommended). You will now want to ground one leg of the pressure switch (this can be the same ground as your compressor) with 16AWG wire. Run the other lead to the #85 pin on each relay also using 16AWG.
9. Connect a 16AWG wire from the #86 pin on each relay to a switched 12V+ source in your vehicle. (We recommend you attach this wire to a source that is live ONLY when the vehicle is running to prevent draining of your battery.)
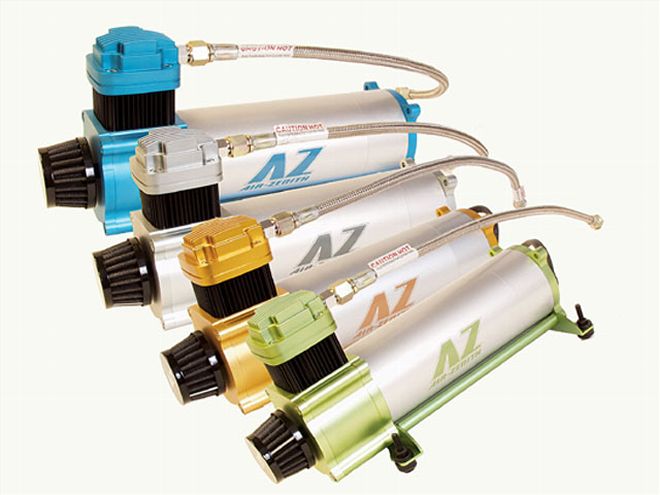
| air Zenith Compressor color Selection
Compressor Do's and Don'ts1. To ensure maximum compressor life, DO NOT run your compressor over its max. working pressure of 200 psi for the AZ-OB1.
2. To prevent unwanted discharge of your vehicle's battery, make sure that you keep the engine running while operating a compressor.
3. Periodically check all electrical connections, plumbing fittings, connections, and mounting hardware. Also, clean any dust or dirt that has built up on the compressor's cooling fins or body. And be sure the air filter is clean and free of obstruction.
4. One of the major advantages of the Air Zenith (besides its lightning-fast fill times and rebuild capabilities) is that it's equipped with a permanently lubricated oil-free piston. Never try to lubricate the compressor with any lubricant such as motor oil or WD-40.
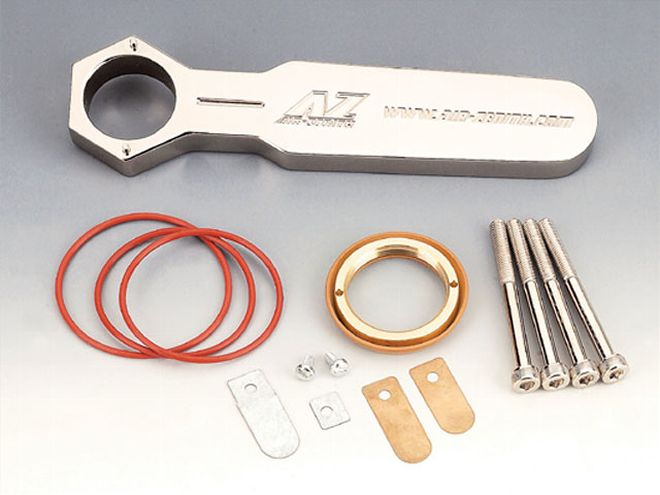
| air Zenith Compressor rebuild Kit
Quick Tech: Rebuilding the AZWhile many compressor companies find reasons not to warranty your compressor (if you take it apart, if you're filling a 5-gallon tank when they recommend a 3-gallon, etc). Air Zenith works on ways to make sure that you'll never have another stranded compressor headache story to tell your buddies. Here's a look at the rebuild kit. Check out just how easy it is to ensure worry-free operation for years to come on your new Air Zenith.


