| Removing and reinstalling the '99-and-newer Gen III V-8 from your GM truck just got a little easier. For the basics, refer to this two-part story (look for the second part next month in ST). For the ultimate detail, look for the book How to Build Performance Chevy LS1/LS6 V-8s at www.cartechbooks.com.
This is part one of two stories detailing the process of the removal and reinstallation (R&R) of the Gen III V-8 from a GM fullsize truck or SUV (which would include Chevy, GMC, Hummer, and Cadillac vehicles). The Gen III V-8, commonly referred to as an LS1 (see sidebar "LS1 or Gen III?" for more on this), has been powering GM trucks and SUVs since 1999. So this information will help you when removing an engine on any Gen III V-8-powered GM truck built from 1999 to the present.
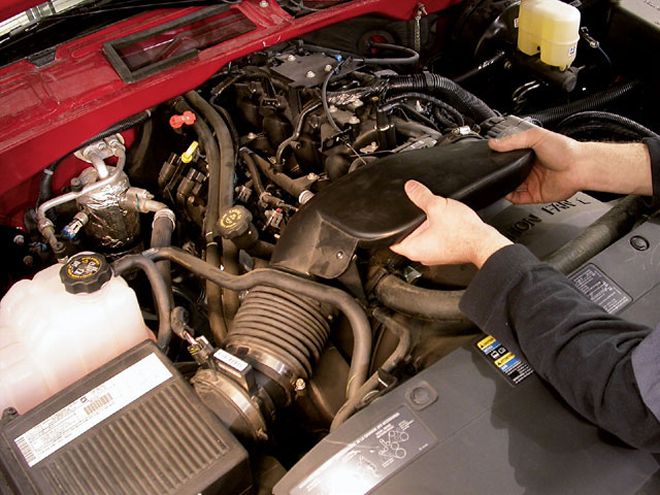
As simple as it may seem to pull a V-8 engine from a full-frame vehicle, just getting the Gen III V-8's wiring and plumbing unhooked can be frustrating if you haven't done it before. As most of the difficulty is in the details, these stories will show you what pieces to work with and how to finagle them off the vehicle to maximize success. To simplify the explanation, this story uses more photos than text. In fact, this story is an excerpt from the upcoming book, How to Build Performance Chevy LS1/LS6 Engines, by Will Handzel (see sidebar). The book has a chapter with more than 150 photos, showing how to remove the Gen III V-8 from multiple types of GM vehicles. If you want to see practically every step to R&R'ing a Gen III V-8 from a fullsize truck/SUV, a Vette, and the Camaro or Firebird, get the book.

| The tools required to do this job vary from the standard pliers, screwdrivers, and open-end wrenches to a custom pulley puller, air impact hammer, and radiator hook tool. A pry bar is often useful to persuade various components apart.
LS1 Or Gen III?The first the public ever saw of the General Motors Gen III V-8 was in the completely redesigned '97 Chevrolet Corvette. That vehicle, and the engine that came in it, made such an indelible mark the engine architecture has become commonly known by the regular production order code (RPO) that was assigned for that vehicle: LS1.
Inside the production vehicle world (that would be mainly GM and its suppliers), the engine architecture is actually called Gen III V-8 because it powers multiple vehicles in multiple power levels and is denoted by multiple RPO codes. For more on this, see the sidebar "Common Gen III V-8 Engine RPO Packages and Power Output."
Many enthusiasts still call the engine in their Escalade an LS1, even though the RPO for that engine is LQ9. Is it wrong? That's for someone else to decide. To avoid confusion in this story, we'll call the engine a Gen III V-8 -you call it what you want.
Service Bay CredThe tips and tricks listed here are a little from the GM manuals, but mostly from the technicians doing this work every day. These techs have discovered ways to simplify the task of pulling a Gen III V-8 engine while minimizing the amount of work and the possibility of damage to the vehicle components at the same time.
Just so you know, the R&R of a Gen III V-8 from the Camaro/Firebird (what GM calls F-car internally) and Corvette (Y-car) is more involved than the R&R on the fullsize trucks (called the 800-series internally within GM). This is because the engine must come out of the vehicle from underneath on the F- and Y-cars, while the truck engines come out the traditional method - over the radiator core support. For all these vehicles, including the trucks, being able to put the vehicle on a lift will make the job of R&R'ing the engine easier.
Keep The Systems SealedOne of the great ways to simplify the R&R of the Gen III V-8 is to keep the many "sealed" systems just that - sealed. So, on the power-steering and air-conditioning systems, instead of removing the pumps from the vehicle as suggested in some manuals, the pros have figured out how to unbolt them from the engine assembly and swing them out of the way in the engine compartment.
This removes the hassle and cost of having to purge the air from the power steering system (a major hassle) and recharging the A/C system. Even more of an impetus to avoid disassembling these systems is that many techs believe these systems aren't the same after they have been taken apart in the field.
Pulling a Gen III V-8 from a GM fullsize truck or SUV will probably look familiar to those that have pulled engines from other full-frame vehicles. Even with that traditional nature, there are plenty of sensors, hoses, and other specific tips and tricks shown here that will make the job go easier when it comes time to pull your Gen III.
Installing the Gen III V-8 back in the engine bay requires basically reversing the removal process shown here. Any different details to the reinstallation are discussed during the removal process.
Tricky ClipsIf you haven't been around a late-model engine bay for a while, you'll probably notice how different many of the connectors, clips, and clamps are from previous clips, clamps, and connectors you have worked with on engines. That's because the GM development engineers worked very closely with the manufacturing engineers to help create an engine with the ultimate in quality.
| gm Truck And Suv Gen Iii Ls1 V8 Engine Removal And Reinstall chevy Ls1
That level of quality is achieved by minimizing mistakes in assembly. Eliminating as much variation as possible in the component set and assembly process is the key. A simple way to do this is to design the connectors, clamps, and such so they can only be installed one way and are either "installed" or "not installed." This minimizes the chances of a clip being installed just far enough where it looks completely installed, but falls off once you start driving the vehicle.
What makes it difficult for the enthusiast is that a lot of these connectors, clamps, and so on are not designed to be intuitive to remove. That's where this story and next month's story come in. Here, you're learning from the experiences of everyone else who has destroyed those connectors, clips, and clamps so you don't have to when you do your Gen III V-8 buildup.
Next Month
| gm Truck And Suv Gen Iii Ls1 V8 Engine Removal And Reinstall book
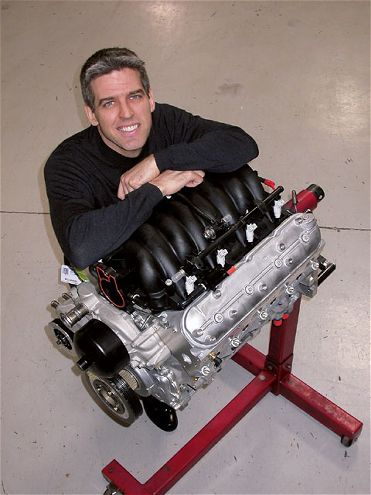
The Book: How To Build Performance Chevy LS1/LS6 V-8sIf you are interested in the latest small-block engine from GM, the LS1 Gen III V-8, you will want to get the book How to Build Performance Chevy LS1/LS6 V-8s by Will Handzel. Handzel, a former staff member on magazines such as Hot Rod, Circle Track, Rod & Custom, and others, started writing this book more than three years ago, when he was a release engineer working for General Motors. He's now the group manager of marketing at GM Performance Parts. The goal when he started this project was, "to create the definitive shop staple for all those interested in making power with the new Gen III V-8."
We'd say he's done that with features such as the full history on the Gen III V-8 creation, a detailed overview of the engine components, and copious assembly methods to use for performance applications. Powering trucks since '99 and the Corvette since '97, this book shows what an incredible design the Gen III V-8 is and how it responds with plentiful power to performance upgrades -which Handzel shows with multiple engine buildups and bolt-on parts how-tos. There is also a complete chapter dedicated to just the truck versions of the Gen III V-8 and multiple suggestions on how to improve their performance.
With more than 60,000 words and 550 images gathered from inside GM and throughout the industry, this is the definitive book on the Gen III V-8 engine family. To purchase the book for only $18.95, go to www.cartechbooks.com or call (800) 551-4754.
Common Gen III V-8 Engine RPO Packages, Power Outputs, And Compression Ratios RPO Description
L, (ci) Power Output
hp/torque Comp.
Ratio LS1 5.7 (346) car
Corvette
Camaro/Firebird
345/340
305/335 to 325/350
10.19 GTO 350/365 LS6 5.7 (346) car Corvette 385/385 '01 10.46 405/400 '02 and newer LQ9 6.0 (364) trck/suv Escalade & 345/380 10.08 Silverado SS LQ4 6.0 (364) trck/suv GMC/Chevrolet/ 300/360 to 330/370 9.41 Hummer fullsize LM4 5.3 (325) trck/suv '01-and-newer 290/325 to 300/335 9.49 fullsize, '04 SSR '04 Trailblazer/Envoy/ Bravada LM7 5.3 (325) trck/suv '99-and-newer 285/325 to 295/330 9.49 fullsize LR4 4.8 (293) trck/suv '99-and-newer 270/285 to 280/290 9.47 fullsize
| gm Truck And Suv Gen Iii Ls1 V8 Engine Removal And Reinstall engine
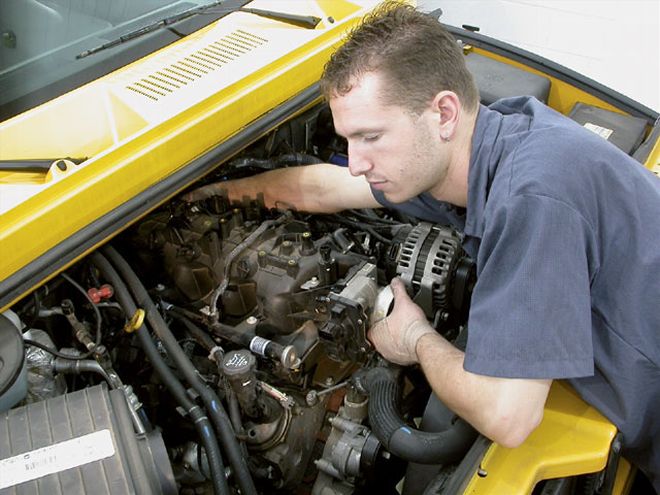
Do I Have To Pull The Engine To Work On It?Of all the vehicles the Gen III V-8 has powered, the trucks and SUVs are the easiest to make changes to the engine while it is still bolted in the vehicle. But that's not saying much. Changing the heads or cam on a Gen III V-8 in a Corvette or Camaro is simply not advised due to the lack of space in the engine bay, but on a truck it is doable.
On the trucks/SUVs, you'll probably find the time it takes to do it either in the vehicle or out of the vehicle is similar, but the frustration level of doing the work in the vehicle is much higher. We'd recommend pulling the vehicle if you are doing anything more than adding an intake or swapping the heads. The camshaft change or bottom-end work really requires some space to accomplish and you'll be able to really get around the engine to do the work correctly (such as angle-torquing the head fasteners).
More than anything, you'll probably find the engine removal will go much more quickly the second and third times because you'll know the little tricks to making everything happen - and soon it will be a no-brainer whether you work on the engine in the vehicle or on an engine stand.


