When we last left this ’05 GMC Sierra, we had installed a Belltech 2/4 lowering kit with front and rear sway bars to drop our daily driver and give it more sporty handling. During the first part of the transformation, we also added a set of EBC disks all the way around and EBC YellowStuff pads to make it stop on a dime. We were happy with our progress and wanted to continue our quest to make this driver a bit more comfortable for the daily portion. More than 100K miles of seat time had already been logged on the engine, and the interior had seen the same amount of use; showing its age in stretch marks and coffee stains.
Our plan was to upgrade the interior and give it a more custom feel because this truck was expected to tick off another 100K. This time we wanted all the oohs and ahs that only a leather swap can provide. We called the interior experts over at Katzkin Automotive Leathers in Montebello, California, to have our cowhides professionally installed. After reviewing Katzkin’s vast array of colors, we chose a shade of gray that matched the preexisting portions of the interior and added a dark gray piping to create a subtle pop. We also asked the leather experts to stitch in the Truckin logo for style and flair. Our new duds would make our ’05 comfier to sit in and make fetching groceries seem like a pleasure rather than a chore.
Where did the unusual Katzkin name come from? In 1983, siblings Mitch and Leslie Katz combined their last name with the word “kin” to reflect the fact that they were brother and sister. Today, their company is synonymous with leather upgrades in the automotive aftermarket. Using state-of-the-art CNC equipment, along with a staff of hundreds of highly skilled leather craftsmen, they can assemble a set of seat skins, and have them shipped to a qualified restyler for installation in less than 24 hours.
Katzkin’s catalog covers more than 2,500 models, including nearly every pickup and SUV built in the last decade, and is growing every year. To maintain its quality reputation, Katzkin does not offer a DIY kit, as it takes a certain level of skill to ensure a proper fit. Fear not, though, you can purchase quality leather from Katzkin in two ways. The company works with hundreds of dealerships nationwide to offer trucks and SUVs a dealer-installed leather upgrade option, available to both new and used vehicles going back at least a decade. So if you love an older body style and got a honey of a deal on it, chances are, Katzkin has a kit for you. The dealership can order the interior swap kit and perform the work in a few days. Or, contact your local authorized Katzkin dealer or qualified restyler and ask the shop to do it for you.
The folks over at Katzkin were nice enough to offer up their facilities, and we jumped at the chance. Their expert-level installers made short work of our leather kit. While there, they treated us to an extensive tour of the facilities. They gave us a demonstration on their entire product line, including some new products, and let us into the R&D section of the factory to discover how these custom-fit leather kits go from concept to production. Follow along as Katzkin installs our leather interior kit and gives our ’05 Sierra new skins.
| 02 2005 GMC Sierra Katzkin Interior Install
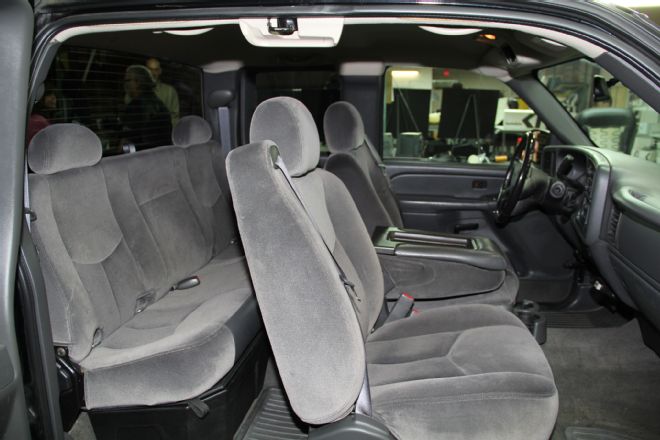
Our ’05 Sierra arrived from the factory in standard trim level, which meant leather seats were not an option. As you can see, the cloth has held up pretty well, but had logged more than 100K miles of transportation. It had seen its fair share of French fries and trapped dirt under the seats.
| 03 2005 GMC Sierra Katzkin Interior Install
The installers went to work quickly to remove all the seats, and we laid them out to develop a game plan. Brother installers Sergio and Luis Tirado tag teamed the front and rear to do the job quicker.
| 04 2005 GMC Sierra Katzkin Interior Install
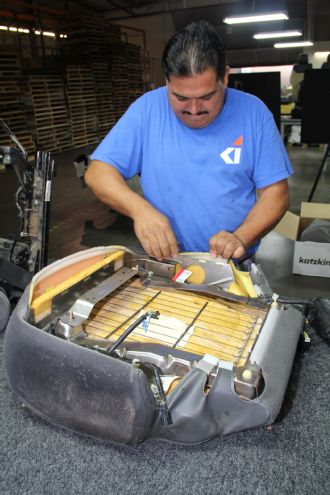
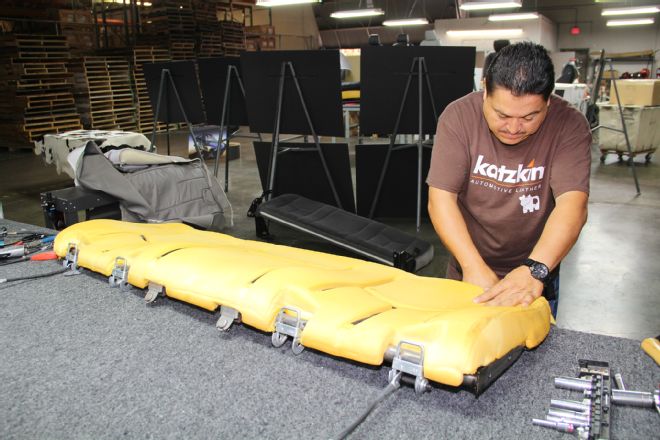
The driver’s seat was the first to be attacked, and Sergio wasted no time separating the cushion from the seat frame to remove the cloth, which is held in place with series of clips, hook-and-loop tape sections, and hog rings. These were removed delicately so as not to damage the frame or the mounting points.

| 05 2005 GMC Sierra Katzkin Interior Install
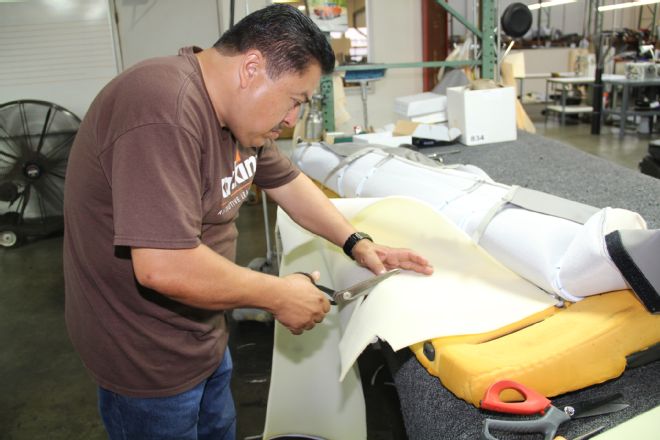
Although Katzkin develops these kits for each specific truck model, during the actual sewing process a little more material is necessary to ensure a proper seam. Our installers trimmed down the excess leather to achieve that custom look and ensure no wrinkles showed up later.
| 06 2005 GMC Sierra Katzkin Interior Install
Our installers had to be a little forceful to encourage the seat covers to lie correctly as the seat pad fought back a little, but it was all part of the smoothing process. Once the cover was on, it would be hard to make adjustments if one side were over a little too far—proper placement is key.
| 07 2005 GMC Sierra Katzkin Interior Install
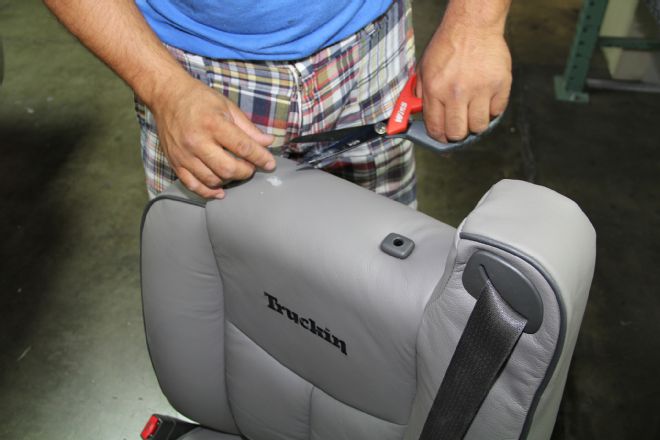
With the driver’s seat recovered, our installers cut holes for the headrests. These are purposefully left out of the manufacturing process because the headrests need to be custom fit. A pair of sharp scissors made small slits and the headrest tubes were popped through.
| 08 2005 GMC Sierra Katzkin Interior Install
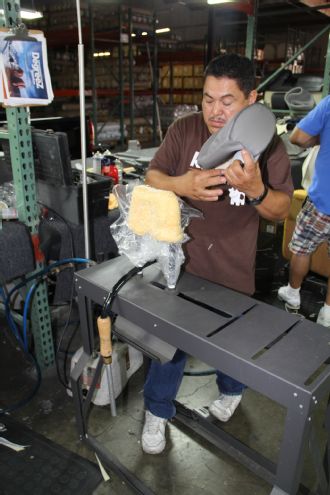
The headrests themselves presented a unique installation problem, but Katzkin had a trick vacuum machine that compressed the headrest inside a plastic sheet and the cover could just be slipped on in seconds.
| 09 2005 GMC Sierra Katzkin Interior Install
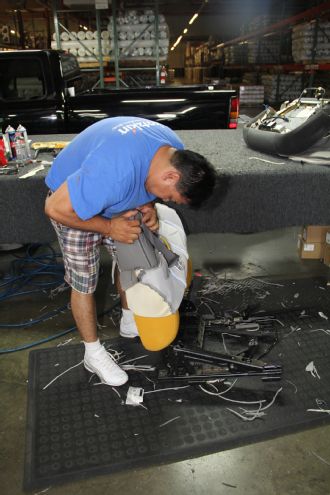
Installation of the passenger seat went similarly to the driver’s, but the passenger seat pads had seen less wear, so Sergio had to use a little ground-based leverage to push the cover on. Around his feet, you can see more trimmings.
| 10 2005 GMC Sierra Katzkin Interior Install
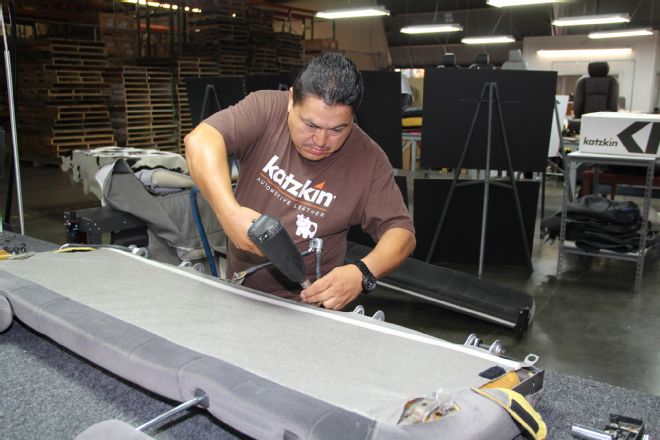
The rear bench was a bit more of a challenge and Luis spent a significant amount of time working on it. First he stripped the cloth off, and because it was one piece, it required more hook-and-loop tape than the front buckets. Also, he had to remove a significant amount of mounting hardware before the cloth could be peeled off.
| 11 2005 GMC Sierra Katzkin Interior Install
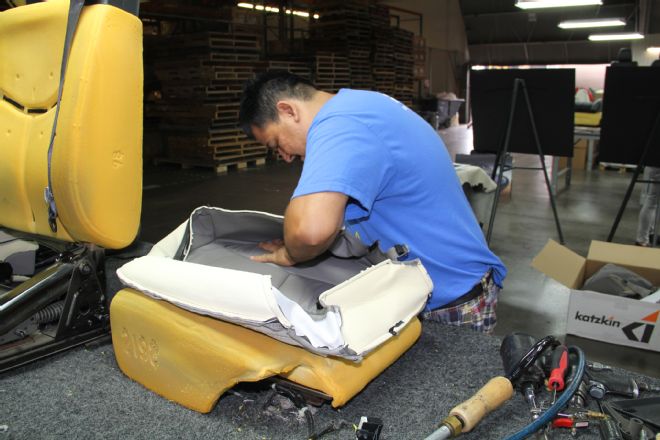
Once the cloth was completely stripped off, our installer inspected the condition of the seat pad. Although most rear benches have people sitting in them, they might also have large heavy items stored on them, causing premature foam wear and breakdown.
| 12 2005 GMC Sierra Katzkin Interior Install
Luis deemed the seat bottom was a little low on padding and gave it a little extra with custom-cut segments of white foam sheeting, which was spray-glued into place.
| 13 2005 GMC Sierra Katzkin Interior Install
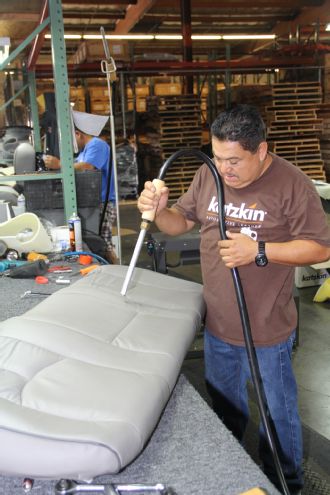
To ensure all seams lay where they should, the steam wand was employed extensively to make the sure the hook-and-loop tape went down properly. Luis had to do a lot of adjusting to get the fit perfect.

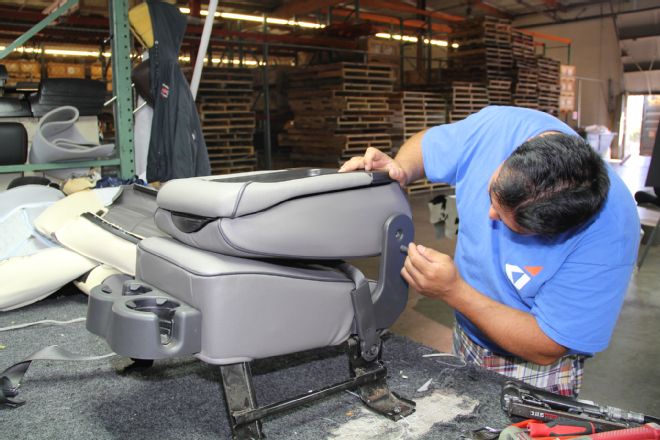
| 14 2005 GMC Sierra Katzkin Interior Install
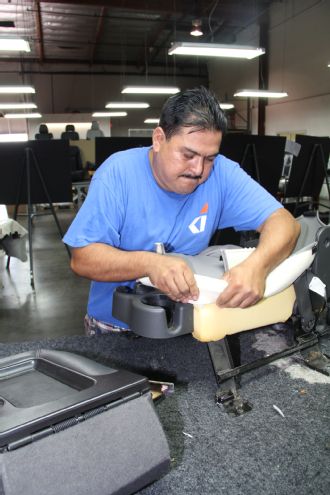
The center console presented its own set of complexities due to the multiple surfaces that all needed to be re-covered. Its small size was deceptive, it took a long time to dismantle it and add the leather.
| 15 2005 GMC Sierra Katzkin Interior Install
With its many layers removed, Sergio stripped off the old cloth and quickly recovered it with the leather. It looked a thousand times better.

| 16 2005 GMC Sierra Katzkin Interior Install
They steamed the plastic clips that held the console’s hinged lid to loosen them from their factory-installed homes so it could receive a cover of its own.

| 17 2005 GMC Sierra Katzkin Interior Install
The plastic top cover had no metal frame so the old cloth had to be gently removed. Staples that held the old cloth in place and had to be pried out before the leather could be fitted over the top, and stapled back into place.
| 18 2005 GMC Sierra Katzkin Interior Install
With the console’s many levels all re-covered, it was reassembled. This was the final component to our seat transformation.
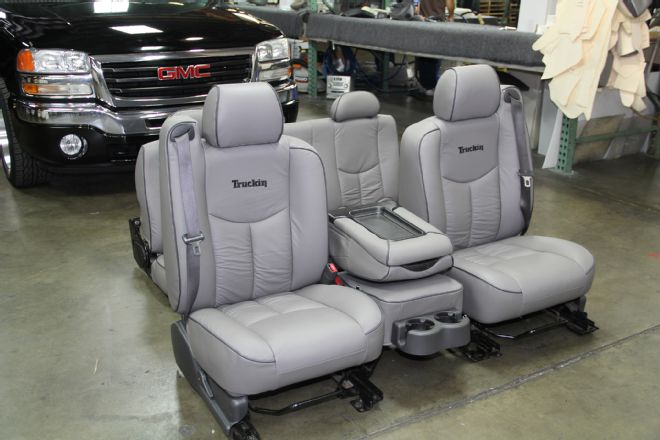
| 19 2005 GMC Sierra Katzkin Interior Install
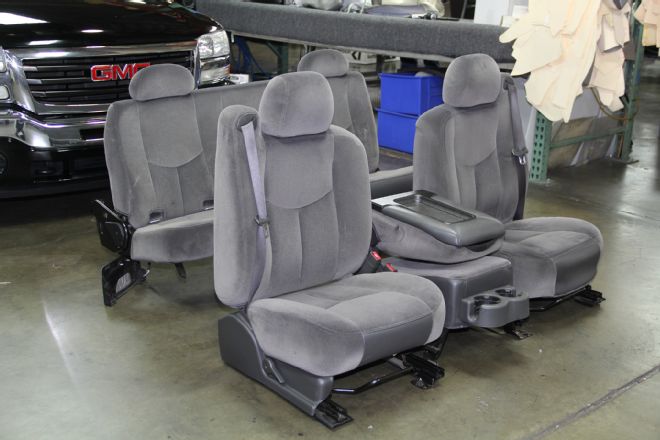
Our new seats looked like a million bucks laid out on the floor! The installers wasted no time getting them back into our Sierra and stood back to enjoy a fresh interior and the luxurious smell of leather.
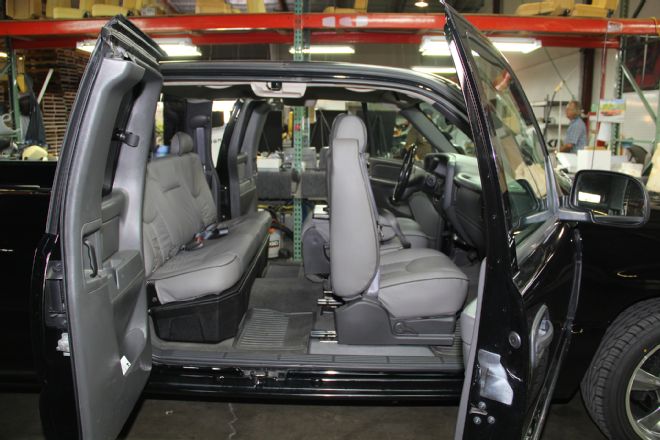
| 20 2005 GMC Sierra Katzkin Interior Install
With the seats back in the truck, it was obvious right away that our color choice was spot on. It resembled the color of the cloth covers that we had just removed, matched the other gray interior accents, and certainly improved our driving experience.