Brake Job Special - Jp Magazine

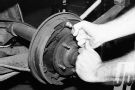
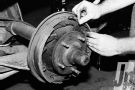
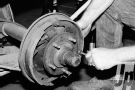
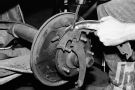
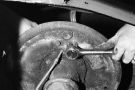
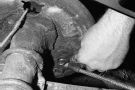
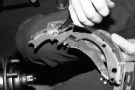
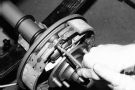
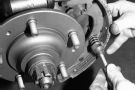
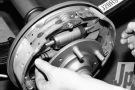
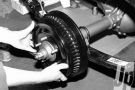
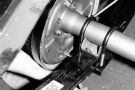
For those who haven't worked on drum brakes before, the task can seem quite daunting. But, fortunately, that tangle of springs, pins, cables and all looks worse than it really is.

154 9901 Brake Job Special old Brake Drum Photo 30788392

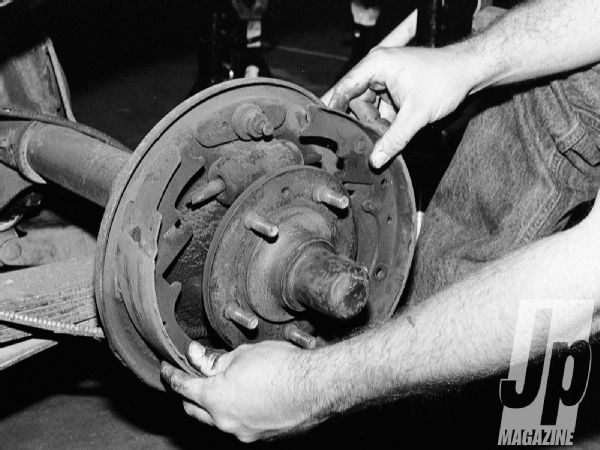
For this story, we focus our how-to exposé on the rear brakes because, due to the addition of the parking-brake system, they're more complicated than the front. Tool requirements are minimal for this job, although a quality set of drum brake tools, like those we got from Eastwood, can make the job a bit easier.

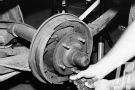
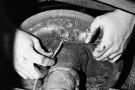
As for replacement parts, you can get just about everything in a CJ's drum brake system from Savanna Jones, our source for this operation. Since our Jeep has reached a healthy 22-plus years of age, we thought it wise to replace everything we could-especially the springs, as these can rust over time and possibly break (parking-brake strut springs, for example, are notorious for breaking).

154 9901 Brake Job Special savanna Jones Brake Drum Kit Photo 30788419 
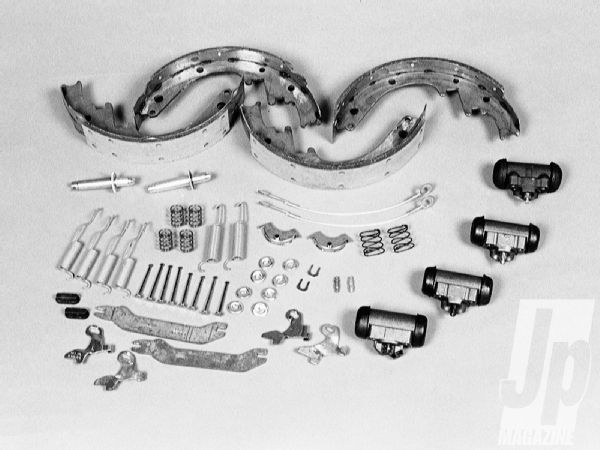
Savanna Jones supplied everything needed to do a thorough rebuild on Project Ridge Runner's drum brakes: shoes, cables, adjusting screws, springs, cable guides, wheel cylinders, and assorted small parts.

Follow the photos as we take you through the joys of rebuilding drum brakes.

PhotosView Slideshow After placing the rear axle securely on jackstands and blocking the front tires, remove the tires and wheels. The brake drum may slide right off, but sometimes three screws hold it, and they need to be removed. The adjuster may also need to be turned for the drum to slide off. Before taking things apart, take a photo or draw a diagram of the components to aid in the reassembly. The proper tools can make a brake job much simpler. Eastwood offers a complete drum brake tool kit, which we used for this rebuild. We used those tools to remove the primary and secondary shoe-return springs from the anchor pin. The self-adjusting cable is removed from the anchor, along with the guide plate and lower adjuster lever. Remove the top shoe guide plate, and if you plan to reuse any of the old parts, check them for excessive wear. The lower spring and adjuster is removed from the bottom. If you plan to reuse these parts, keep them separate from the other side because they're different and aren't interchangeable. The spring hold-down tool is used to remove the hold-down springs. A pin through the center of the spring must be held in place by placing a finger on it from the back of the backing plate. The parking-brake strut and spring can easily be removed as the shoes separate. The shoes can now be taken off, but the parking-brake lever must be unhooked from the parking-brake cable. Simply pull the external spring away from the end of the lever, and the lever can be rotated off the cable end. A small clip holds the lever to the rear shoe and must be pried off to be removed. Since a complete brake job includes rebuilding or replacing the wheel cylinders, the cylinders need to be removed. A rebuild can be done with the cylinder on the backing plate, but new cylinders are a better deal. Soak the fitting on the backside with penetrating oil for a while and use a line wrench to loosen the nut. Two bolts hold the wheel cylinders onto the backing plate, which should also be soaked with penetrating oil to prevent breakage of the bolts. The rods sticking out of the wheel cylinders will have to be used on the new cylinders, so they should be removed and cleaned. The parking-brake cable unbolts with two screws. With the backing plate denuded of hardware, it can be cleaned with a wire brush and solvent on both sides, then painted. We used Eastwood's rust-proof paint to make these look like new. With everything clean and new, reassembly is a snap. Bolt the new wheel cylinder in place and torque the bolts to the proper specifications. Insert the two push rods into the cups of the cylinder. Then, for easier shoe installation later, crack the bleeder screw open to relieve pressure. The parking-brake lever is attached to the rear shoe (the one with more lining than the other), and retained with the supplied clip. Be careful not to squish the clip too much since the lever requires free movement. Slip the end of the lever over the end of the parking-brake cable. The spring may have to be pushed back to facilitate this. Align the wheel cylinder rods into the shoes, and secure the shoes with the hold-down springs. A quarter-turn is all that's needed to lock the spring retainer in place. With the adjuster lever, Install the adjuster and lower spring, then install the top guide plate. The parking-brake strut and spring can now be placed as shown. The round end of the adjuster cable slips over the anchor pin and is routed over the cable guide once it's installed. Using the Eastwood spring tool, the primary and secondary springs are installed. The hook end of the adjuster cable hooks into the adjuster lever. Lift up the lever and use pliers to attach the cable. Check for free movement of all parts. Screw the brake line fitting into the back of the wheel cylinder and tighten the bleeder valve.
The brake drums had previously been sent to the machine shop for turning, which removes ridges and scoring and rounds out the drum. We used Eastwood's Brake Drum Coating to give the drums a finished appearance. On the backside of the backing plate there's a slot for adjusting the adjusting screw. Use the brake spoon to move the adjuster until a slight drag is felt on the brakes. Bleed the brake system and testdrive the Jeep. Adjust the brakes until they brake equally. The self adjusters will give a final adjustment after being driven normally for a while.