
Has there been a Mustang owner who, a day after taking possession, hasn’t thought about bolting a blower to it? Or a larger blower for Cobra and Shelby owners?
We’re no different. It didn’t take us long to decide to supercharge our 1999 GT project car. But we did noddle a bit over which ProCharger to bolt on. Not unexpectedly, a P-1SC was on our hit list. It is easily the most popular street-strip ProCharger and would certainly do the deed to our mild Two-Valve runabout. But after a chat with ProCharger and an honest session with ourselves (as in, just how long would it take us to max out the P-1SC and still want more?) we opted to start with the slightly larger D-1SC.
Both blowers are dimensionally identical and offer the same easy bolt-on installation. The difference is the D-1SC is optimized a tic higher up the boost food chain. Its impeller is rated for an extra 100 hp (825 hp for the P-1SC versus 925 for the D-1SC), and max boost rises from 30 to 32 psi. Tellingly, the base engine rating for the D-1SC is also 100 hp higher than the P-1SC; Procharger says you should have 300 hp worth of naturally aspirated motor under a D-1SC while the more street-friendly P-1SC works with just 200 hp. So yes, we’re starting out a little mild-mannered with the D-1SC on our humble Two-Valve. But that will change.
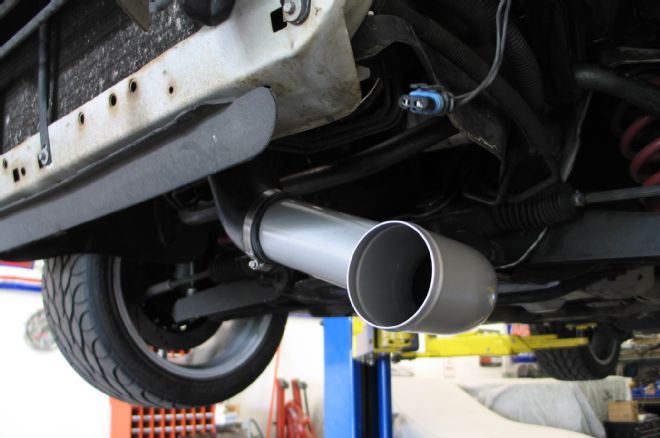
In this article we detail bolting on the blower. While not technically a plug-and-play fitment (there is one set of wires to splice and a hose to trim), the installation really is easy. ProCharger’s self-contained lubrication means there are no oil lines or fittings, and with the blower pulley facing the engine the mounting bracket is dead simple: No engine accessories need be moved, and other than the blower the only front-of-engine part is a longer serpentine belt. The wide-open 2V intake manifold makes reaching the injectors a cinch, and dropping the fuel tank to access the fuel pump is no big deal. Once under the car you’ll agree a nearly empty fuel tank makes things a lot lighter, so save tankering up with premium until after the install.
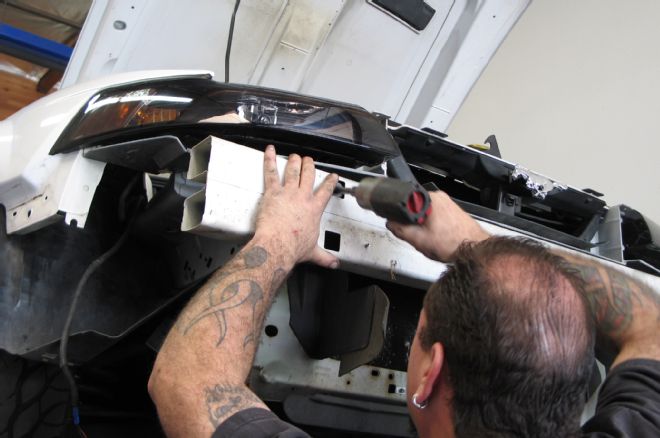
We definitely advise removing the front bumper cap and bumper to ease the charge cooler installation. It’s not mandatory, but it’s far easier with it removed. The pros certainly get the bumper out of the way. And speaking of pros, working in front of the camera this time was Steve Morrow at Stevie’s Garage in Simi, Valley, California. “A really straightforward install,” is how Morrow summed up the job.
Next time we’ll get into the power gain and tuning from our new ProCharger, but for now the install is the thing.
01. All told, the Two-Valve ProCharger is a good home job. Call it a two-pizza install for a couple of car buddies or a weekend for a solo mechanic. This story follows the installation; next time we’ll get the combo up on the dyno for tuning and report on the power increase.
02. Nearly as virginal as its white paint, our 1999 featured only a BBK throttle-body and cold air intake when the blower install began. Not the most powerful starting point in the Mustang firmament, the 2V is inexpensive and far roomier underhood to work on than its 3V and 4V brothers.
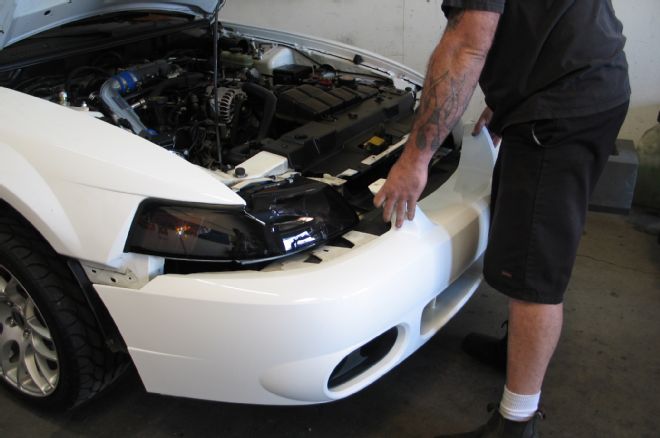
03. Go ahead and take the front bumper cap off first—OK, second, because you disconnect the battery first. The cap should come off anyway and you might was well avoid scratching its paint while working in the engine compartment. A series of popup and screw fittings around the perimeter make this a quicker job than it looks.
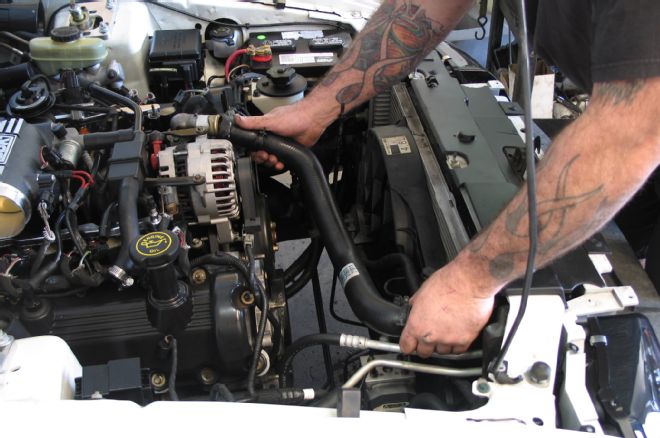
04. Stripping the top of the engine compartment is next. Drain a fat gallon of coolant from the system, then unbolt the coolant surge tank and upper radiator hose. Also unplug and remove the cold air intake and mass air meter assembly plus the air filter.
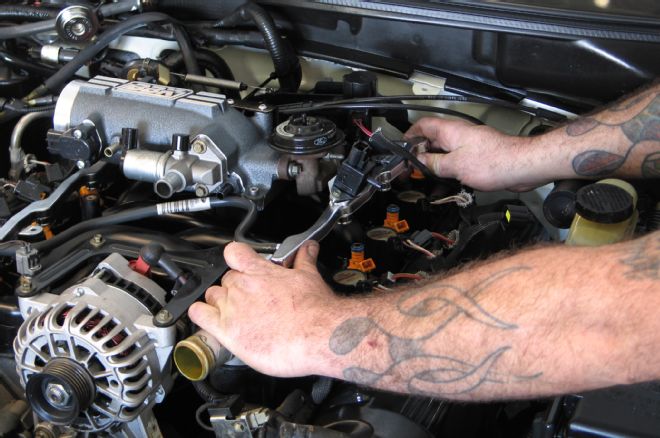
05. Larger fuel injectors are part of the ProCharger D-1SC kit, and changing them is simple, top-of-the-engine stuff on the 2V. You’ll need a fuel line disconnect tool to disconnect the fuel rails from the supply lines, and from there it’s just unbolt and lift off the rails to swap the injectors. Be sure to use new injector O-rings—and lube them—as the originals are past their shelf life at this point.
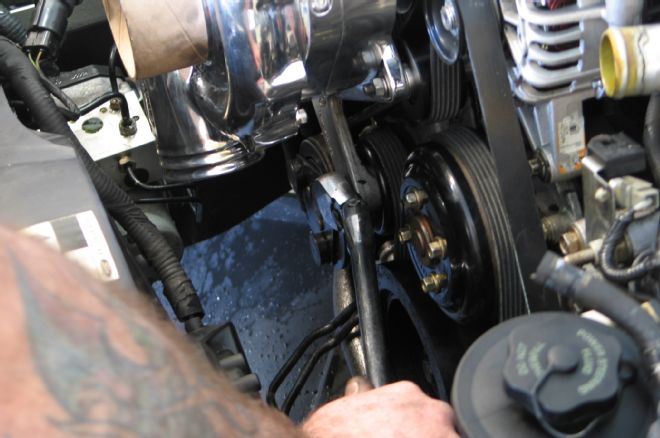
06. Minimal nut-and-stud swapping is required around and above the belt tensioner to make clearance and mounting studs for the blower and bracket. The precise procedure varies slightly between 1999 and 2000-2004 engines as detailed in the ProCharger instructions, but it’s all quick, easy stuff.
07. ProChargers mount to thick, flat plate, which is a simple four-bolt job. The blower and plate are joined on the bench, then the assembly is mounted on the engine.
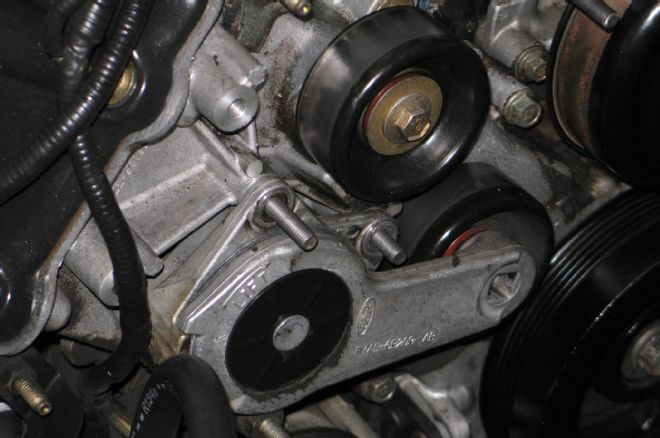
08. Prior to installing the blower on the engine, an idler pulley is mounted to the lower alternator attach point, and the serpentine belt is threaded into the position shown.
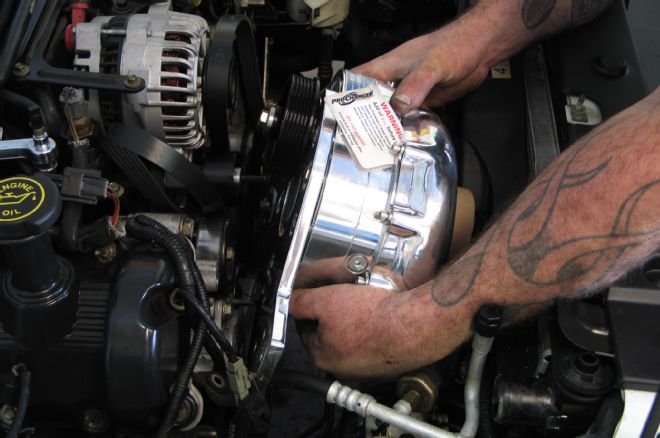
09. When the big moment arrives, it’s easy enough for one guy to slide the blower and bracket assembly onto the studs. Don’t forget the serpentine belt or you’ll be retracing your steps a bit to install it.
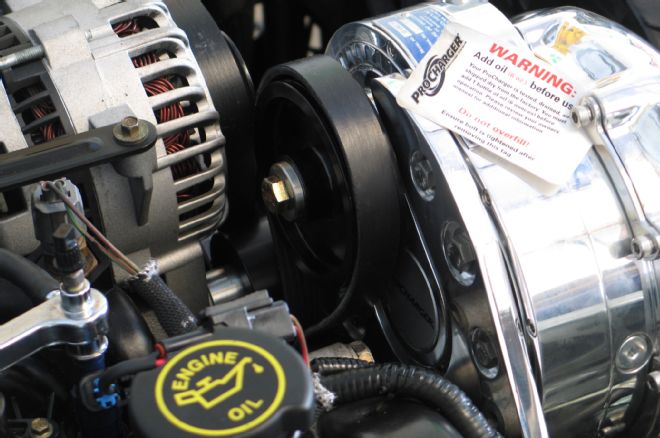
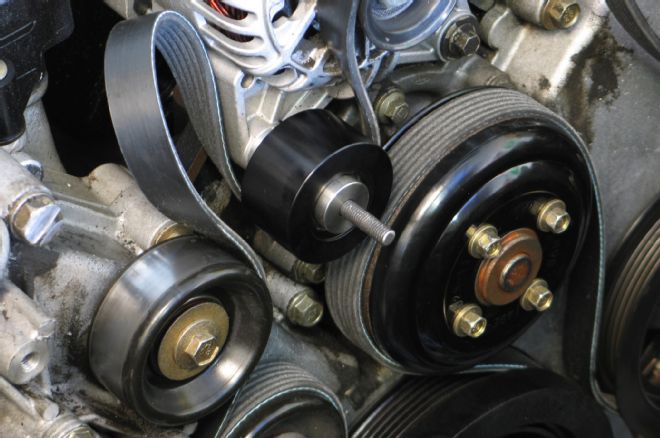
10. Next slip the belt over the pulley and install all blower bracket hardware. ProChargers feature an aggressive step-up gear ratio inside the supercharger, allowing a fairly large-diameter blower pulley for a given amount of boost. That means good belt wrap and thus the ability to live with the stock six-rib belt width until boost gets truly racy.
11. Once the blower is bolted in place, the serpentine belt can be installed by depressing the tensioner with a 1/2-inch drive breaker bar or ratchet. This is supereasy now, before the air plumbing starts taking up room.
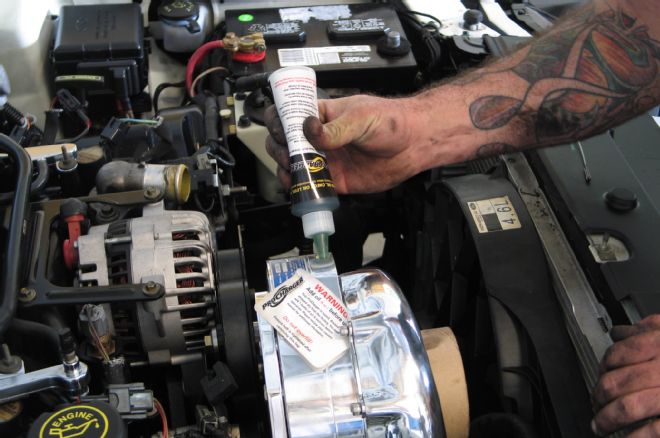
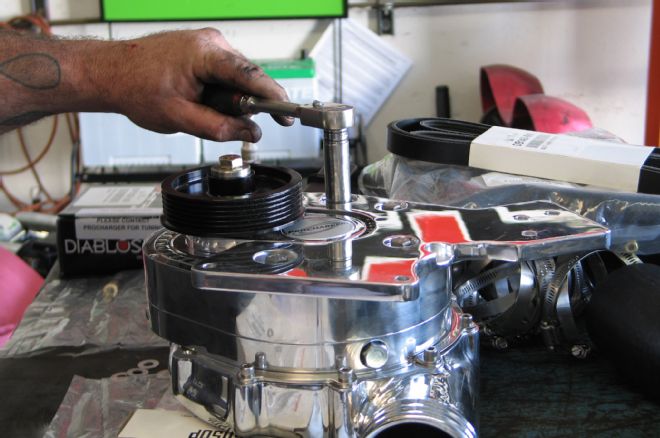
12. ProChargers are shipped dry, so don’t forget to squeeze in the bottle of secret sauce (synthetic oil, actually) that ProCharger includes in the kit. This lube should be changed every 6,000 miles; call it every engine oil change. There’s a drain on the bottom of the blower to get the oil out.
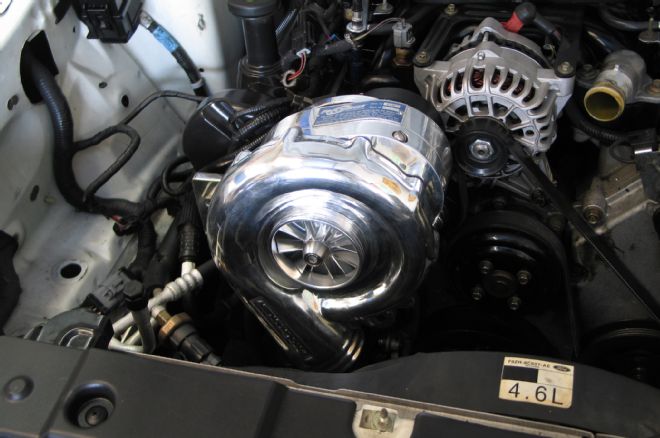
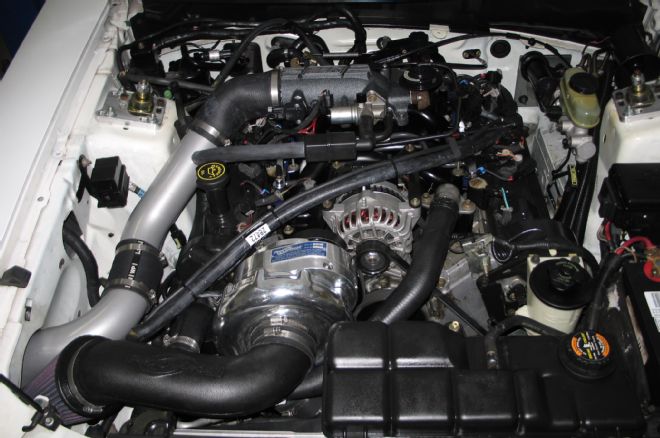
13. Shining like a diamond in a pile of coal, the polished ProCharger puts a lot of visual pop in an engine compartment.
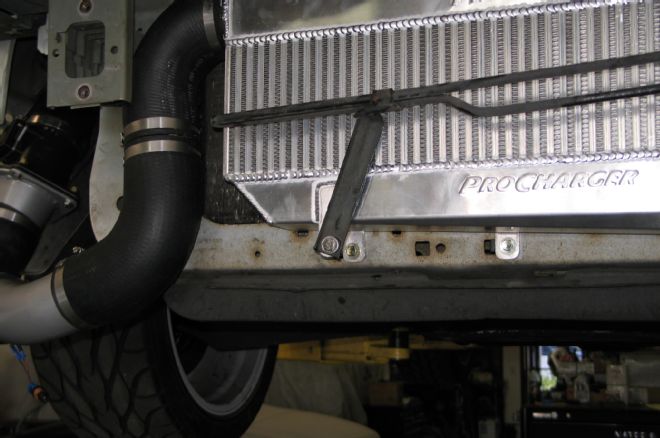
14. Now the blower discharge air tubing can be installed starting at the blower. ProCharger gives a diagram of the pipe layout in the instructions, but the main concept is that the piping runs from the blower discharge to the lower front driver side of the car, enters the charge cooler, runs out the cooler on the passenger side, then turns and runs up and back into the engine compartment and through the mass air meter and into the throttle-body. Here the tubing is making the turn forward to enter the charge cooler, which gets installed next.
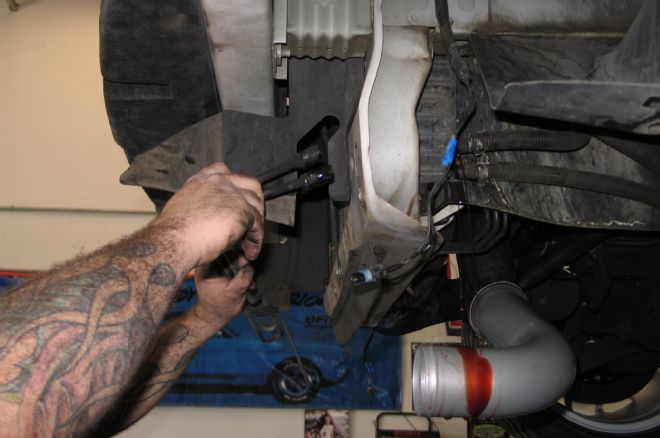
15. Before the charge cooler can be mounted a few items must be removed. Here the power steering cooler—it’s just an elongated loop of pipe—is being removed to make room for the charge cooler.
16. Also remove the foam and steel bumpers, as the charge cooler mounts behind them.
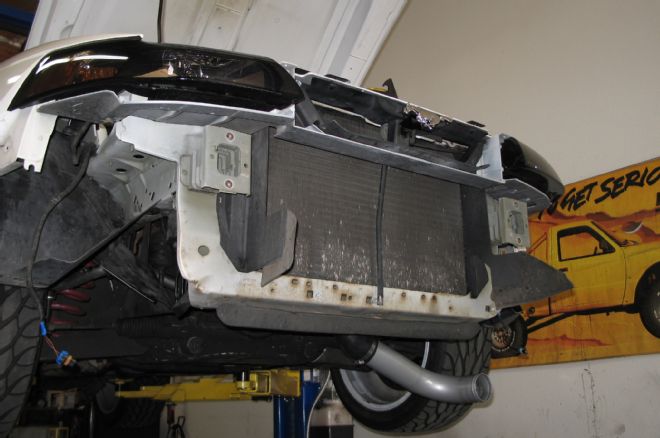
17. The vertical black rod running down in front of the A/C condenser is a brace for the hood latch; unbolt the brace at its bottom end from the core support. The charge cooler has a tab that will bolt in place of the latch rod. There is also some plastic shrouding around the A/C condenser to remove
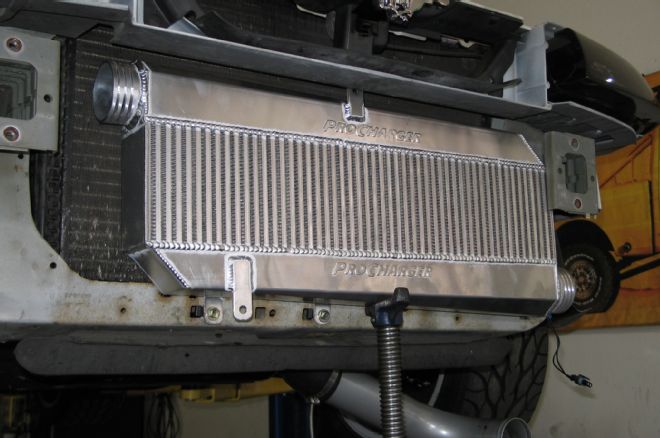
18. Getting the charge cooler in place is the most physical part of the entire installation. Pros use a muffler stand, but at home it’s best to have a friend help hold the cooler while you install the attach hardware to the mounting tabs.
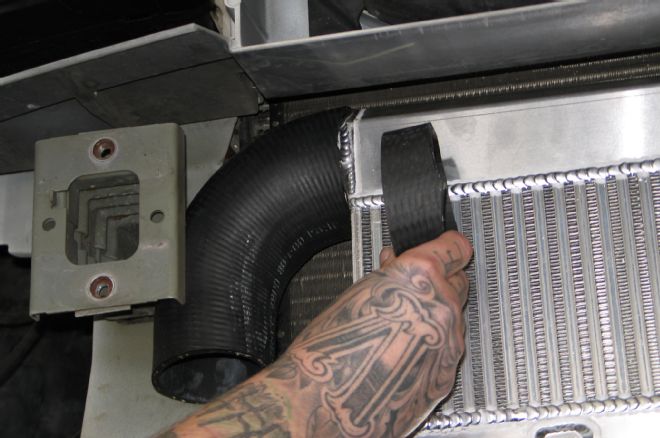
19. Next connect the air ducting to the charge cooler. Everything slips in place on the driver side; some trimming (as shown here) is necessary on the passenger side.
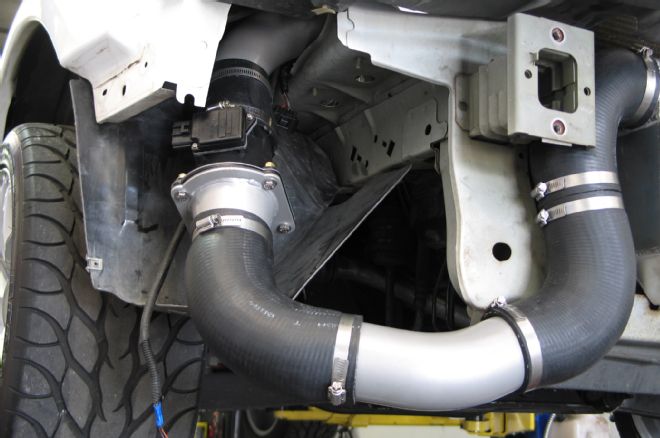
20. As the air ducting turns up and back you’ll run into the mass air meter assembly, which is most easily put together on the bench then slipped into the car. The ProCharger kit does not include a MAF, so you’ll have to supply your own larger-than-stock unit for best results.
21. The power steering cooler remounts to the front of the charge cooler. This moves the steering cooler forward. Two short lengths of hose are used to extend the PS cooler lines on the driver side.
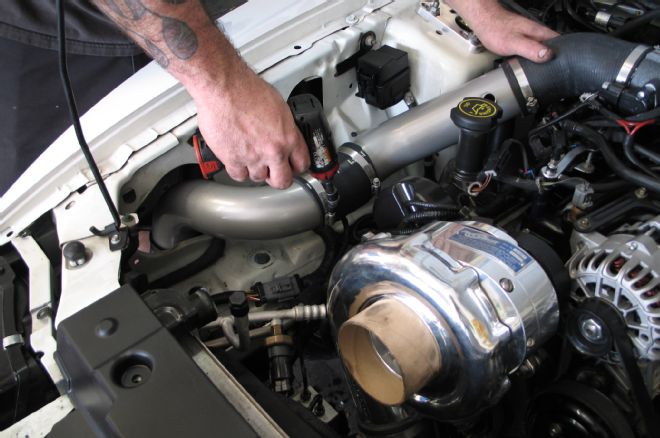
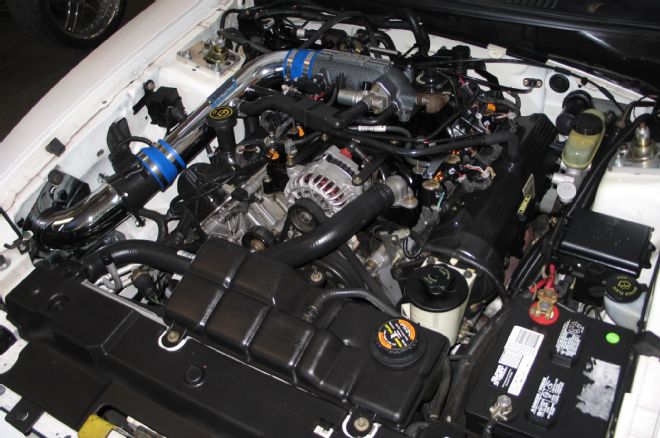
22. In the engine compartment the air ducting goes together quickly, as the MAF is in the inner fender. Other chores in this area are to slightly bend one of the A/C hard lines for increased clearance (easy); fit the new upper radiator hoses and remount the surge tank, install the short air filter/air inlet duct to the front of the supercharger and the bypass and PVC hoses to the inlet. You’ll also need to splice and lengthen the intake air sensor wiring with supplied hardware.
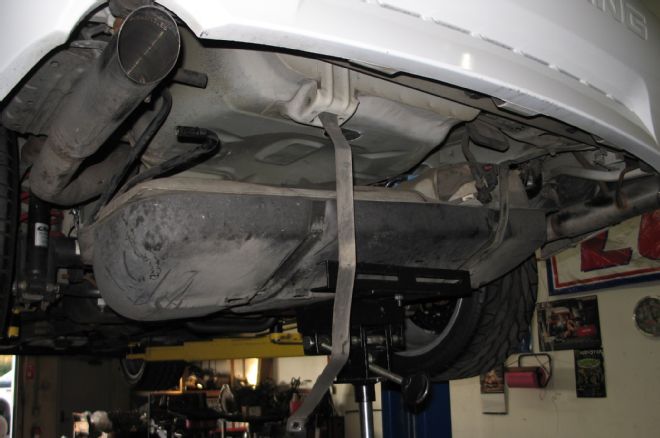
23. In back there’s no mystery to dropping the gas tank to change the fuel pump. Harness plugs allow easy electrical disconnection while the tank drops down once the filler neck (look for three small bolts inside the gas cap door) and two mounting straps under the tank are disconnected.
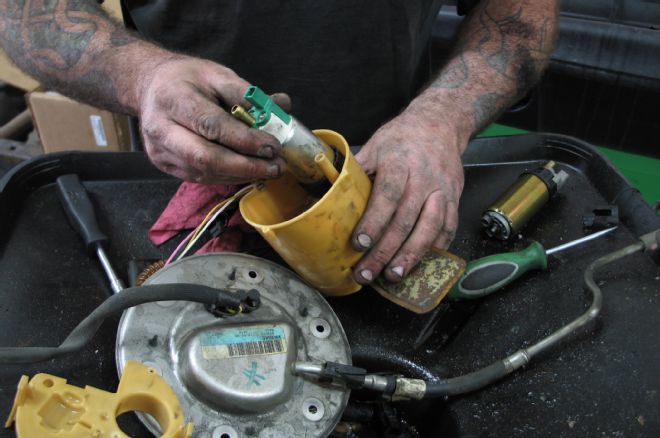
24. In the foreground is the tank access plate removed to pull the yellow fuel pump assembly out of the tank. Once on the bench, a bit of screwdriver work will get the pumps swapped, then the whole process is reversed to get the tank back in the car. Don’t forget to use premium fuel when you’re ready to sample the blower for the first time.