I'll start out by saying that I've been using Vintage Air products for nearly 20 years now and each and every time I do I'm impressed with how well made they are and how easily they go together. A few years ago I installed a Front Runner system on my '57 Chevy small-window pickup here in CLASSIC TRUCKS and was amazed at the huge amount of interest the story generated at the time.
Recently, I began finishing up the build of another small-block Chevy for use in an upcoming project and when it came time to choose an accessory drive system for it I naturally chose to use a Vintage Air Front Runner System for this engine as well. I'm still serious when I say that if Vintage Air says something fits, it fits. Whether it's an air-conditioning kit or an accessory drive system like the Front Runner, there's never any fine-tuning or modifying their components to get 'em to fit, just follow the instructions and enjoy the result — that's my honest personal experience.
Aside from just plain making good stuff, Vintage Air supplies some of the most complete and easy-to-follow instruction sheets in the industry too, and I'm convinced that's one of the main reasons their stuff goes together as easy and works as well as they do. The install you see here, without exaggeration, took just a couple of hours — some of that spent on a trip to my local parts store to buy a set of 12-point sockets since all of mine were 6-point and the kit comes with top-quality ARP stainless hardware of which nearly all are of the 12-point head design. So follow along and see how straightforward this install is and just how good the system looks as well!
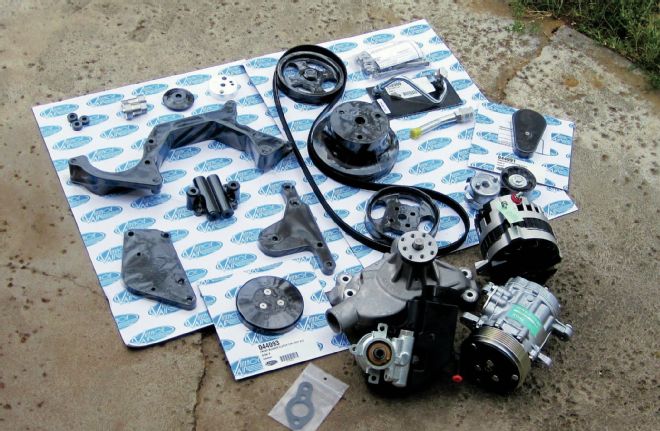
01 Vintage Air's Front Runner serpentine drive kit is a well-made accessory drive system that comes as a complete ready-to-install system. Above and beyond the CNC-machined billet aluminum bracketry (in either bright or black hard coat), spacers, belt, belt tensioner, and pulleys, the system also provides high-grade ARP stainless hardware, a 140-amp alternator, an A/C compressor, a power steering pump (if ordered for a P/S equipped vehicle), and an aluminum Stewart High Performance water pump. The first steps upon unpacking the new Front Runner system were matching all the components to the parts list in the instruction sheets, and giving the instructions a complete read through before starting the install.
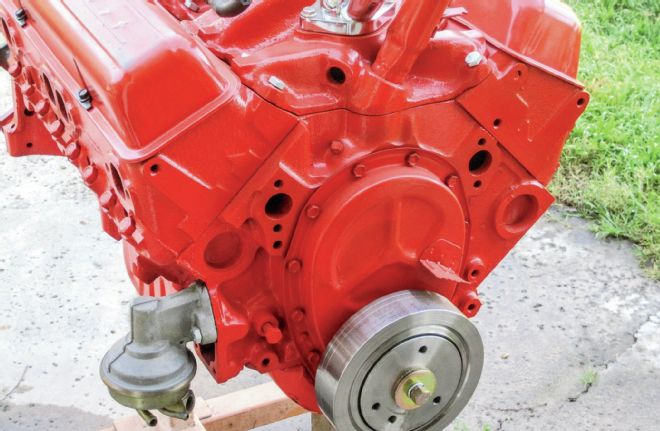
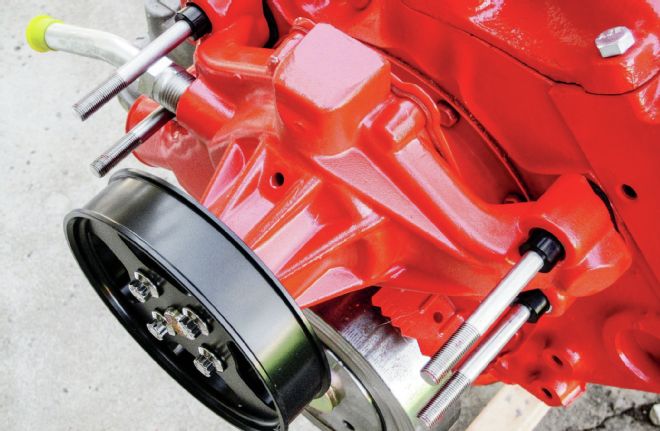
02 Since the SBC in question was sitting on my engine stand getting started was simple, I just began by removing the stock water pump so it could be replaced with the Stewart aluminum pump that is part of the Front Runner system. Speaking of the Stewart pump, it's important to note that it is designed without an internal bypass. This means you've either got to use a Stewart High Performance thermostat or drill three 3⁄16-inch bypass holes in the existing thermostat.
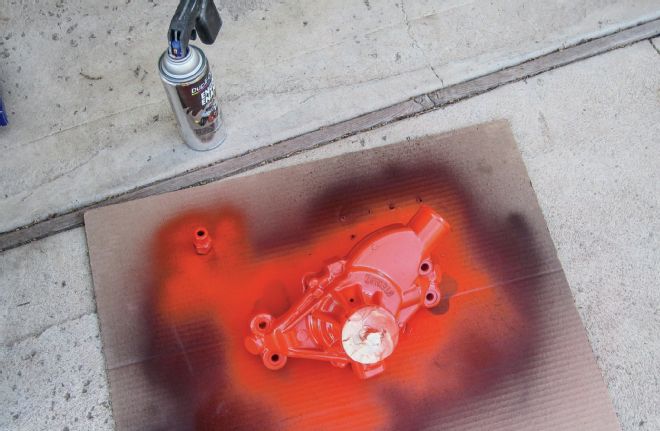
03 Since the small-block had been finished in traditional Chevy Orange I prepped and painted the new water pump to match.
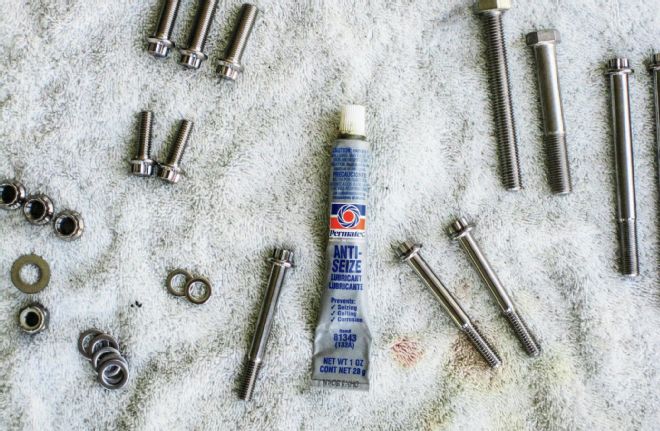
04 As I mentioned earlier, Vintage Air supplies top-quality ARP stainless hardware as part of the system. This means antiseize compound must be used on all threads to prevent galling caused by dissimilar metals reacting to each other. I'd also recommend you match all hardware to the supplied list so you don't get to any point and find out you're missing a key piece of hardware.
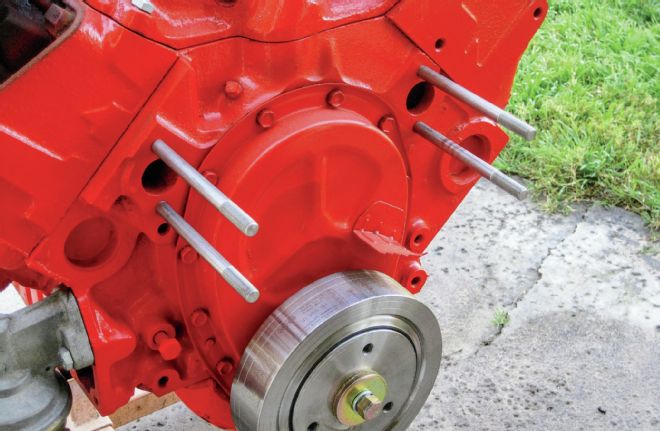
05 With the stock water pump removed and the hardware double checked to make sure everything I needed was there I located the four pump mounting studs. The studs thread into the block coarse end first. Remember to apply a small bead of silicone sealer to the block sides of the studs before installing them. The studs go in so each protrudes 45⁄8-inches from the face of the block.
06 Once the new Stewart pump was dry enough to handle I slid it onto the mounting studs.
07 I then went ahead and installed the supplied 5⁄8-inch heater hose fitting into the new pump and attached the water pump pulley using the stainless 12-point bolts.
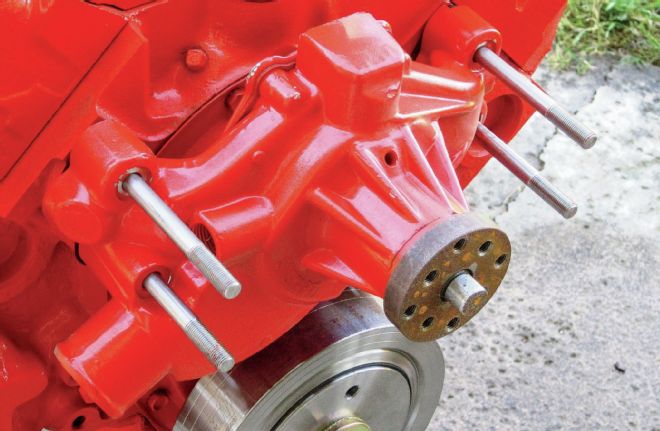
08 Next I located and slid the four main bracket spacers onto the four water pump mounting studs.
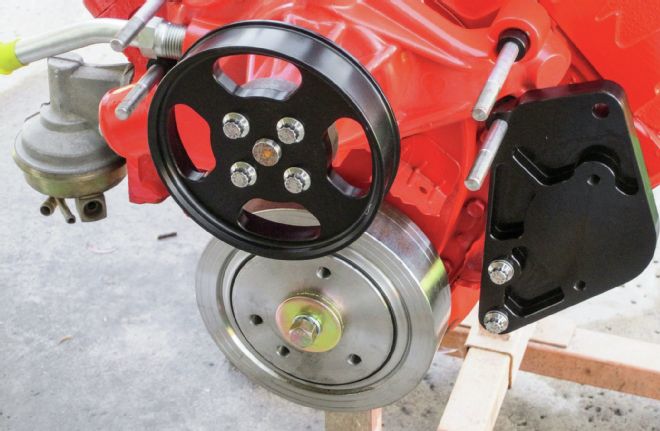
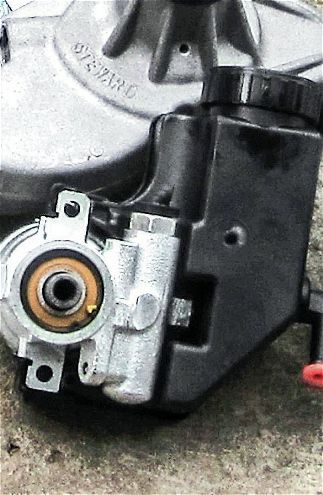
09 Then I located the power steering pump bracket, bolts, washers, and the two bracket standoff spacers. I slid the power steering pump bracket over the lower left-side pump stud and then slid each mounting bolt through the bracket and standoff spacers and threaded them into the block.
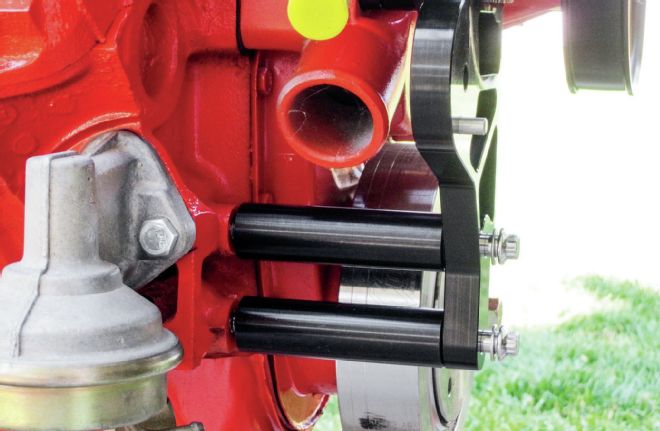
10 This side view of the engine and pump bracket shows how the spacers hold the bracket out away from the lower block so the lower part of the bracket is perpendicular to the upper mounting area (at the lower left hand water pump mounting stud and spacer). The power steering bracket is then held at the bottom via a pair of 3⁄8-16x21⁄2-inch 12-point bolts.
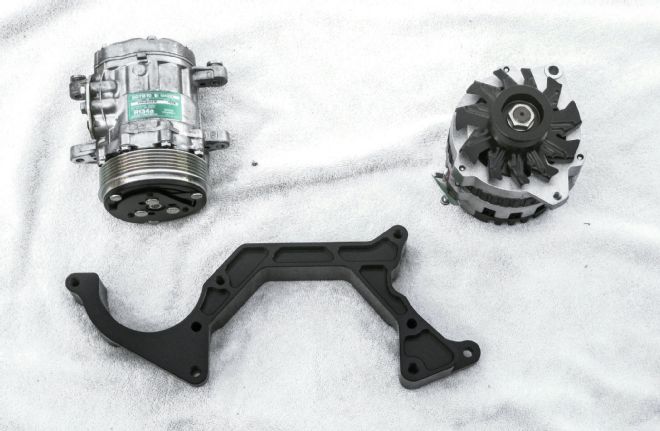
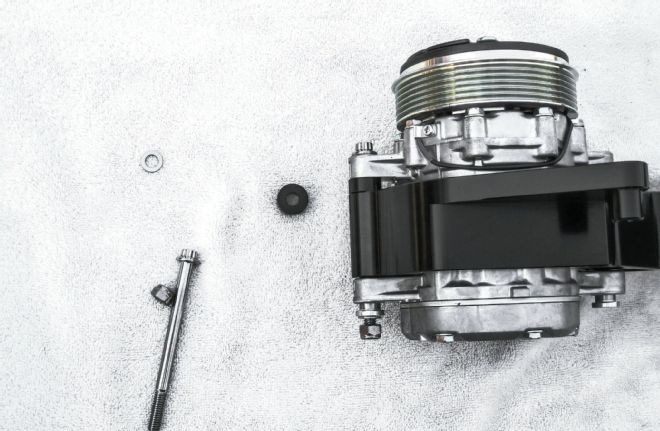
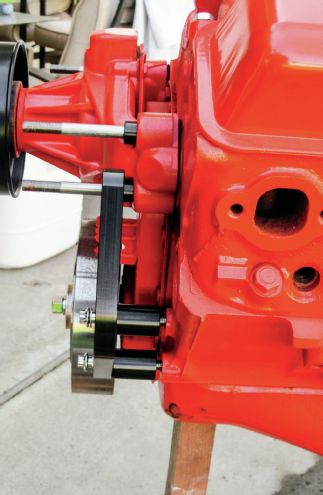
11-12 With the pump bracket in place I then moved on to the next step which is mounting the A/C compressor to the main bracket assembly. The compressor is mounted to the bracket using two (provided) spacers—one between the main bracket and the compressor's upper rear mounting ear and one between the bracket and the compressor's lower rear mounting ear. With the spacers in place the compressor is bolted to the bracket using two 5⁄16-18x41⁄2-inch 12-point stainless bolts, washers, and 5⁄16-inch Nylok nuts (Note: the compressor is fitted with press-fit bushings in the rear mounting ears. The compressor will fit a bit loosely until the bolts are tightened.).
13 The alternator uses one spacer and one 8mm 12-point bolt and washer at the top mounting ear.
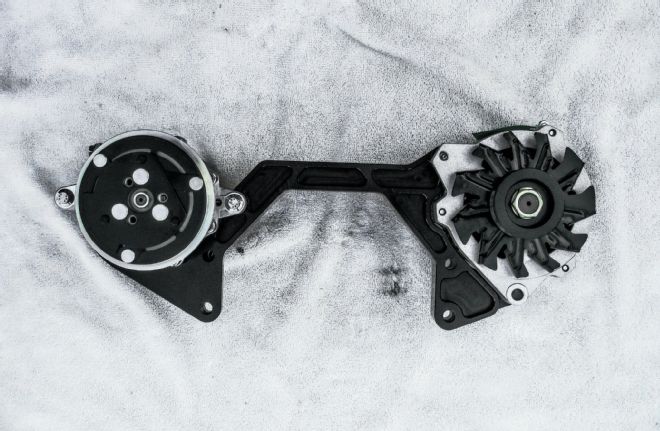
14-15 Next, the Front Runner main bracket, pump, and alternator assembly is mounted to the engine. Slide the assembly over the water pump mounting studs and then secure the left (driver) side of the assembly using two 3⁄8-24 12-point nuts and washers. Next, secure the lower alternator to the power steering bracket using a 3⁄8-24x4-inch 12-point bolt, washer, and 3⁄8-24 Nylok nut. As a reminder, don't forget to use the antiseize on all threads, you'll be sorry if you don't.
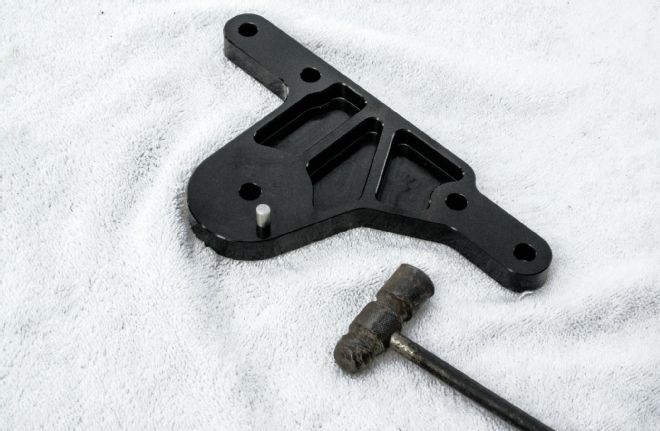
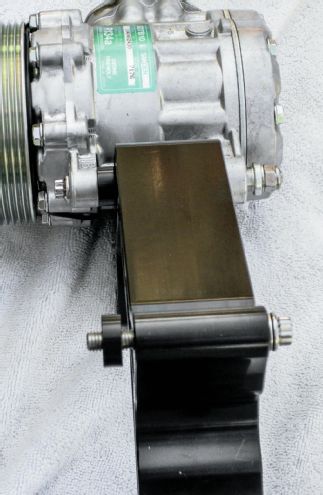
16 The belt tensioner bracket is the next item on the agenda. First you need to install the supplied dowel pin in the locating hole of the tensioner bracket as shown. The dowel pin is a press fit so I used a small hammer (that my pop made in high school metal shop back in the late '40s by the way) to carefully tap the pin into the locating hole.
17-18 The tensioner bracket is slid onto the two passenger (right hand) side water pump studs and is held in place with two 3⁄8-24 12-point nuts and washers. The lower two mounting holes are then fitted with the two tensioner bracket standoff spacers and secured to the engine block with two 3⁄8-16x43⁄4-inch bolts and washers.
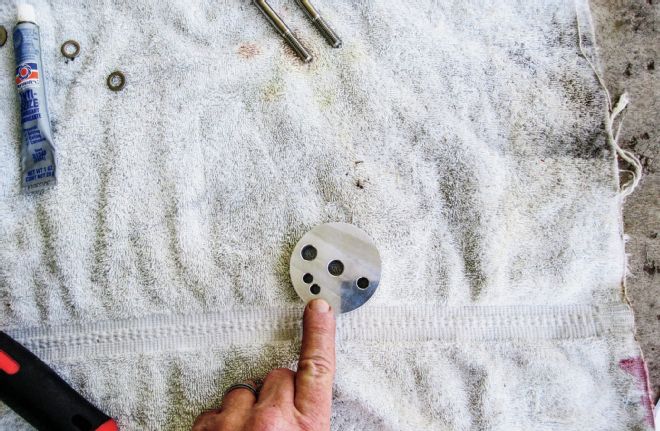
19 I then located the tensioner spacer and chose the hole in it that is used to locate the tensioner for use with power steering.

20 The Front Runner kit comes with a tensioner cover assembly too. I opened up the cover package and read and followed the included instructions that show how to install the captured nut used to hold the cover to the tensioner.
21 Next, I grabbed the tensioner and fitted the machined aluminum spacer to its backside, and installed the tensioner with spacer to the tensioner bracket (note: see the instruction sheet for a reminder of which spacer hole is used to accept the dowel pin that had been fitted to the tensioner bracket earlier). Next, secure the tensioner/spacer assembly to the bracket using the supplied bolt, washer, and Nylok nut.
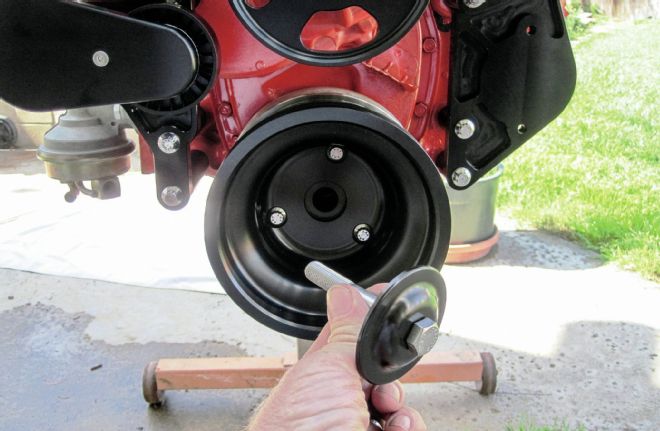
22 After installing the tensioner it was on to the crank pulley. The pulley is installed in the same manner as any conventional V-belt pulley; remember that antiseize!
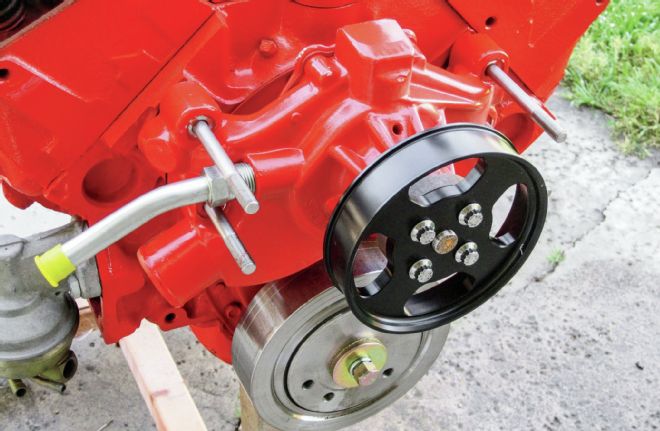
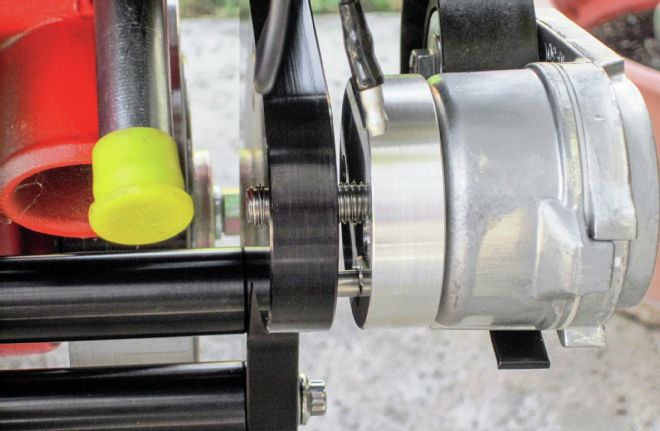
23 The power steering pump assembly comes next. The pump is held to its bracket using two 5⁄16-24x3-inch 12-point bolts and washers. I used a pulley installation tool to attach the pulley to the new pump. It's very important to use the proper tool to install the pulley. Note, attempting to hammer or press on the pulley will more than likely destroy the pump — always use the correct tool for the job (K-D Tool # 2897 or equivalent).

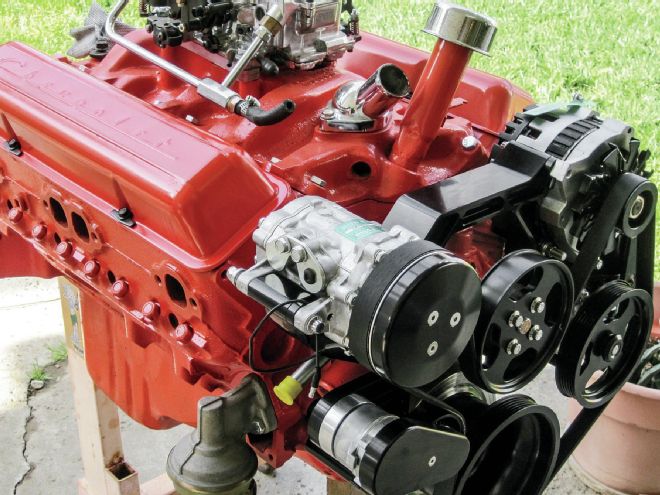
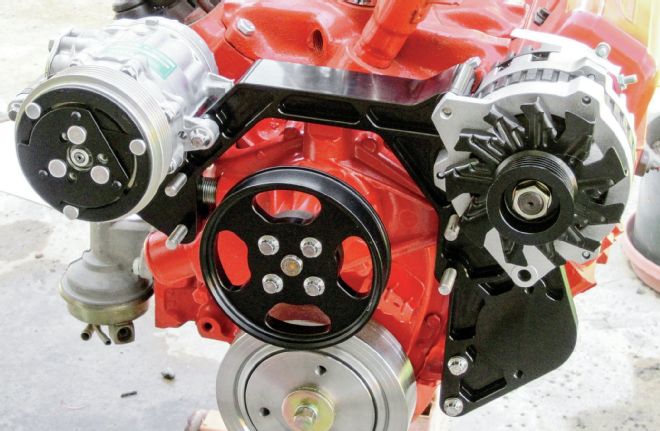
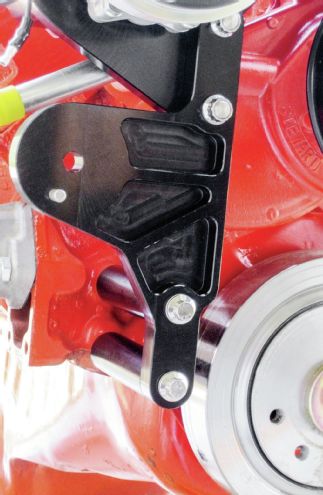
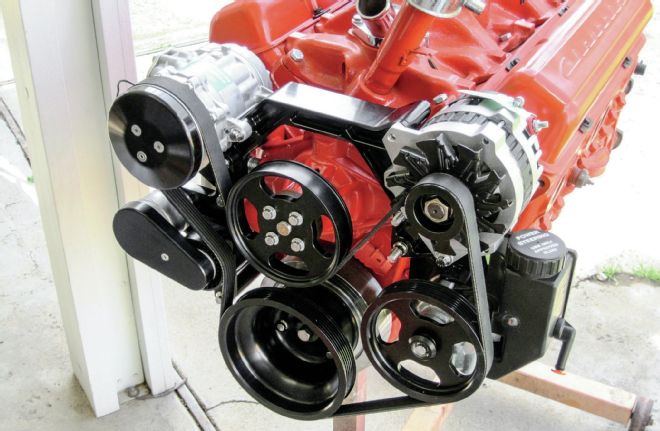
24 With the power steering pump mounted and all the assembly hardware tightened and double checked the job is just about complete. I'm happy I chose to go with the black powdercoated version of the Front Runner. It goes well with the OEM-style, traditional look I've always been partial to.
25 The final step was to install the belt. Insert a 1⁄2-inch drive ratchet into the square socket in the tensioner and rotate it clockwise until it stops. Route the belt around the crank pulley, power steering pulley, alternator pulley, and over the compressor pulley. Then pull the belt downward and slide it under the water pump pulley last, and then release the pressure on the ratchet and tensioner. And that's it. Installing Vintage Air's Front Runner is an easy and rewarding chore. The system looks great and works even better!