When Classic Trucks Tech Center Manager Jason Scudellari showed up to work one Monday morning all smiles, I knew something was up. When he told me that he scored something at the Pomona Swap Meet, I was even more suspicious. Turns out, Jason was able to score a Tremec T56 transmission for his LS-powered '56 Chevy pickup for a couple hundred bucks, which seemed like a pretty good deal and one Jason was obviously proud of. His elation quickly soured when I told him that it wouldn't work behind his LS engine. "That transmission will only bolt up to a Hemi," was my response.
I let him pout for a day or two before fellow magazine guy Steve Rupp and I put him in touch with the crew at Anaheim Gear. Specializing in all things gear related, we knew they could straighten out Jason's Mopar trans, identify and remove the ½-inch steel adapter plate, and get it to happily bolt up to his 500hp LS engine. Turned out the Viper transmission was adapted to mount behind a Gen-I small-block Chevy, using a modified adapter plate to mate to a standard bellhousing. Anaheim Gear promptly removed the adapter plate, midplate, and input shaft, replacing them with LS-friendly components. When it was all said and done, Jason had himself an LS-compatible Viper T56 transmission.
With the gearbox sorted, it was time to decide on the clutch components. For that end, Jason turned to McLeod Racing, who recommended their RXT line of twin-disc clutches, a perfect blend of high-power capabilities combined with streetable attributes thanks to the metallic-lined clutch discs that provide smooth engagement with a soft pedal effort. The RXT kit includes a pair of organic friction discs, pressure plate, floater plate, adapter ring, and pilot tool. To actuate the clutch, McLeod recommended their 1300-Series Hydraulic Throwout Bearing, which features a threaded boss that attaches to the transmission, allowing for perfect engagement adjustability. The hydraulic setup eliminates the need to fabricate a complex clutch linkage arrangement and makes for an extremely reliable system once properly setup and bled.
To mate the Chevy engine, Viper transmission and Ford rearend, Jason sent off his specs to the guys at Inland Empire Driveline Service so that a bulletproof driveshaft could be fabricated. Using custom drawn 6061-T6 DOM aluminum 4-inch tubing, the crew at IEDLS installed the correct yokes at either end, welded up the assembly, and then balanced it to perfection. By having their products pass Spicer's grueling dynamic reverse torsion testing and being one of only a handful of Spicer-authorized aluminum driveshaft builders in the world, suffice to say that Inland Empire Driveline Service knows how to build a strong and reliable driveshaft.
After the initial sticker shock (cheap!), subsequent depression (incompatible!), and final satisfaction (installed!), I think Jason's task of figuring out how to make the Viper trans paid off in dividends and hopefully might help someone else score a transmission of unknown origin for a deal as well!
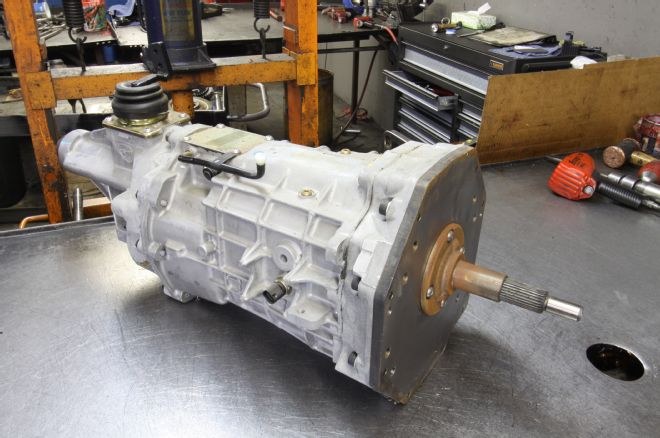
01 Jason purchased the Viper T56 Tremec trans for a song at a local swap meet in the hopes that it would mate to his LS engine. Unfortunately, at some point in the not-so-distant past, it had been equipped with an unidentified adapter plate that prevented it from directly bolting up.
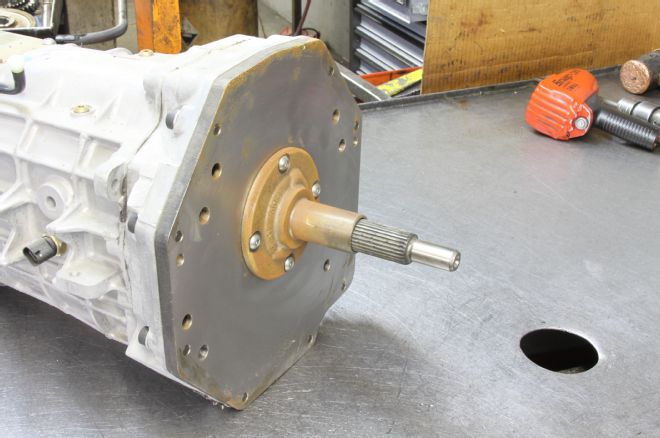
02 Further investigation turned out the plate as well as the midplate, input shaft and support, was an adaptation to fit a Gen-I small-block Chevy.
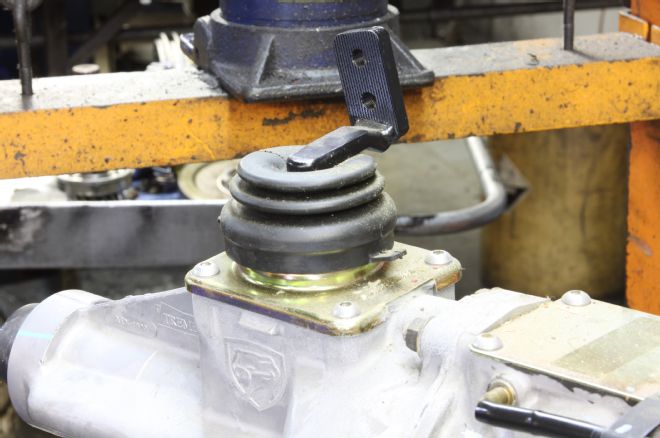
03 The dead giveaway of the Viper trans is the logo on the tailshaft housing's shifter tower.
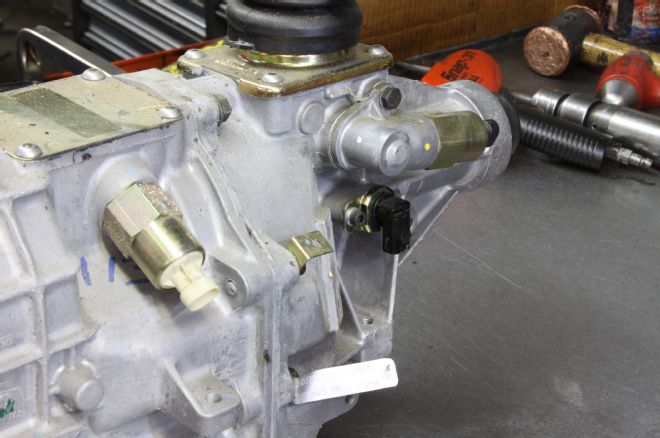
04 There are three items on the driver side of the T56 Viper trans that need to be noted (from left): the skip shift solenoid, reverse lockout solenoid, and the vehicle speed sensor. The skip shift solenoid is a standard issue device added to a number of T56-equipped vehicles that prevents the standard 1-2-3-4 shift pattern. Instead, the solenoid prevents the shifter from engaging either first or second gear, causing the driver to shift directly from first to fourth gear in an effort to improve fuel economy under partial throttle situations. Under heavier throttle input, the computer disengages the solenoid and the standard 1-2-3-4 shift pattern can be used. For our application, the skip shift sensor will simply be left in place and not connected, though a plug could be fashioned to replace it if space is an issue. The reverse lockout solenoid is designed to prevent accidental shifts from fourth to reverse. It operates by "blocking" the selection of the reverse gear unless a 12V signal is applied to the solenoid, preventing accidental shifts into reverse. Without a 12V input, reverse gear may be hard to shift into, depending on application. Jason found that shifting into reverse was not problematic, therefore negating any reason to wire up the solenoid. Your results may vary. The vehicle speed sensor sends an electronic signal from the transmission to the vehicle's speedometer to display the vehicle's speed. The Viper trans uses a different speed sensor that its GM counterpart, so interchangeability can be an issue. For Jason's application, he'll be using a GPS-based speedo, so the Tremec speed sensor is another unused sensor.
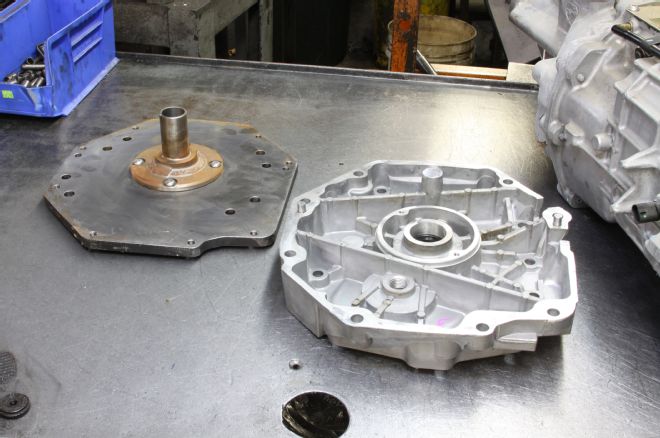
05 To mount the Viper trans behind Jason's LS1, we need to not only remove the 1/2-inch steel adapter plate and input shaft support collar, but also the midplate, replacing it with the standard T56 midplate pictured here. For this end, we took the T56 down to Anaheim Gear where the guys swapped out the Gen I components for the proper LS items.
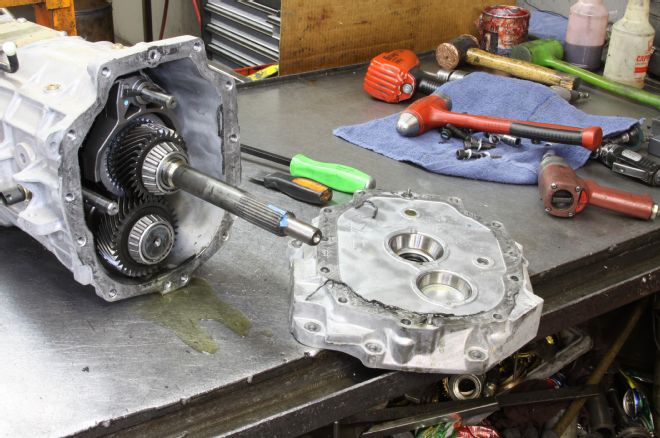
06 With the midplate removed and set aside, the input shaft can now be removed.
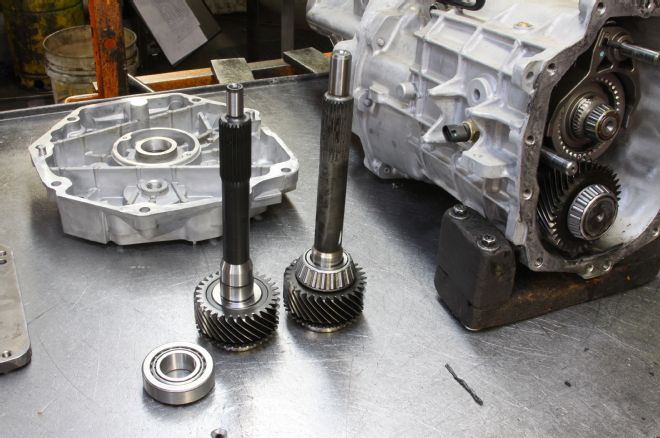
07 A side-by-side comparison shows the difference in length, diameter, and spline count between the LS version (left) and the small-block adaptation.
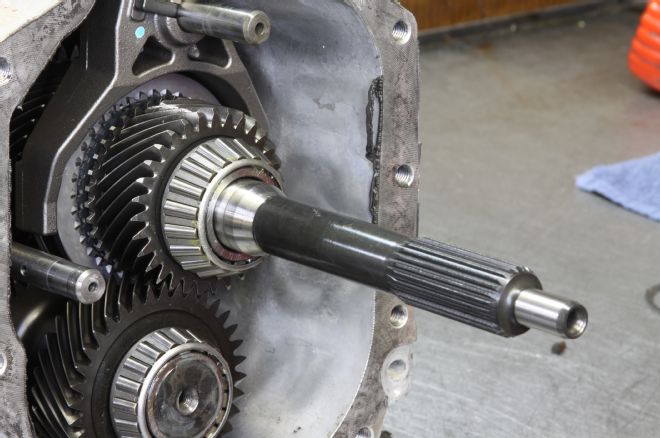
08 The new LS input shaft in place, the Viper trans is ready to be bolted back up.
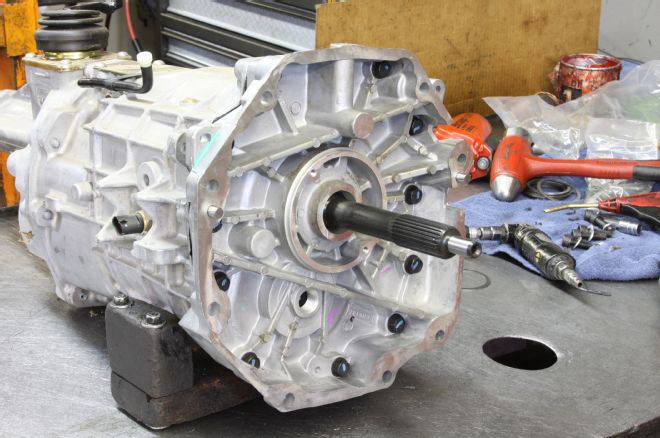
09 The new LS mid plate allows the Viper T56 to bolt directly to an LS bellhousing without using an adapter plate.
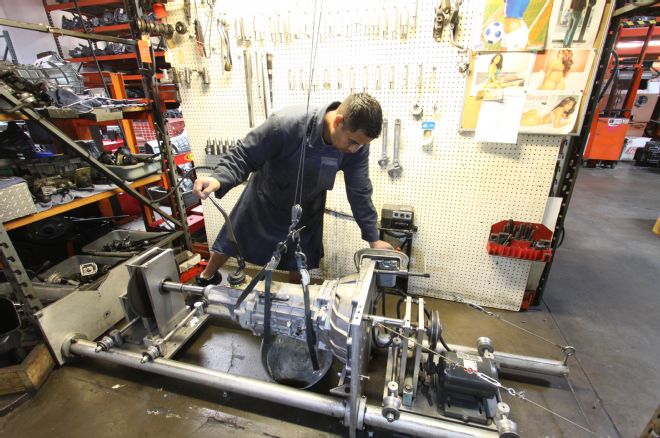
10 Before any trans leaves the facility, it's given a thorough testing on Anaheim Gear's transmission dynamometer, where it's checked for proper shifting and smooth operation.
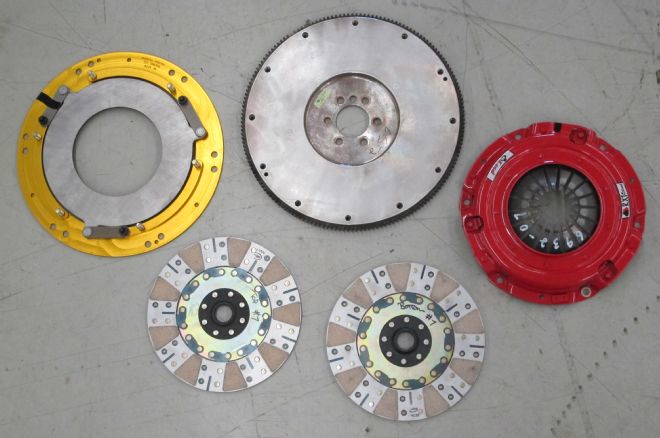
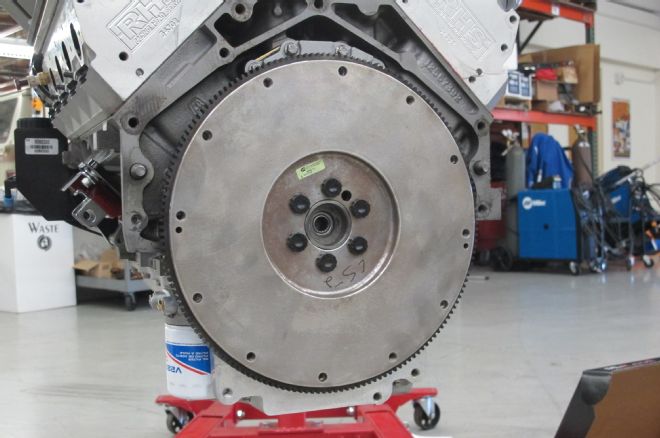
11 Back at the coalmine, Jason laid out the clutch components, straight from McLeod Racing. Jason spoke with one of McLeod's tech guys who recommended their RXT Street Twin Disc Clutch and pressure plate setup (#6932-07) to better handle the 551 horsepower that the 383ci LS is putting out. Though the RXT Street clutch can handle upwards of 1,000 horsepower, it doesn't require a fancy flywheel, which means the stock LS unit would be just fine, provided the surface is acceptable. Jason didn't have a flywheel so he opted to use a new CNC billet steel unit (#460530) from McLeod to complete a combination capable of handling any power-adder Jason might through at the LS engine.
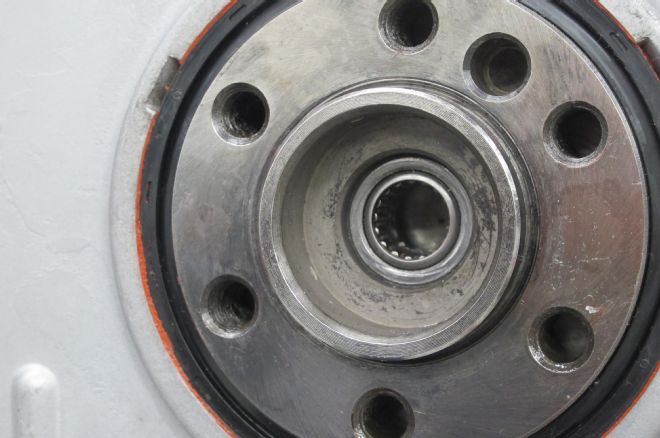
12 To support the input shaft at the flywheel, a roller pilot bearing is used, inserted in the pilot hole of the crank flange.
13 ARP fasteners are used to attach the zero-balance flywheel to the LS crank, torqued to spec. Note that Jason's McLeod flywheel meets current SFI specs for a street application.
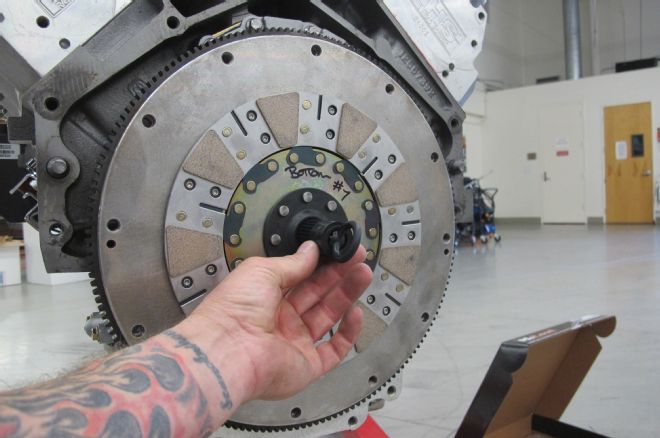
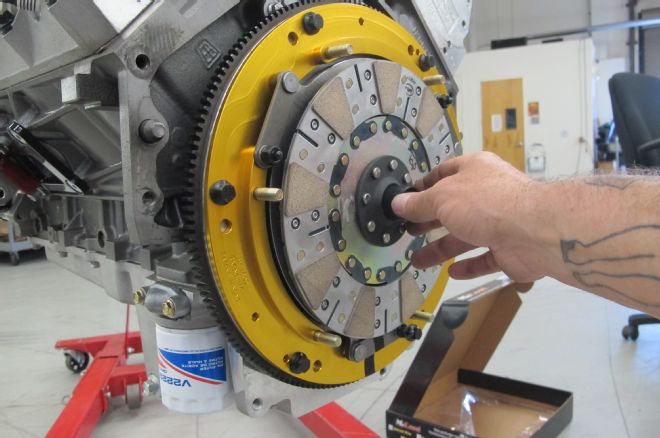
14 Using a clutch alignment tool, Jason assembles the bottom clutch disc...
15 ...followed by the adapter ring and floater plate. ARP hardware is used once again to attach the adapter ring to the flywheel.
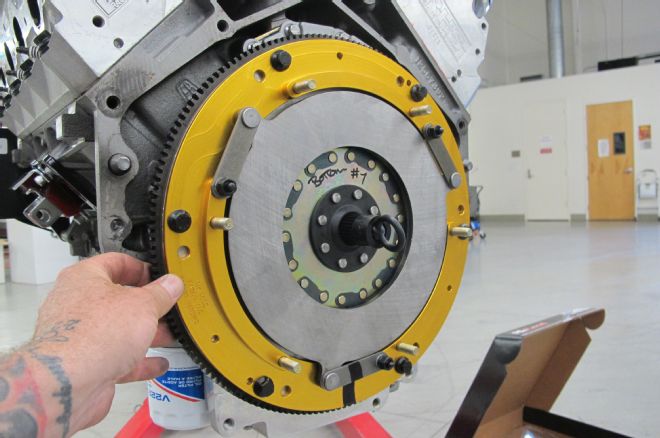
16 Next the top clutch disc is installed...
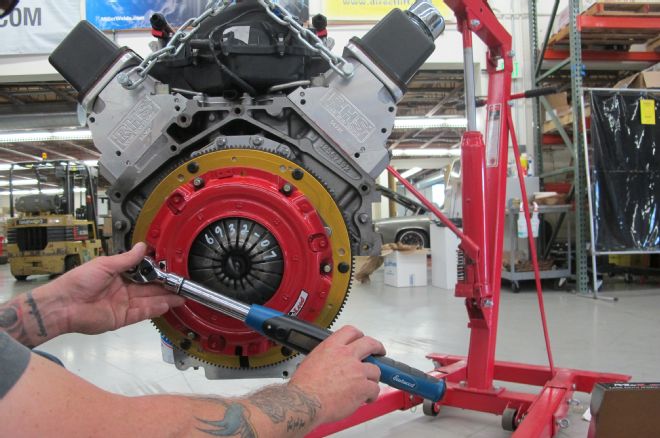
17 ...followed by the pressure plate, again torqued to McLeod's specs using ARP fasteners. Note that the clutch alignment tool isn't removed until the pressure plate is securely fastened to the flywheel.
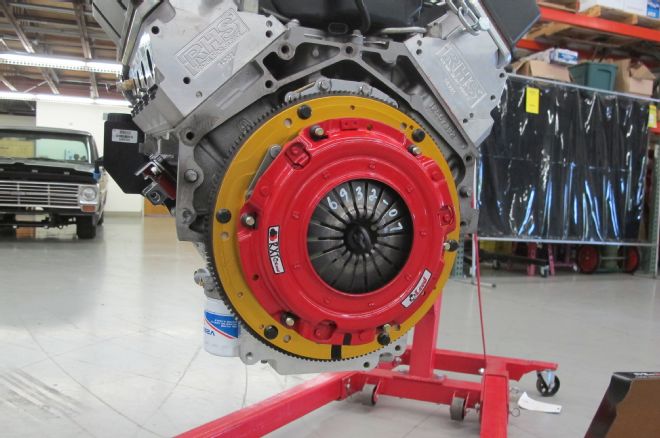
18 The finished assembly is more than able to handle the LS engine's horsepower output, yet smooth enough to provide a soft pedal effort for the street.
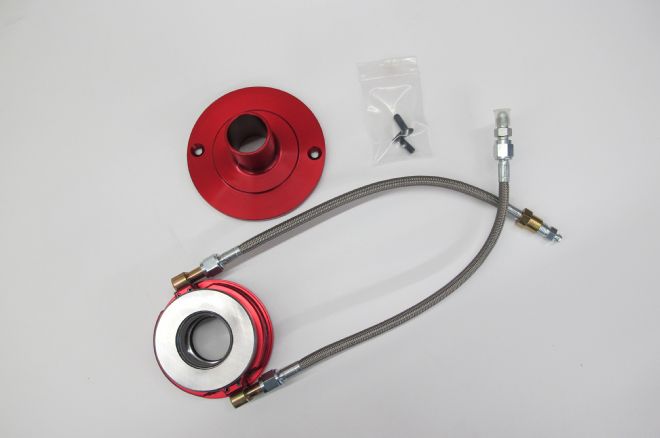
19 The last piece of the puzzle before he mates the new Viper T56 trans to the LS engine is to sort out the hydraulic throwout bearing. McLeod offers a number of different height configurations that cover a variety of applications, but it all boils down to two different bearings, depending on the distance between the surface of the bellhousing and the pressure plate fingers.
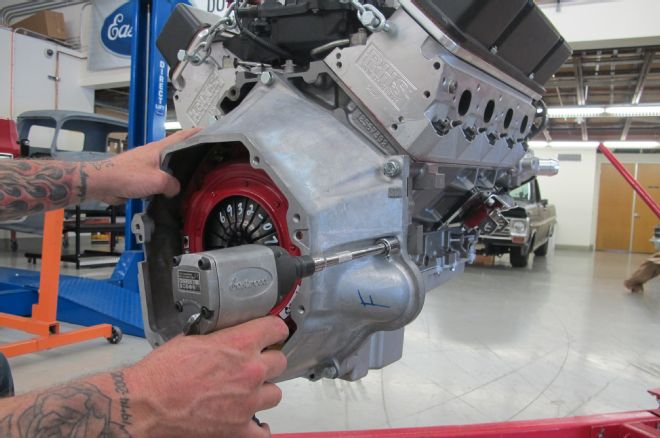
20 To determine this, the bellhousing needs to be installed as well as the entire clutch package (which was just completed).
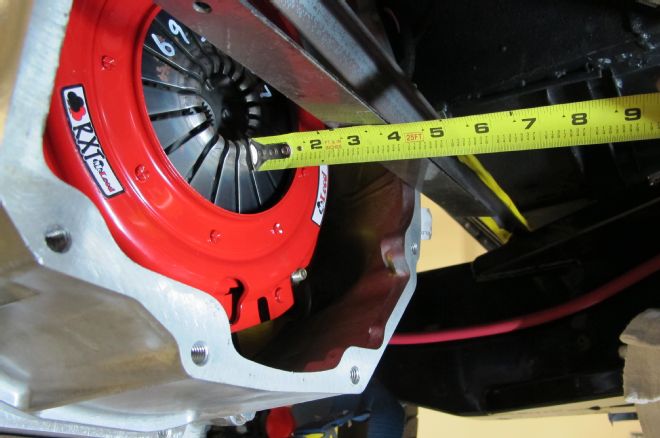
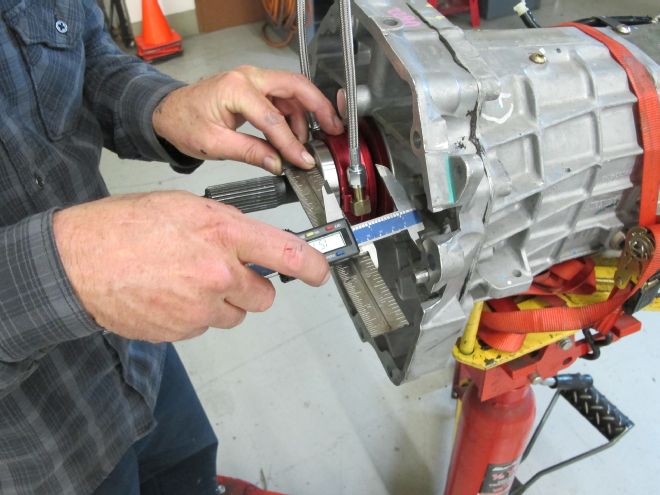
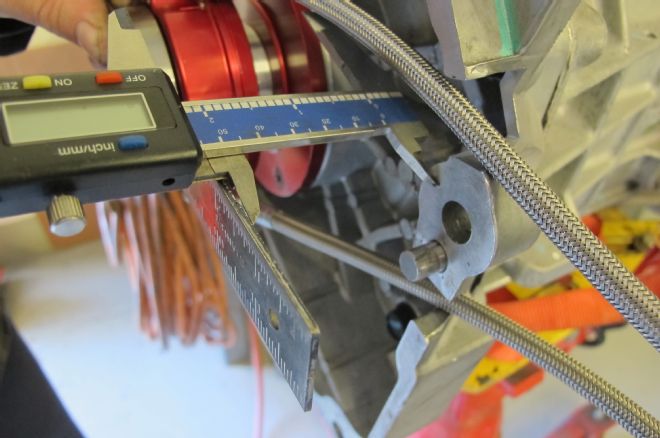
21 Then, the "A" dimension can be determined by measuring the aforementioned distance between the bellhousing flange and the fingers of the pressure plate. The distance on Jason's setup is 2 3/8- or 2.375-inches, which requires the use of a McLeod 1300 series bolt-on throwout bearing (an "A" measurement under 3 inches).
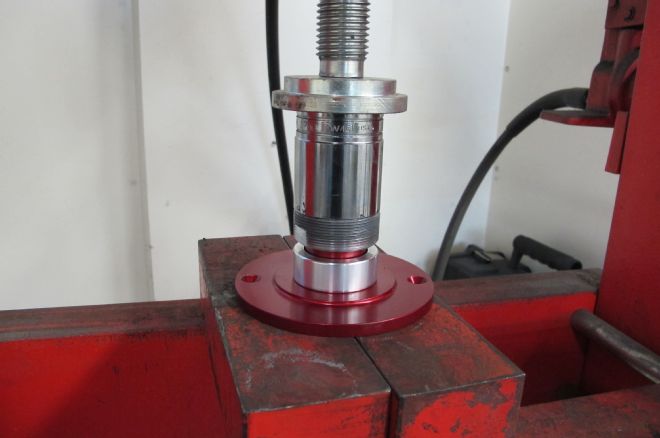
22 For the T56 setup, a spacer is pressed onto the new input shaft collar that will bolt to the transmission, followed by a threaded collar.
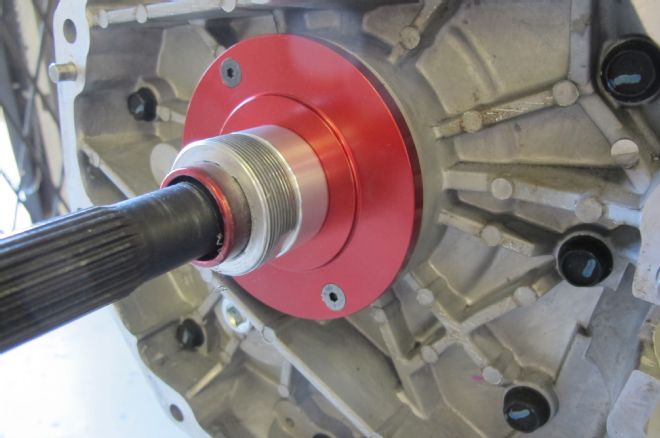
23 This collar assembly is then installed onto the T56 transmission using the two threaded bosses on the midplate.
24 Next, the throwout bearing is threaded onto the collar so that the "B" measurement can be made. This is the distance between the surface of the transmission mounting flange and the "front" of the bearing. With a "B" measurement of 2 inches, Jason subtracts that from the "A" dimension for a total clearance of 0.375-inches. McLeod recommends 0.100-0.150-inch clearance, so the bearing needs to be brought out a few thou toward the transmission mounting surface. Thankfully, McLeod has designed some adjustment into the threaded collar, with each full rotation yielding 0.060-inch bearing movement. So, by completing four counterclockwise rotations, the collar can be move outward 0.240-inch, bringing the clearance to 0.135-inch, well within the aforementioned spec.
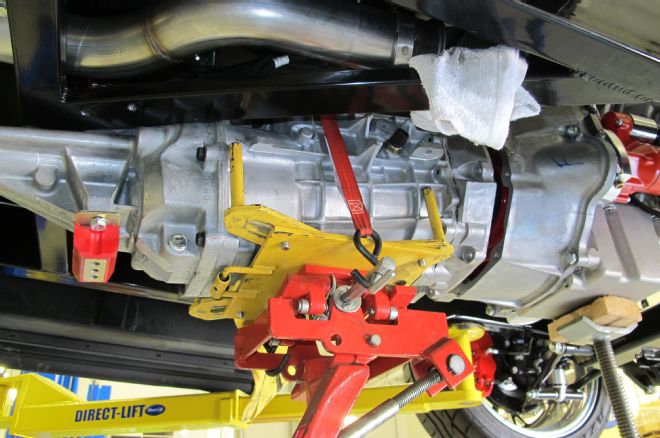
25 With the throwout bearing dialed in, it was finally time to mate the Viper T56 with the LS engine.
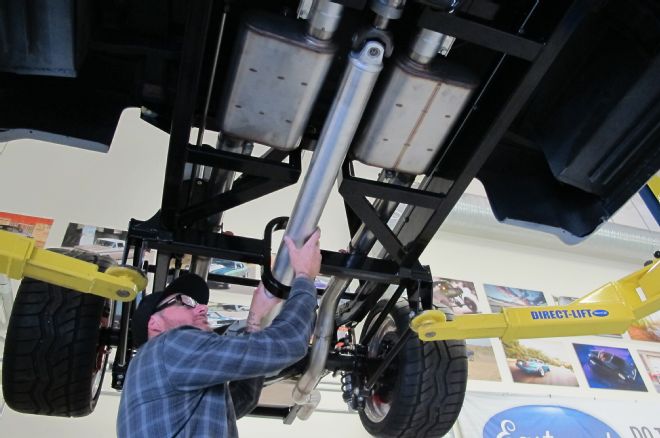
26 The Viper T56 uses a different output shaft than its GM counterpart (30 spline as opposed to 27), which is worth noting if you're planning on using GM components. Jason's truck required a custom built, aluminum driveshaft fabricated by Inland Empire Driveline Service so it was easy to facilitate the necessary yoke requirements. The 4-inch tube mates the Viper trans to a 9-inch Ford rearend; a true hot rod Bow Tie build!