
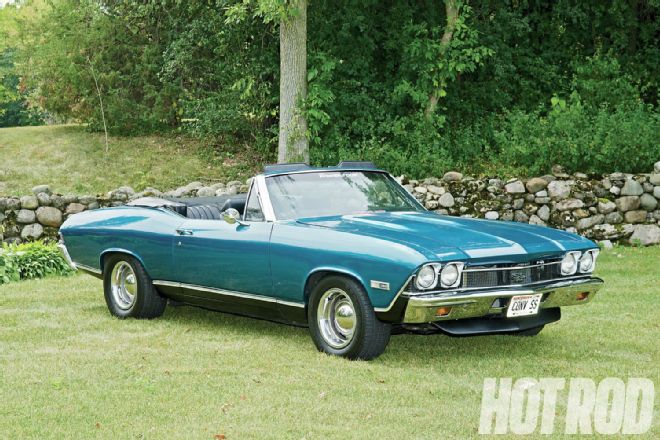
The Combo
Greg Miller has owned his ’68 Chevelle SS for more than 20 years. Backed up by a Tremec TKO-600 five-speed overdrive manual trans and 3.42:1 geared 12-bolt Posi rearend, the car’s latest engine--a balanced and blueprinted, 9.5:1, 0.030-over 396--currently sports Edelbrock aluminum Performer RPM oval-port heads and a Comp Cams XR282HR Extreme Energy hydraulic-roller cam (0.521/0.540-inch lift with Harland Sharp 1.7:1 roller rockers, 236/242 degrees duration at 0.050, 110-degree LSA). ACCEL’s rendition of the large-cap GM HEI breakerless noncomputer distributor enhanced by an ACCEL in-cap Super Coil light the spark; full-length Jet Hot–coated headers (1¾-inch primaries into 3-inch collectors), dual 2½ pipes, and generic turbo mufflers exhaust it. Originally, the motor was fueled via an engine-mounted mechanical fuel pump, a 750-cfm Holley double-pumper carb, and an Edelbrock Performer Air-Gap intake. Miller, who uses the car mainly for road trips and cruising, says this combo performed to his satisfaction.
The Problem
On the ’10 HOT ROD Power Tour®, Miller won a free Holley Avenger four-barrel throttle-body injection (TBI) system. “We put it on the following winter,” related Miller. “Everything seemed to work OK at first. In early June 2011, we left our Verona, Wisconsin, home to cruise down to Cocoa Beach, Florida, for that year’s Power Tour®. South of Nashville, it got hot: The ambient air temperature was 90 degrees and rising, with lots of Southern humidity. After gassing up, cruising down the freeway, the motor started to sputter and miss--then it just quit. I’d wait 20 minutes, the car would cool down, then it would fire right up and go. I could run maybe another 20 minutes to a half hour, and the problem would recur. It got worse as the fuel level in the tank dropped. I was able to complete the Tour by keeping the tank over half full, plus stopping at a car wash to spray cold water on the tank, which was hot to the touch.”
When you have three to four things going on simultaneously, you can get lost in the forest.
Miller really wanted to keep the TBI setup. “When it did work, I had much better driveability. Even with an overdrive trans, I was getting maybe 13 mpg on the highway with the carb. When it was cool and the TBI was working, I saw 19–20 mpg. That was with the system automatically self-learning and self-tuning, plus the spark was still controlled by mechanical and vacuum advance.”
Over the next two years, Miller tried a bunch of things to address what he perceived was a fuel-overheating issue: relocating Holley’s inline electric fuel pump closer to the fuel tank, lowering the pump’s mounting location so gravity could help prime it, rerouting the fuel lines away from heat sources, adding a return line back to the tank, putting a fuel cooler in the return line, insulating the lines, replacing the original fuel tank, installing a new fuel tank sending unit, and placing new canister-style fuel filters on each side of the fuel pump. Nothing helped.
Fortunately, Verona, Wisconsin, is only about 1½ hours away from our favorite northern Chicago-area rescue facility, Norm Brandes’ Westech Automotive in Silver Lake, Wisconsin.
 Running the car on Westech’s Mustang chassis dyno revealed several problems: red-hot headers indicative of a badly-tuned engine or even a possible mechanical problem; poorly routed fuel lines close to exhaust-heat sources; an unnecessary fuel filter on the inline electric pump’s suction side that lowered the fuel’s boiling point; a fuel cooler installed on the return line that did nothing because it was mounted parallel to the frame adjacent to a hot muffler; and undersize, poorly routed fuel pump feed-wiring.
The Diagnosis
When the car sputtered into the shop under its own power, Brandes put it on the rack and inspected the fuel-supply system. Right off the bat, he observed several deficiencies:
The longer the car was driven, the worse the problem became. Fuel temperatures increase in inverse proportion to the total amount of fuel remaining in the system. With a full 20-gallon tank, the entire system’s fuel quantity recirculates about four to six times per hour; when the tank is half full, the number of recirculation cycles doubles. With at least twice the heat exposure on one hand, and ever less fuel remaining in-tank to dissipate the heat on the other, fuel temps can go off the scale.
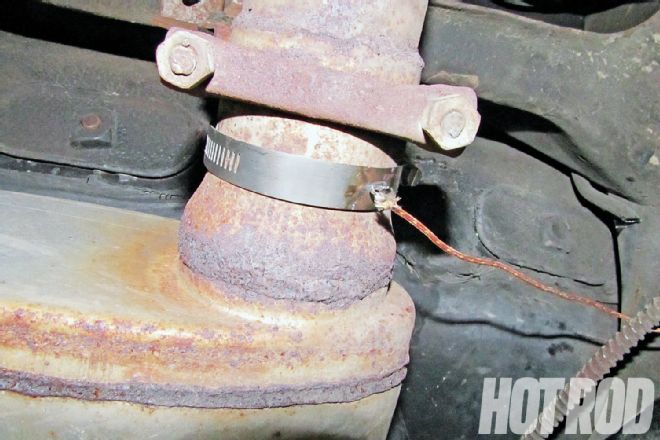 Westech installed thermocouples at various critical points to monitor actual temperatures as changes were implemented. For example, this thermocouple monitors muffler temperatures. Heat guns were also used liberally. The thermocouples connected to a digital readout display.
How hot is too hot? According to Rockett Racing Fuels’ Tim Wusz, “depending on the various components in the particular formulation, gasoline boils at anywhere from 100–400 degrees.” The entire amount doesn’t vaporize all at once. Think of what happens when boiling a kettle of water: When the water in the kettle gets hot, it starts bubbling and giving off steam. The bubbles are where individual clumps of water molecules have begun to vaporize, but overall, most molecules are cooler, still in their liquid state (if they weren’t the entire volume of water in the kettle would instantly evaporate).
As applied to gasoline driveability in the real world, Wusz says generally 130 degrees is the crossover point where you start to have serious problems--enough to form localized vapor pockets that can cause fuel-pump cavitation and intermittent driveability problems, especially as the tank’s fuel level drops. By 140 degrees the car is totally undriveable. On the other hand, problems can occur lower than 130 degrees. One example is if the car was filled up with winter-grade gas before being put into winter hibernation, then not driven until spring. “Winter-grade gas is more volatile,” explains Wusz. “Its Reid vapor pressure can be as high as 14 psi, compared to summer gas, which can be as low as 7 psi. Higher pressures are needed to aid winter starts, but in the summer, the winter gas vaporizes too easily.” Even assuming the correct, seasonally adjusted gasoline blend, Wusz recommends no more than 120-degree real-world fuel temps--but lower is always better.
 Boil, toil, and trouble: Initial as-received temperatures after running loaded on the dyno at 2,500 rpm for 20 minutes were through the roof (clockwise, from top left): fuel-tank temps at a dangerously high 137 degrees; mufflers, 338 degrees; ambient air temp in front of the radiator, 88 degrees; header primary pipes, 852 degrees.
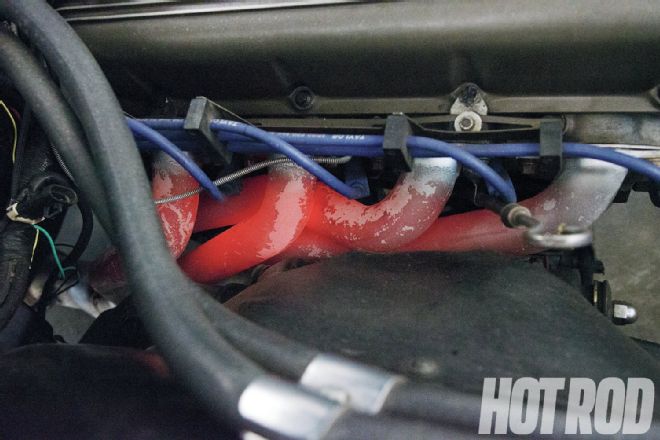
On Miller’s car, fuel heating was exasperated by unusually high exhaust temperatures: up to 875–900 degrees at the exhaust header flange near the engine, and still 330 degrees at the mufflers. Exhaust temperature is an indicator of engine inefficiency. It can signal too low a compression ratio, too big a cam, a mistuned engine, or even if combustion is occurring late or not at all, which pushes waste energy (heat) out the exhaust. Brandes judged that both the fuel system and engine calibration required a fix, but he elected to get the Rube Goldberg–like fuel-supply system sorted out first before attempting serious baseline tuning on the engine management side of the equation.
The Fix: Fuel Tank and Pump
A traditional inline, vane-style pump requires priming. That creates a suction force, generating undesirable vacuum. High-efficiency turbine pumps, similar to those used on new cars, perform better--but require in-tank mounting. Yet immersing the pump inside the tank’s fuel creates a whole bunch of advantages in its own right. With the in-tank’s pickup positioned near the tank floor, it’s subject to positive pressure generated by the weight of the entire fuel column pressing down on it. Positive pressure on the pump’s inlet side behaves the opposite of suction or vacuum; just like a radiator pressure crop, it raises the boiling point of the fluid medium, decreasing the chances of vapor-lock at the pump.
When placed inside the tank (away from the exhaust system), the pump runs inherently cooler in its own right. By running cooler, there is less electrical resistance buildup, meaning less chance of efficiency-sapping electrical voltage drop, which again translates into more flow with less heat. And an in-tank pump runs much quieter, with the fuel in the tank serving as a noise insulator.
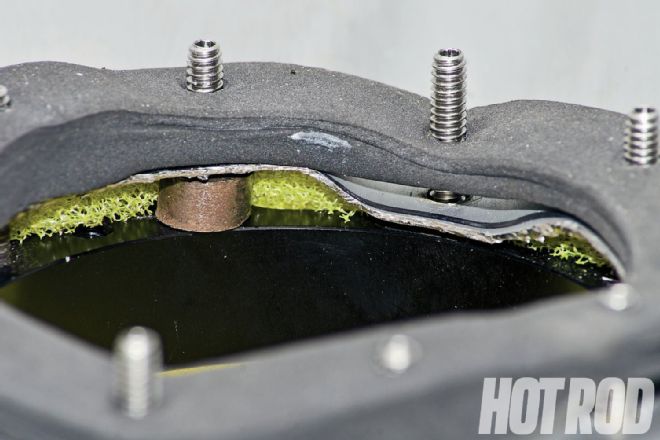
The only downside is you have to find a way to mount a pump in the tank. Retrofit installations used to mandate a new custom tank with sophisticated internal baffling to prevent fuel slosh from uncovering the pickup in higher-pressure EFI systems when the fuel level dropped too low. But now there’s a universal, less-expensive alternative: Aeromotive’s Phantom pump series that contains its own unique baffling system and fits inside most existing fuel tanks (end-user tank mods are needed for installation, see photos). The 340-liter-per-hour (lph) pump Aeromotive supplied for Miller’s Chevelle supports as much as 825 hp on a normally aspirated, 60-psi EFI system. With the proper regulator, it also supports low-pressure carbureted systems up to 1,000 hp.
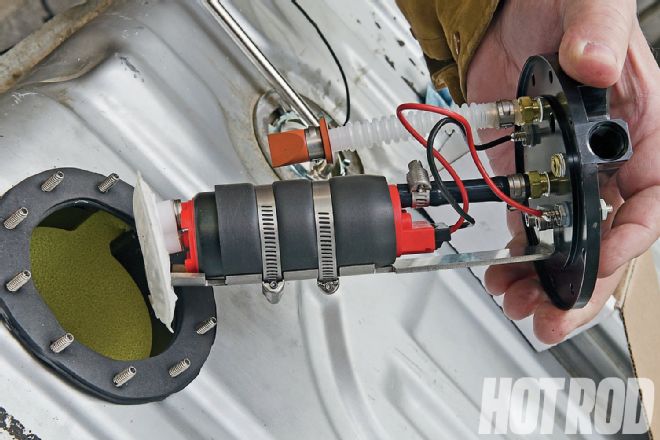 Aeromotive’s Phantom Stealth 340-lph in-tank turbine-style fuel pumps are more efficient and run cooler than old-school inline vane pumps. They work with most existing fuel tanks. Besides the pump, the self-contained, cartridge-like system contains its own baffles, prefilter, and outlet, return, and vent lines.
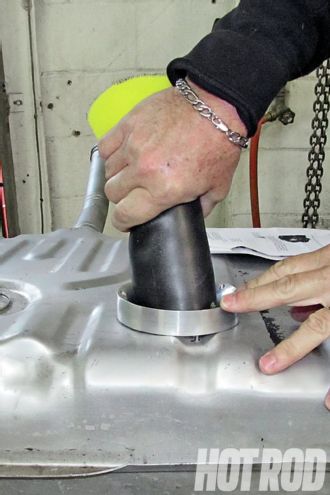
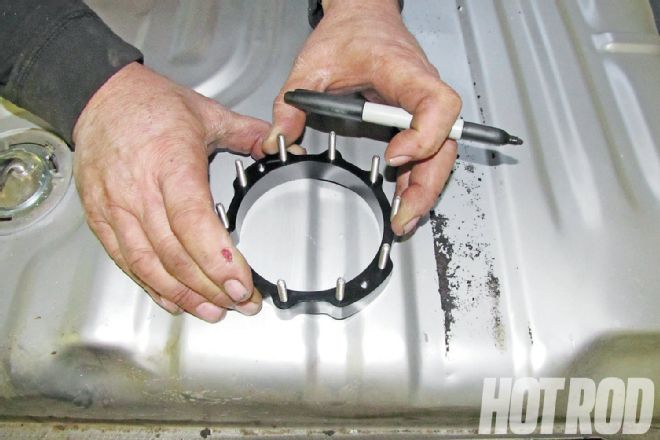 Mounting the pump requires cutting a 3¼-inch hole in the existing tank. The hole’s preferred location is in a relatively flat area over the tank’s deepest part, but away from the stock sending unit, filler neck, or any area that might contact the bottom of the vehicle framerails, supports, or floorpan. Use the fuel pump retainer ring as a template for scribing a drill-guide circle.
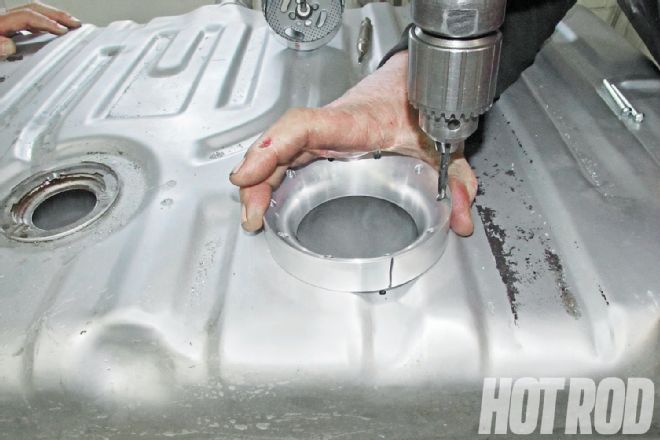
 Be sure to thoroughly drain the tank and wash it out with soap and water. Let it sit overnight so any remaining vapors evaporate. Drill a pilot hole at the center of the hole position, then use a 3¼-inch hole saw to drill out the complete hole.
 Index Aeromotive’s supplied installation ring template so none of its drill-guide holes align over the sides of a tank rib, then use the included No. 2 drill bit and drill through one of the ring’s bolt holes. Place one of the included No. 10-24 x 2½-inch screws in the drilled hole to help hold the index ring for further drilling. Repeat 180 degrees across from the first hole.
 With the installation ring still held in place by the first two alignment screws, drill the remaining eight holes using the template as a guide. Remove the installation ring and two alignment screws. Deburr as needed, then clean out any tank debris using a shop vacuum.
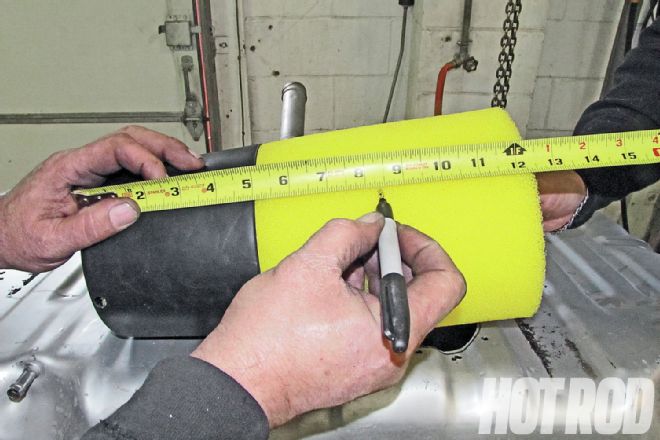 Measure the tank depth at the fuel pump location.
Transfer this dimension plus 1 inch to the foam baffle assembly, measuring up from the black rubber end.
Measure the tank depth at the fuel pump location.
Transfer this dimension plus 1 inch to the foam baffle assembly, measuring up from the black rubber end.
 Cut the foam baffle to the desired length. The goal is for the permeable foam baffle to seal tightly against the bottom of the tank. This forms a fuel pocket that prevents fuel slosh from uncovering the pump pickup under hard cornering or acceleration.
The Fix: Fuel Lines and Filter
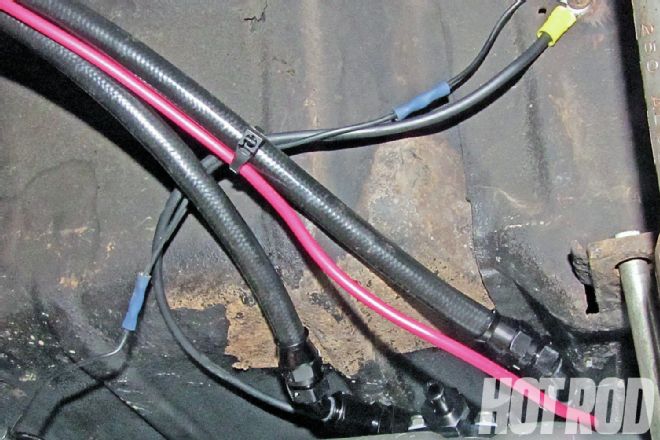
The next step was rerouting the fuel supply and return lines away from heat sources. An Aeromotive 10-micron fuel-filter set-up for O-ring boss (ORB) fittings was installed on the outside of the frame, on the pressure side downstream from the in-tank pump. The free-flowing filter can flow up to 2,000 lbs/hr with virtually zero flow restriction.
For the fuel lines, Westech chose a hose-based solution that downstream from the filter permitted snaking the lines inside the Chevelle convertible’s fully boxed frame. You can’t get any further away from heat than that: Now the frame itself becomes a heat shield. TechAFX supplied -6 AN hose and reusable fittings to accomplish this. But not just any generic hose and fittings: Traditional rubber-core hose is not happy with today’s street gas formulations; it rots from the inside out, with small pieces breaking loose and clogging sensitive fuel-injection nozzles. Plus, rubber has a finite shelf life; we didn’t want Miller to have to dig around, periodically replacing hose run through the inside of the frame. The solution was TechAFX’s Teflon-cored BlackWrap hose based on the latest, more flexible designs widely used on new cars. Teflon hose lasts forever and is impervious to today’s fuels. “BlackWrap” additionally adds a black antiabrasion protective cover over the usual stainless steel braid, just what’s needed to ease through-the-frame pass-through routing.
The in-tank pump, rerouted fuel lines, and low-restriction after-filter dropped fuel temps about 10 degrees, to a more manageable 120–125 degrees F. On the dyno, Brandes says “the car was idling better, but it was still not right.” Exhaust temps remained stubbornly high. And due to the high-fuel-temp-induced gremlins, the EFI system had never self-tuned properly. Time to look at the motor.
The Fix: Engine
Exercising due diligence, Brandes removed the spark plugs to perform a cranking-compression test. He found the plugs in the Edelbrock heads were too short. Westech cleaned out the heads’ inner carbon-fouled plug-threads and installed the proper ¾-inch-reach Champion plugs. As for the compression test itself, Brandes says “everything was normal--about 150 pounds across all cylinders--about right for a low-compression engine with a fairly large cam.”
Plugs changed, Brandes again tried to make some dyno runs. The idle was erratic and the engine backfired. Westech temporarily installed the shop’s “known-good” Quick Fuel carb in place of the TBI system. Idle improved but the full-throttle run was still “spiky” from just under 3,000 rpm on up. It was so shaky that the car wouldn’t run over 4,200, way too low a peak for Miller’s healthy cam. Brandes says this is an indicator of valvetrain distress--and sure enough, the valvesprings tested weak. They were actually for a flat-tappet cam, not for the Chevelle’s hydraulic roller grind. Miller had never gotten around to installing the correct valvesprings because of the car’s perceived fueling issues.
The right valvesprings let the engine rev past 5,800 rpm. More important in the context of this Rescue, it dropped exhaust-flange temps more than 100 degrees and decreased unburned hydrocarbons. Fuel-tank temps dropped another 10–15 degrees as well. Brandes theorizes that even off-idle the weak springs weren’t fully controlling the valves, delaying the exhaust valve closing point and dumping waste heat out the exhaust
It looked like things were finally shaping up: Out on a test drive, Miller exclaimed that “the car never felt so good!” But that was still with the temporary shop carb on the car.
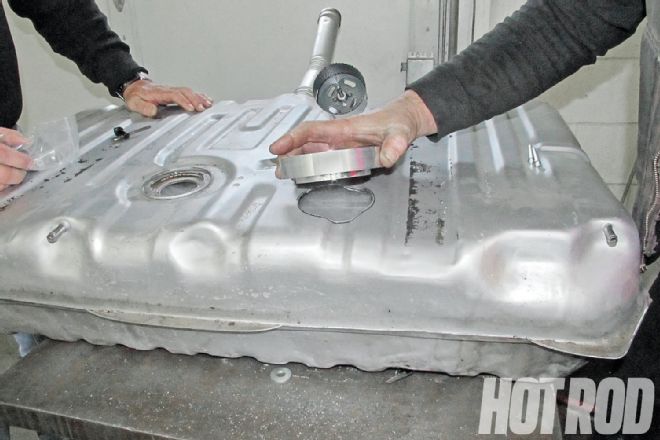
 Insert the C-shaped fuel pump retainer ring into the fuel-tank hole sideways, then flip it 90 degrees so the studs face up. Push the ring studs up through the drilled screw holes.
 Place the installation ring template over the retaining ring studs protruding through the tank top. Insert the foam bladder into the bladder/cup. Compress the baffle assembly, then insert it through the installation ring into the tank. Be careful not to cut the assembly or your hands on the tank edge. Once the baffle assembly is in the tank, center it within the opening.
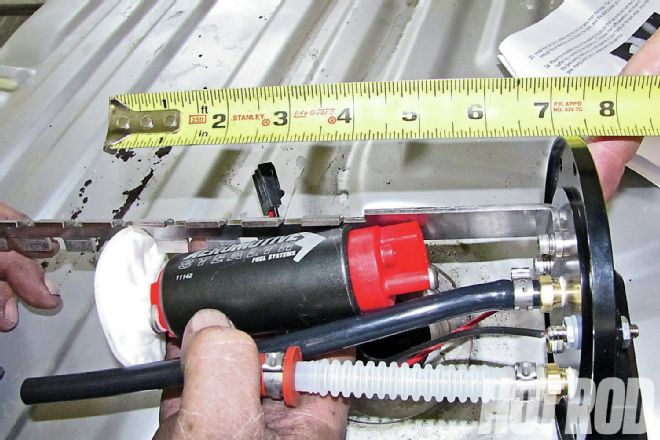 Place the fuel pump on the fuel pump hanger assembly bracket (rear, arrow), positioning it so the outlet cap-to-fuel pump strainer depth equals the fuel-tank depth. Cut the bracket and the black outlet hose to the proper depth.
 Fully assemble the front capsule’s internal fuel lines and wire up its electrical connections. Install the gasket onto the fuel pump retaining ring’s threaded stud. The thick gasket can accommodate up to ¼-inch-deep corrugated tank “valleys,” but to be on the safe side the Westech crew fabricated spacers to position the gasket perfectly flat.
 Install the assembled capsule into the baffle assembly inside the fuel tank, then rotate it as needed to correctly orient the fuel line and vents. Drop the hanger onto the retaining ring studs. Install and tighten the provided lock nuts and sealing washers in a crisscross pattern.
Reinstall the fuel tank in the chassis. The conversion adds around 2⁄3 inch to the tank height. It cleared the floorpan on Miller’s Chevelle, but if necessary you can back the fuel-tank mounting straps out slightly. Note the neatly routed fuel lines and large 10-gauge fuel pump power wire.
Install the assembled capsule into the baffle assembly inside the fuel tank, then rotate it as needed to correctly orient the fuel line and vents. Drop the hanger onto the retaining ring studs. Install and tighten the provided lock nuts and sealing washers in a crisscross pattern.
Reinstall the fuel tank in the chassis. The conversion adds around 2⁄3 inch to the tank height. It cleared the floorpan on Miller’s Chevelle, but if necessary you can back the fuel-tank mounting straps out slightly. Note the neatly routed fuel lines and large 10-gauge fuel pump power wire.
The Fix: TBI System
With the engine’s mechanicals sorted out, Brandes reinstalled the TBI setup and tried to dial it in. But under a steady-state load at 2,500 rpm to simulate normal engine cruise speeds, the system started breaking up again. According to Brandes, the exhaust backfiring “sounded like someone was duck hunting in the backyard!” Hydrocarbons were way up, too. “With all the other problems, the owner hadn’t noticed this characteristic before,” relates Brandes. “But something in the fuel-management system wasn’t right.”
Further diagnostic checks ultimately found and corrected several problems with Miller’s early version of the Holley Avenger system:
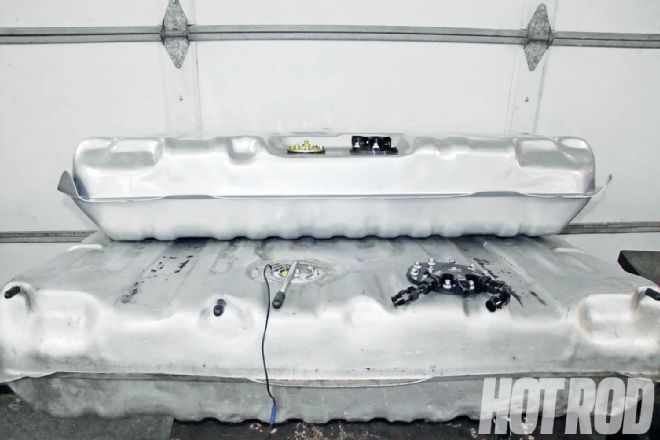
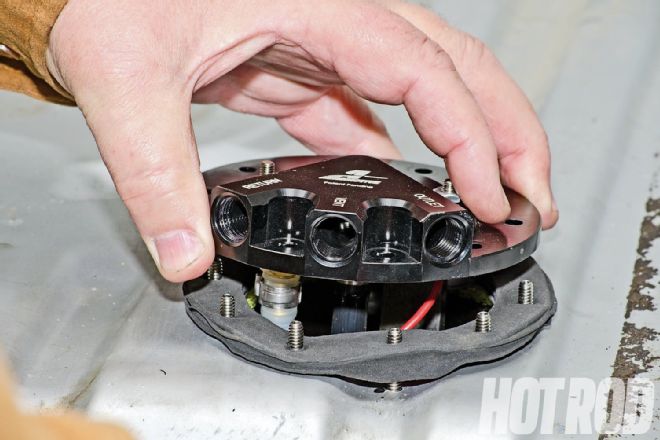
For about $115 more than the universal Phantom conversion, Aeromotive also offers new, bolt-in, EFI-compatible fuel tanks for selected popular muscle cars like Chevelles. The new tank (top, compared to original converted tank, bottom) has integral tank baffles plus the in-tank pump. Note the new tank’s recess that compensates for the retaining ring’s added height.
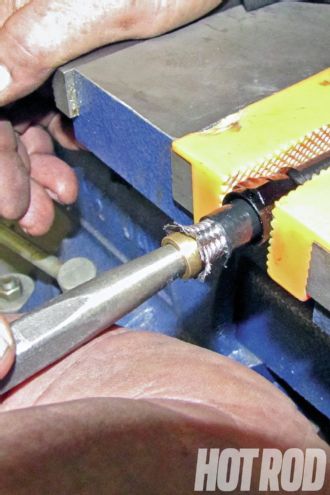
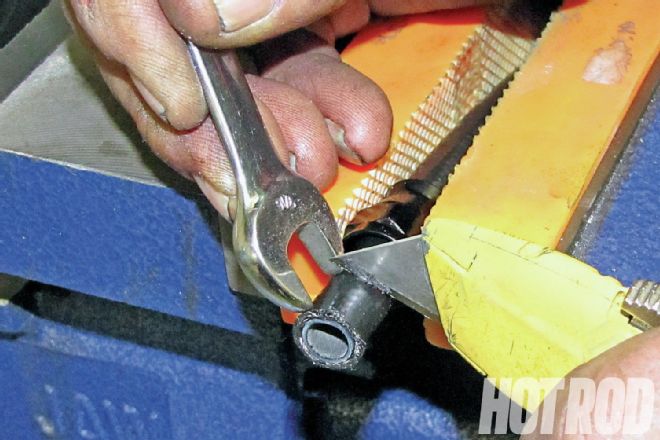 New fuel lines were fabbed using TechAFX Teflon-core, stainless steel-braided BlackWrap hose. The antiabrasion outer cover on the BlackWrap hose must be removed to a depth equal to the fitting’s socket: 7⁄16-inch for –6. Insert the socket over the hose. Use a box cutter or other expedient tool to trim back the outer cover. After scribing the cut line, peel the cover back off the braid.
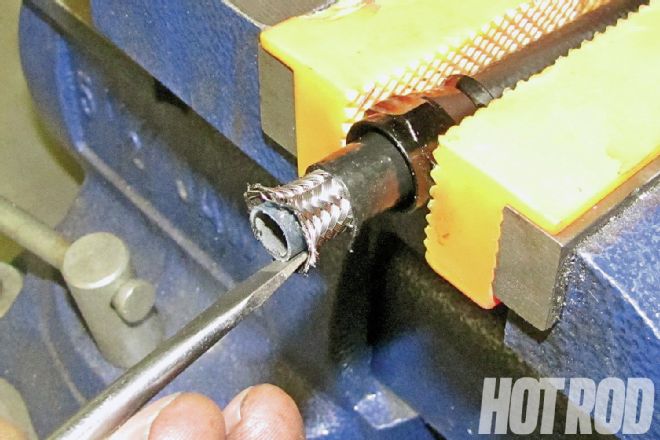 Separate the stainless braid from the Teflon core. Note the gray-black (instead of typical commercial-white) Teflon core color. That’s a small amount of carbon impregnated into the Teflon, which makes the hose conductive. High-velocity fuel flow can develop a small static charge on stainless Teflon hose; the added conductivity safely transfers this charge to ground.
 TechAFX also supplied reusable noncrimp aluminum hose ends plus adapter fittings. Final assembly is similar to other Teflon hoses. Work the ferrule in between the stainless braid and Teflon core until it firmly bottoms. Use an awl to spread the hose into the ferrule.
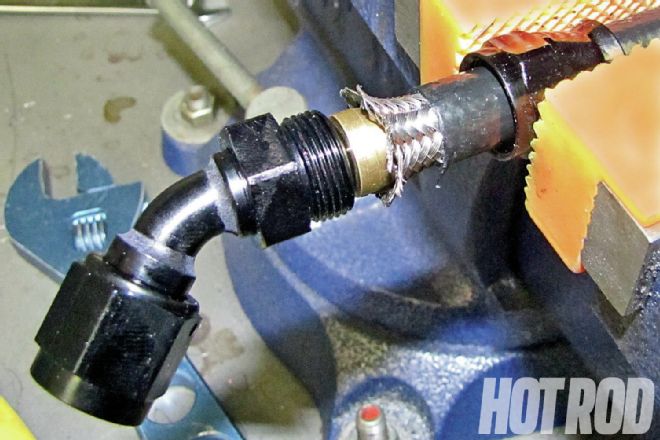 Screw the fitting into the nipple. TechAFX says its fittings “aren’t just typical commercial-level JIC fittings, but genuine AN-spec stuff made for us by a company that supplies the U.S. military. They perform better, can be handled without scratching, and look better than the competition.”
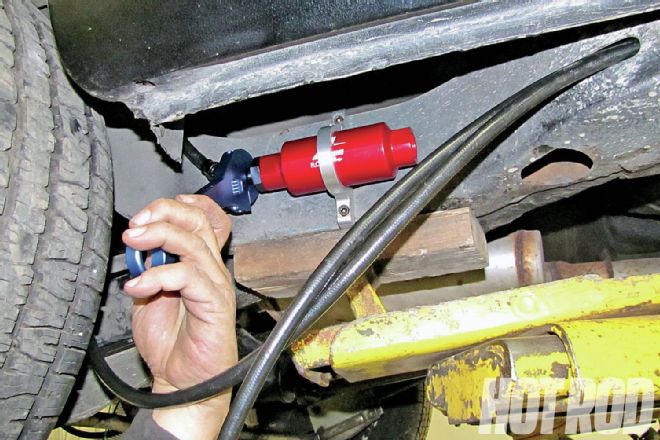 Westech routed the hose away from the hot exhaust, running it up out of the tank close to the floorpan, then along the outside of the frame to a low-restriction Aeromotive billet-aluminum fuel filter with a replaceable element. Past the filter, the hoses snake through an existing hole in the convertible’s fully boxed frame.
Results
Fixing the Chevelle turned out to be another case of peeling back ever more layers of the proverbial onion. Fix one symptom, and a heretofore hidden issue rose to the fore. Still, resolving the fuel-system, exhaust-temp, and engine-management issues ultimately brought peak fuel tank temps down to 110–115 degrees, muffler temps down to 230 degrees, and exhaust flange temps down to 750–775. Brandes says the latter remains slightly higher than optimum. “Perfect” would be 550–600 degrees, but he chalks up the final values to the engine’s relatively low compression ratio and healthy cam. A totally satisfied Miller says he’s “really impressed with what Norm and Jim are doing. I’ve learned so much. They’re real professionals!”
Lessons Learned
An old-school carburetor setup running rich can hide a lot of underlying problems--not the case with more exacting fuel injection with constantly recirculating fuel. We initially thought this one would be a simple rescue; a better fuel pump and relocated lines should have resolved the issue. But, as Brandes puts it, “There were bad things going on that the fuel system was only covering up. The trail of diagnostics doesn’t stop at the first victory. You need to have patience and persistence to get a car to perform as it should.”
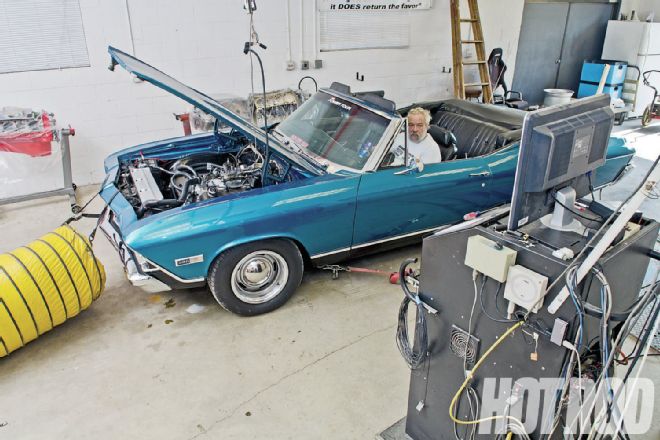 After fixing the underlying problems, Westech fine-tuned the car on its Mustang chassis dyno. Look for Miller on the ’14 Power Tour®.
Need Junk Fixed?
If your car has a gremlin that just won’t quit, you could be chosen for Hot Rod to the Rescue. Email us at [email protected] and put “Rescue” in the subject line. Include a description of your problem, your location, and a daytime phone number.