| This is a reenactment of the purchase. I forgot my camera because I was so busy that day. I do renderings for $500 bucks. Let me know if you need one.
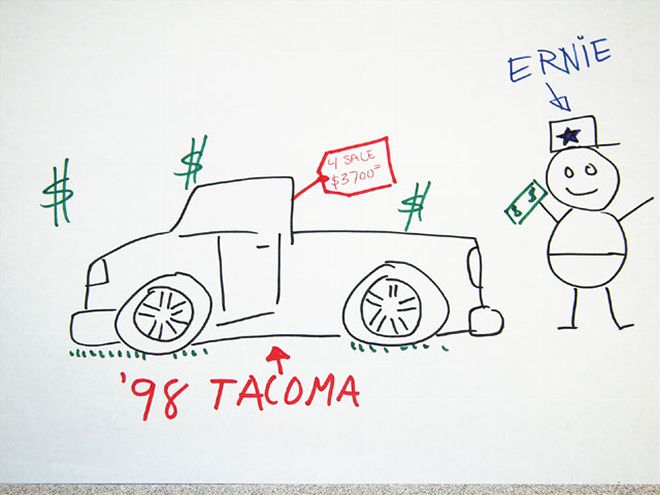
I drive about 70 miles each way to work everyday, and with gas prices these days eventually my wallet was going to give. The Raider just wasn't cutting it as far as miles per gallon, or looks for that matter. So, I decided I wanted to buy a new project to get me to and from work. I wanted to buy something somebody had already 'bagged, to save some money on buying most parts. What I bought was a real beater. It was somebody else's project and had pretty much seen its good days already. It had a really crappy four-link that wasn't set up properly, the compressors were fried, the gas tank was strapped into the bed, and the valves and switches were disconnected. You had to air up each 'bag individually with an air chuck to air it up. What a pain!
So, we decided to build this truck in order to show a good example of some of the steps that will help you get into the pages of the magazine. The trick for me was I don't have a lot of time and too many projects already, so I laid out my plan, set up my budget, and gave myself a 90-day limit. Now, I wasn't going to try and tackle this thing at my house. I went to my buddies and close friends and we devised a plan to take it to other shops and get the work done as cheaply and quickly as possible.
So, here goes the break down:
1. What to Buy? I knew I wanted to spend less than $4,000 on the ride, itself. I also knew I wanted a Tacoma. I had a Tacoma back in '99, when I had a love/hate relationship with Tacos. I loved how it looked, but I hated how it rode. It had a really crappy 'bag job. When I got the editor position here, at MT, I fell in love with a truck named Chump Change, so I knew a Tacoma was in order for me. I love those fat headlights and sultry curves.
2. The PlanI would build this truck as a simple daily driver show truck. That's a lot of things all wrapped up in one tiny truck, trust me, I know. But, I wanted to build a feature-worthy truck that was also a reliable daily driver. I would need to be body dropped, painted, have a full interior, and a really clean motor. And yes, I know, a body-drop isn't a necessity, but it's something important as far as looks, and so I added that to the plan. I didn't want to fight stuffing big wheels into the truck, because I didn't want to lose the air conditioning. After all, this is Southern California, and we get some intense temperatures during the summer.
3. The Time LimitI would build this truck in 90 days or fewer. The reason I gave myself a time limit was to prevent it from turning into one of those crazy projects that end up a full build. I've been down this path before, this time I wouldn't let myself slip up. I also really wanted to drive this truck and save some money on gas. So, I called a couple of shops I knew that could get this done in a timely manner.

| 1998 Toyota Tacoma rear Suspension
4. First Things FirstThe truck was a disaster, as far as the rear suspension was concerned. It had a horrible pinion-angle problem and rode pretty crappy. Steve from Kant Trust Emz went with me to buy the truck. It was a good price, and had some good features to it. The best feature to me was it was already back-halved. Steve told me he could four-link the truck for me in three days. I would need to spend some money on steel, but I would save money on 'bags and shocks. The truck also had valves, but they were disconnected; nevertheless they were there, so they would also be used.
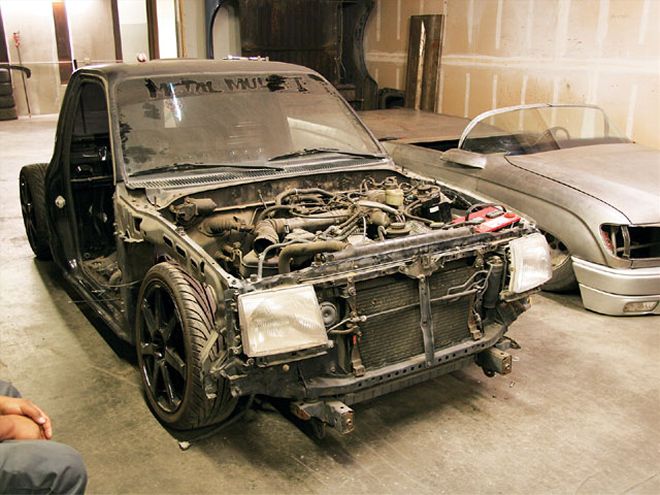
| 1998 Toyota Tacoma no Panels
5. The Body The paintjob went to Josh, who owns his own shop, called Nostalgic Restyling. Josh is your basic hot-rod guy and knows his way around candy paints and flakes. I told Josh I wanted something traditional and not too flashy. He came up with a suede and scallop idea to blend nicely over my truck's curves, which would give it a great old-skool flavor. I got the roll pan from Grant Kustoms and it's going to look great, especially since the factory bumper was ruined. One thing you guys might find crazy is that when I bought the truck, it had shaved door handles. Some quick searching on www.craigslist.org found me a new bed and new doors off of a wrecked '98 Tacoma. I ended up purchasing both for about $400, and now I have door handles. It might seem kind of backwards to add handles, but like I said, it's going to be a daily and I don't want to deal with pesky solenoids.
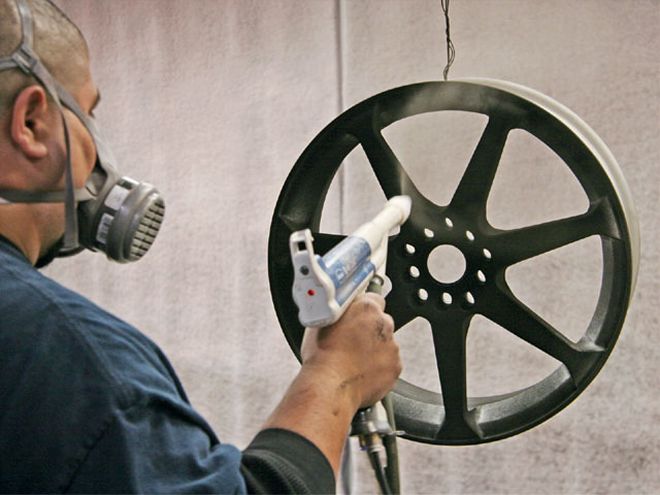
| 1998 Toyota Tacoma powdercoating Wheels
6. The WheelsIn order to save money, I would keep the existing wheels and freshen them up a bit. When I purchased the truck, I was really happy to see it had 18-inch rims with almost new tires. The only real big issue with the wheels was they had a lot of overspray on them, which was from a previous primer job on the bed. I had a choice: I could chrome the wheels or powdercoat them. I decided the powdercoat look would be best.
7. The AccessoriesTo give this truck a more unique look I will add a few parts. Most parts I will get from Mike Kazi at Auto Accessory Warehouse, such as the headlights, the corners, the intake, and the taillights. Other parts, such as the '01 Tacoma mirrors, '98 Toyota Tacoma 4x4 fenders, and the '97 Tacoma 4x4 bumper would come from the dealer. In the end, in order to save money, I decided to buy the 4x4 bumper from an aftermarket company. I found out through the grapevine that an old friend of mine had some factory fenders and bought those for a whopping $150. That was an incredible find, and saved me a ton of cash. The switchbox would come from AVS. I thought the one with the lock on it in blue would be an awesome addition to the interior.
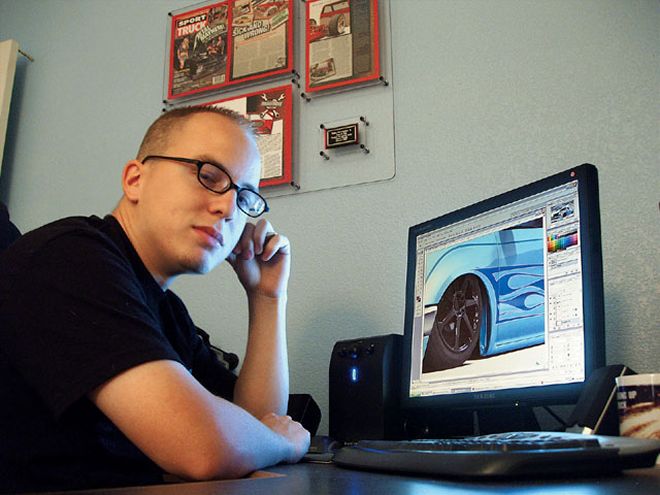
| Nick put a Tacoma rendering together for me overnight. I loved it, and ran with it.
8. The InteriorThe interior is the only thing we'll have to wait to see what I come up with. I don't plan on touching it until the end. What I have now is two interiors, the one it came with and a blue one I got from a friend of mine. I traded some rental space on my land for it. I live on an acre and I sometimes rent spots to people for storage, so I bartered a bit to get my hands on a complete dash. I found some Acura Integra seats in the classified ads and some Eclipse ones, as well. I'm not sure which ones will end up inside, but I imagine the ones that fit best after the traditional body-drop. I plan on adding a BAD steering wheel and maybe painting the dash, too.
9. The Design on PaperNow that I had my design in mind, I went to Nick from Surface Art and had him work his magic on paper. The result is what you see here. I don't plan on it looking much different than this, other than a slight change in the colors. They will still be blue, but I may add some pearl to the flat blue paint.


