The 2003 Hyundai Sonata was an edition of the fourth generation of Sonatas from the South Korean automaker. The standard stereo system of the '03 Sonata was an AM/FM stereo with single-disc, in-dash CD slot. Optional systems included CD changers mounted in the trunk of the vehicle. Sonata owners who wish to upgrade their system or replace a malfunctioning stock radio can do so for a fraction of the cost of having an audio technician perform the replacement.
Lift the hood of the Sonata. Loosen the bolt that holds the negative battery cable clamp around the negative battery terminal post, with a 10mm wrench. Place the cable away from the battery until the replacement is complete.
Open the storage compartment below the stereo assembly and remove the two screws inside the compartment with a Phillips-head screwdriver.
Remove the trim panel surrounding the gear selector lever with a trim-panel removal tool. Pull the wiring for the cigarette lighter from the underside of the panel and set it aside.
Remove the two screws at the bottom edge of the stereo assembly trim panel with the screwdriver.
Grab the center console paneling and slide it away from the dashboard.
Remove the four screws from the stereo mounting bracket, located at the corners of the stereo, with the screwdriver.
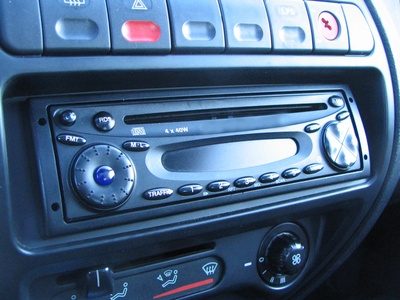
Pull the Sonata's factory stereo from the dock to access the wiring connected to the back of the unit.
Pull the stereo wiring from the back of the radio. The antenna cable is on the right side of the rear of the stereo, the speaker wiring and power supply can be pulled from the left side.
Insert the faceplate adapter from the Hyundai stereo installation kit into the now empty stereo mounting dock. Pull the stereo wiring and antenna cable to the front of the dash to be connected to the new stereo.
Plug the stereo wiring into a wiring harness adapter. Connect the leads of the wiring harness adapter to the back of the new stereo. Plug the antenna cable into the aftermarket stereo.
Slide the new stereo into the dash of the Sonata until the front face of the radio is level with the trim of the faceplate adapter.
Place the dash trim panel around the stereo assembly and screw in the two screws on the bottom edge of the panel.
Move the center console forward against the center dash assembly.
Replace the two screws in the dashboard storage compartment (below the stereo) and screw them in with the screwdriver.
Connect the cigarette lighter wiring to the underside of the gear selector trim panel and snap the panel in place around the shifter.
Place the clamp at the end of the negative battery cable around the lead post of the Hyundai battery's negative lead terminal. Tighten the bolt on the clamp with the wrench and close the hood.