Jeep Wrangler TJ Coil-Over Conversion - Jp Magazine

Jeep Wrangler TJ Coil-Over Conversion - Coil Correction Christian Hazel Brand Manager, Four Wheeler wrangler Coil Over Conversion front Photo 25315010

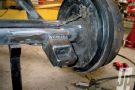
The last time we messed with the suspension on Jay Miller's TJ we showed you how to convert to coilovers using top-quality Walker Evans 16-way adjustable shocks, Eibach Springs, and some simple shock mounts from Currie Enterprises. The story is on our web site at jpmagazine.com if you want a refresher. Well, the Jeep is back and this time we're tackling the back end, ditching the factory coil setup for some clean, simple coilovers.

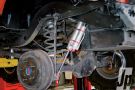
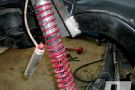
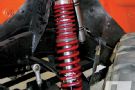
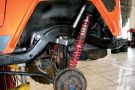
If you do read our original "Coil Correction" story, you'll see that we used relatively short 10-inch Walker Evans shocks up front. Because Miller only wanted a 2.5- to 3-inch lift, it seemed prudent at the time. However, Miller discovered that the shorter shocks tended to top out during hard running. We ordered up some 12-inch Walker Evans coilover shocks and mounted them up front. We used the shorter 10-inch shocks originally in the front for our rear coilover conversion. Check the sidebar "Spec Sheet" for all the part numbers. The Walker shocks offer performance that can only be described as phenomenal. With a huge range of valving adjustments easily reached at the end of the remote reservoir, heavy-duty chrome-moly shafts, a T-6 body with anodized ends, and a 2-inch diameter, you'd be hard-pressed to find a better working, better looking shock for your Jeep. And like before, we tapped Eibach's seemingly infinite selection of coils to hang the framerails above the axles. The Eibach springs are powdercoated for corrosion resistance and are made in the USA to ensure a long, sag-free life.

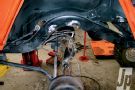
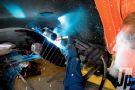
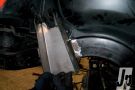
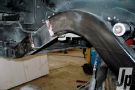
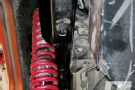
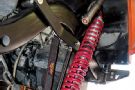
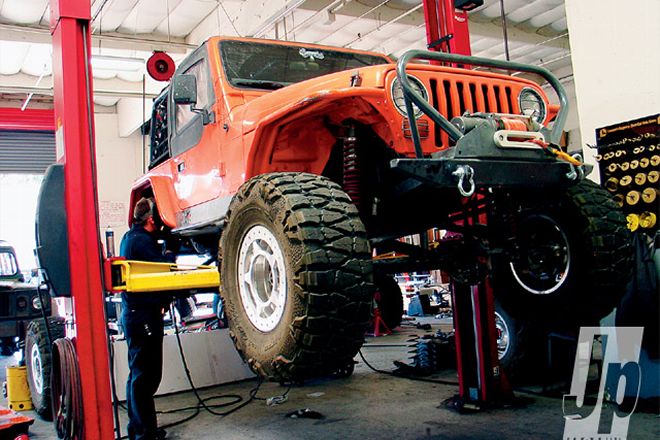
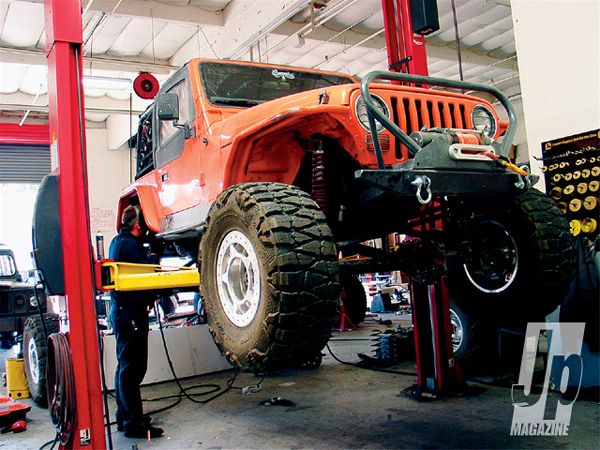
With the Walker shocks on the way, we did some searching for a simple yet strong mounting solution and found it at Gen-Right Off Road. Gen-Right has been coming on like gangbusters over the past couple of years with a huge arsenal of Jeep suspension, body armor, protection, fuel tank, and any number of other components you can think of. We get lost in buildup dreams whenever we log onto the company's website to check out their latest offerings, so plan a little time in your day before logging on. Follow along as we mooch a rack at TAG Motorsports in Escondido, California, to finish our coilover transformation on this '97 TJ.

PhotosView Slideshow Here's Miller's pre-conversion setup. With 3-inch Teraflex coils, 8-inch Walker Evans shocks, and a Currie AntiRock it's actually a great suspension. Although the rear hit the bumpstops on compression now and again, the 9 inches of travel wasn't too shabby. However, in the interests of more potential suspension travel, a cleaner design, and our nagging, Miller removed, cut, and ground the factory spring and shock mounts off the frame and axle tubes for our cameras. Step one is to get happy with the cutoff wheel and grinding discs, eliminating the factory coil and shock mounts from the frame and axle tubes. Miller also relocated his Currie AntiRock from its rear-mounted position to in front of the axle centerline just under the tub. It's not a Ted Nugent zebra thing, but rather measurement markings off a known location on the frame rails for the swaybar links. Miller test-fit a couple locations for the swaybar end link mounts on the axle and the swaybar mount on the frame before finalizing this arrangement. Miller built some mounts with some 3/16-inch steel plate, a band saw, and a hole saw before tack-welding them into place. We ordered a rear coilover conversion mounting kit from Gen-Right Off Road (PN RSM 1001), as well as some limiting straps and pirated the 10-inch Walker Evans shocks (PN 700-16-010) that the Jeep was running up front. We put these 12-inch units (PN 700-16-012) in their place. As usual, Eibach had the right combination of coils to hold up the 4,500-lb Jeep. Gen-Right designed its kit to run 14-inch coilovers with the coil buckets mounted at a 10-degree angle, but Miller went custom on his application. That's the nice thing about Gen-Right coil buckets; you can easily make them work for your application based on your needs and wants. After determining his ideal location with tire clearance, shock movement, and shock mounting height taken into consideration, Miller used the buckets to trace where the cutout needed to be made. Note the extra material on the mount below the framerail allows the buckets to be mounted taller for longer-travel shocks. You can use a plasma cutter, but you'll have better results using a thin abrasive cutoff wheel on an angle grinder or pneumatic cutoff tool. The notch is pretty substantial, but so is the construction of the Gen-Right buckets. Be sure to thoroughly clean any rust, paint, or undercoating from inside and outside the frame rails in preparation for welding. With the shock buckets tacked in place, Miller test-fit the shocks with no springs so the position of the Gen-Right shock mounts could be determined on the axle. As it turns out, we were a bit hasty in our positioning of the lower mounts, welding them on before fully-cycling the suspension with the coils in place. Doh! Once we installed the coils and cycled the suspension to full droop we discovered that increased travel and position of the axle shock mounts allowed some contact with the side of the bucket. Our fix was to raise the shock mounts closer to the top of the axle tube. This not only pulled the coils away from the side of the shock buckets at full droop, but allowed the axle to drop out a bit further. Up front we wanted to keep the Jeep's 3.5-inch lift height while curing the front shocks' tendency to top out. The 12-inch stroke coils shod with 150lb over 400lb Eibach springs did the trick. Miller set up the front with five inches of uptravel and seven inches of droop, which he finds perfect for his wheeling. The finished installation out back shows the modified Currie AntiRock swaybar arms that were shortened for clearance. Although shortening the arms stiffens the swaybar's spring rate, Miller reports the Jeep is much more stable on the road now, but off-road flex isn't affected. In reality, the old swaybar was probably too soft with the longer arms needed to reach the axle tubes from the swaybar's old mounting position above the rear bumper. If you undertake a conversion like this yourself, don't forget to think in three-dimensions when cycling your suspension and checking your coil bucket mounting position. Notice the clearance between the bottom of the bucket and coils. There's plenty of clearance when the suspension is at rest or dropped out equally on both sides, but when the axle articulates side-to-side, the spring comes pretty close to the bucket. With a 61-inch WMS-WMS measurement on the rear axle and 3.5-inch backspacing on the wheels, Miller reports no tire interference on the coilovers. With the relatively steep 34-degree mounting angle, Miller upped the spring rate and added a couple clicks on the rear shocks' compression adjustment knob and went a bit heavier on the coil rate, at 225lb over 400lb springs. Remember, you'll need to weigh your Jeep and take your shock angle into consideration when choosing your spring rates for optimal performance.

Spec Sheet
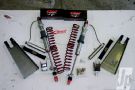
Here's a complete rundown of the parts we used to convert this Wrangler to a full coilover suspension.Front Shocks: Walker EvansPN 700-16-010

Rear Shocks: Walker EvansPN 700-16-012

Spring Isolators: Walker EvansPN 220349

Front Springs: EibachPN 1000-250-0150PN 1400-250-0400

Rear Springs: EibachPN 1000-250-0225PN 1200-250-0400

Front Coil Buckets: Currie Enterprises PN CE-9602

Rear Coil Buckets: Gen-Right Off Road PN RSM 1001