Jeep FSJ Suspension Lift Kit Installation - JP Magazine

Jeep Suspension Lift Kit - Hillbilly Work Truck Part II John Cappa Former Editor, Four Wheeler fsj Lift Kit Install fsj Front View Photo 8943710

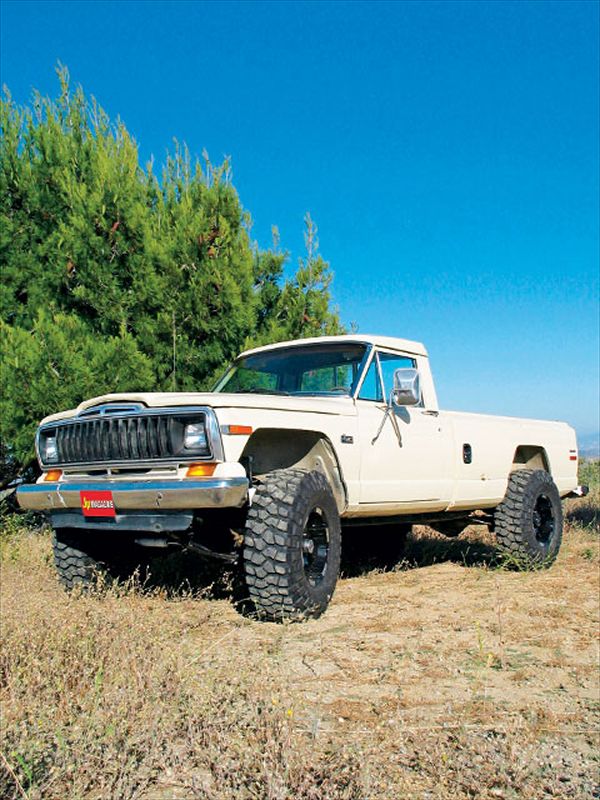
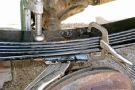
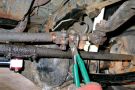
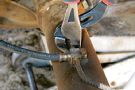
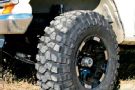
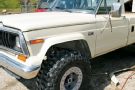
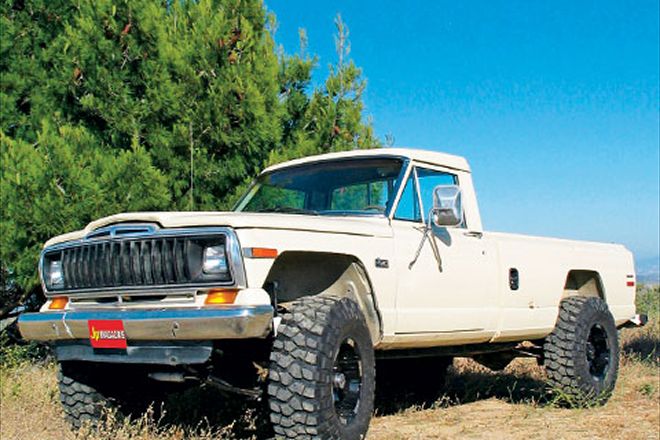
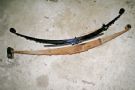
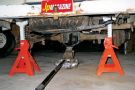
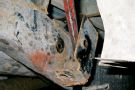
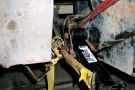
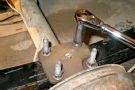
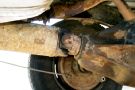
We weighed our options of keeping the stock, boring, brick-stiff suspension and getting a cement spine implant or installing Softride leaf springs, which would lift our J-20 4 inches to fit 37-inch tires. Guess which option we took? Last issue we showed you the installation and tricks for the front of the Jeep. This month we'll show you some tips out back along with our tire fitment solutions all around.

PhotosView Slideshow For log, rock, and gravel hauling, you can't beat the factory back-breaker leaf springs (bottom). But for a lift, a smoother ride, and more suspension travel, the Skyjacker Softride rear leaf springs (top) are a welcome upgrade. The Skyjacker rear springs come complete with rubber bushings already installed. Look, ma, no lift blocks! We suspended the rear of the truck with jackstands. The floor jack is located under the axle so it could be raised and lowered for easier installation and removal of the leaf springs. Remove the wheels and shocks. Much like what happened in the front, the rear spring mounts collapsed a little, making it difficult to install the new springs. A little adjustment with the prybar remedies the problem. The new rear springs have more arch than the stock factory parts, so it can be tricky to get them in place. We first installed the shackle end of the spring and used a large ratchet strap to stretch the spring forward into place so the main-eye mounting bolt could be installed. The ratchet strap is hooked onto the spring clip on one end and a frame hole on the other. A prybar is also helpful when wriggling the spring into its home. With the springs in position, we jacked the rear axle into place and installed the U-bolts. We needed 9/16-inch, 3 1/8-inch wide by 9-inch long U-bolts because the Skyjacker parts that were included are not intended to be used on the J-20's larger Dana 60 rear axle. Torque the nuts to 80 lb-ft in a criss-cross pattern, making sure the center pins are lined up with the spring perches and U-bolt plates. Install the new shocks, tires, and wheels. Lower the Jeep and tighten the shackle bolts to 30 lb-ft and the main-eye bolts to 50 lb-ft. We found out the shims that came with our Skyjacker springs wouldn't work on our longbed truck. The pinion angle was all out of whack once the Jeep was back on the ground. PhotosView Slideshow Ideally, the rear axle U-joint should be pointed down 1-2 degrees more than the upper U-joint. To correct the pinion angle, we simply removed the included shims from the spring packs using a C-clamp and some locking pliers to hold the pack together, a pair of locking pliers to grab the round end of the spring center pin, and a 9/16 socket to loosen the spring pin nut. We yanked the shims, slammed it all back together, and voila ... perfect rear pinion angle. With the lift in place front and rear and the Jeep sitting on the ground, we centered up the tires and then adjusted the draglink so that the steering wheel was centered. Nothing worse than an upside-down steering wheel when you're driving straight. Don't forget to unlock the ignition so the steering wheel will turn freely while you adjust. If you don't already have a pair, get some! Our Craftsman Professional Arc Joint pliers (PN 45761) have yet to fail at removing a stuck brake line without damage to the fitting (Knipex also makes some good ones). Our line wrenches aren't even that good. Anyway, with the Craftsman pliers we were able to remove the old brake line to install the new and longer stainless-braided Skyjacker unit. We wanted 37s but only 4 inches of lift on our J-20. Fortunately, most FSJs have huge inner wheel wells that easily allow bigger tires with a little trimming here and there - the J-Trucks and Cherokee Chiefs more so than the four-doorWagoneers. After measuring and drooling over cool wheel designs, we found we could best fit the molded 37x12.50R17 BFG Krawlers on Wheel Pros Moto-Metal black 951 17x9s with 4 1/2 inches of backspacing. We also whacked off the rest of the ugly flares with a reciprocating saw for a cleaner look. The rear flares had to be cut for the 37s regardless of the backspacing used. However, we could have easily kept the flares all around (had we wanted to) by going with 35x12.50 tires on 8-inch wide wheels with 3 1/2-4 1/2 inches of backspacing (the more the better). For fitment, we borrowed a set of unmolded 37-inch BFG Krawlers mounted on 17x9 wheels with 331/44 inches of backspacing. This was not ideal. They rubbed when turning and at full stuff. We also tried only trimming part of the flares off, but we really don't like the factory FSJ flares all that much to begin with. You pretty much always lose some turning radius when you install a dropped pitman arm. Our FSJ fell right into this category as well. To keep the steering box from overextending itself (and possibly causing damage to it) we replaced the factory Dana 44 steering stops on the knuckles with 1 1/2-inch long, 3/8-inch fine thread Grade 8 bolts and adjusted them so the stops would bottom out just before the steering box does in both directions.