2.5 Ton Rockwell Axles - 4-Wheel & Off-Road Magazine

2.5 Ton Rockwell Axles - 2 1/2 Ton Teardown Ali Mansour Brand Manager, 4WD & Sport Utility 25 Ton Rockwell Axles heavy Duty Axles Photo 13097847 
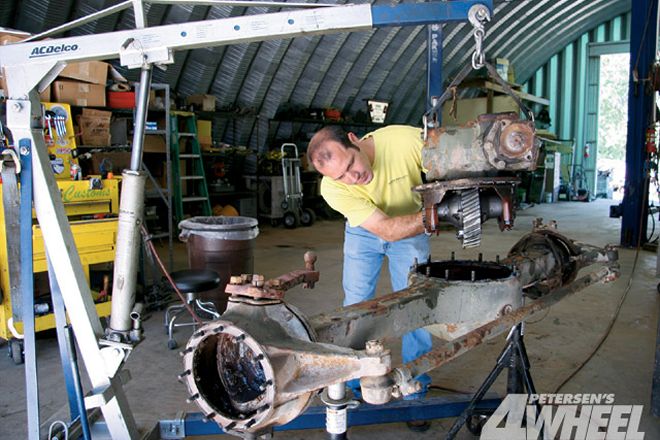
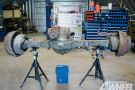
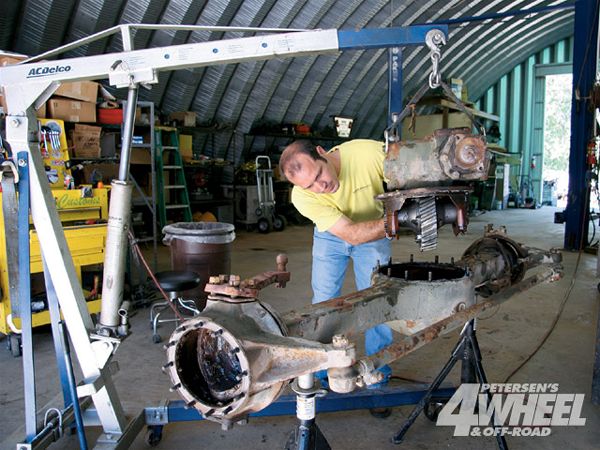
We can't stress how heavy these axles are. Do yourself a favor and buy an engine hoist. Hoists are surprisingly inexpensive and very useful for jobs like this.

Riding high atop the axle food chain, the 2 1/2-ton Rockwell axle is about as tough as it gets for guys craving huge tires and big horsepower. Over the past decade, these axles have shed their monster-truck-only stigma and have shown up under buggies and local mud boggers alike. Compared to a more traditional axle set, the Rockwells are virtually untouched when it comes to cost and strength-especially when you consider that a complete set of Rockwells can run you less than the cost of one Dana 60 front axle.

Now don't get us wrong. We know there are two sides to every coin, and when you start adding the massive weight (approximately 700 pounds without the drum brakes) and the extremely tall third member (a little over 9 inches from the top of the axletube), fitting these massive hunks of metal under a rig becomes a real challenge.

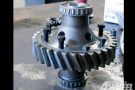
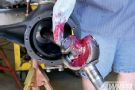
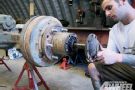
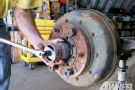
For us they are the perfect axles for building a massive mud machine. The third member keeps the driveline high, which equals better clearance and less driveshaft angle, while the 6.72 ratio makes turning 44-plus-inch tires effortless. Built with 3.5x3.5-inch square axletubes, the top-loader axles make for a solid and fabricator-friendly build platform. And the best part is they are a simple axle that usually requires very little in the way of new parts to get them rolling again. In fact, the set that we picked up from Red River Parts and Equipment-and tore down with the Rockwell gurus at Old Town Customs-only required one new hub bearing and race! Not bad, considering these axles had been lying in a field for who knows how long.

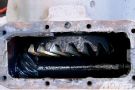
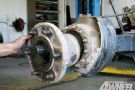
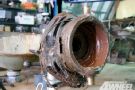
Take a look at the inner workings of the Rockwell axle, and be sure to check out next month's issue, where we start the axle rebuild as the first step in our new project affectionately titled Heavy Metal Mudder.

PhotosView Slideshow 1. Before you can tear down a 2 1/2-ton Rockwell you have to find a set! For us it was as easy as driving up to Red River Parts and Equipment in Texarkana, Texas, where we had our choice of new, rebuilt, and direct pullout axles. We went with a set of pullouts since they were the most cost-effective. 2. One unique aspect of the 2 1/2-ton Rockwell axle is the hub. Interchangeable from front to rear, the massive six-lug hub can be flipped in or out to modify your axle width. One important thing to note about the wheel studs is that one side of each axle will have lefthand studs. While many don't seem to mind the mix-up, a few chose to swap out the lefts for a standard righthand thread to avoid confusion when your buddies can't figure out why your impact can't break your lug nuts loose. 3. Removing the 16-spline full-float rear shafts is as easy as removing the eight bolts that secure them to the hubs. From the factory, the front shafts will have a drive flange, which will keep the front end engaged full-time. For what we're looking to do, a pair of selectable hubs is a definite plus and something we'll be bolting on soon. 4. While one half of the rear drum-brake setup simply unbolts from the hub, you will need to use a grinder to remove the rivets that attach the backing plate. Though there are a few other ways to remove the backing plate, we found this to be the cleanest, and since we plan to run disc brakes, this would allow us to use the rivet holes for caliper brackets. 5. The steering knuckle is attached by four upper and lower bolts. It's a good idea to remove each side to inspect the kingpin steering components carefully. Each steering Rockwell axle will also have a zipper boot on each side that's secured by an inner and outer boot clamp... ...While they are meant to keep the grease in and debris out, they are one of the more venerable parts of the Rockwell. We'll address this later on in the build as we look at some aftermarket options that help keep the boots protected. 6. Removing the axle nuts from the spindle is incredibly easy; the difficult part for us was tracking down a 3-inch spindle nut socket! Though you can just as easily use a punch and a hammer to remove nuts, it's always nice having the right tool for the job. <strong>River's End</strong><br />It's hard to believe, but almost every part on this rusty old axle can be purchased new or used from Red River Parts and Equipment. And what's even better, you most likely won't need to buy much. Why? The U.S. military is somewhat particular about how they keep vehicles serviced, and that usually results in an axle set that will most likely only need a set of boots and maybe a seal or two. PhotosView Slideshow 7. Distributing the torque through gear reduction, the 2 1/2-ton third member uses an upper 2.44:1 ring-and-pinion to propel a spur gear. This spur gear, or intermediate gear as it's commonly called... ...powers the massive 33-tooth bull gear (2.75:1 ratio). The combination of the two creates an end differential ratio of 6.72:1, which is a great ratio for turning 44-inch and larger tires. 8. The bull gear is without a doubt one of the most impressive parts of the axle. Connected by thru bolts and safety-wired like Rockwell bolts commonly are... ...the carrier houses a massive set of spider gears that make it an open differential from the factory. Of course this won't cut it off-road, so stay tuned as we lock things up. 9. Another unique feature of the Rockwell is that both ends of the third member are fitted with drive flanges. This gives you the option of making the axle either a driver- or passenger-side drop, and by simply modifying a few housing holes you can rotate the third member 180 degrees. 10. Though there are three different types of the front axleshafts for our money, the U-joint style is the best and most easily serviceable. After spending a little time with ours in the parts washer, we uncovered that beneath all of the old grease was a practically brand-new shaft. We decided it was best to leave it be, and per our Rockwell manual, we greased it up and put it back just like we found it. 11. We found this overhaul manual from Ouverson Engineering and Machine to be a great help. From the demonstration of the proper way to secure the third member for removal to the in-depth service diagrams, it's a great tool for any Rockwell owner. <strong>Heavy Metal Thunder</strong><br />Packing a V-8 and a terrible purple paintjob, our newest project rig, dubbed Heavy Metal Mudder, will be featured in next month's issue as we begin the transformation.