EZ Axle Upgrades - Locking Differential - 4Wheel & Off-Road Magazine

EZ Axle Upgrades - Locking Differential

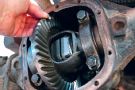
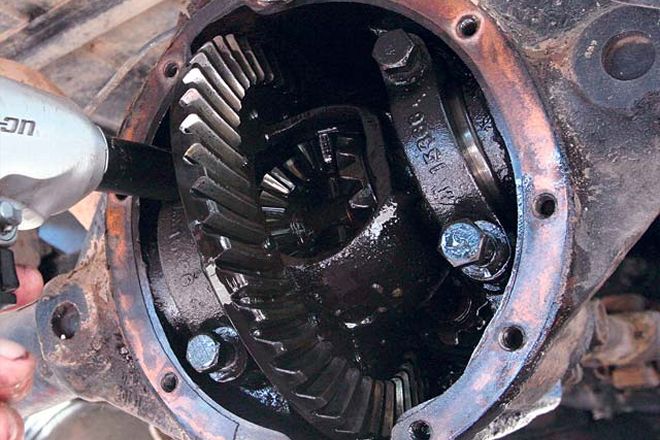
Next to a flexible suspension, positive traction is one of the most important off-road extras you need. Locking differentials add that extra advantage when wheeling by positively powering both tires on an axle, rather than having one slip and the other stand still. For our EZ upgrade section we found that the Lock-Right locker from Richmond Gear was the simplest to install, and applications are available for almost any axle. For the most part this unit can be installed at home with a minimum amount of tools, while the mess of gear oil is the biggest problem to worry about.

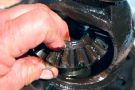
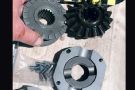
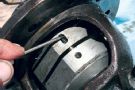
It helps to have a copy of the factory service manual for your particular axle, as each model may have some differences from what we show here. The concept of the Lock-Right is to replace the standard spider gears in an open differential with drivers and couplers. These units positively lock a differential when under power, yet allow the gears to ratchet when needed for cornering. The strength of the system is limited to the stock carrier, but for many applications this unit is just the ticket. Many models can be done without removing the carrier from the housing, but of course we chose one that took the extra work-a Dana 41 semifloating axle with 5.38 gears.

PhotosView Slideshow After pulling the cover and draining the oil out, rotate the carrier to access the spider gears. On some models the cross-shaft can be slid out past the ring gear when the lock pin is removed, but low gears like this 5.38 ratio require the ring gear to be removed, so we had to pull the carrier after removing the axleshafts. With the ring gear unbolted, the retaining pin and cross-shaft are removed. The spider gears can be rotated out of the way (don't forget the thrust washers behind them) and removed. The side gears lift up out of the bore in the carrier and the thrust washer is removed as well. Make sure to get new thrust washers before you put it back together. We sourced the Lock-Right cross-shaft and thrust washers from Randy's Ring & Pinion since they know what a Dana 41 is. Assemble the couplers, drivers, and spacers according to the directions supplied. Also use the original axle spacer if your axle requires one to set axle bearing end play on the axleshafts. We went to full-floating axles, so the spacer wasn't required. Notice that the old spiders were 10-spline, and the Lock-Right is 19-spline as we upgraded to better axleshafts at the same time. The most difficult procedure is stuffing the pins and springs in the right pockets in the correct order and direction. If you follow the directions, it's easy, but if you're under the influence or can't read, you might have some trouble. Use some heavy grease and spread some newspaper on the ground so you don't lose the parts in the dirt when you drop them. Once assembled, replace the cross-shaft and lock pin (we installed new ones to be safe) and then install the ring gear. Bolt the diff back into the housing and double-check the backlash of the gear teeth and preload on the carrier bearings to make sure you didn't screw anything up. Slap on a new gasket and install the cover, then fill the diff with oil and get ready to wheel!