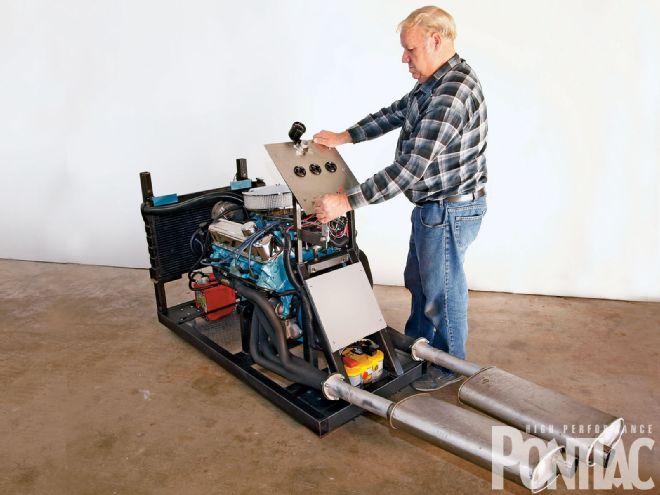
Performing a break-in procedure on an engine before it is placed between the fenderwells is money well spent. In addition to avoiding the headaches of multiple installs and removals, it serves many purposes including: breaking in the cam, seating the piston rings, testing the powerplant's seals, and verifying proper operation at low rpm. Now that our break-in stand is finished. Let's break in an engine on it.

Also keep in mind that these procedures will work just as well if you are breaking in a fresh engine that is already installed in your Pontiac. So don't skip this story just because you don't have an engine break-in stand.
Conclusion
Whether you are breaking in an engine for the first time or verifying that an engine, which was stored or previously broken in will operate properly, be meticulous when following these engine break-in procedures. There will be a definite sense of achievement in breaking in your engine, your way, and at your convenience.
Special thanks to DuSold Enterprises, Bob Cook, Floyd Hand, and Marty Parker, all of whom went well beyond the call of duty, dedicating many hours and/or needed knowledge and parts to aid in the preparation of this story.
• Have a minimum of one adult there to assist you with the break-in procedure.
• Keep all people who are not adults out of the test area. Make sure your pets are safely secured and can't come over for a visit.
• If you choose to use an engine driven fan, either install a fan shroud or fashion a "barrier" between the dash and radiator support beams to prevent someone from reaching into the front of the engine and injuring themselves.
• Do not rush. Visually inspect each subcomponent of the engine to make sure that it is fastened properly. Look into the front barrels of the carburetor(s) with a flashlight to make sure an errant screw, tool, or other item has not fallen in.
Procedures
• Pull each spark plug and visually inspect for wear and contaminants, such as oil or coolant. If the plugs indicate any of the above conditions, replace them and determine the cause of the problem before proceeding.
• Check the level of oil in the engine. If it uses a standard flat-tappet cam (non-roller hydraulic) then add a break-in oil additive. For other camshaft types, use conventional or synthetic oil per your engine builders recommendations.
• Always use a high-quality oil filter brand, such as an ACDelco or AMSOIL to ensure that high oil pressures do not burst it!
• Do not run a thermostat in the thermostat housing during break-in. Install a thermostat only after ensuring that all air pockets have been removed from the engine block.
• Use either a crankshaft socket or a crankshaft turning tool to rotate the engine through a few revolutions to make sure the rotating assembly moves freely.
• Remove both sets of valve covers.
• Rotate the engine to top dead center on cylinder No.1 (drivers side, furthest forward on Classic Pontiac V-8s). If the harmonic balancer timing marks are accurate, top dead center will read at zero and the rockers for the intake and exhaust on No. 1 will be loose. The piston will be at the top of the cylinder twice during a combustion event, so make sure before proceeding.
• If the engine is verified to be at top dead center and the harmonic balancer does not read zero, then the harmonic balancer could be defective, improperly installed or you need to check TDC again. If the balancer is still off, strongly consider replacing it, as a common failure of an OE style balancer is the rubber material starting to shear, allowing the timing marks to move. A defective balancer will create accelerated wear to the rotating assembly and is very dangerous.
• Remove the distributor (if previously installed and timing was set) and note the location of the No. 1 cylinder and/or vacuum advance canister (a piece of tape or marking device is a helpful visual reference). Note the orientation of the rotor cap.
• Either create your own oil pump primer or purchase one from a Pontiac vendor. Depending on what you have, use either an air or an electric drill (1/2-inch drive) to spin the distributor gear in a counter-clockwise rotation until oil is seen coming out of each rocker arm. Remember to rotate the crankshaft clockwise every few minutes to aid in getting oil up to the rockers.
• Reinstall the valve covers and clean any oil up that may have splashed onto the engine or exhaust. Check the oil level on the dipstick a second time.
• Install the distributor and using your reference mark (if the distributor was previously installed), line up the orientation of the No. 1 cylinder or set the vacuum advance canister to the center of the driver's side cylinder head freeze plug.
• Carefully pour a small amount of gasoline into the carburetor. If using a mechanical fuel pump, remember that the fuel has to be drawn up from the fuel source before it can get to the carburetor. If you choose to install an electric fuel pump, turn it on and pull the throttle back and make sure gas is squirting into the carburetor.
• Start the engine and run it between 2,000 and 3,000 rpm for a period of 20 minutes to break in the cam (if it's a fresh assembly). The rpm can be varied between the two suggested rpm settings and maximums but there is no need to rev higher.
• Check to make sure that each pushrod is rotating and if one isn't, shut down the engine immediately, as this indicates that the valvetrain is improperly adjusted or a cam lobe is worn.
• If a vacuum advance line is on the distributor, remove it and plug the engine vacuum source before checking the timing. A general recommendation for timing is to set it at idle between 10-12 degrees before top dead center and to ensure that there is no more than 36 degrees of timing when the distributor is advanced.
• Change the oil and filter after the break-in procedure and inspect for any contaminants. If the engine will be put into service and will use a standard flat-tappet cam, use an oil that has a high ZDDP content to ensure the cam lobes don't wear prematurely.
Engine Break-In Tools & Supplies
Pontiac Service Manual for head torque specs and sequence
Fire extinguisher
First aid kit and ready access to a telephone
Engine timing light
Distributor wrench
Spark plug socket
Oil pump priming tool
Crankshaft rotating mechanism
Engine coolant
Torque wrench
Oil, break-in lube, and engine oil filter
Standard wrenches and sockets
Electrical tester
1/2-inch-drive electric or air-powered drill
Spare plugs, coil, plug wires, rotor