We've heard a thousand times that oil pressure and volume are keys to a healthy oiling system. We can use an oil-pressure gauge to monitor the effects of changes in our oiling system, but aside from blindly bolting on a high-volume and/or high-pressure oil pump, how can we actually control the oil flowing through our engine along with its effectiveness? Until Pfizer comes up with a pill you can drop down your valve cover (Addapreshavalvoline, perhaps), the best we can do is control our bearing clearances.
Although bearing clearance is one of the most important things to measure, it is too often taken for granted as being correct simply because "it had good oil pressure before freshening it up," or "it's a new crank," or "it was just turned." As a machinist, I can't tell you how many new crankshafts were either on the high or low side, or even completely out of specification.
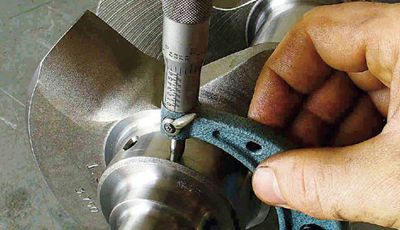
 To start your bearing clearance exercise, use a micrometer and take a direct reading of the crankshaft journals.
Most of the domestic top-name crankshafts coming from companies like Lunati do an amazing job of finishing cranks, which makes the task of blueprinting bearing clearances much easier. Buying an off-brand $99 Internet special "race" crank from an online auction house might seem like a deal, but when it comes to fitting the crank to your block, you might not be so happy.
Loose or tight? Generally, loose clearances will lower oil pressure, and tight clearances will raise pressure. Most hot rodders equate high pressure with a healthy oil system, but there is more to good oil pressure than just pegging the old Stewart Warner gauge.
Bearing clearance is what determines the size and effectiveness of the hydrodynamic wedge that actually supports the crankshaft. Tighter clearances make for a long, evenly distributed wedge that can support the crank over a wide radius. Make the clearance too tight though, and the bearings could scuff and lead to (gulp!) spun bearings. On the opposite end of the spectrum, loose clearances give us that low-friction feel we all like when spinning over the crank by hand (keep in mind that would be unpressurized). Too loose though, and the hydrodynamic wedge is easily pushed out of the way by the crank moving around. This unsupported crank can run directly on the bearing surface with no oil holding it in suspension, thus easily destroying the bearings. Again, not good.
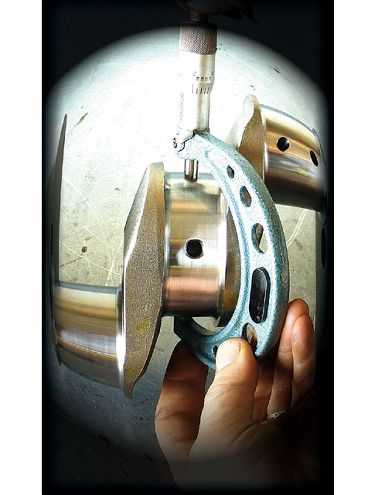
 Then transfer this measurement to the dial-bore gauge.
So what is a good oil clearance number to shoot for, and how do you get there? If you are on a first-name basis with your auto parts store counterman (you do spend a lot of time at the parts store, don't you?), then you could ask to see a copy of its Clevite bearings catalog. In it, you will find a plethora of information including-pause, wait for it-recommended bearing clearances. If you don't have access to a Clevite catalog, or if you can't find a listing for your engine, then a good rule of thumb is to shoot for .001 inch per inch of shaft diameter. In the case of a generic small-block Chevy with a nominal crankshaft main journal diameter of 2.45 inch and a rod journal of 2.10 inch, that would have us aiming for clearances of roughly .0024 on the mains, and .0021 on the rods. Generally, I prefer to use those numbers as my high side, and drop down about .0005 to get my low side, in this case .0019 and .0016, respectively, on a stock engine. In a high-performance engine, I'll use the rule-of-thumb number as my low side, and add .0005 to get my high side.
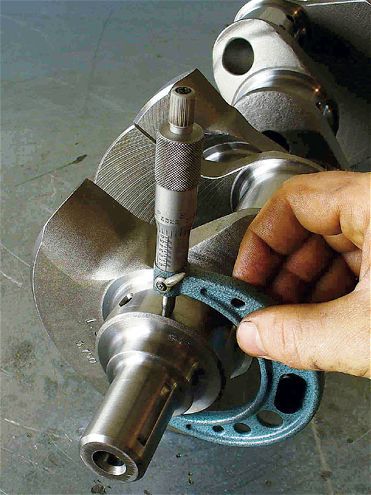
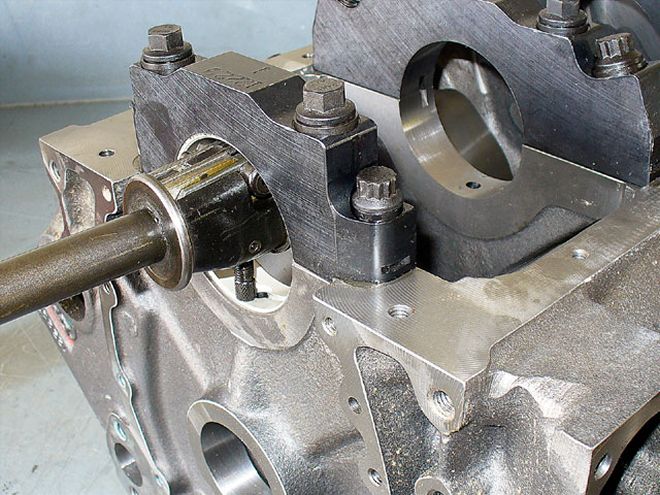 With the main bearings installed and the caps torqued, install the dial-bore gauge in the main bore.
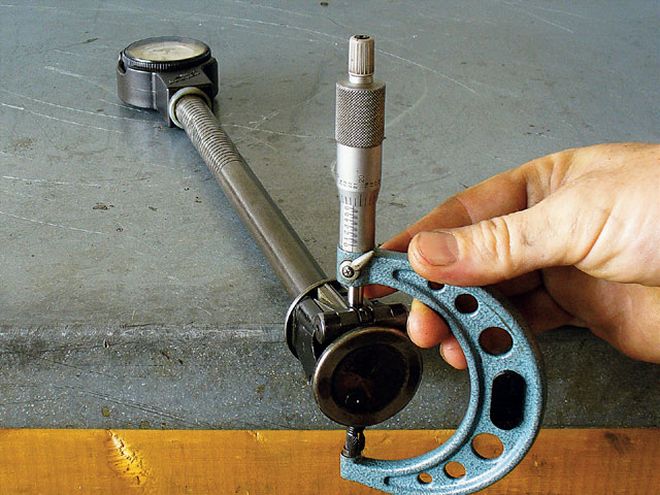
You can use Plastigage to get a fairly accurate clearance measurement, or if you are so inclined, you can measure it like the pros with a micrometer and a dial-bore gauge. If you flag down your local Snap-on truck (don't you wish they had little bells like the ice-cream man?), or visit www.snapon.com, they can hook you up with a micrometer that reads in ten thousandths of an inch, commonly referred to as "tenths," for less than $70. In most applications, a single micrometer, 2 to 3 inches in our case, will handle both the rods and the mains. Several companies sell accurate, yet reasonably priced dial-bore gauge sets in the $50 to $100 range for those not wanting to kick close to a grand for a professional-style gauge, like the one we are using from Sunnen.
Using the micrometer, start by measuring the diameter of the crankshaft journals. Clean and install the bearings in your block, and torque the caps down. You'll also want to install the rod bearings in the rods and torque the caps, preferably with a rod vise. Set the dial-bore gauge to the journal size you want to check clearance on, then just stick it in the bore to get a direct reading of your bearing clearance. Measure at the front, middle, and rear of the bearing to check for taper as well. Continue this until you have checked all of the rods and mains.
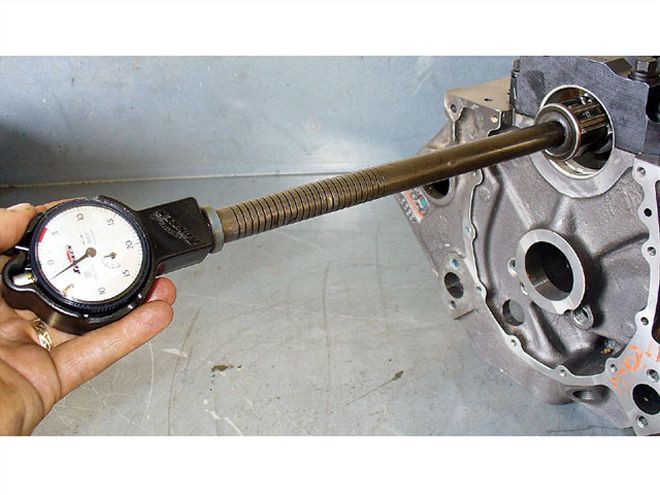 In this case, we saw that the main clearance measured .0023 inch.
Once you have mapped out all of your clearances, you can make a decision as to whether these will work for your application. If you think the clearance is too tight or too loose, you can refer to the Clevite catalog again. (You did ask your buddy at the parts store to hook you up with a copy, right?) In the catalog, you'll see that they list the standard size bearings, which are presumably what you've taken your measurements with. You'll also see listed .010-inch or .020-inch undersizes, and in the case of the more commonly hot-rodded engines, they have a .001- or .002-under, as well as an "X" bearing that gives you an extra .001-inch clearance. Using .001-under or .001-over bearings, or combining half of one with half of a standard bearing to add or subtract .0005 is common when fine-tuning clearances. When combining half sets, always install the thicker half-shell in the upper part of the rod or the lower part of the main cap.
There is no hocus-pocus trickery in setting up your bearing clearances, and you don't have to take for granted that everything will bolt together and be perfect in your new engine. A little extra effort and a few good tools will help you set up your engine as good as any professional out there.
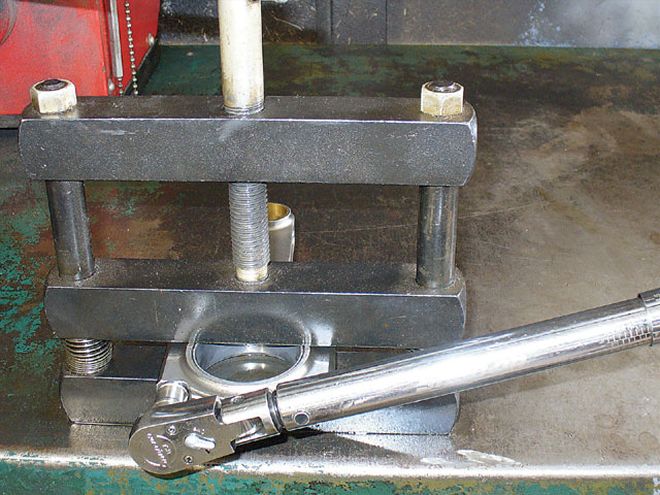 Using a Snap-on torque wrench and rod vise, we installed the rod caps.
Pre-Assembly Tips
There are a few things that will help you put together your engine with a little more ease, and also help you when it is time to freshen it up. Using machinists' dye or layout fluid on the side of your rods, and scribing the rod numbers before splitting the cap from the rod are big headache-savers. Also, use the same layout fluid and scribe technique to label the rod and main torque specs on the engine block pan rail. This is especially important when you are using non-OEM parts or fasteners.
Take a good look at your washers before installing them. Many aftermarket washers have a chamfer on one side that is to be installed facing the head of the bolt. Installing the washer upside down or installing a non-chamfered washer on a high-quality bolt with a large, under-head radius can create a stress riser, and actually break the head off the bolt.