What is handling, and when is a car considered a good handler? Handling is an entirely subjective phenomenon that means different things to different drivers. Take someone out of a bracket-racing Dart and slip him behind the wheel of an ’84 Camaro, and the response will nearly always be: “Wow, this thing handles great!” But put Michael Andretti in that car, and he’ll probably go on record saying it’s a softly sprung luxo-barge. Realistically, though, 99 percent of hot rodders will agree that late-model performance cars are good handlers, and most ’60s musclecars need help.
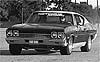
We wanted to find out just how easy it could be to convert an average street machine into a decent corner-turner without spending gobs of money and more than a weekend of time. Bolt-on parts and normal tools were specified (no welding this or relocating that), and we wanted to gauge the difference each change made with real-world numbers. Skidpad g numbers are great, but if you’ve never driven a new Corvette, you really don’t know what .95g is, so it’s hard to relate to that type of data. We wanted to find out how much faster the car could be driven around corners and how the pucker factor increased with each suspension change. We called the folks at Hotchkis Performance to see if they might have a test sled, and what they came up with was a perfect car: a ’68 Chevelle with a junkyard 307, a Powerglide, nonworking air conditioning, a spray-can paint job and air shocks. It was a typical on-the-verge-of-being-a-beater hot rod.
We made our changes in the order that most rodders do. We then tested the car after each change—and did it all at the track in a single day. We think that you’ll be surprised.
The Test
Since improvements in handling are such a seat-of-the-pants thing, it’s tough to convey the changes with the typical skidpad and slalom tests. Of the two, the slalom is the easiest to relate to because it shows how much faster the car can be driven through a series of corners. We set up a 300-foot slalom with four cones spaced 100 feet apart and timed how long it took to drive through. We also did two 200-foot-diameter skidpad tests—one as a stock baseline and one when the car was finished. Running the car on the skidpad after every component change would have destroyed the tires, which we didn’t want to do. To get accurate times, we had Hotchkis Performance owner John Hotchkis pull driving duty. He’s got serious racing time under his belt and is a much hotter shoe than any of us.
Baseline
For a representative test, we wanted the Chevelle stock but in good shape, so Hotchkis rebuilt the suspension to stock specs with a Performance Suspension Technology (PST) Super Front End Kit and replaced the front drum brakes with factory discs. The only nonstock parts were the bushings, which were PST’s Polygraphite urethane bushings. We allowed that for time reasons: Since we would be doing the parts changes at the track (which is really just a big parking lot), we didn’t want the hassle of pounding or torching out the rubber bushings. With rubber bushings, the baseline times would be just slightly slower. The tires were old 235/60-14 Goodyears with one Eagle ST up front and GT Radials at the other three corners, all on 14x7-inch American aluminum wheels.
Stage 2: Tires And Wheels
Tires and wheels are usually the first modifications made to a car. In most cases, in fact, good tires are the single best improvement you can make to a car’s handling. All of the trick suspension hardware in the world won’t work if the tires can’t stick it to the ground.
A late-model car that already has good tires obviously won’t benefit as much as our Chevelle did, but older musclecars with weak tires really respond. We replaced the 14-inch mags and vintage tires with 16x8-inch (4-inch backspacing) Center Line Billet Fluted Hammer wheels and sticky 245/50-16 Goodyear Eagle VR tires. Pressures were set at 38 psi in front and 32 psi in back and weren’t changed during the test.
Stage 3: Sway Bars
The next step was to add sway bars front and rear. Sway bars basically limit body roll by tying the left and right sides of the suspension together. The bigger the bar, the less body roll, but if the bar gets too big, it can actually lift the inside tire and do more harm than good, so you can only go so far. The stock front bar measured 1-5/16 inch in diameter, and Hotchkis replaced it with a rather large 1-¼-inch bar and urethane bushings. There was no stock sway bar on the rear, so to facilitate the swap, Hotchkis bolted on the company’s beefy lower control arms and 7/8-inch bar. The lower control arms are constructed from rectangular tubing and greatly reduce flexing and motion over the channel-sectioned stock arms.
Stage 4: Springs, Shocks, Upper Rear Control Arms And Street Alignment
The tires and sway bars did an admirable job of making the mushy stock suspension work to its fullest, but they were basically like putting bandages on a tumor and only masked the true problem areas. It was time to get serious. We wheeled the Chevelle into the pits and swapped the front and rear springs for Hotchkis coils. The fronts were rated at 600 lbs/in, which is on the stiff side (stock front coil springs are usually between 250 and 300 lbs/in). The rear springs were 140-lbs/in coils, up from a stock rate of 90 lbs/in.
The springs were short enough that we didn’t need to use a spring compressor to get them in, and they lowered the car about 1 inch in the front. The blown-out bargain-basement shocks and rear air shocks were replaced with Bilsteins (part No. AK2070 in front, B460929 in back). The Bilsteins are high-pressure gas shocks that work perfectly with the springs we installed, but they will also work great with stock springs. They were pricey (Hotchkis sells them for $89.95 each), but you get what you pay for.
Hotchkis Performance also installed the rest of its rear-axle control system, consisting of the other pair of rectangular-steel-tubing control arms and forward mounting braces. Those beefy arms replace the stock channel-section arms and keep the rearend firmly located. The braces connect the upper and lower arms at the frame mounting points. Hotchkis claims that this package not only improves handling but also decreases wheelhop in a drag-racing situation. Alignment was set to street specs at 1/8 degree negative camber, 2.5 degrees caster and 1/16 inch in toe.
Conclusions
What did we accomplish in our day at the track? Plenty. In stock form, the Chevelle was squirrely almost to the point of being dangerous by today’s standards. In a day’s time, using all bolt-on parts, we transformed the car into a real corner-burner that won’t knock your fillings out or drive you to the poorhouse. The numbers we generated better those of some true late-model performance cars, and a good driver in the Chevelle could wax the tail of a mediocre driver in even a new Corvette. Not counting the wheels and tires (prices vary tremendously depending on which brands and styles are chosen), we spent just over $1300 on parts, but that expense doesn’t have to happen all at once. Go in stages as paydays allow, and you’ll get there without the pain of writing one big check. Besides, you’ll forget about the money after the first offramp. Trust us.