In the Sept. '14 issue we installed an Aeromotive Phantom Stealth fuel system along with a new fuel tank from YearOne and a Holley Ultra HP 850 for our Slick Challenger project. For safety's sake, we tested its new Aeromotive fuel system for any possible fuel leaks. This was a great opportunity for us to fire up the car's wounded 340 (spun rod bearing, wiped cam lobes/lifters) that hadn't run in 20-something years. Once the tired small-block was running, knocking, and tapping with the 1973 Dodge Challenger up on jackstands, we shifted the old 833 transmission through the gears. We inspected the clutch and trans linkages, which were sloppy and in dire need of help. Fortunately, the E-Body's original four-speed box still shifted smoothly and held each gear without any signs of grinding or whining.
Knowing a stout 340-based 416 stroker will be residing under the factory two-scoop hood, we wanted a clutch with enough holding power to transmit the torque through the toughest four-speed transmission ever built. A standard single-disc clutch is sufficient for a stock-type resto engine with 300-350 hp, but that's not enough of a clutch for our high-torque, stroked-out, small-block. There are other street-style single-disc clutch kits available that can handle up to 500-550 hp, but then pedal effort is stiffer than stock. Lately, there's been lots of hoopla about dual-disc clutch packages with a soft-as-stock pedal feel, smooth engagement, and enough holding power to support 800 through 1,200 hp—depending on the friction disc material. That sounded like what we needed for our street-type project!
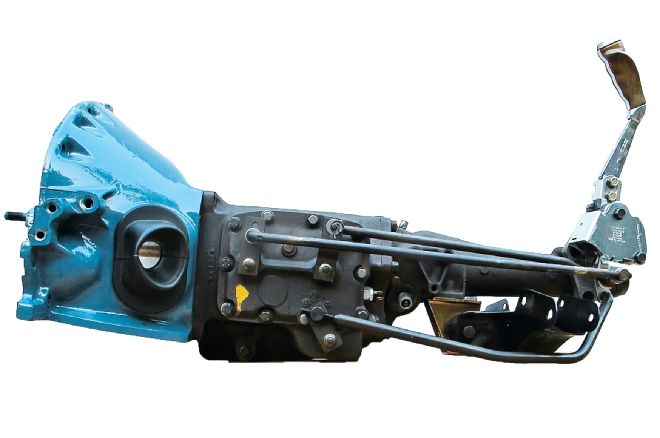
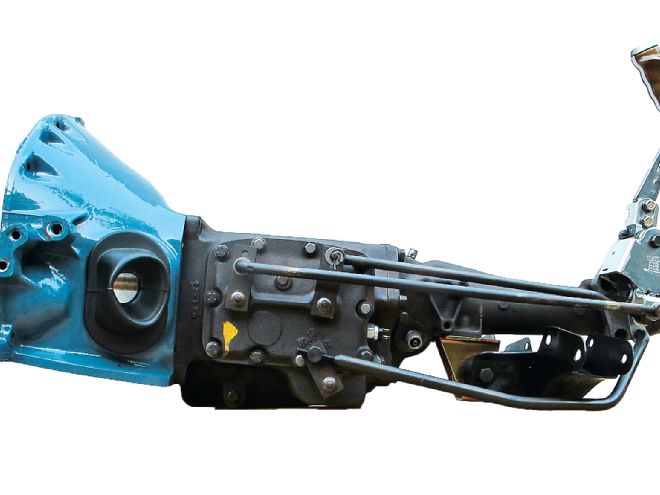
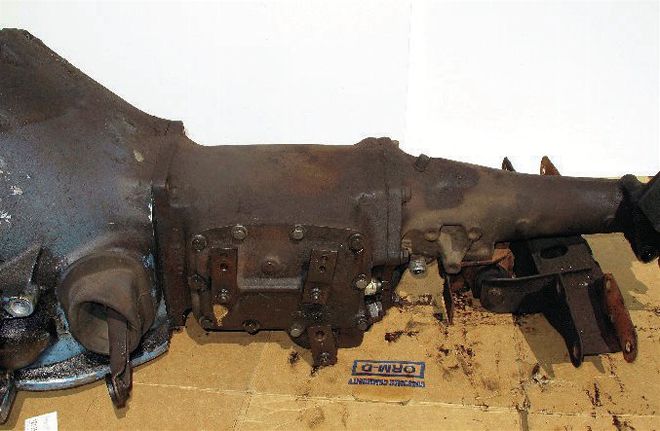
Here's our Challenger's original A-833 four-speed transmission, bellhousing, and crossmember after receiving the replacement parts it needed from Brewer's Performance. After over 100,000 miles, then sitting unused for over 20 years, this numbers-matching Pistol Grip four-speed was still shifting well without any odd noises during a testdrive while up on jackstands.
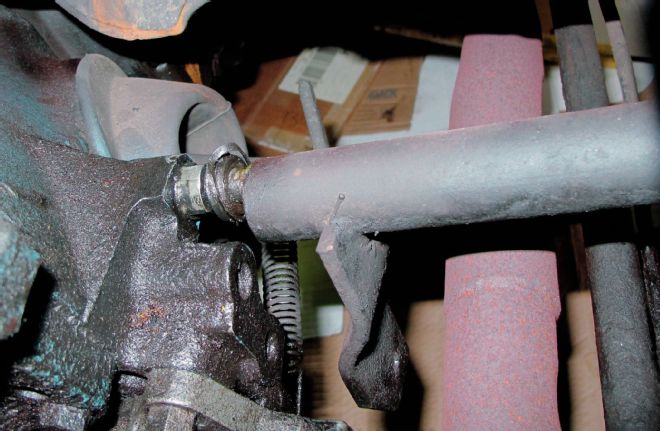
It's very obvious the torque shaft (Z-bar) is crooked and cockeyed. This Z-bar has been missing it's plastic bushings since the '80s when my friend first purchased the E-body. The torque shaft was rocking around and squeaking each time the clutch was depressed. We removed the Z-bar to assess the damage to the clutch linkage components.
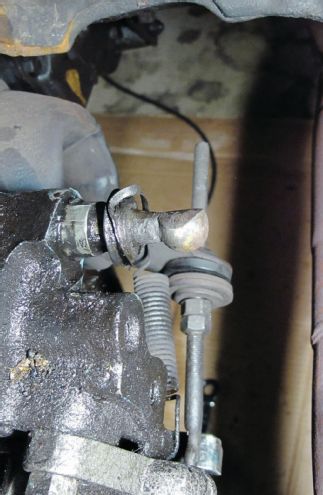
Without the plastic bearings in their place, the ball stud (pivot ball) was worn down to a half-moon shape. Also, there was excessive wear to the inside of the torque shaft.
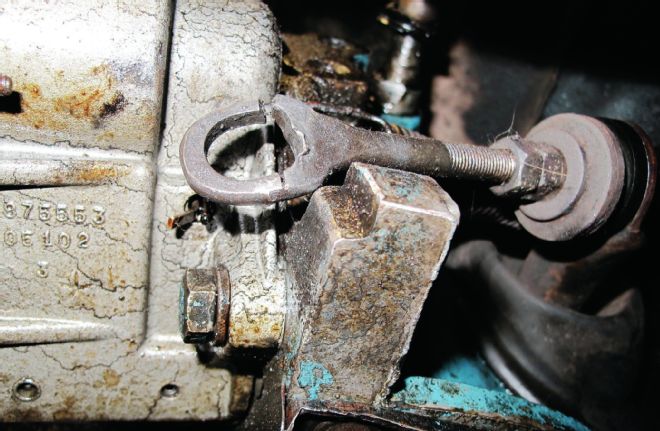
We also discovered the clutch adjusting rod was cracked and ready to break in two.
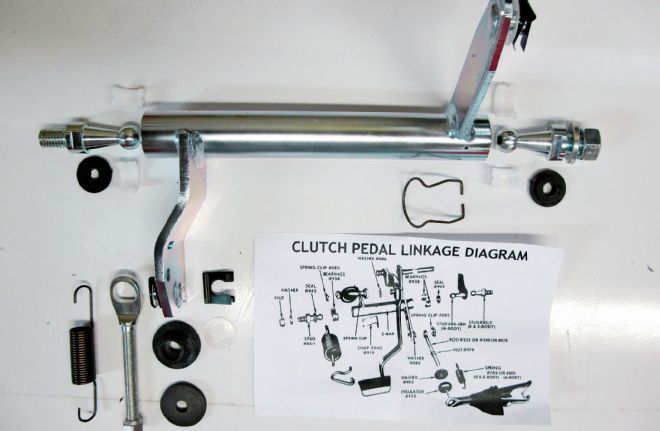
This prompted us to place an order for a new torque shaft, torque shaft service kit, and a clutch adjusting rod service kit (all three kits shown) from Brewer's Performance. The torque shaft kit consists of four plastic bearings, two ball studs, two ball stud seals, two anti-squeak washers, and clips. The clutch adjusting rod kit includes a clutch adjusting rod, adjusting nut, washer, insulator, spring, anti-squeak washer, and clip.
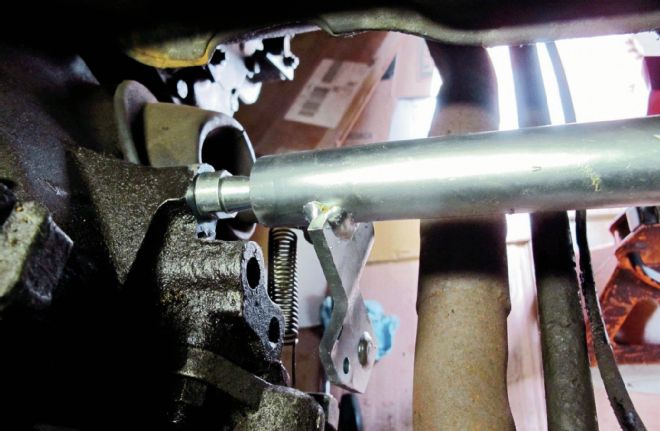
Now, the torque shaft looks straight and clutch pedal operation became smooth and squeak-free. We coated the ball studs, bearings, washers, and all pivot points with wheel bearing grease for many more years of trouble-free service.
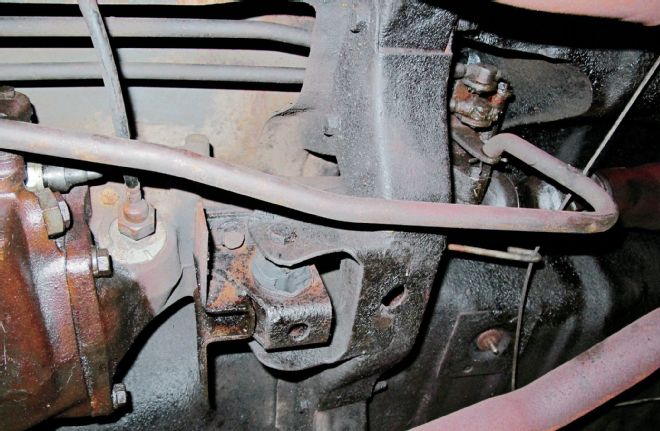
It's easy to see the gear oil seepage, dry-rotted original trans mount, and the dreaded '73-74 reverse linkage rod that hangs down and loops back too far to use a high-flow exhaust. All the shift linkage rods were missing their washers and clips causing lots of slop and rock. Only cotter pins were holding the linkage rods very loosely in place. The original shifter mechanism was so sloppy we knew exchanging it for a Brewer's rebuilt mechanism would dramatically shorten the shift throws.
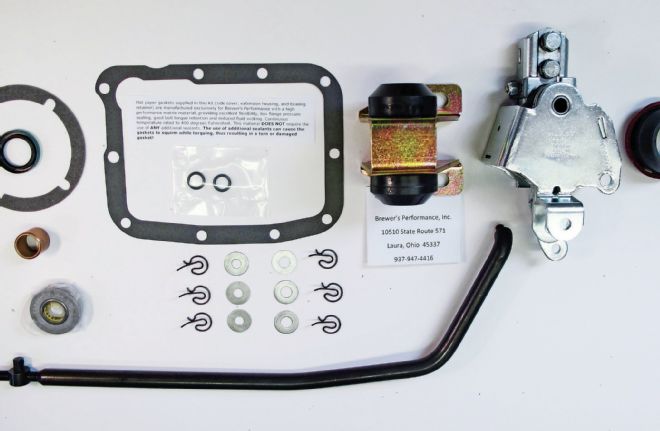
Here are the goodies we needed to stop the gear oil seepage, sloppy shifting, and excessive trans movement. Nobody needs gear oil leaking into a new clutch assembly so we ordered a front pinion bearing retainer seal and gasket, side cover gasket, gearshift lever O-rings, and tailshaft seal. To tighten up the shift throws we also got a rebuilt shifter mechanism (exchange only), shifter linkage clip/washer set, and a reverse linkage rod to clear the future TTI exhaust. Keeping the trans and its input shaft in line is a polyurethane trans mount, pilot bushing, and pilot roller bearing.
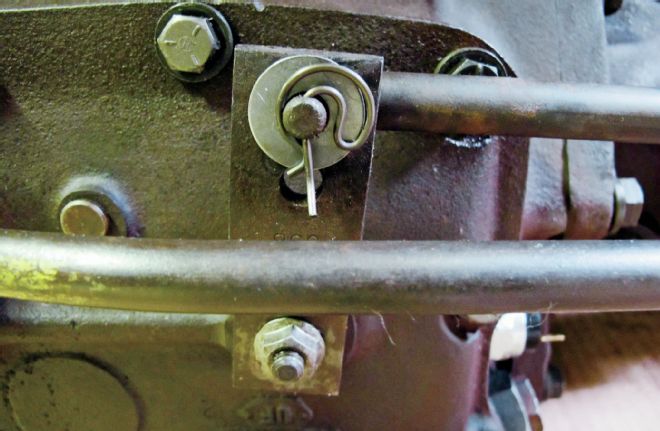
We needed the proper washers and clips at each shift lever (there are six of them) so there would not be excessive slop and long shift throws. Be sure to grease all the pivot points in the linkage system.
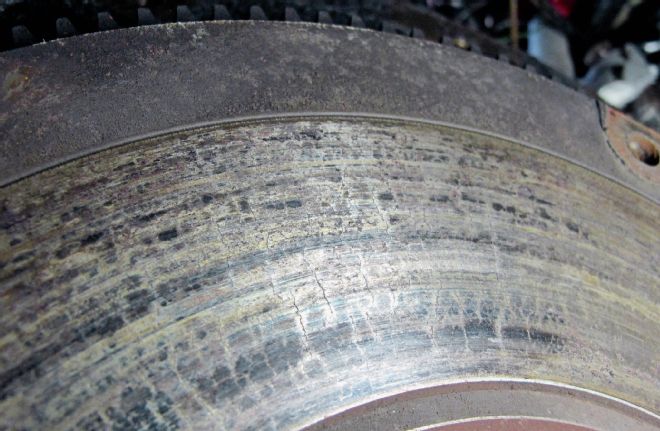
We couldn't use this heat-checked flywheel. Besides, it's externally balanced for the stock cast crank 340. If your stock flywheel is in good condition, the McLeod RST or RXT twin-disc clutch setup will bolt right up. For our application we ordered a new McLeod steel flywheel (130-tooth, 6-bolt) to match the Scat 4340 forged steel internally balanced crankshaft and reciprocating assembly. McLeod recommends a steel flywheel for the weekend warrior that is primarily street driven.
When we ordered our clutch, shifter, and transmission components, we asked the experts at Brewer's Performance which brand of clutch they recommended. Without hesitation, Brewer's suggested we use a McLeod clutch from its years of experience working with the brand. That led us to getting a McLeod Racing RST Street Twin clutch kit for our project car. We felt confident the McLeod RST Street Twin would transmit the power of our freshly built stroker small-block to the pavement. Brewer's has all the parts and service you'll need and even offers complete four-speed conversion packages if you'd like to ditch your 'matic and go bangin' gears.
Considering all the available parts and services that Brewer's offers, it was an easy choice for us to exchange the original, sloppy shifter mechanism for a rebuilt unit, making for a smoother and tighter shift pattern with much shorter throws. We're confident the McLeod RST clutch will perform admirably, along with the other replaced and rebuilt components. In this installment, you'll see the typical worn-out parts and pieces your A833 four-speed Mopar machine might be in need of during rebuilding. We're looking forward to grabbin' gears with that Pistol Grip once we drop the 416 into the Slick Challenger!
What to get!
Description: PN: Price (Brewers): Brewer's Torque Shaft (Z-Bar) TS914 $89.95 Brewer's Torque Shaft Service Kit CSK447 $59.95 Brewer's Clutch Adjusting Rod Kit AK449 $46.95 Brewer's Linkage Rod (Reverse) LR854A $56.95 Brewer's Pilot Bushing PB329 $3.95 Brewer's Pilot Roller Bearing PB5300 $18.95 Brewer's Shifter Linkage Clip/Washer Set CL/WA $11.95 Brewer's Throwout Bearing CB1463 $39.95 Brewer's Transmission Mount (Poly) TM2512P $59.95 Brewer's Rebuilt Shifter (Exchange) SM-BOLT-RO $149.95 Brewer's Pinion Seal (23-Spline) PS515C $6.95 Brewer's Bearing Retainer Gasket G307-31P $1.95 Brewer's Tailshaft Seal (30-Spline) TS85-63N $14.95 Brewer's Side Cover Gasket GSC037 $2.95 Brewer's Side Cover Shift Lever O-Rings OR111 $1.90 Brewer's Sta-Lube 85W-90 Gear Oil, 1 Gallon GL4SL $39.95 McLeod RST Twin Disc Clutch Kit MC6913-02 $699.95 McLeod Steel Flywheel (6-bolt, 130 tooth) FW102 $299.95
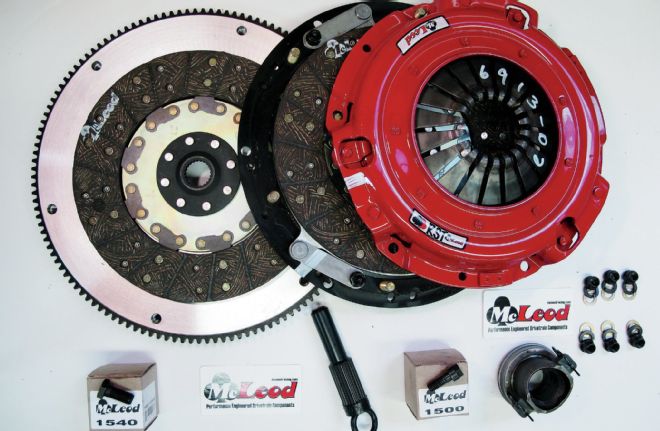
We decided that the McLeod RST twin-disc (up to 800 hp) would be the right choice for our intended street driver. What's nice about a twin-disc clutch is that it will provide more clamping force with a stock pedal effort while dissipating heat quicker. Here's the steel flywheel, adapter ring, two 9.7-inch friction discs separated by the floater plate, and the pressure plate.
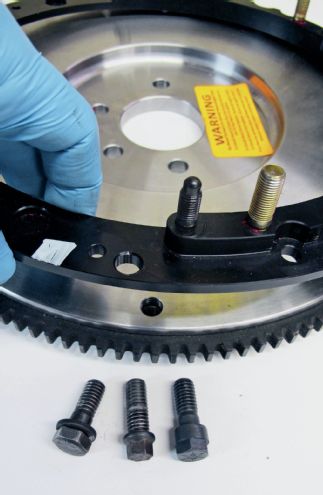
The first step to assemble the RST clutch assembly is bolting the adapter ring to the flywheel. Be sure to use OEM pressure plate bolts. Pictured are an OEM pressure plate bolt (3/8-inch), a header bolt, and a McLeod PN 1500 pressure plate bolt that can only be used with a single-disc pressure plate. It's important to use OEM pressure plate bolts (left) or Grade 8 replacement bolts that have the same size 7/16-inch length shoulder and 1/4-inch-thick hex head for clearance of the floater plate straps. The OEM bolts have the shoulder that will act like a dowel pin for the adapter ring, while the other half of the bolt's shoulder goes into the flywheel register to lineup and center the assembly. Torque the six adapter ring plate bolts (again, OEM pressure plate bolts or exact replacement bolts) to 35 ft-lb in a star pattern.
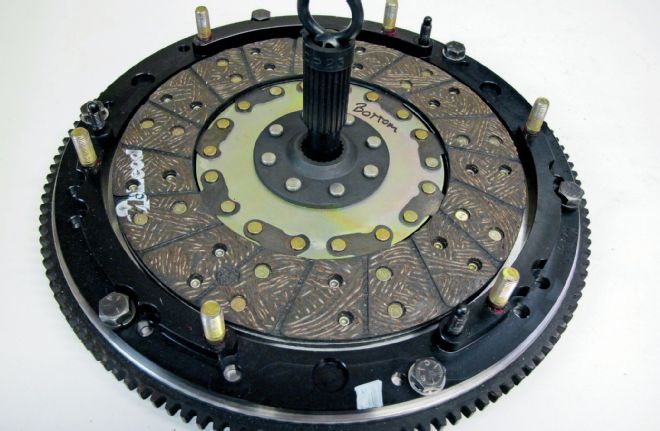
Next, the clutch disc marked "bottom" is put in place. Be sure to use the provided alignment tool and install it through the disc into the pilot bearing.

The floater plate is placed on top of the "bottom" disc. Make sure the white paint stripes line up with the alignment tool in place before bolting up the floater plate. Torque the three floater strap nuts to 25 ft-lb. At this point the "bottom" disc should rotate using the alignment spine tool.
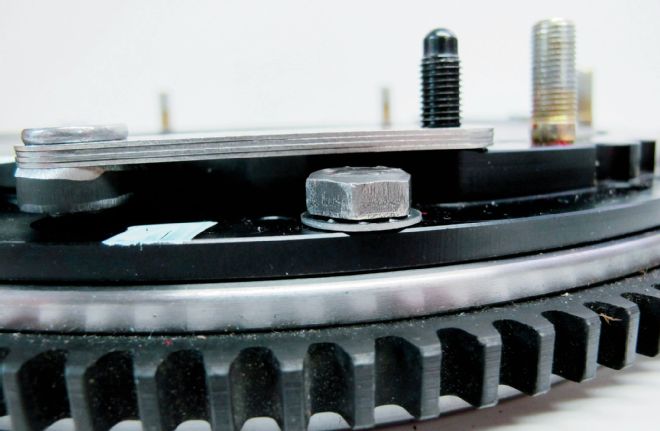
For enough clearance (at least .080-inch plus) at the three floater straps, we used a thin (.030 inch) star washer with the three of the six OEM pressure plate bolts for the adapter ring. Do not use the thick (.120 inch) OEM lock washer—there will not be enough floater strap clearance (.040 inch) for the clutch discs to wear more than .020 inch each.
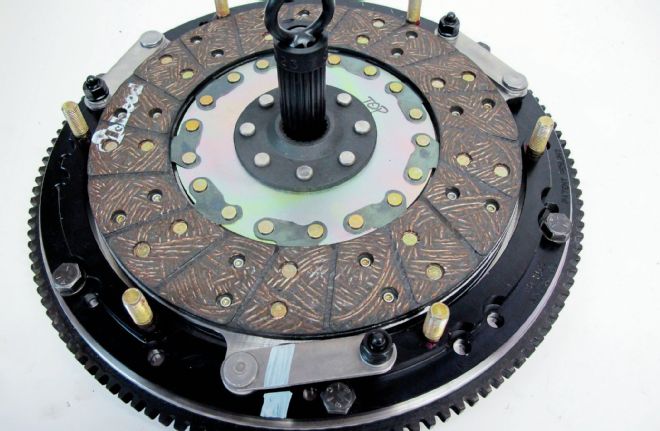
Install the disc marked "top" using the alignment spine tool and be certain it fully engages into the pilot bearing to correctly center the two discs.
Now the pressure plate can go onto the six studs on the adapter ring. Pay special attention that the white paint stripes are all lined-up for the adapter ring, floater, and pressure plate. In this order, install the six flat washers, six lock washers, and six nuts onto the studs finger tight. Rotate the alignment tool in either direction to make sure the discs are aligned properly. Tighten the pressure plate nuts to 25 ft-lb in a star pattern. Final torque (35 ft-lb) is determined when the diaphragm fingers stop pulling toward the flywheel.
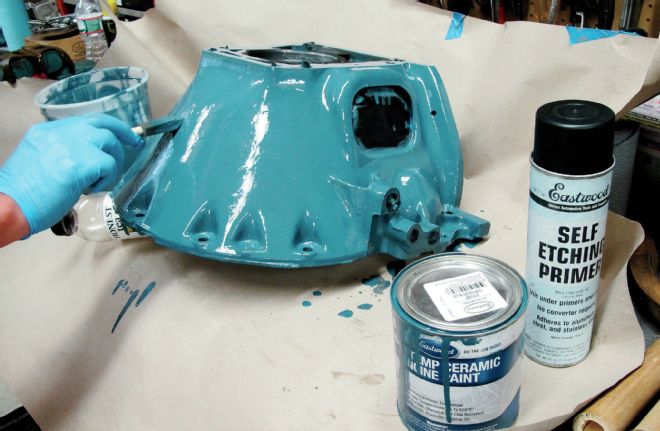
We coated the bellhousing with the same Eastwood High Temp Ceramic Engine Paint (PN 51619ZP Chrysler Blue) we had leftover from the stroker 340/416 we're building for this E-Body. We'd have to agree that it's the most durable heat-resistant engine paint available.
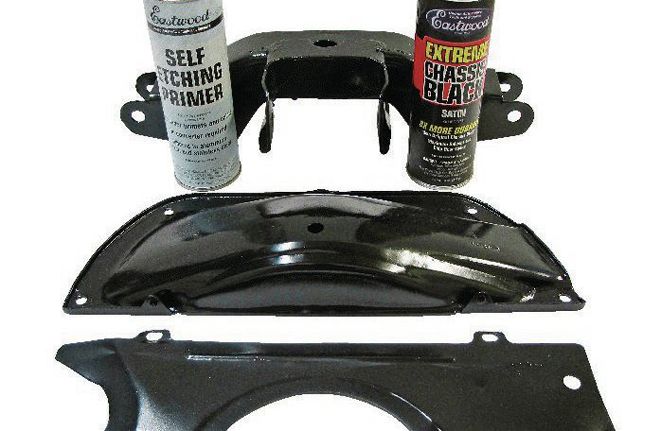
Both clutch inspection covers and the crossmember were cleaned up, then primed, and painted with more Eastwood products: Self Etching Primer (PN 16014Z) and Extreme Chassis Black (PN 11175Z).
Here's a good before and after look at our revived Pistol Grip four-speed. We're impressed with the crisp shifts and how much shorter the throws are with Brewer's rebuilt shifter and linkage system components. With the new gaskets and seals we'll have no worries about gear oil leaking onto the new McLeod RST clutch assembly.