Don't be afraid to adjust the carb with more than just your idle-air screw! The opening line says it all, right? Install a new carb or one that you just found at a local swap meet and don't be afraid to turn some screws and change some jets. I've been to many automotive-related classes in the past, but always seem to forget the part on how to tune a carb.
Some can tune by sound and by vacuum, but I could never really tell if the truck got faster or slower without a dyno or dragstrip. Dyno shops are the next option, but unless you are interested in squeezing every last horsepower out of your engine then the cost for dyno time may not be in the budget.
So what is the next step for the at-home or even local hot rod shop builder when it comes to tuning carbs? Well for me I learned how to tune a carb by how well it ran, but that method only got me so far. I never knew how rich or lean the engine was running and was always timid about driving the vehicle hard.
This is why I turned to an O2 sensor and reader for tuning carbs. Most importantly I could now tune to a targeted air/fuel ratio instead of guessing or looking at spark plug readings. Did you know that running an engine too lean or too rich can cause major engine troubles? A while back I was at a friend's shop where he showed me the effects of an over-lean condition. To make a long story short the engine self-destructed. So here are a few tips that may help you tune your carb with a little help from a O2 sensor reader.
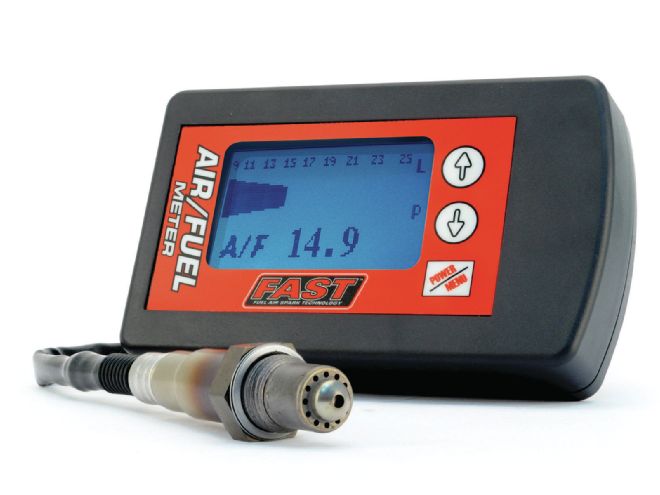 The FAST air/fuel ratio reader 170401 is simple to read and very easy to install. The kit comes with a protective case, data screen, O2 sensor and bung, and wiring.
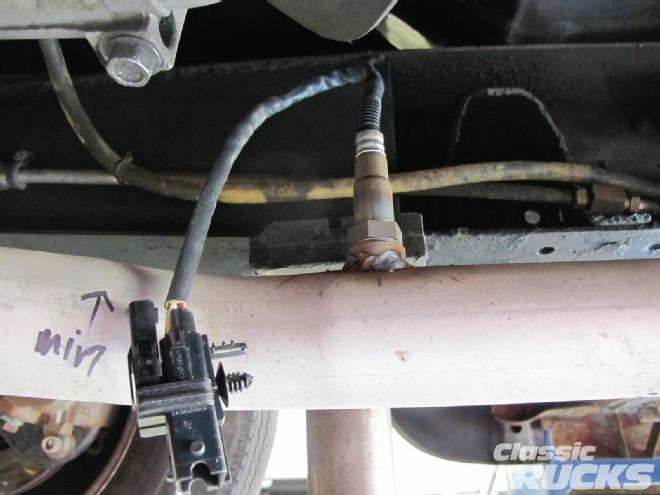
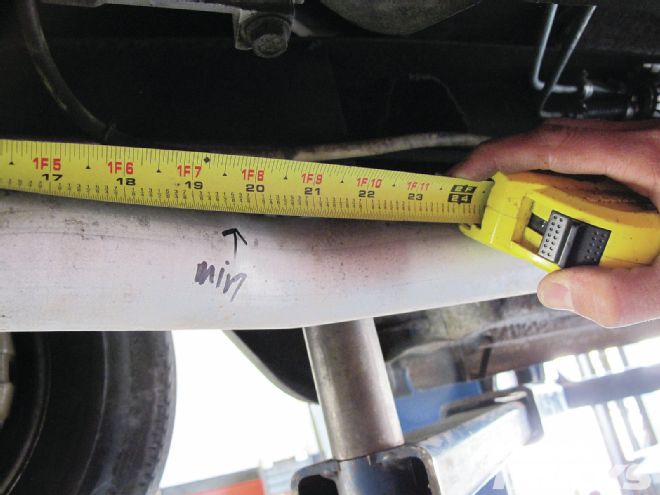 The hardest part of installing the O2 sensor reader is deciding where to weld in the O2 sensor bung. FAST recommends that the O2 sensor is at least 20 inches away from the header collector and that the O2 sensor is pointed 10 degrees downward.
If you weld the O2 sensor bung with the wiring pointing down, there's a good chance that the O2 sensor will fill with condensation and have a false reading.
The hardest part of installing the O2 sensor reader is deciding where to weld in the O2 sensor bung. FAST recommends that the O2 sensor is at least 20 inches away from the header collector and that the O2 sensor is pointed 10 degrees downward.
If you weld the O2 sensor bung with the wiring pointing down, there's a good chance that the O2 sensor will fill with condensation and have a false reading.
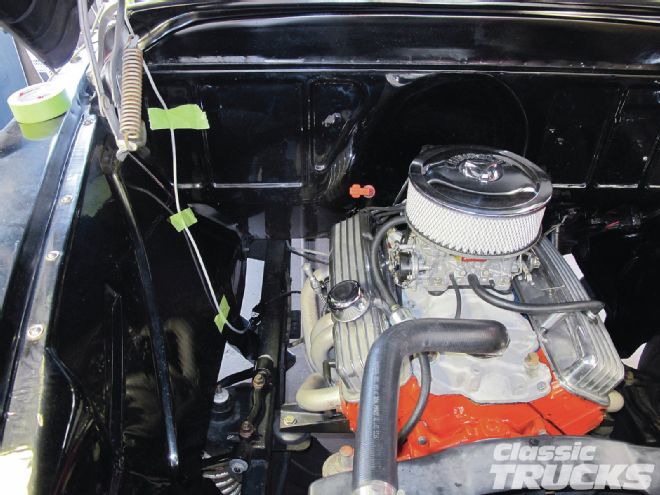 Since we were using this to tune several vehicles we wanted the wiring and O2 sensor to be removable. Using green tape I routed the wiring through the hood and into the cab. To power the FAST O2 sensor reader, simply plug it into a cigarette lighter socket and push the power-on button.
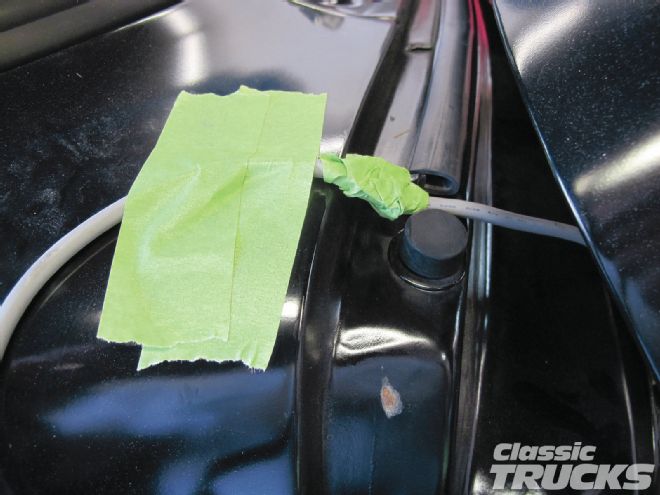 Extra care was taken to make sure the hood closing did not damage the wire to the reader.
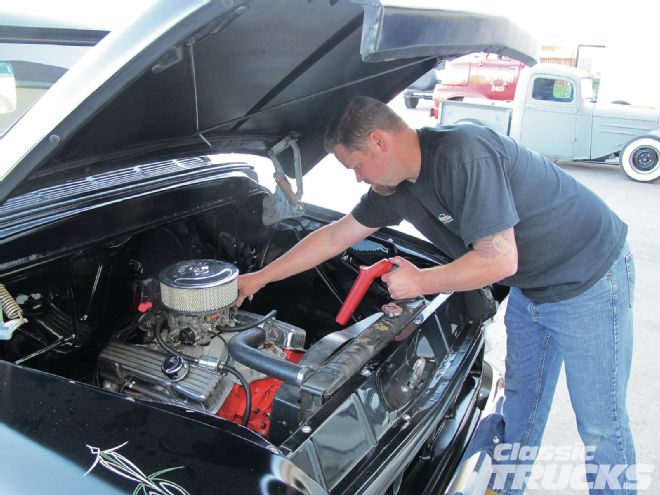 Next I verified that the timing was correct for the engine with the vacuum advance disconnected. This engine had a mild thumper cam from Comp Cams that let the engine breath a little better. The owner of the truck originally set the timing to 8 degrees and 31 degrees total. Since the owner had a bigger cam than stock I wanted to bump the total timing to 35 degrees, which increased the initial timing to 12 degrees and gave us better idle qualities and vacuum. This is also a good time to pull a spark plug or two just to check for wear and or fouled plugs. Also check the wires for burned ends from header contact. Make sure the cap and rotor are in good working order and don't have excessive wear
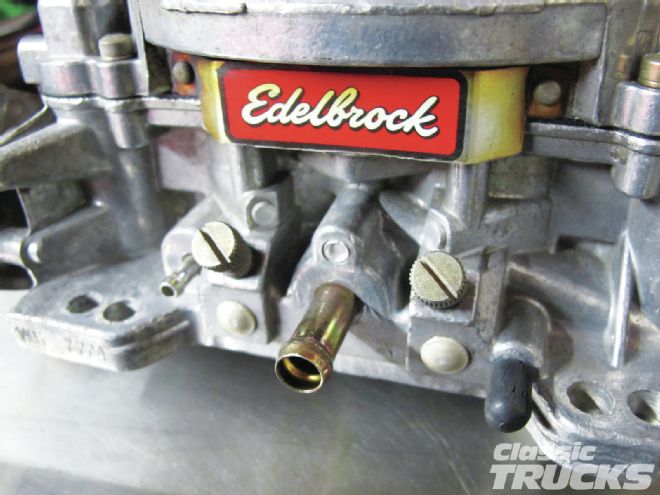
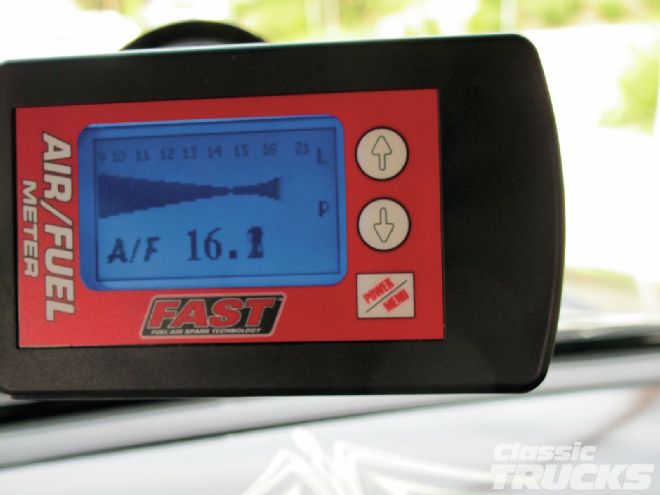 With the used Edelbrock 600-cfm carb (part number 1406) on the truck who knows what the previous owner did to it and what the jets inside actually were. All we know is that with the new O2 sensor reader we could now see what the engine demand for fuel was. We let the engine warm up to operating temp and noticed the idle and cruise were on the lean side – 16:1 air/fuel ratio. Wide-open throttle was close, but I only wanted to address one thing at a time. Time to open this Edelbrock 600-cfm carb up.
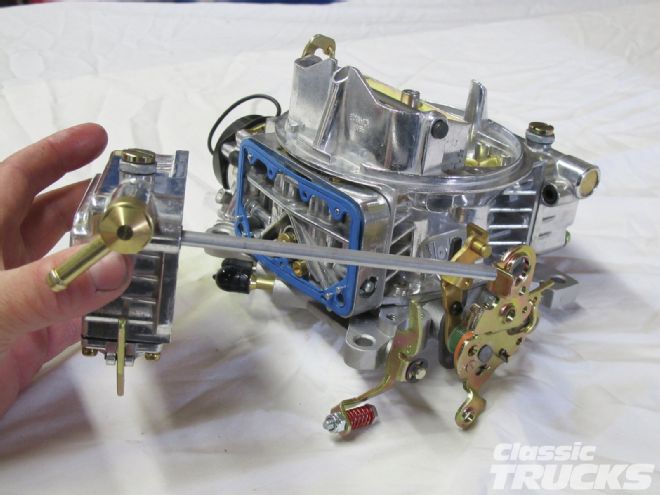
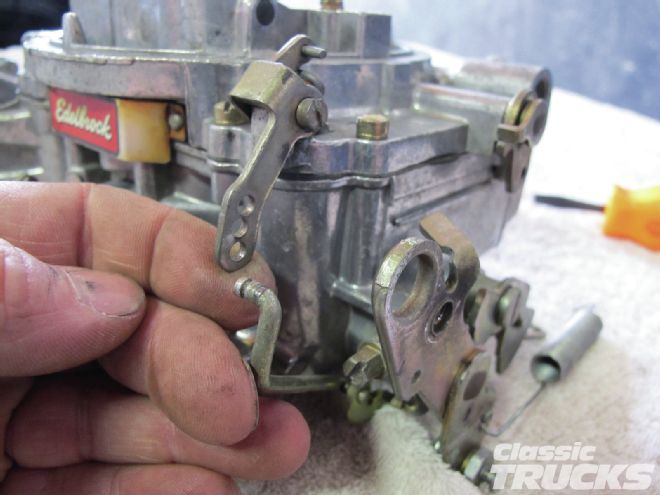 I removed the carb and set it on a clean towel so I could safely remove bolts without having them roll away on the table. Start by removing the choke linkage clip and then move to the other side.
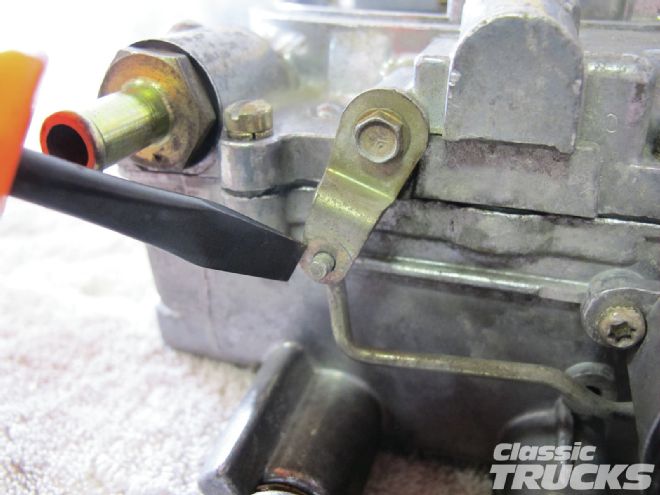 Then remove the accelerator pump linkage clip.
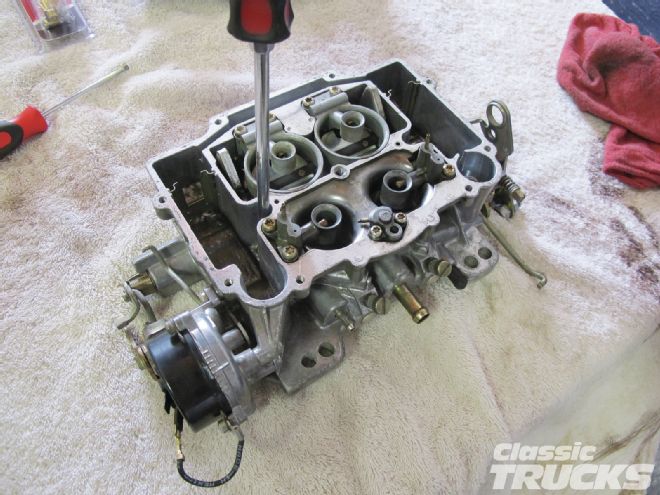
 I removed the eight screws on top of the carb and gently tapped the upper carb with the soft side of a screwdriver to loosen the top. Edelbrock recommends that the metering rods are removed before removing the top of the carb, but if you are really careful and don't force the top of the carb off then you can remove it without removing the rods.
 OK, here is a look inside of the Edelbrock single pumper with vacuum secondaries. For now we are going to look at the fuel float bowls, needle and seat, main jets, and secondary jets.
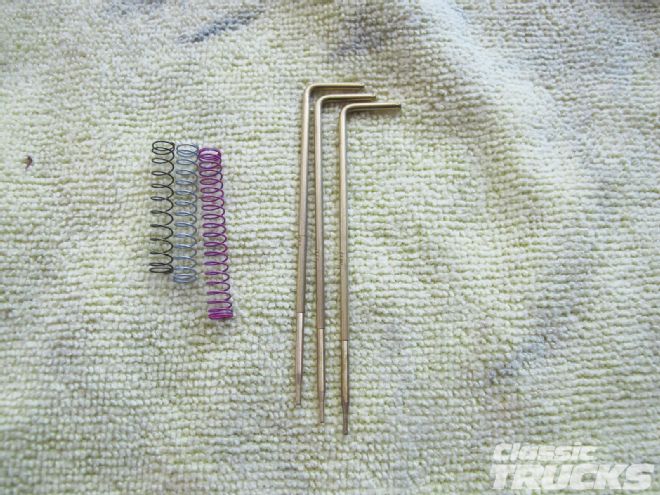
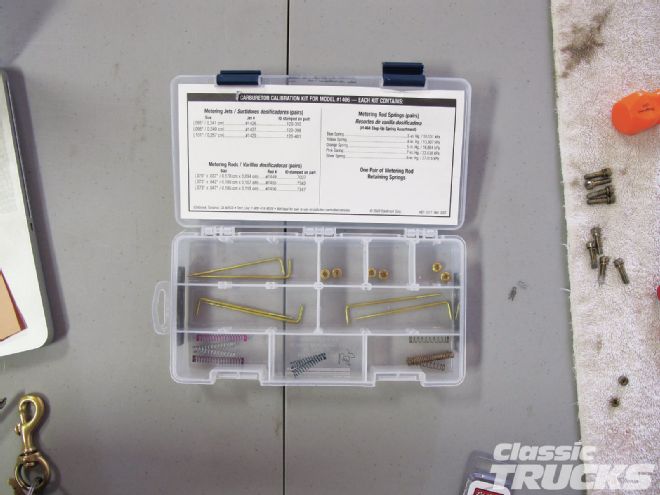 I picked this Edelbrock calibration kit, which has several different size jets, metering rods, and metering springs.
 The main jets are located on the bottom of the carb near the middle on each side. With a large screwdriver they are easily removed by unscrewing them. Since we were running lean on the idle side and during cruise, I wanted to make a slight jet change on the main jets from .095 to .101 jets.
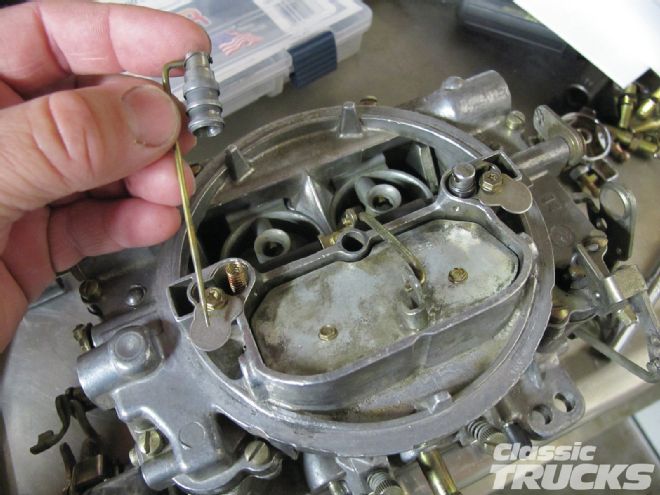
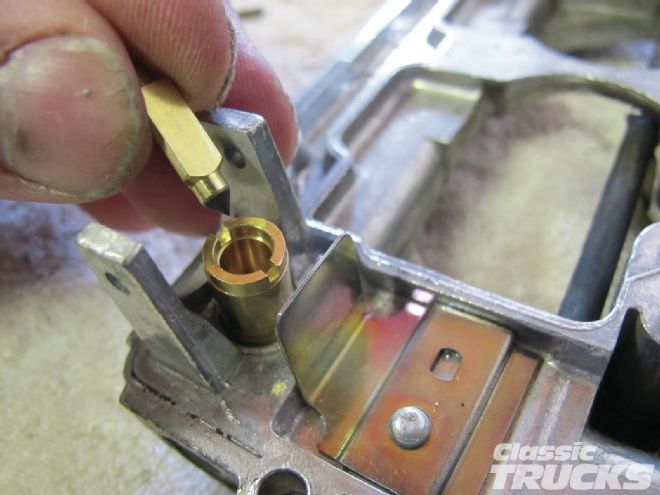 While I was in there I wanted to replace the needle and seat. The needle and seat let the fuel into the carb when the float is down and stop the fuel when the float is up. If they are not working properly then the fuel can overfill the fuel bowls and flood the engine, causing a rich condition.
 The top half of the carb also holds the accelerator pump. The accelerator pump's job is to squirt extra fuel into the carb during acceleration. It's a good idea to check the accelerator pump plunger for cracks and wear. If the accelerator is not working correctly then the engine can go lean when you decide to push on the accelerator causing a bog or lack of power.
 Float bowl level is very important, because it can make the engine rich or lean depending on where it is set. Edelbrock recommends setting the float at 7⁄16 closed and 1 inch open. I used a torque bit that measured 7⁄16 to check the floats. It is also a good idea to have a fuel pressure regulator on the engine to set the recommended fuel pressure.
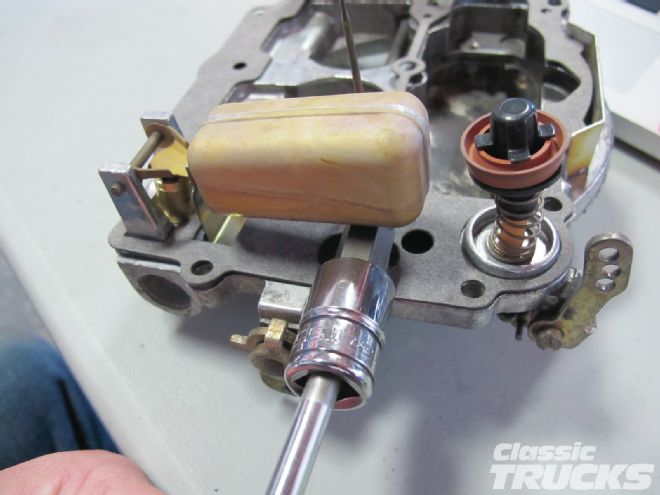
 Make sure to install a new top gasket after opening the carb up. Also make sure to snug all the bolts and not overtighten the carb in one area. On the top of the 1406 Edelbrock is a set of left and right metering rods and springs. The rods are tapered to increase or reduce fuel depending on the size of the rods and metering springs installed.
The metering rods and springs work in conjunction with the main jet. The main jet allows fuel to enter the carb and is limited on how much fuel it can deliver by the metering rod size. The metering rod is controlled by springs that are different lengths and or strength. The spring's main job is to move the metering rod away from the main jet during different stages of vacuum. If you have a spring that is too soft, then try a slightly stiffer spring or higher vacuum rating to increase fuel during mid throttle. With the FAST O2 sensor reader you can see what the O2 sensor reading is when driving. A lean condition at cruise depending on your engine is anywhere from 15.5-18 air/fuel ratio. I like to tune my engine's air/fuel ratio to run around 14-15 at cruise. You can go slightly leaner, but risk the chance of engine damage if too lean. Wide-open throttle is controlled by the secondary jet and is tuned by replacing the jet; ideally I want my WOT air/fuel ratio to be at 12.5-13.
Idle is set by either listening to the engine as you adjust the idle-mixture screws or you can simply place the FAST O2 sensor reader in the engine bay and adjust for best air/fuel ratio. You can also use a vacuum gauge to adjust for best vacuum at idle, but I found the FAST O2 sensor reader to be the easiest way to adjust idle. I like to set my air/fuel ratio to around 14.7-15 at idle for safe mixture. Your engine might demand more fuel, so keep in mind that these are just target areas and not actual specs for every engine.
Make sure to install a new top gasket after opening the carb up. Also make sure to snug all the bolts and not overtighten the carb in one area. On the top of the 1406 Edelbrock is a set of left and right metering rods and springs. The rods are tapered to increase or reduce fuel depending on the size of the rods and metering springs installed.
The metering rods and springs work in conjunction with the main jet. The main jet allows fuel to enter the carb and is limited on how much fuel it can deliver by the metering rod size. The metering rod is controlled by springs that are different lengths and or strength. The spring's main job is to move the metering rod away from the main jet during different stages of vacuum. If you have a spring that is too soft, then try a slightly stiffer spring or higher vacuum rating to increase fuel during mid throttle. With the FAST O2 sensor reader you can see what the O2 sensor reading is when driving. A lean condition at cruise depending on your engine is anywhere from 15.5-18 air/fuel ratio. I like to tune my engine's air/fuel ratio to run around 14-15 at cruise. You can go slightly leaner, but risk the chance of engine damage if too lean. Wide-open throttle is controlled by the secondary jet and is tuned by replacing the jet; ideally I want my WOT air/fuel ratio to be at 12.5-13.
Idle is set by either listening to the engine as you adjust the idle-mixture screws or you can simply place the FAST O2 sensor reader in the engine bay and adjust for best air/fuel ratio. You can also use a vacuum gauge to adjust for best vacuum at idle, but I found the FAST O2 sensor reader to be the easiest way to adjust idle. I like to set my air/fuel ratio to around 14.7-15 at idle for safe mixture. Your engine might demand more fuel, so keep in mind that these are just target areas and not actual specs for every engine.
 With the carb back on the truck, Mat Colvin, the truck's owner, and I went for a little drive. As he drove the truck I watched the air/fuel ratios and compared them to the last tune. Looks like with a simple main jet change from .095-.101 and metering spring change we were able to get his SBC to run like a top with a 600-cfm carb. Mat's engine previously had a 750-cfm double pumper that was a great carb, but was too big for the engine.
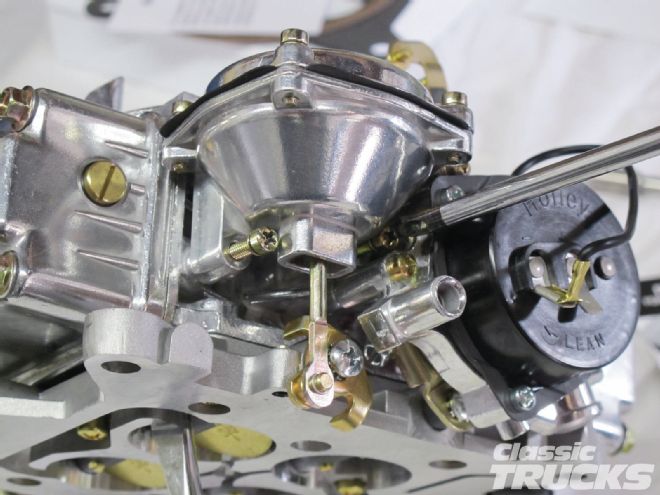
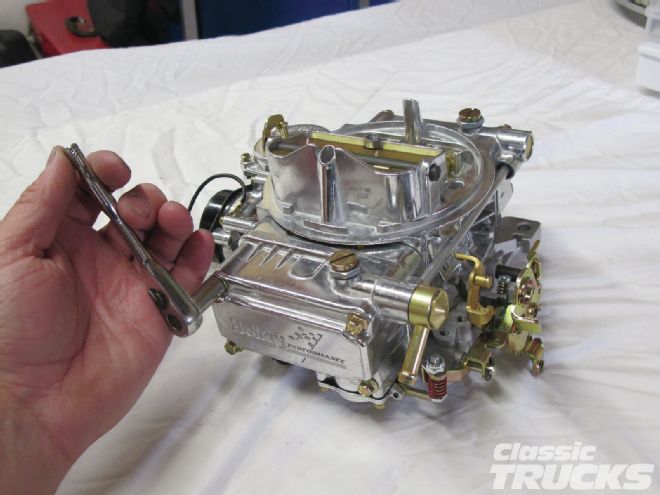 OK, the Edelbrock tuned great on the basic 350 with a mild cam, but I wanted to show you guys how a basic Holley 600 single pumper (part number 4160C) with vacuum secondaries would tune. Both the Edelbrock and the Holley are probably the most popular carbs when it comes to economy at the pump and purchasing.
We removed the front fuel bowl on the Holley and inside were the front fuel bowl and accelerator pump. The fuel bowl is set via a large nut and locking screw on the outside of the bowl.
OK, the Edelbrock tuned great on the basic 350 with a mild cam, but I wanted to show you guys how a basic Holley 600 single pumper (part number 4160C) with vacuum secondaries would tune. Both the Edelbrock and the Holley are probably the most popular carbs when it comes to economy at the pump and purchasing.
We removed the front fuel bowl on the Holley and inside were the front fuel bowl and accelerator pump. The fuel bowl is set via a large nut and locking screw on the outside of the bowl.
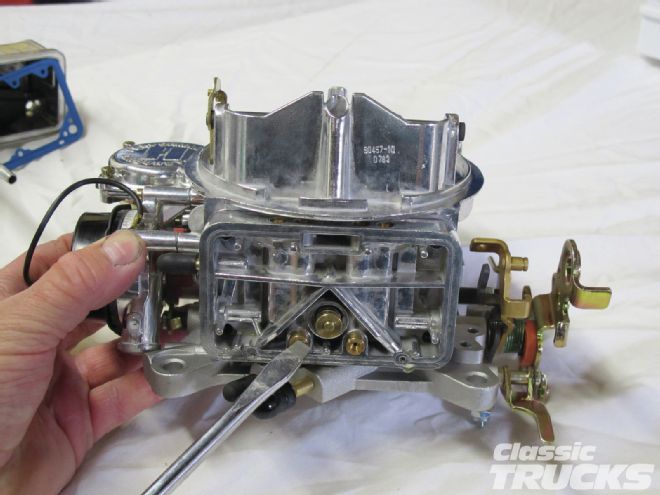 On the metering block side is a pair of jets that control fuel for the main and secondary. In the center of the metering block is a power valve that controls the idle to off-idle fuel. The power valve should be tuned with the use of a vacuum gauge depending on cam size and vacuum. In general the stock 65 power valve will perform well with 12 inches Hg or higher. If you have a slightly bigger cam with less vacuum at idle then a smaller-numbered power valve is required.
 To adjust for a lean condition at idle you can swap the jets for larger sizes. The primary-side jets control the air/fuel mixture at idle and off idle. In this case we jump up from 65 jets to 66 jets because I didn't think the mixture was too far off. You also need to look at fuel delivery like float bowl level, fuel filter, and fuel pump issues before changing jets.
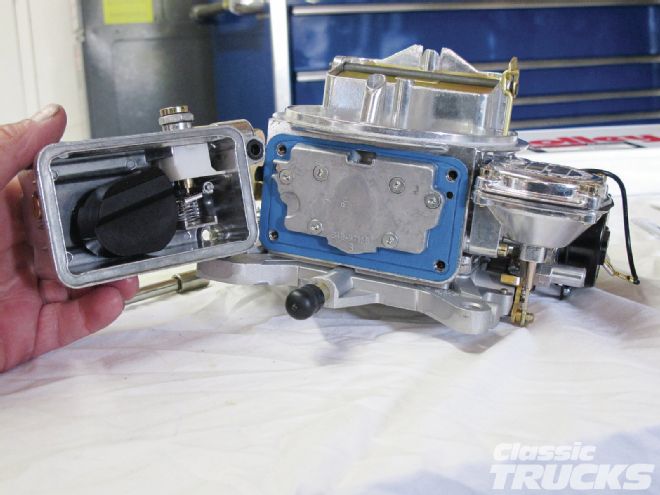
Holley has two floats: one for the primary and shown is the secondary float on the backside of the carb. To check the secondary floats, the vehicle needs to be under load and not stationary in the driveway revving the engine.
To adjust for a lean condition at idle you can swap the jets for larger sizes. The primary-side jets control the air/fuel mixture at idle and off idle. In this case we jump up from 65 jets to 66 jets because I didn't think the mixture was too far off. You also need to look at fuel delivery like float bowl level, fuel filter, and fuel pump issues before changing jets.
Holley has two floats: one for the primary and shown is the secondary float on the backside of the carb. To check the secondary floats, the vehicle needs to be under load and not stationary in the driveway revving the engine.
 he vacuum secondary is found on the passenger side of the carb near the back. Ideally you want the secondary to come on as fast as possible without the carb going lean. Springs are used to control the amount of vacuum it takes to open up the secondaries. The lighter the spring, the faster the secondaries will open. Usually trucks require a mid to large secondary spring because of the vehicle's weight.
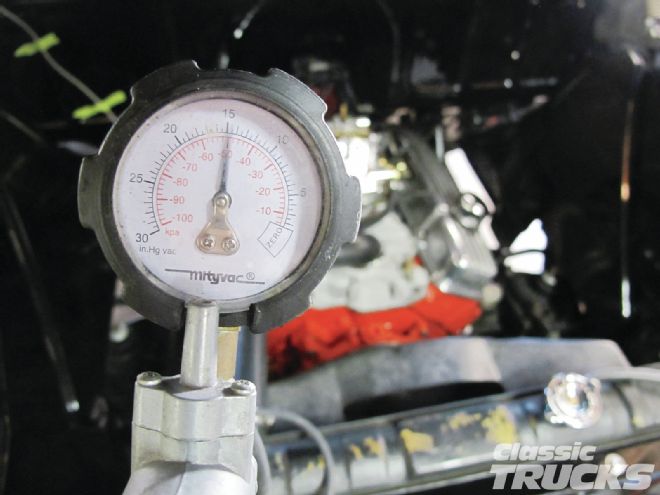 With the carb back on the vehicle I hooked up a vacuum gauge and set the FAST O2 sensor reader inside the engine bay so I could set the idle to best vacuum and also best air/fuel ratio. The vacuum gauge also helps me determine that my power valve is correct per the amount of engine vacuum. A good rule to follow for power valve choice is to divide engine vacuum in half to get power valve size; 14-15 inches of vacuum equals a 6.5 power valve give or take a few numbers.
 With everything said and done I left the O2 sensor reader on the truck for a few days to make sure the carb was set to the air/fuel ratios I wanted. Here I'm at wide-open throttle and the air/fuel ratio is around 12.5-13.1 with the Holley. On both carbs I was able to adapt very easily to engine demand and if you are looking for drivability and performance without hurting your wallet, look toward these common 600-cfm single-pumper carbs.