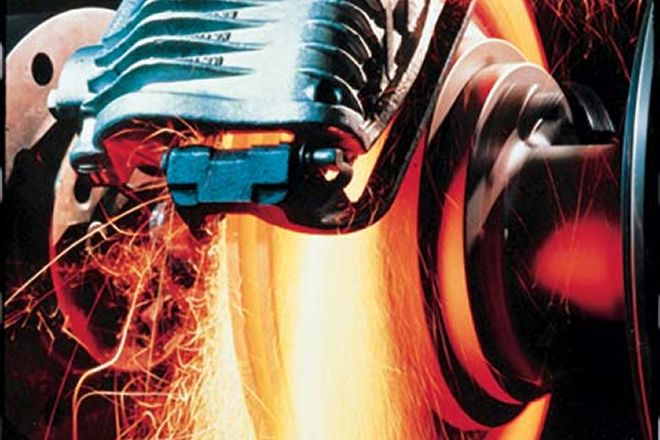
The advantages of disc brakes are well known to serious four-wheelers. Although discs have lessarea than comparable-application drums, they work better when hot and wet. Plus, discs are easier to service.
Many older 4x4s can be updated to disc brakes using later-model OE components or aftermarket kits. Slapping on rotors and calipers is the easy part of the job; getting all four corners to function properly can be challenging. Half-assed disc conversions can actually stop worse than the drums they replaced, and some "kits" don't include all the components necessary to optimize stopping. The solutions aren't as easy as upgrading to higher-tech pads to increase stopping power....
To put it simply, disc braking takes foot pressure and translates it into enough clamping force to stop a multithousand-pound vehicle. The focus here, to use an engine analogy, is dialing in "naturally aspirated" disc-brake conversions for pre-ABS 4x4s. Vacuum-assists and hydro-boosts "supercharge" brake systems by increasing pressure, but they rely on a running engine to generate vacuum or hydraulic pressure. Just as adding a forced-induction unit to a tired engine puts the proverbial cart before the horse(power), a dialed-in manual braking system should be even better if swinging pedals and booster-mounting space are available. In other words, strive for brakes that'll keep a stalled 4x4 from rolling down a hill.
Doing some math might save time and unnecessary parts later. Start by finding your pedal ratio (normally about 5:1 for manual systems and 3:1 for power-assist brakes; see diagram):
pedal ratio = pivot point to foot pad distance / pivot point to master-cylinder rod distance
When upgrading brakes, a hard pedal can indicate that the ratio is too low for the new system; too much pedal travel means that the ratio is too high.
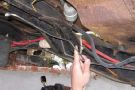
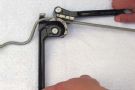
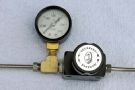
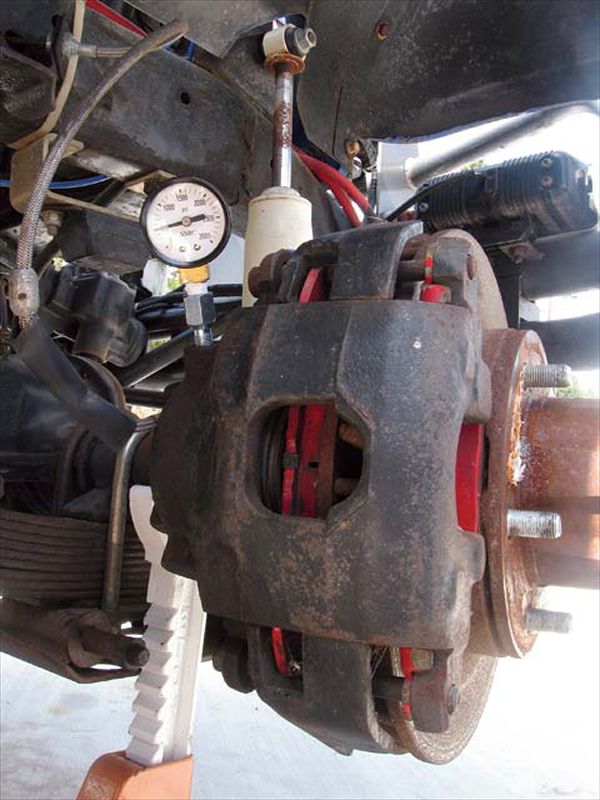 By replacing the bleeder at each corner with a brake gauge, side-to-side pressure variations point to a pinch, block, or leak in the lines, and front-to-rear variations help narrow down biasing issues. Disc systems typically need 800-1,200 psi up front and 750 psi in the rear to actuate pistons; drums require as little as 400 psi for wheel cylinders to spread shoes. On this four-disc-converted manual-braked CJ, each corner spiked under 500 psi during brake-pumping. Pressure dissipated with the pedal depressed, indicating a bad master cylinder. An MC rebuild spiked the pressure to 1,200 in front and 700 in the rear without an adjustable proportioning valve.
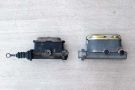
Next, get your master cylinder's specifications (from a parts-store counterman's catalog or an aftermarket specialist if necessary). Pre-'66 vehicles should always be updated to a dual-reservoir master cylinder so that one end will theoretically stop in case of leakage or failure with the other end.
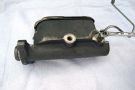
OE 4x4 master cylinders' strokes are usually between 1 and 2 inches of piston travel, and their bores are typically between 7/8 inch and 1 1/8 inches. Rear calipers require more pressure and volume than drums' wheel cylinders, which is why drum/drum or even disc/drum masters often won't work with four-disc systems. Drum setups also have residual pressure valves in their master cylinders. These valves maintain about 10 psi of preload on the wheel cylinders so that the shoes won't retract completely when the pedal is up. If attempting to retain a drum-system master cylinder, remove the residual valve(s) from the outlet port(s). Otherwise, disc-drag will result from the residual pressure. Further, manual master cylinders have a deeper piston hole than vacuum-assisted units, and their bores normally have a maximum 1-inch diameter to limit the force required to move the brake pedal.
If the pedal ratio and pivot point are mismatched to the master cylinder's stroke, the system might not achieve full pressure and the piston might not retract all the way. A partially depressed piston can create brake drag even when the pedal is all the way up, and a pedal that hits the floorboard before full piston travel occurs won't achieve full braking pressure.
Front disc brakes typically require 1,000-1,200 psi of hydraulic pressure to fully actuate (around 800 psi is rock-bottom for disc movement compared to 400 psi for drums). A system's pressure capacity can be calculated:
master cylinder pressure = pedal force / piston face area (sq. in.)
So, a 100-pound person "standing" on a brake pedal with a 5:1 ratio moving a 1-inch-diameter master-cylinder piston ("pi" symbol R2 = 0.7854) yields about 637 psi of braking power (500 ? 0.7854). Swapping in a bigger-bored master cylinder moves more fluid but generates lower pressure. Conversely, a smaller bore creates more pressure but moves less fluid. It also requires more pedal travel, so a smaller-bore master cylinder might not be the pressure solution if the pedal is mounted close to the floorboard.
So, changing a master cylinder's stroke and/or bore alters the amount of fluid the system displaces. Volume remains constant (glycol-based brake fluid can't be compressed, and hydraulic braking systems are "closed"), and the pressure rises when the pedal is pressed, causing the calipers' pistons to move. Larger-bore master cylinders require a shorter stroke to displace the same amount of fluid as ones with smaller bores. Here's the fluid formula:
fluid displacement = master cylinder's stroke length (piston cylinder) x piston surface area (sq. in.)
If each front caliper's pistons displace 0.075 cubic inch and each rear displaces 0.05 cubic inch, our total piston area is 0.25 cubic inch. If we double this for a safety factor to allow for seal-swelling, deflection, and potential leakage, we need 0.5 cubic inch of total cylinder displacement to move all four caliper pistons. If our master cylinder's stroke is 1 1/8 inches (1.125), we arrive at 0.5 ? 1.125 = 0.444 square inch of required master-cylinder piston area, or approximately a 7/8-inch bore (0.444-inch radius x 2 = 0.8888-inch diameter, or about 7/8 inch).
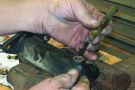
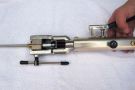
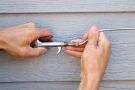
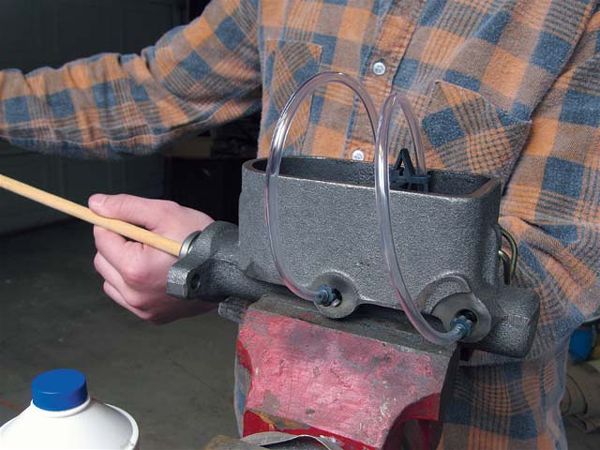 Bench-bleeding a rebuilt or replacement master cylinder is easier and faster than attempting to purge air with the unit on the vehicle. This cheapie parts-store kit feeds fluid from the ports back into the reservoir as the piston is plunged with a blunt object. Once all air bubbles disappear from the master's ports and the bleeder kit's tubing, promptly put the lid on the master, install it on the vehicle, and bleed the brakes to minimize additional air from entering the system.
Once the master cylinder and pedal ratio (if adjustable) are mathematically matched to the calipers' fluid-displacement requirements, hydraulic valves are used to tailor the pressure and volume. Proportioning-front/rear biasing-is necessary because the vehicle's leading end needs more braking power. The other end (i.e., rear) actually needs to grab first to avoid an unsafe nose-dive, analogous to the front brake throwing a cyclist over the handlebars. However, the front rate of rise is higher, meaning that the rears actuate first but grab more slowly than the fronts. OE systems typically use a combination or metering valve that regulates front/rear pressure in addition to containing a warning-light switch. Consult the brake specialists listed here to see if an OE-application valve will work for your conversion.
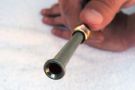
For the rest of us, an aftermarket adjustable proportioning valve allows the rear brakes to be fine-tuned. If they lock up before the fronts in a panic stop, the adjustable proportioning valve will help limit the rear rate of rise. Ballpark pressure for rear calipers is around 750 psi. This can be used as a starting point, then the proportioning valve can be adjusted a quarter turn at a time until braking passes the seat-of-the-pants test on a long, deserted road with no poles alongside it: In a panic stop, both ends should lock around the same time.
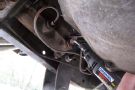
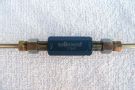
In disc systems, 2-psi residual pressure valves maintain a preload on the calipers' pistons so that they won't retract fully (quicker activation). This typically happens when the calipers are located above the master cylinder and fluid siphons back into the reservoir. If the pedal needs two pumps for the pads to grab, 2-psi residual valves can be a cure.
Power-assists: These units can solve low-pressure problems. However, vacuum boosters require a minimum of 16 inches of engine vacuum as well as space for mounting the booster. (The larger the booster, the more assist it provides.) Remote-mounted boosters and even electric vacuum pumps are marketed to hot-rodders, as are other potential fixes such as ECI's frame-mounted Brake Pressure Multiplier. Another possible low-pressure solution is a steering-pump-driven hydroboost system such as the one from Vanco.
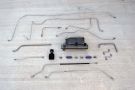
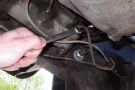
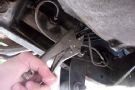
Hoses: Lift kits sometimes come complete with longer brake hoses; suspension downtravel can cause too-short hoses to kink, either locking fluid in the caliper or preventing fluid from entering. The worst-case scenario is a snapped hose. Rubber hoses are mainstays, but many brands of braided-steel hoses are now DOT-compliant. They're more expensive but offer better durability and pedal feel.
Fluid: DOT 3 and DOT 4 glycol-based fluid works fine for most recreational applications. DOT 5 silicone fluid doesn't absorb water or eat paint, but it isn't compatible with glycol-based fluids and can compress under pressure. Most nonracers don't feel that DOT 5's advantages are worth thoroughly flushing the system. Glycol brake fluids will absorb ambient moisture, so always use a new bottle for best results. Along the same lines, thoroughly flush your 4x4's glycol brake fluid every year or two (depending on usage and conditions) to keep it from turning to sludge.
Leaks: Never use Teflon tape or pipe dope to seal brake lines. The seal is actually made at the lines' flares, not by the nut's threads. Inline Tube says that most leaks result from improper seating and recommends loosening and tightening the fitting several times so the line's flare can form a leakproof seat.
Even armed with the mathematical formulae above, performance braking is often a trial-and-error science. However, the theoretical background should narrow the possibilities, and many of the Web sites listed here contain Troubleshooting or FAQ sections to further zero in on what you need to make your disc-converted 4x4 stop on a half dollar without you owing any additional change.
So, math can help you match non-OE brake-system components and illuminate why your rig stops worse following a disc conversion. After all, the only thing that's worse than a 4x4 that won't start is one that won't stop.