
For all those assuming that assembling a suspension system is just that—assembling suspension—think again. While that may be the case in some situations, let me tell you, when you’re building a chassis from scratch, it definitely ain’t one of those situations. Blueprints, diagrams, and jigs may indeed go a long way toward reaching that cherished point of actual parts assembly. When it comes to initially setting everything up, the two important factors that really matter are time and patience. That last one is something my maker forgot to equip me with at birth, because anything that doesn’t happen immediately, usually doesn’t happen. That said, Jimmy White must’ve inherited my share of the fortitude, not to mention extreme tolerance of annoying factors … like me!
The frontend is where we cut things off last month—had it not been for the extreme misfortune of having to resort to a backup plan as far as the radius rods were concerned, we may have been able to combine both ends of the suspension spectrum in one issue. Well, then again, maybe not. Even though we were able to retain Alan Johnson’s Hot Rod Hole Shot aluminum rear radius rods, it took some time to properly set them up along with one newly acquired drivetrain component.
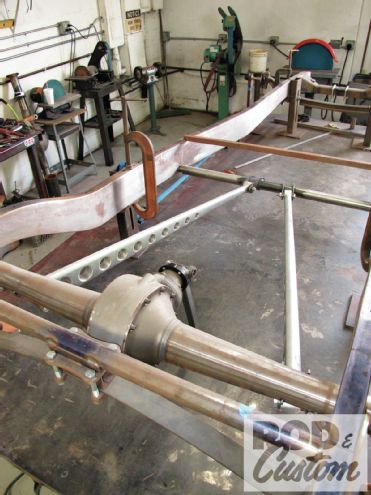
With the ladder bars remaining on the parts list, the rearend of choice wound up being a Winters Performance steel tube (non quick-change) banjo—an absolute work of axle art! When I first became aware of their all-new banjo rear, the looks clearly stole my heart right from the start. But, upon further investigation, its features sealed the deal: Winters steel tubes/bells, cast-aluminum banjo, big bearing (Torino) 31-spline axles, 8 3/8-inch, 3.78:1 ring-and-pinion, and traction-sensing Wedgelock gear-drive differential. It may look like an early Ford banjo from the outside, but beneath the surface is anything but. White hung the Winters rearend from the chassis using a SO-CAL Speed Shop ’40 Ford–style spring with Circle City Hot Rods (CCHR) hangers/brackets and painted tube shocks mounted via SO-CAL’s tubular crossmember.
With all the tedious measuring, leveling, and re-measuring out of the way, we finally have ourselves a rolling chassis. Next on the list: engine/trans mounting, steering, and pedal assembly.
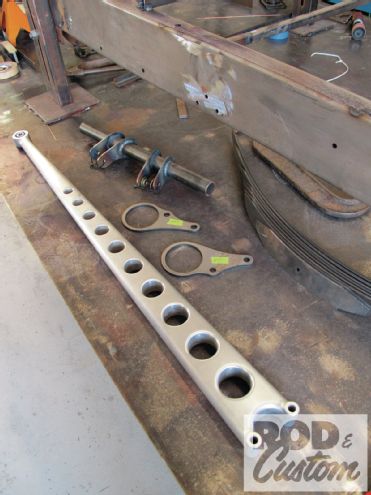
[1] Fortunately, caster did not play a negative factor with the rear suspension! The Hot Rod Hole Shot ladder bars from Alan Johnson’s Perfection Hot Rod Parts are about to see some action, thankfully.
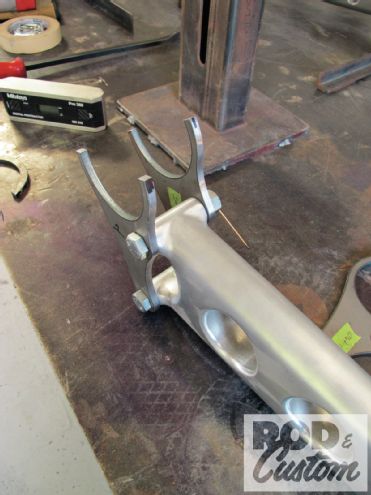
[2] Jimmy White has constructed a jig for use when fashioning up rear spring hanger brackets, as shown here. Our transverse leaf is a ’40-style unit purchased from SO-CAL Speed Shop.
[3] Jimmy White has constructed a jig for use when fashioning up rear spring hanger brackets, as shown here. Our transverse leaf is a ’40-style unit purchased from SO-CAL Speed Shop.
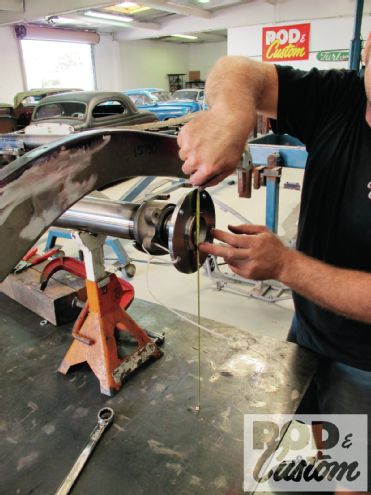
[4] As mentioned numerous times in the past, the decision has been made not to go with a stock-location fuel tank, and here’s the main reason why—a Winters steel-tube banjo rearend. No point in concealing this work of differential art, right?!
[5-6] In order to set the rear suspension up, we de-leafed the rear spring and added a spacer so that the rearend could be put under load and the ride height simulated.
[7] Compressing the rearend till it “looked good” wasn’t exactly what we were after. What we needed to do was take into consideration a number of things, including the overall diameter of the wheel and tire combo. Since I’ll be running a 16-inch Wheel Vintiques wire wheel with a 700R16 Excelsior Stahl Sport tire, I’ve got just under 30 inches to accommodate. The framerail will likely be notched accordingly for rearend clearance.
[8] Though supplied laser cut as one piece, Johnson’s ladder bar axle tabs were severed in half prior to installation, as our axle tubes already had their bearing flanges welded in place.
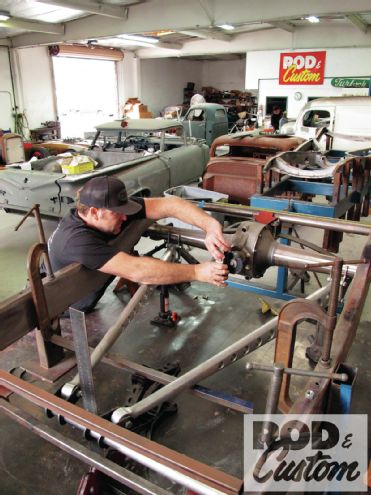
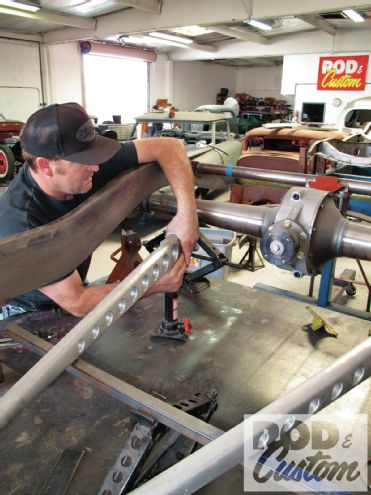
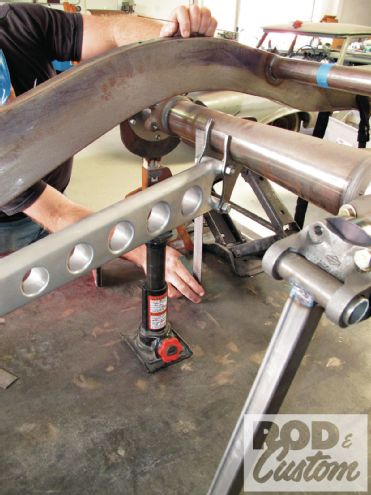
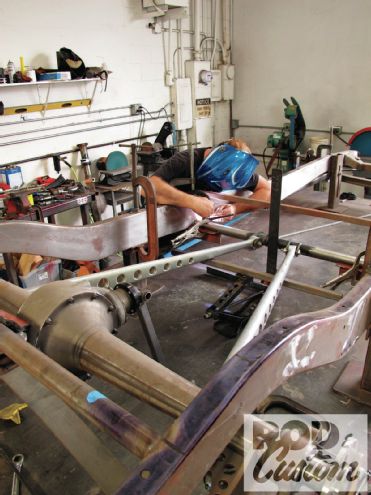
[9] Initial setup of the ladder bars was a bit cumbersome, having to balance the rods on bottle jacks and tubing tack-welded to the framerails all the while carefully lining everything up.
[10-11] Early on, White and I had entertained different options for the chassis X- or K-member. The forward mount for the rear ladder bars Johnson provides is intended to be integrated into a similar, tubular-type setup. In the end, however, we wound up lengthening the mount and attaching it to the framerails.
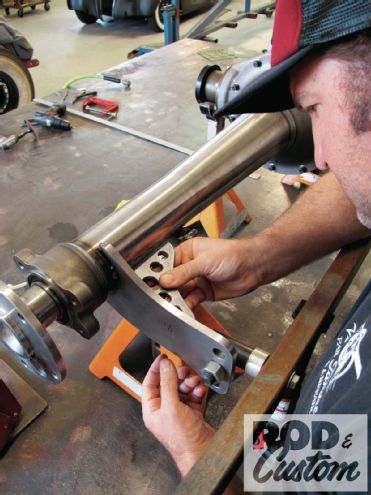
[12-14] Aligning the axle tube brackets required a good chunk of patience—since the ladder bars were attached to the forward crossmember, even though it wasn’t attached yet, each time one side was adjusted, the other came out of adjustment. Squaring them up was simply icing on the frustration cake.
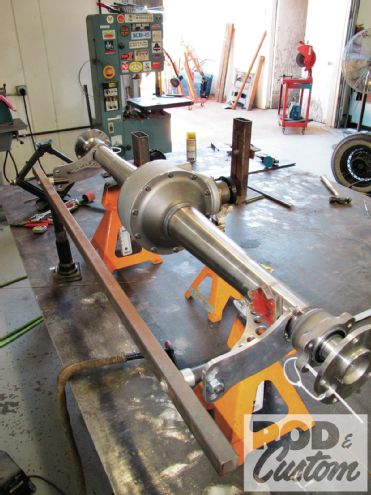
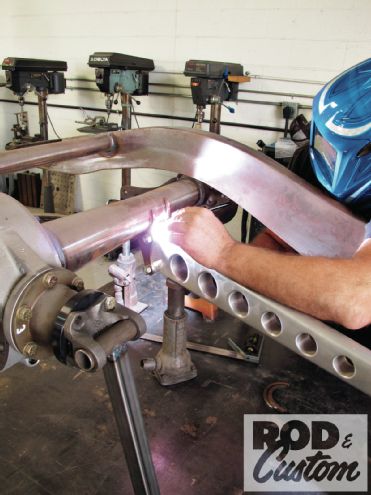
[15-16] With everything in harmony, White set the pinion angle in the 3-degree ballpark before fabbing up a brace to hold the rearend solidly in place.
[17] And once again, the positioning and alignment of the brackets were triple-checked before the TIG was even fired up.
[18] Having the pinion braced allowed the brackets to be tack-welded without worry of the rearend walking away in the process.
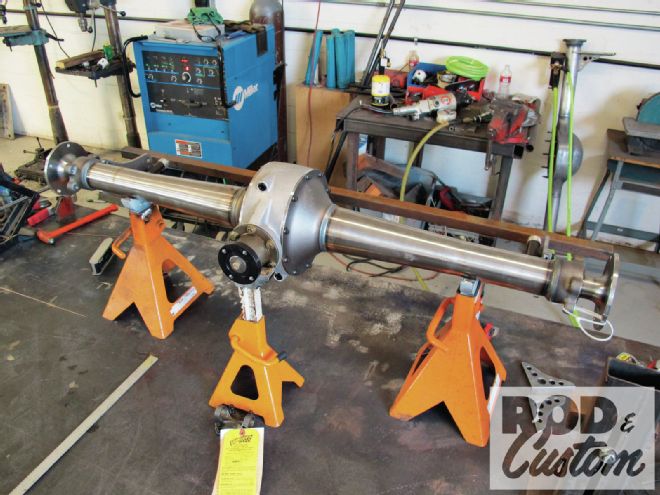
[19] As mentioned, the forward tube crossmember was stretched (by sleeving the inside and adding lengths of tube to each end) prior to being welded to the frame rather than incorporating into a formal center crossmember.
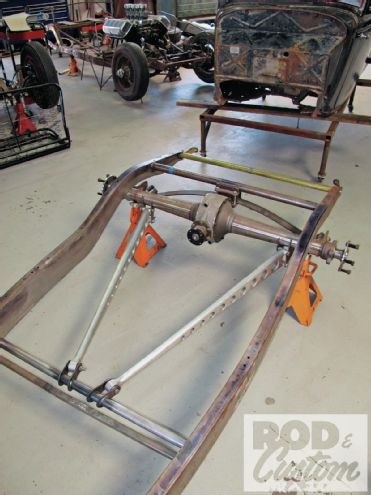
[20] Save for the aforementioned wheels and tires, we now have ourselves a rolling chassis!