Open up the hood of any classic muscle car and the battery dominates an otherwise beautiful mechanical landscape. Besides the engine, a battery takes up more real estate than anything else in the engine bay—and, boy, is it ugly too. One could even argue that if it wasn't for the battery, there would be no reason to need a hood, other than for protection from the elements.
Aesthetics aside, a typical battery accounts for as much as 1.5 percent of the weight of a vehicle, which means that moving the battery from the very front of the car to the very rear can improve the front/rear weight bias by as much as 3 percent—and that's a difference you can really see and feel on the quarter-mile and the autocross. Unless you are working on a critical museum-quality restoration, relocating your battery to the trunk is one of the most cost-effective performance and appearance mods you can make.
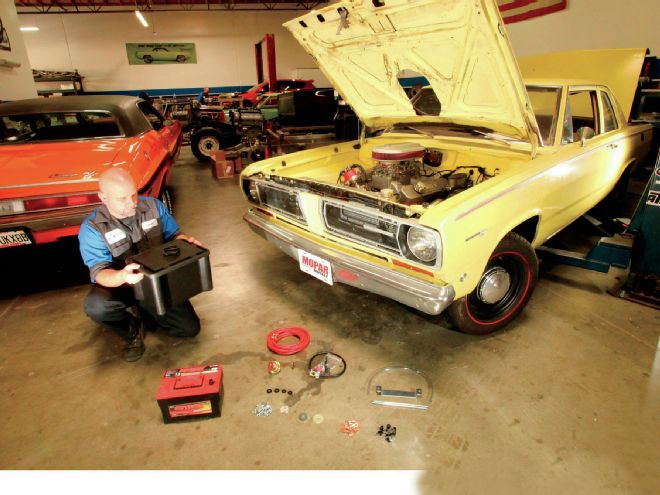
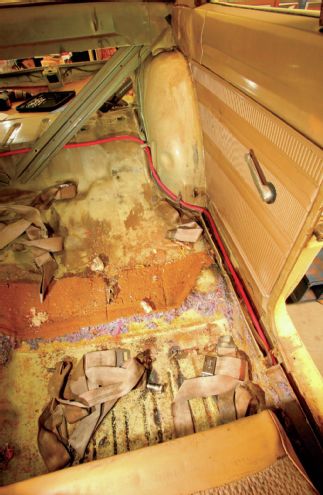
In the case of our 1968 Plymouth Valiant project, both of those reasons were forefront in our decision to relocate the battery to the trunk of our Plymouth; with such a beautiful engine under the hood, we didn't want the distraction of the battery, and with so much power on tap, we didn't want poor mass distribution to ruin the experience at the track. Notwithstanding, we had also installed a wider Be Cool radiator with electric fans, and the real estate previously taken by the battery was now gone.
To solve all these issues, we turned to the guys at Speedway Motors; they are not only experts on muscle cars and street performance, but they have a long history in supplying parts for regular-guy racers. They knew exactly what hardware to recommend, and had plenty of good advice on installation and safety. Perhaps the most significant upgrade we made, however, was upgrading to an Enersys Odyssey Extreme battery, which will keep us cranking reliably for many years to come. Odyssey Extreme batteries represent the state-of-the-art in battery design and ruggedness, and once you understand how they're built, you'll never go back. (Check out the sidebar for all the details.)
The last piece of the puzzle was securing the services of Jason Muckala at Motech Performance in Murrieta, California. Muckala is not only one of SoCal's top Mopar experts, he's an expert on the electrical systems of Mopars. We don't know if that's because he's a glutton for punishment, or simply has the same sort of twisted mind that Chrysler's electrical engineers had in the 1960s—but whatever the case, having him on hand to upgrade our electrical system at the same time was a godsend. Now take a look how Jason put it all together for us ...
What To Get! Description: Source: PN: Price: Two-post battery disconnect switch Speedway 91064500 $19.99 Red heat-shrink sleeves, 4-pack Speedway/ACCEL 1051858 $7.99 Hammer-style battery cable crimper Speedway 91064111 $39.99 18-foot battery cable kit Speedway 91064505 $64.99 Insulated Adel clamps, bag of 10 Speedway 91031312 $5.99 Copper battery cable ends, 10-pack Speedway 91022388 $14.99 Sealed plastic battery box kit JAZ/Speedway 458700 $74.99 Odyssey Extreme battery, group size 34/78 Summit Racing 34-PC1500 $296.55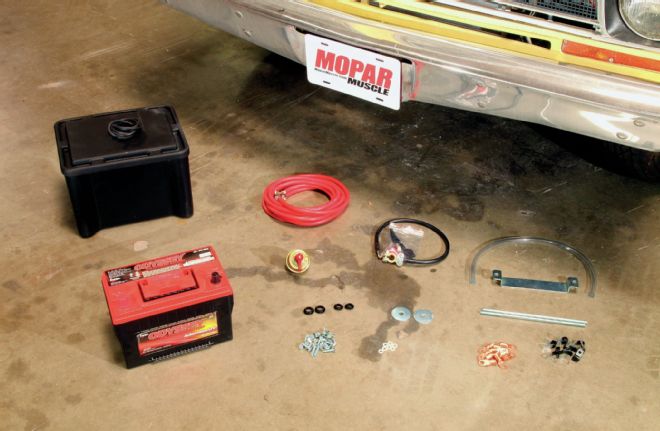
With the exception of our Odyssey Extreme battery, all our hardware for relocating the battery in our A-Body came from Speedway Motors. Total time for our install: four hours.
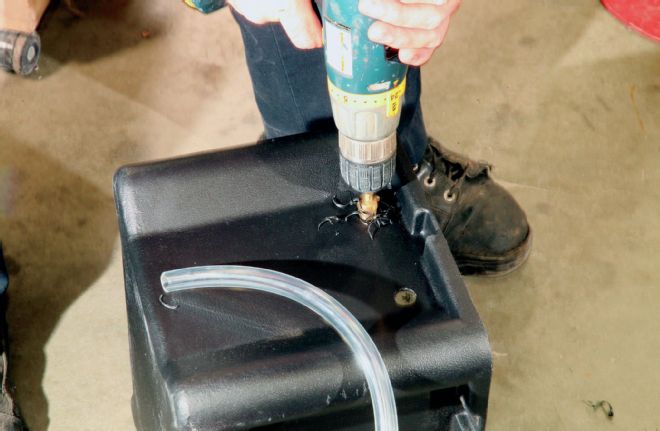
Our sturdy JAZ battery box is made of rugged, chemically resistant thermoplastic polymer, and comes without holes for cables or fasteners. That's good, because they will be different for every car. Here, Jason Muckala of Motech Performance has already established the box location and cable routing. Now he uses a stepped drill bit to make pass-throughs for the cables and vent tube.
Our sturdy JAZ battery box is made of rugged, chemically resistant thermoplastic polymer, and comes without holes for cables or fasteners. That's good, because they will be different for every car. Here, Jason Muckala of Motech Performance has already established the box location and cable routing. Now he uses a stepped drill bit to make pass-throughs for the cables and vent tube.
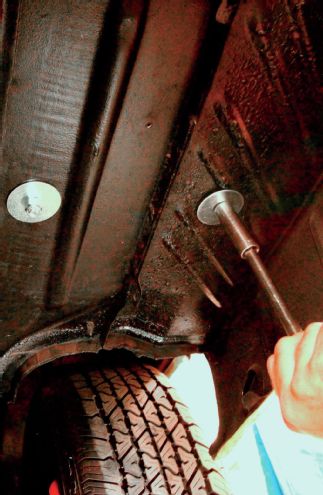
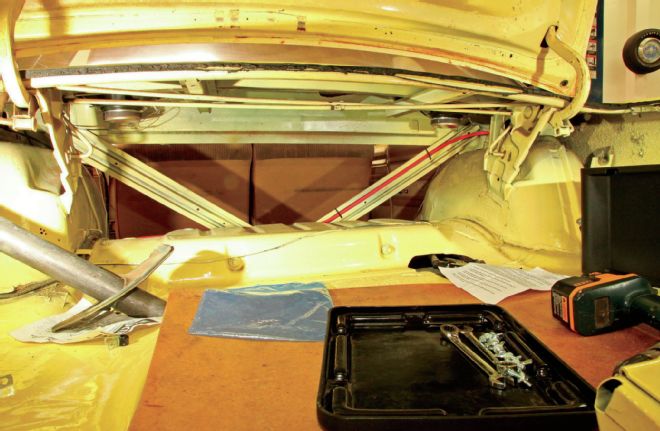
Under the trunk, you can see how the arrangement works, although we've skipped ahead here in the sequence. Note the pinch weld between the two rods; this creates a slight ridge up top that we will need to deal with ...
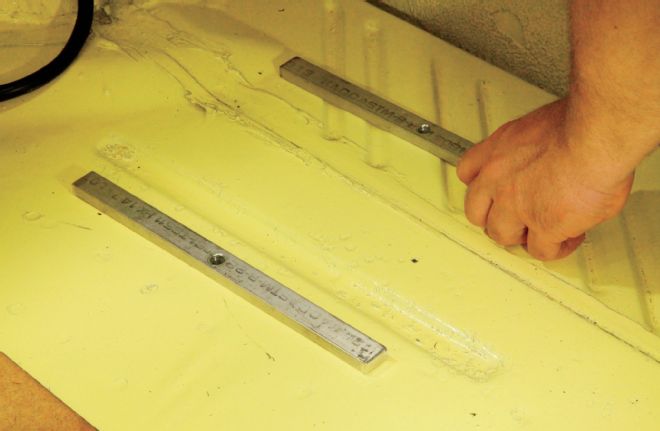
To get the battery box to lie flat, Muckala found some aluminum bar stock to raise the box off the trunk, keeping if off the sheetmetal ridge. Note how he has drilled a hole in each for the threaded rod to pass through.
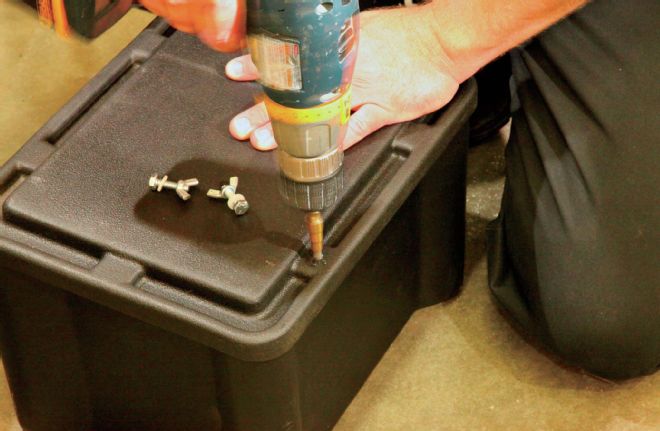
The JAZ kit instructions say to drill the holes for the lid fasteners after mounting it to the trunk floor, but if you choose to put the box deep in the cove of the quarter-panel, you'll need to do it before mounting the box, unless you've got a trick 90-degree drill. We don't, so the holes get drilled now.
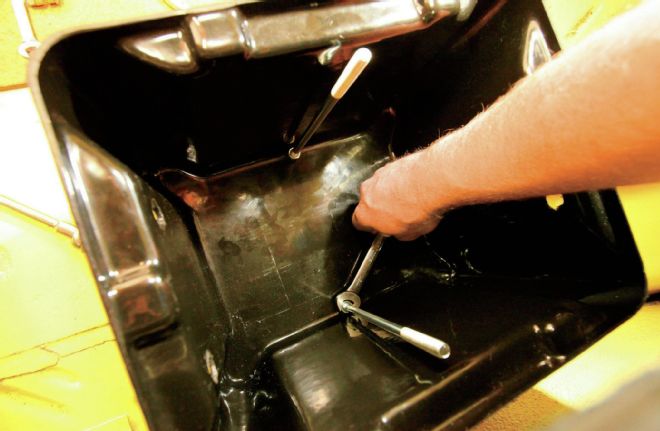
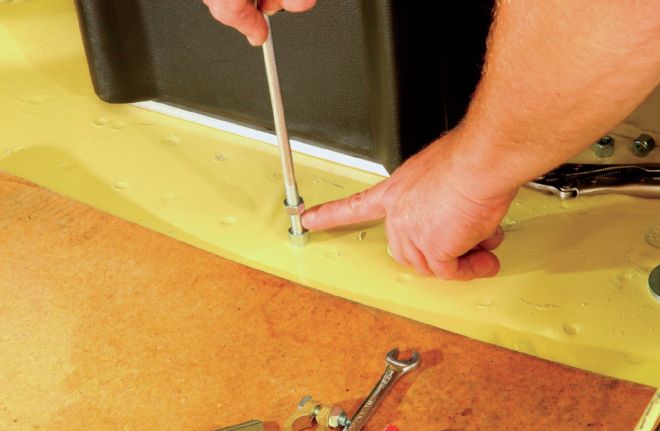
Securing the box in place is a matter of tightening the nuts—a two-person job, as there will need to be someone underneath to hold the nut steady from below.
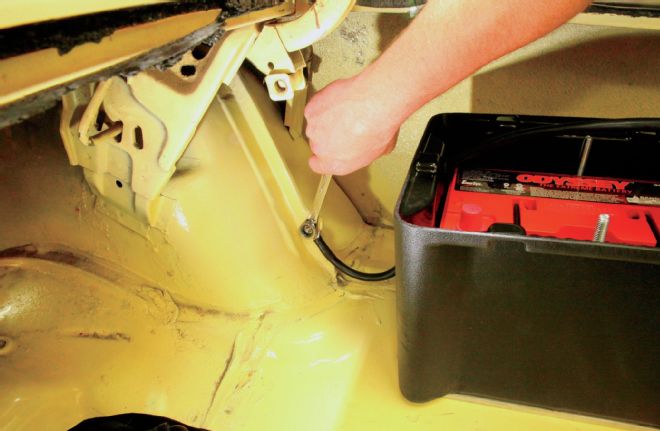
At this point, the black ground cable has been cut to length, the cable terminal has been attached, and the other end is being attached to a nearby hole that the factory was nice enough to provide on the wheelwell. Of course, the paint was ground off to provide good electrical conduction.
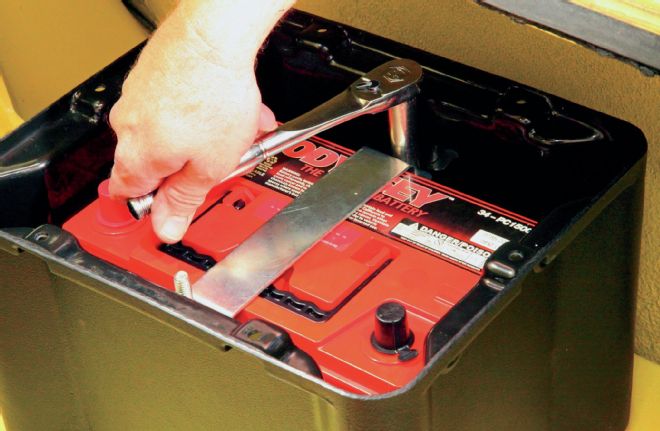
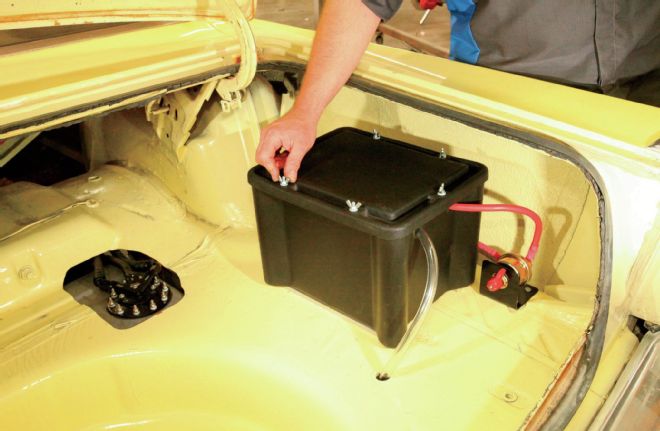
Before proceeding, secure the aluminum battery strap in place and bolt it down. The total strap length is designed to be flush against the box, effectively acting as a hold-off for the battery. The air-gap is a nice safety measure.
Before proceeding, secure the aluminum battery strap in place and bolt it down. The total strap length is designed to be flush against the box, effectively acting as a hold-off for the battery. The air-gap is a nice safety measure.
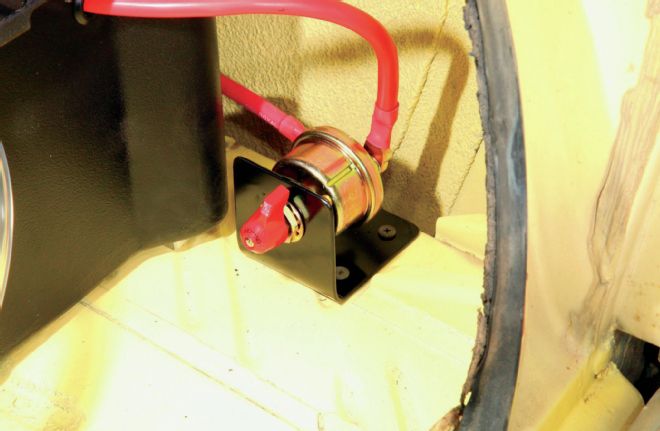
With the switch mounted to the finished bracket, you can see that in the "on" position the lever can be flicked counterclockwise to shut it off. The switch is strategically located so that we'll be able to swap the lever out for one with a Heim joint and a rod that will run through a hole between the trunk and the taillight. When we're not at the track, it will be configured like you see it here, and be another form of theft deterrent.
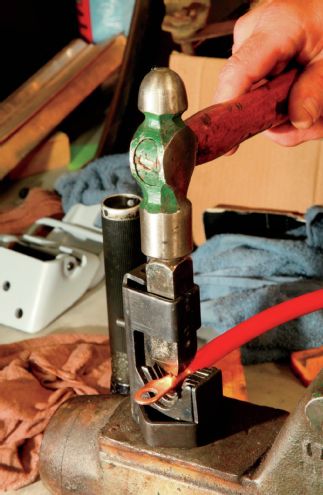
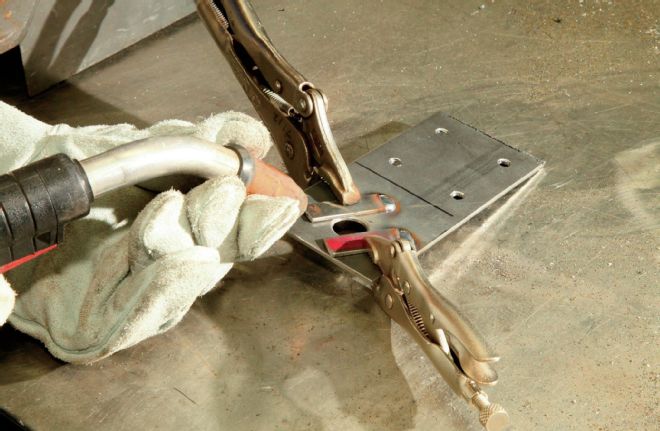
Through the course of the project, Muckala added battery cable ends in several places. To do it right, you'll need a hammer-style battery cable crimper like this one. After stripping the battery cable and inserting the copper strands into the cable end, set it into the crimping tool, and pound it in a couple of spots with a hammer.
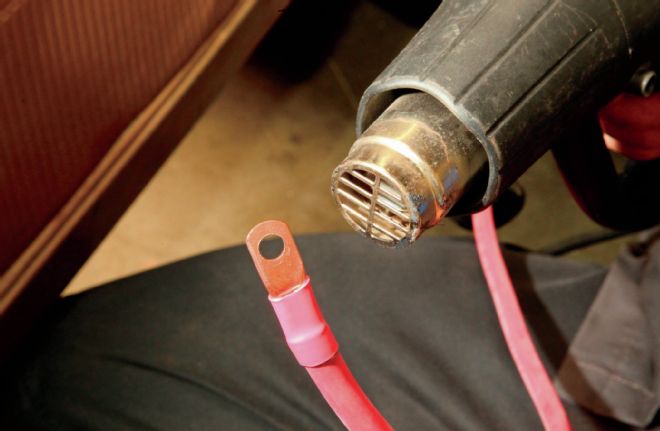
Crimping the cable end is followed by covering the joint with a length of heat-shrink insulation. This secures the connection further while protecting it from contamination. It also looks much nicer. You'll need a proper heat gun for this operation.
At this point, Muckala ran the battery's hot wire to the front of the car, routing it against the rear seat crossbrace, and into the driver-side wiring harness channel along the rocker panel. Using a grommet, the cable passes through the unused clutch rod hole in the firewall. The entire run will be hidden from view once the interior is finished.
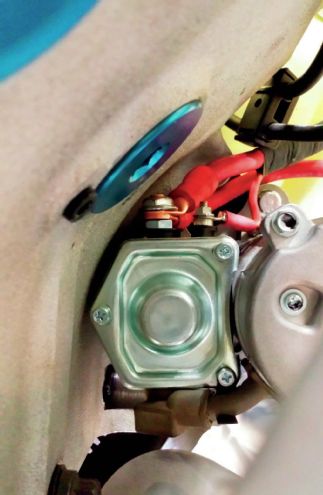
In a slight change from the factory wiring, the battery cable goes straight to the power post on the starter, where it is sandwiched with another 1-gauge cable that carries the voltage to the starter relay block, seen in the next photo. When the relay is triggered, it energizes the starter solenoid through the smaller power wire on the right. Note the tricky grinding work on the top nut to keep the main buss from shorting directly to the block!
Our 12-volt power (from the starter junction in the previous photo) terminates here on the starter relay against the driver-side inner fender. Note how the power for our Be Cool electric fans ties in here too.
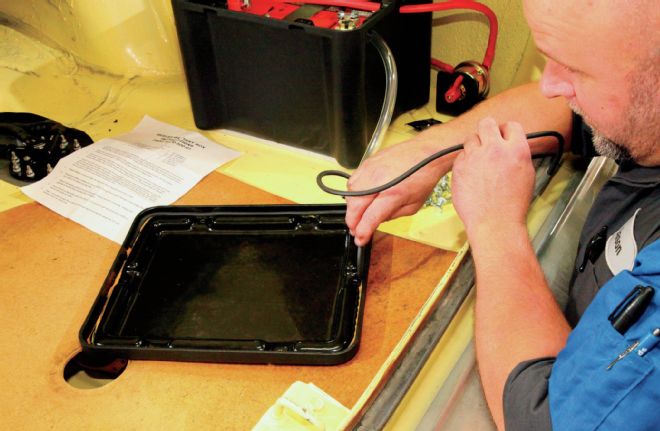
Back to the trunk, Muckala is putting the finishing touches on the JAZ battery box lid. Here he's using weatherstrip and gasket sealer to glue in the O-ring to the channel in the lid, which will make an airtight seal with the box.
The last thing to do is to attach the lid with the bolts and wing nuts provided in the battery box kit. It's hard to see here, but there are airtight grommets at the pass-throughs for both cables and the vent tube. The vent tube is required by the NHRA to vent hydrogen sulfide gas that is produced by flooded batteries in the process of charging. Although outgassing is not a factor for AGM batteries like the Odyssey Extreme, the NHRA requires it nonetheless.
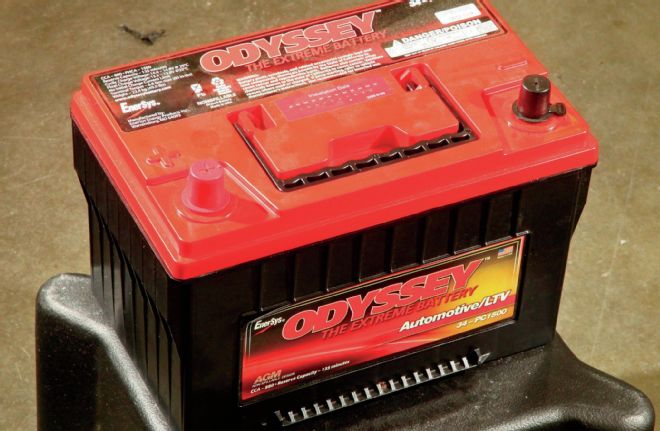
Enersys Odyssey Extreme
It's no wonder car batteries have so many problems getting along with hot rods—we ask them to do the near impossible. We expect a battery to sit for weeks, months, or even years at a time, then fire up an ornery high-compression motor while it takes its time priming or filling up a float bowl. Then we drive it a short distance and assume an antique low-amperage alternator can charge it back up in a flash. We park it at a burger joint, let the starter get heat soaked from headers that are too close, then expect the battery to fire the motor again. And today, many cars also run power accessories like stereos, subwoofers, electric fans, electric water pumps, and even air compressors for suspension systems. We treat batteries like crap, then expect them to save our bacon when we need them the most. It's no wonder batteries fail so frequently, and that's where the Odyssey Extreme comes in.
The Odyssey Extreme by Enersys looks a lot like a traditional battery, but don't let it fool you. The Extreme uses pure lead plates, which allow them to be made thinner than ones made of lead alloy. This packs more plate surface area into each cubic inch of battery, producing significant increases in cranking power—two to three times as much as traditional batteries. Moreover, traditional batteries are suspended in a liquid electrolyte ("acid"), which means they're susceptible to internal damage from shock, and must always be oriented in a top-up position. When plates in flooded batteries break internally, or when electrode material sheds and settles at the bottom, bridging the plates, the plates short out against each other, killing the battery. For this reason, some manufacturers have turned to electrolyte-impregnated absorbed glass mat. AGM technology prevents plates from shorting, and effectively manages gassing that happens during periods of charging. AGM batteries can also be mounted safely in any orientation because the plates will never short, and the electrolyte will never spill.
As we've seen repeatedly, AGM technology is an ideal solution for batteries that see severe mechanical shock loads, and the technology has been famously adopted by a well-known maker of spiral-cell products. Odyssey, however, opted to use the same AGM technology in rectangular-shaped plates, and in doing so, realized the maximum surface area in the same battery footprint. From there, you can see it's just a simple math problem—thin rectangular plates have more surface area (15 percent more) than "six-pack" batteries that have large void areas between cells, which is one of the reasons the Odyssey Extreme has more deep cycle capability (with a class-leading 400 discharge cycles to 80 percent depth) and more cranking amperage in all conditions. Putting all these improvements together in a single battery, we've got the traditional appearance we like, a virtually indestructible design that can be mounted anywhere in any orientation, the ability to be stored for up to two years without charging, superior deep cycle capability, and in excess of 2,250 cranking amps for five seconds. And now you know why an Odyssey Extreme Series was the only logical battery choice for our Valiant.