A few years back we upholstered our '32 Ford highboy using an EZ Boy upholstery kit by LeBaron Bonney. Since it was a driver we never bothered to upholster the trunk. The idea was we could just throw our tools, chairs, and spare tire in the trunk and not worry about tearing up the upholstery. Recently we updated the car with new paint, chrome wheels, and wide whites. Since the EZ Boy interior was still in great shape, we only replaced the carpet. However, tiring of everyone looking in the trunk when we opened it only to see a stack of "stuff", we decided to upholster the trunk as part of the overhaul. The key issue was where to go with all of the stuff. After some thought, and a few sketches, a plan was developed and we would build in hidden compartments to hold the stuff and when it was all buttoned up it would be a fully upholstered trunk.
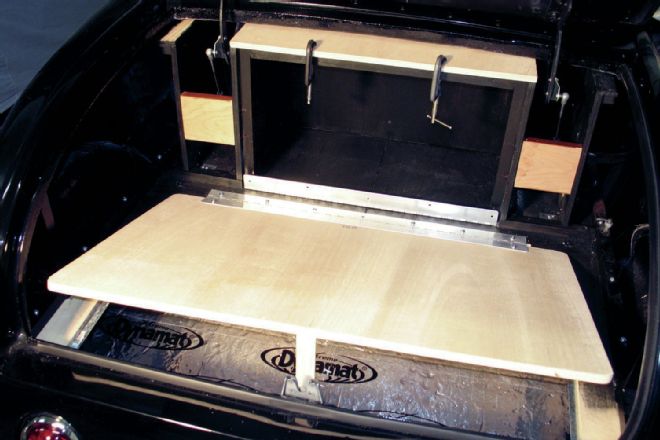
The project started off with Cabinet Building 101. A false floor with a hinged door was constructed. This allowed the stuff to pretty much remain where it was, under the false floor. A hinged door would allow access. A storage box was then constructed in the front area of the trunk between the false floor and the top of the trunk area. This box, with a hinged front door, would contain the battery, a bottle jack, and other stuff we may choose to store there. The framework was constructed to hold panels in place on each side of the front storage box. The decklid hinges determined the size of the storage box, as well as the design of the framework. Remember when the decklid comes down the hinges have to have some place to go. The hinged doors were secured using compact, simple, push-button latches we found in our Speedway Motors catalog. While we were in the catalog we added a couple of stainless steel braided battery cables, and a simple battery box/hold down to our order.
With the woodworking complete, it was on to upholstery. We contacted EZ Boy by LeBaron Bonney and explained what we had in mind, and that the upholstery for the trunk would need to match the interior. The people at EZ Boy are knowledgeable, friendly, and very willing to help.
LeBaron Bonney is best known for their restoration upholstery kits, tops, and so on. The EZ Boy brand is their custom upholstery line. Panel design, size of pleats, and color of piping is up to the customer. If you can design it, they can probably send you the materials to complete your own interior. They have over 6,000 seat cover patterns. If you know what your seat came out of chances are good that they have a pattern and can sew you up a custom cover for your seat. You can go online at lebaronbonney.com, click on Custom Interiors, and design your own interior using the sample material swatches and panel designs on their website. You can order your interior package right there or call their customer service department to get answers to any questions and make sure you have everything you need. They even have complete interior packages for most popular street rods.
In our case we wanted a red bolster on the top, and black, 1-3/4-inch-wide pleats on the bottom, with black welting separating the two. The plan was to match our EZ Boy interior. We also wanted carpet for a decklid underside cover, as well as carpet for the trunk floor. We sent samples of our existing upholstery material and they matched it exactly. The carpet in our recent update was black Daytona Weave and they matched that as well.
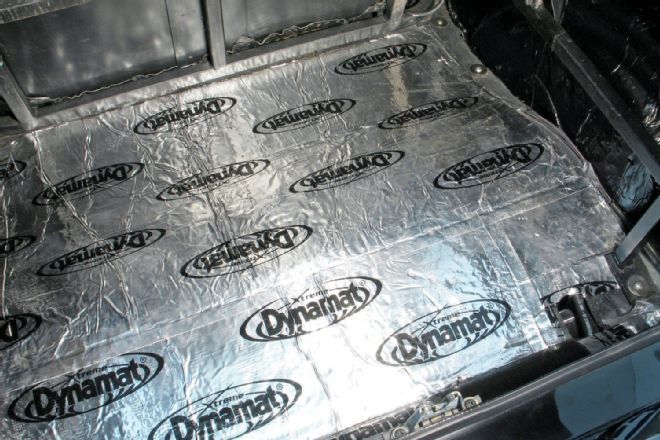 Before we began to build our framework or attach upholstery to our trunk area we covered the floor with Dynamat. Dynamat will keep the exhaust heat out of the trunk as well as form a cushion for stuff that may rattle around in the trunk.
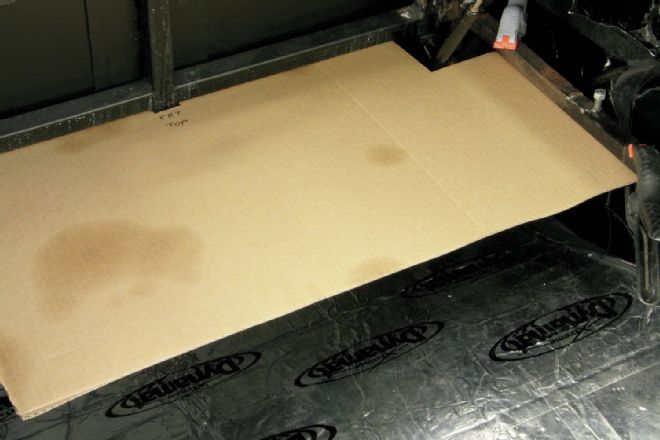 Using cardboard we began creating a pattern for the false floor.
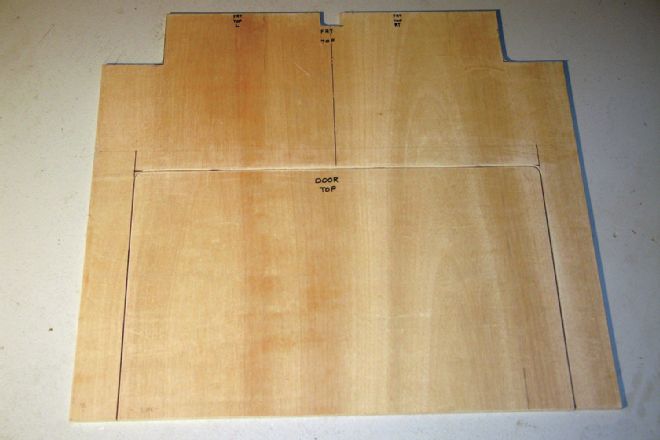 After the false floor was cut from 1/2-inch plywood the door was designed and cut out of the false floor.
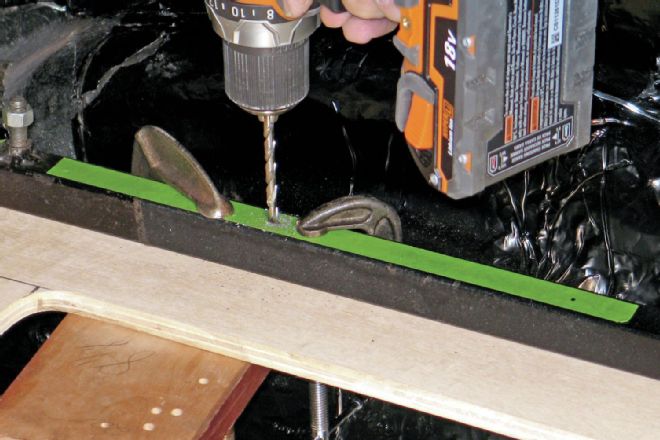 The false floor was cut to a size that it would fit under the steel body framework. The floor was then clamped to the body framework and holes for attaching hardware were drilled through the framework and the floor.
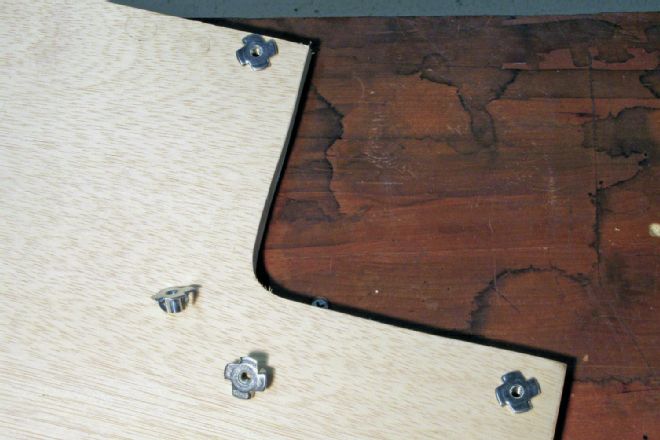 Tee nuts were used throughout the construction of the trunk area. In this case Tee nuts were installed on the backside of the false floor. Screws through the metal body framework would thread into the Tee nuts and secure the false floor to the body framework.
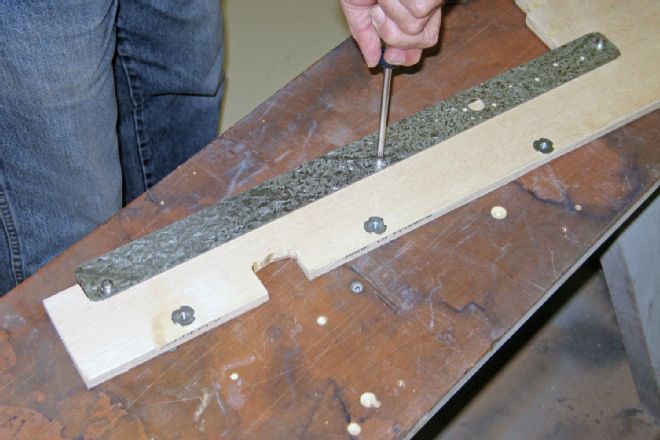 Metal strips were installed along the edges of the door opening of the false floor. These metal strips would support the door when closed. Tee nuts were again used in order to keep the surface smooth for carpet installation.
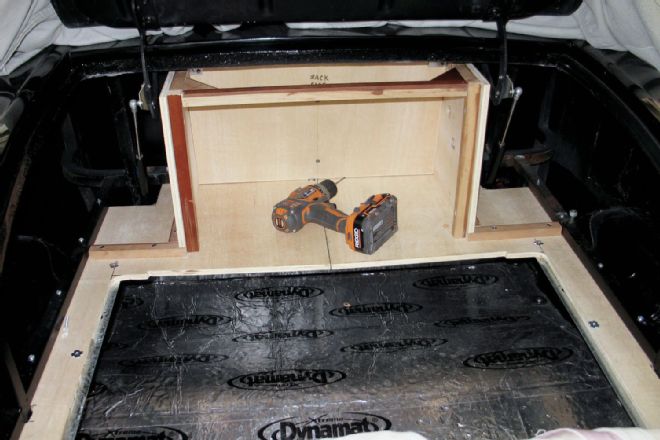 With the outer false floor in place we began construction of the storage box. Note the false floor is also the bottom of the storage box.
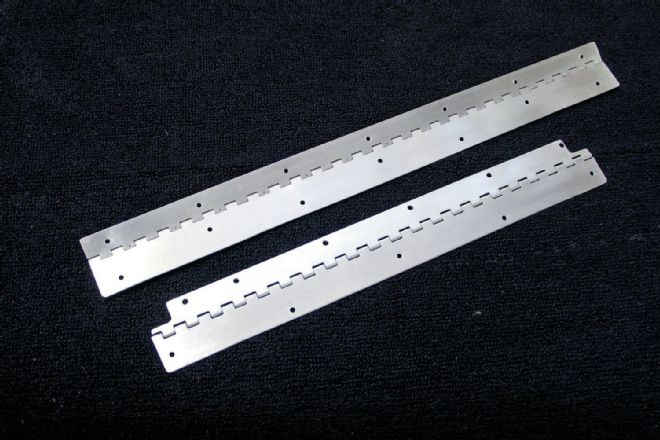 We picked up a couple of aluminum piano hinges at the local boat store. One was trimmed to fit the storage box door.
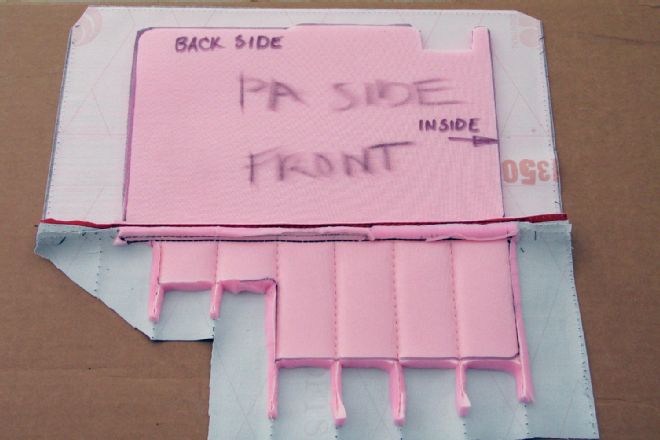
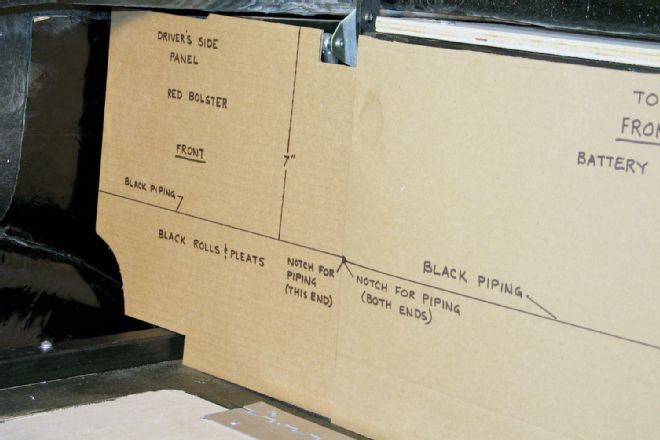 Accurate cardboard templates are critical, as the templates will determine the shape of the ABS panels that the upholstery will cover.
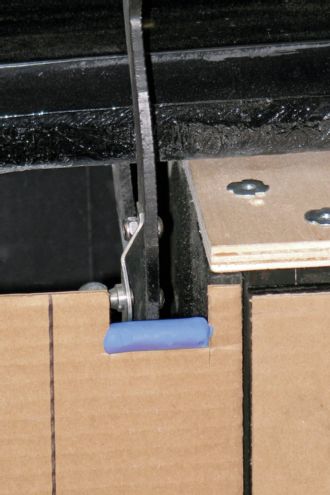 A small piece of clay was stuck to the cardboard template in the area of the decklid hinge. This was to determine that we had enough room for the decklid hinge to operate without interference from the upholstery.
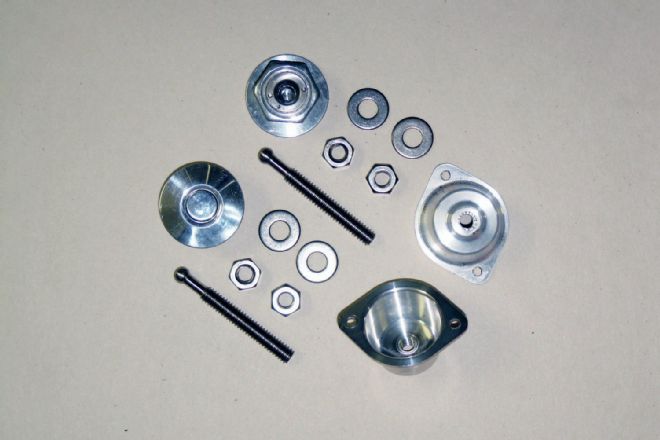 These are the pieces that made up the two push-button latches that we ordered from Speedway Motors. The threaded shaft threads into the cup and the latch catches on the ball on the end of the shaft. Pressing the button releases the catch from the ball. You can fit different depths by adjusting the threaded shaft in or out.
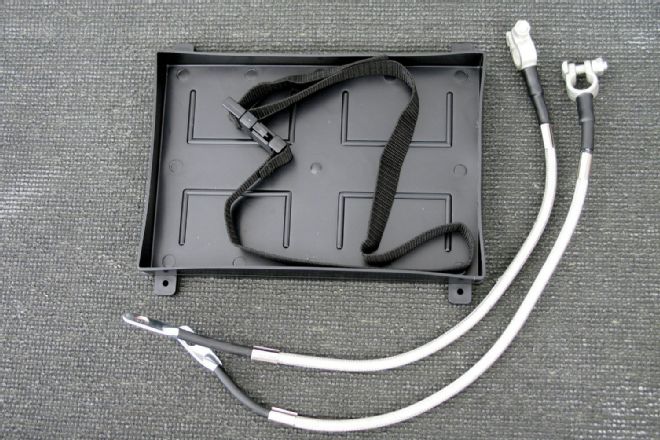 While we were in the Speedway Motors catalog we picked up these braided stainless steel battery cables and a basic, simple, no frills, battery box hold down.
We ordered enough upholstery material to cover our three front panels and two side panels. We also ordered enough carpet to cover our real trunk floor, the false floor, the storage box interior and top, and the underside of the decklid. For panel board we chose ABS. ABS panels are far superior to cardboard or wood product boards. ABS boards are easy to cut with a utility knife or jigsaw, and they can be sanded, drilled, and heat-formed. ABS boards are completely waterproof and will not delaminate or warp. Pieces can be joined together to create larger panels, if needed.
While we were waiting for the material to arrive we began to cut cardboard patterns. Pattern making is a major part of any upholstery project and is critical, as the patterns will determine the actual size and shape of the upholstered panels. We made paper patterns for the carpet.
Once the EZ Boy material was delivered we began by cutting carpet pieces to fit the inside of the forward storage box. Contact cement was used to attach the carpet panels to the inside of the box. The top of the box, as well as two small side tops shapes were cut from the carpet and taken to a local upholstery shop to have a black binding sewn on, with a flap left to wrap around the wooden top pieces. The decklid cover carpet and the false floor carpet were also cut to shape and dropped off to have a red binding sewn on.
We used our patterns to cut the ABS board into our required shapes. Using a sharp utility knife you can cut through the board, or score it deep enough to break it off at the score line. Scoring and breaking can be tricky on small curves and intricate pieces.
Next we marked the ABS panel pattern on the backside of the pre-sewn upholstery panel. It is important to remember what panel is the left side and what panel is the right side and also what side of the ABS panel is the finish side. We then removed the foam from the upholstery panel up to the area that would be the actual panel. Contact cement was applied to the edge of the backside of the ABS panel and the areas where the foam had been removed from the pre-sewn upholstery panel. The upholstery was then wrapped around the ABS panel and stapled in place. This process was used for all panels. The finished upholstered panels were all attached using industrial-strength Velcro. The Velcro allows the side panels to be removed for additional storage areas.
A piece of carpet was cut to fit around the false floor opening and was contact cemented in place. The red bound floor carpet, which was cut over size to overlap the surrounding carpet, was then attached to the false floor door with Velcro. The decklid cover was attached with Velcro as well.
While paint and upholstery are two of the most visual parts of a street rod, they tend to be outsourced by most do-it-yourselfers. EZ Boy by LeBaron Bonney has made the upholstery part of building a street rod a lot less intimidating, and when completed you can be proud that you did it yourself.
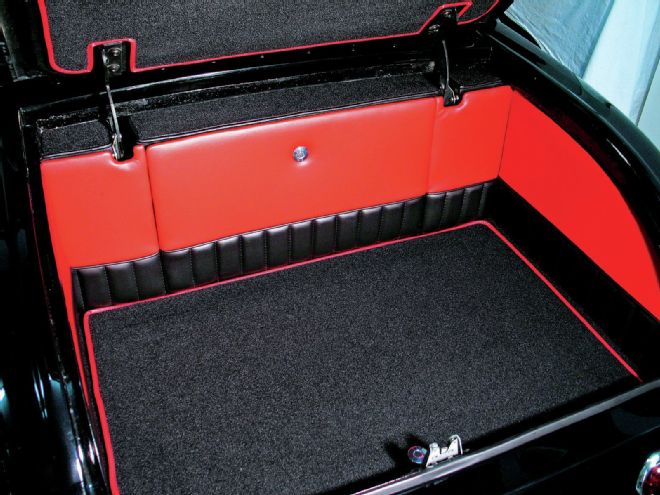
Per design, our finished trunk area offers more than ample storage space and now when we raise the decklid the onlookers will not snicker. And we can proudly say, "We did it ourselves."
 The cabinetry portion is almost complete.
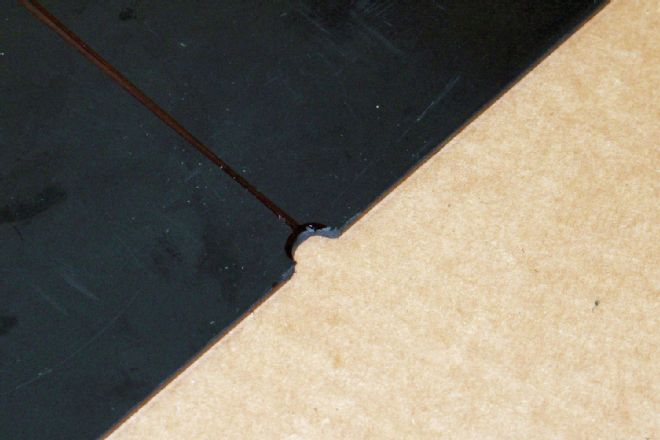
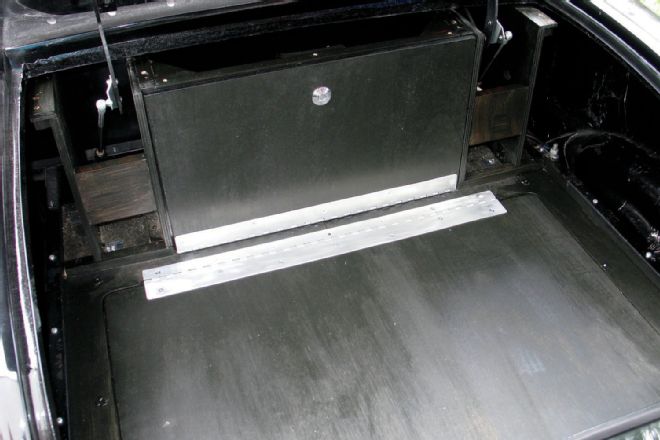 We gave the finished wood work a coat of black paint. The paint will protect the wood, as well as finish the edges.
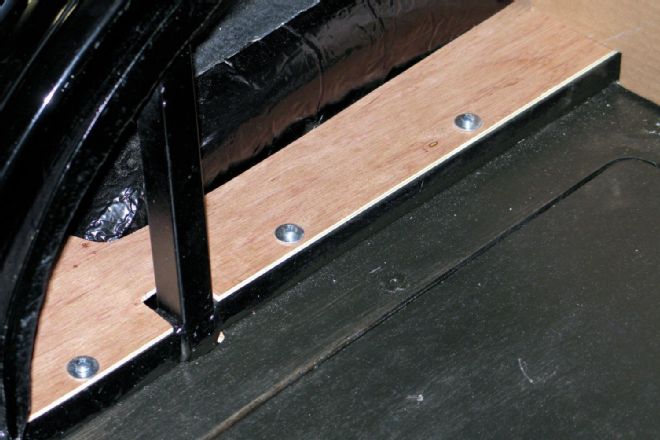 We cut pieces of thin wood to fit between the side upholstery panel and the fenderwell. These pieces were secured to the body framework and will form another storage area behind the upholstered side panels.
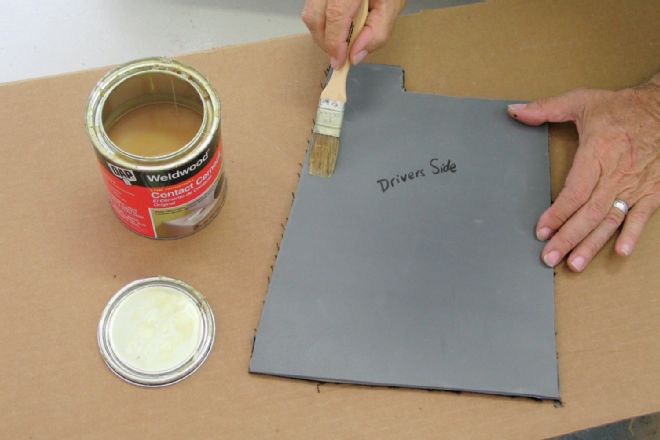 We cut pieces of carpet to fit the bottom, back, and sides of the storage box. Contact cement was utilized to adhere the carpet pieces to the box.
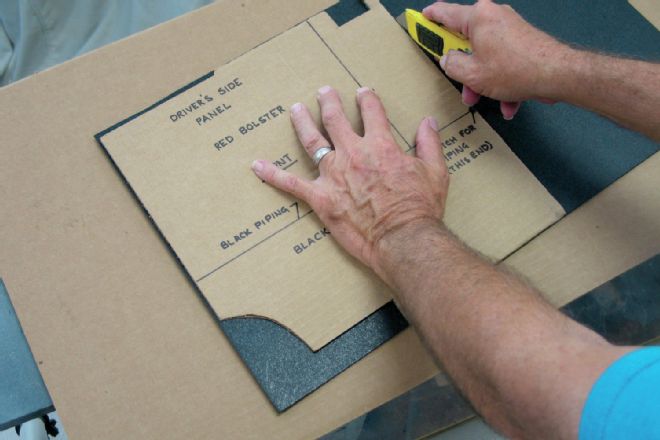 We utilized our cardboard templates and a sharp utility knife to cut the ABS panel board to the shapes required.
 This is how the binding was sewn to the carpet for the storage box top and the two small side pieces. A flap was left on the binding to wrap around and staple to the wooden pieces. This covered the raw plywood edges.
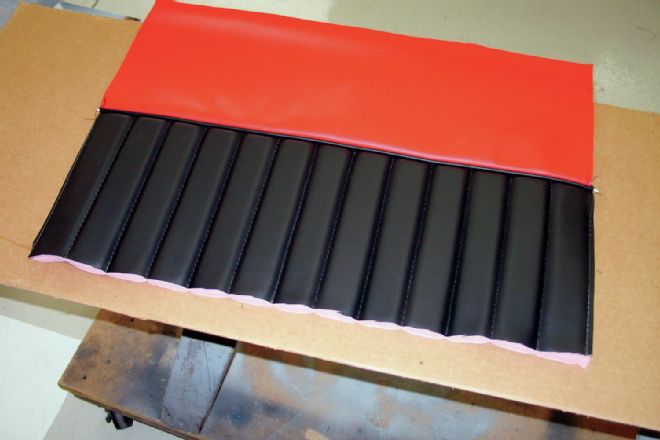 This is the pre-sewn, upholstered panel prior to cutting to size.
 The panel shape was drawn onto the pre-sewn upholstered panel and the foam was removed up to the edge of the panel. Contact cement was applied to the panel board edges and the flaps on the upholstered panel and the flaps were wrapped around the panel and stapled, maintaining an 8-inch red bolster at the top of panels.
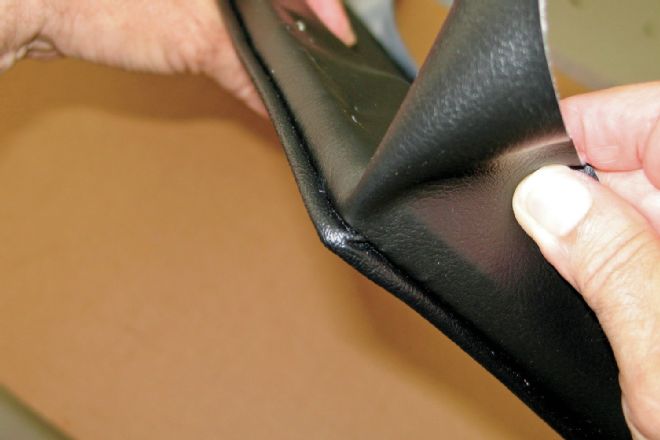
 We cut notches in the panels where the welting would wrap around. This eliminated a large bulge as the welting area wrapped around the panel board.
 We located the center of the decklid and the center of the decklid cover carpet. Using industrial-strength Velcro we attached the cover to the decklid.
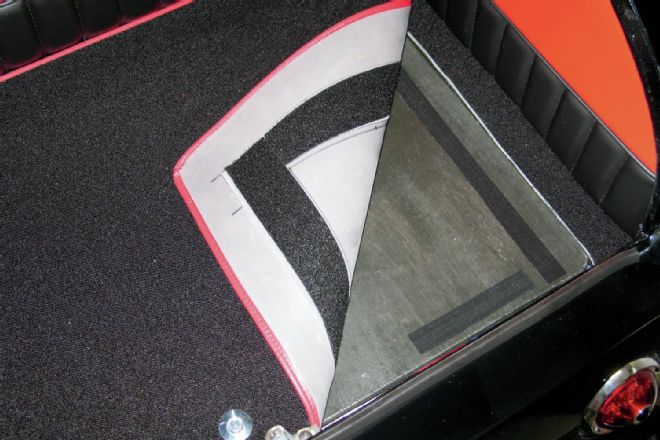 Velcro was attached to the false floor door and the carpet that would cover the door. This method allows you to move the carpet around and to remove it for cleaning or for easy replacement should something go really wrong down the road. Note how the carpet on the door overlaps the false floor edge carpet.
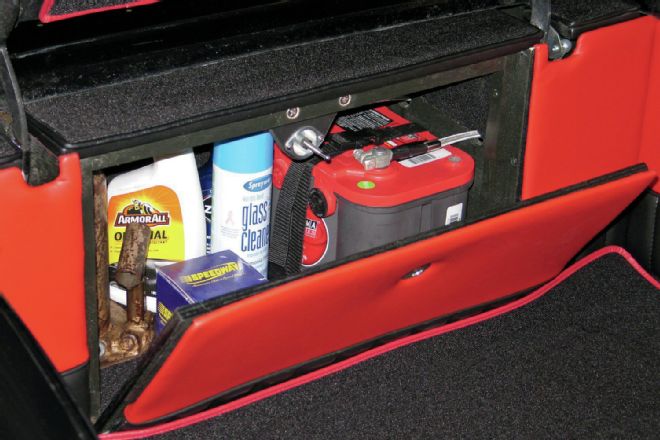 Open the storage box and there is the battery, a bottle jack, and some cleaning products.