We can hear the howling already. "Why do I want to put some junk GM ignition on my (insert AMC, Mopar, or Ford)?" The answer is: Don't—unless you like the idea of a higher-performance, more-efficient ignition that's also incredibly durable and inexpensive. This conversion is not intended for everyone. If you are working on a complete restoration of a 1969 340 Swinger, then this probably isn't for you. But if you bought a fuel-injected 302 Ford engine out of an 1988 Mustang GT and plan to use a carburetor, this is a good time to convert the ignition, since you have to switch to a factory Duraspark distributor with a magnetic pickup because the Ford Thin Film Ignition (TFI) distributor uses a Hall effect trigger that isn't easily compatible with a stand-alone ignition. While you could use a Duraspark box, they are much larger than an HEI module. Or if you have a Jeep or a Mopar engine running a ballast resistor ignition, you're giving up ignition power that could contribute to better performance and improved mileage. As a side benefit, emissions will improve, too.
Here's the drill. If you have an AMC, a Ford, or a Chrysler distributor with a magnetic pickup, it's really easy to convert to a standard four-pin GM HEI module. We've included a simplified wiring diagram to show you how it all comes together. Mount the module on an aluminum plate near the distributor so it can keep cool, and you are already most of the way there. Then, use a late-model e-core coil because they are more efficient than those round, oil-filled coils and make sure you supply full system voltage to the HEI. These newer e-core coils can also be mounted anywhere in any orientation. You can't do that with oil-filled coils, since they need to be mounted vertically or they overheat. Then, to top all of this off, use a high-quality distributor cap with real brass terminals (not the cheap aluminum connectors) and a good rotor, finish it off with a set of high-quality spark plug wires, and you are ready to hit those spark plugs with renewed voltage.
We don't have room for exact details on each conversion, since there are literally dozens of different vehicle configurations. Instead, we'll outline the basics of how the GM HEI module is triggered, and then you can work out the details as far as factory connectors, coils, and so on.
PARTS LIST Description PN Source Price GM HEI module LX301T RockAuto $12.91 GM HEI module LX301 RockAuto $30.79 GM coil connector 85119 RockAuto $6.76 GM coil connector HP4605 RockAuto $10.96 Ford dist. cap/rotor 3D1116A RockAuto $18.96 Chrysler cap/rotor 3D1072A RockAuto $11.11 Chrysler HEI mount N/A Designed2drive $38.50 Heat sink material 276-1372 Radio Shack $3.49 Crane E-core coil PS-91 Summit Racing $65.20
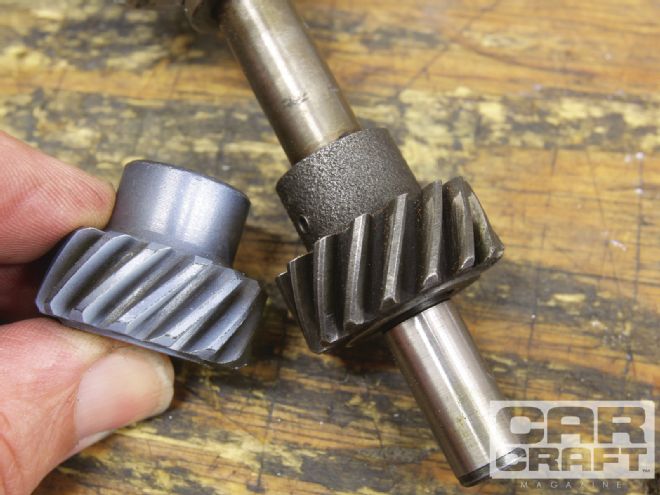 If you have a Ford engine with a flat-tappet hydraulic-lifter camshaft using an iron gear and a Duraspark distributor from a roller cam 5.0L engine, you will have to change the steel distributor gear for a cast version. The opposite also applies. Effectively, you must match the distributor drive gear to the cam. You can identify a steel gear (left) by its smooth surface above the gear compared to the cast-iron gear (right), which has a rougher surface.
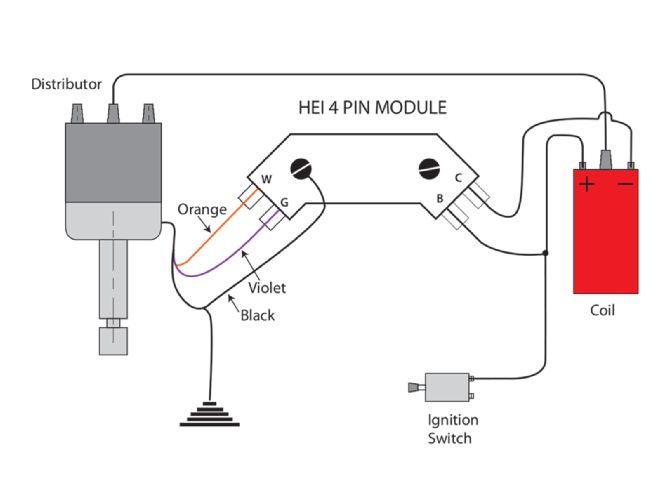 This is a simplified drawing of the wiring diagram necessary to make the conversion. Make sure the plate where the HEI module is mounted is securely grounded to the engine. If the engine runs poorly, try reversing the W and G connections.
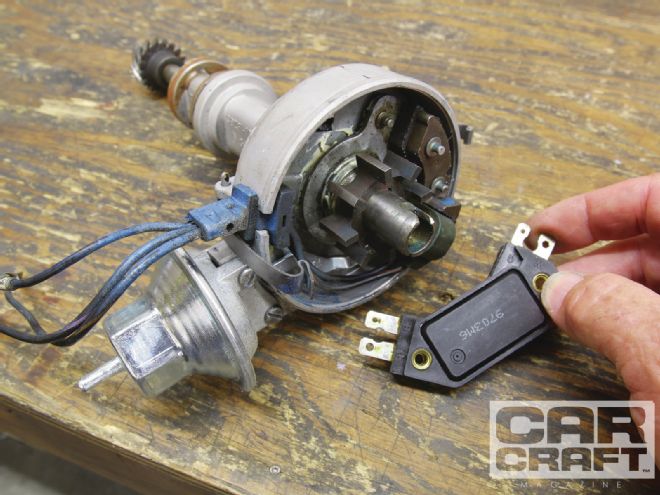
 This is a close-up view of a GM HEI four-pin module. This particular HEI module is for a 1975 Corvette, purchased from RockAuto. Of course, you can also find these everywhere in the junkyard. Each of the four pins is marked with a letter. The W connects to the orange or yellow wire on a Ford or Chrysler distributor, while the G pin connects to the other wire to complete the circuit from the pickup. The other two connect the C pin connected to the negative side of the coil and the B terminal to the positive (+) side of the coil.
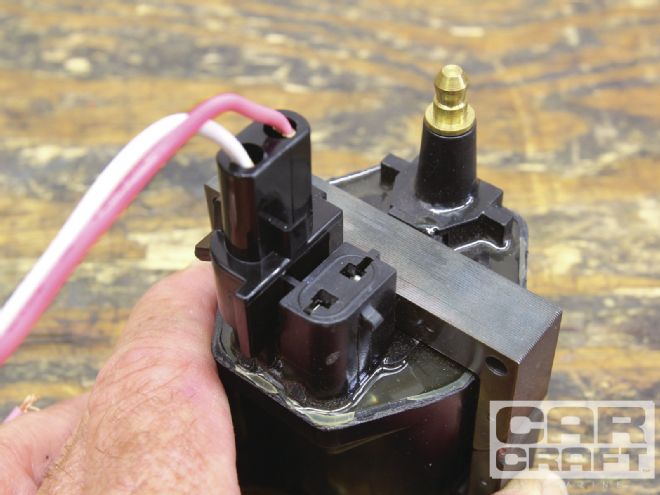
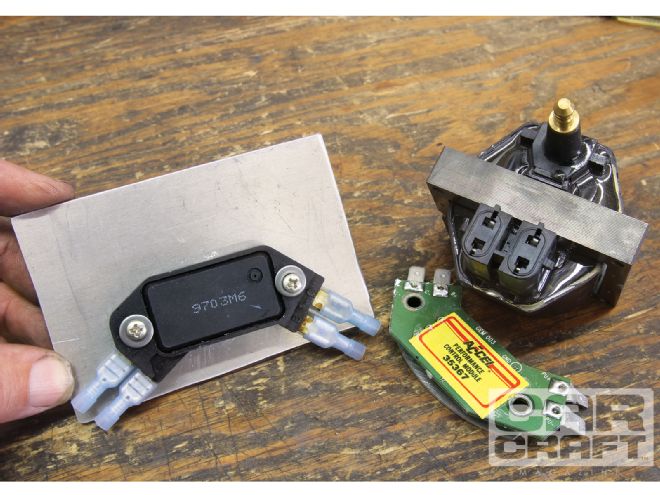 We mounted our HEI module to a 3⁄16-inch-thick aluminum plate. Thicker aluminum is preferable as a heat sink to control temperature in the module. We also included this ACCEL aftermarket high-performance module, if you want to upgrade your conversion. The coil is a GM late-model e-core coil, which is more efficient than the older oil-filled versions.
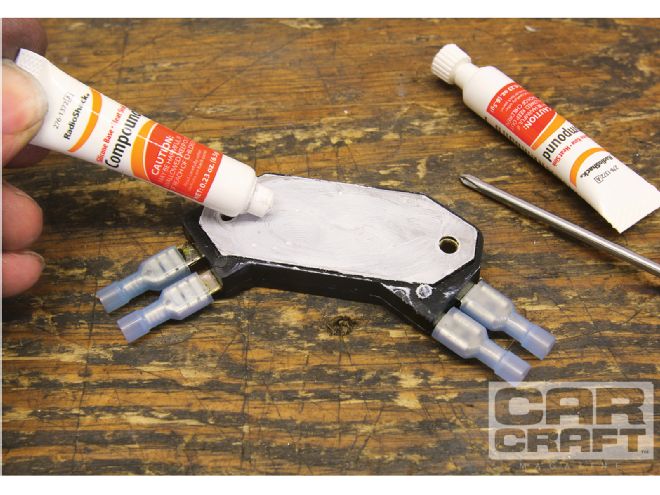 Before mounting the module to the plate, be sure to use a proper heat-transfer material between the module’s metal plate and the aluminum mounting plate. This is a white compound from Radio Shack (PN 276-1372, $3.49). Also, be sure to remove the two small, plastic pins on the bottom of the module so the metal portion of the module fits flush with the mounting plate for maximum heat transfer.
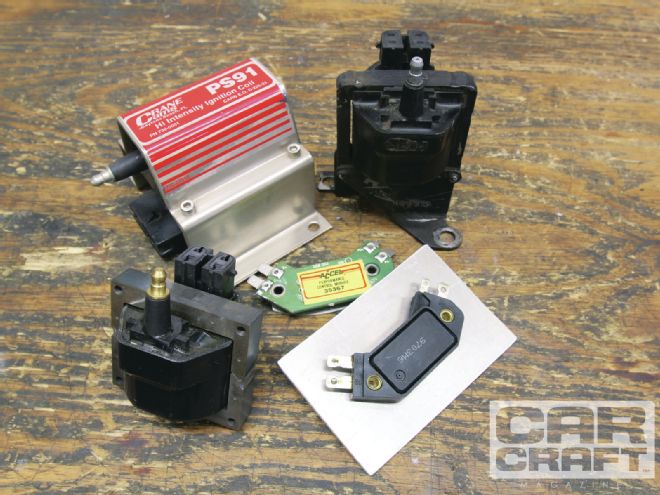 While you can use an older oil-filled coil with the HEI, the newer, e-core coils (as shown) are more efficient and can be easily found in the junkyard. The coil with the bracket was off a late-’80s Chevy pickup. There’s also a ton of high-performance coils available from ACCEL, Crane, MSD, and others. Be sure to match the coil to an HEI inductive ignition. Do not mix coils intended for capacitive discharged (CD) ignitions with an inductive module. All factory coils are inductive and will work with an HEI.
 If you want to use a matching GM coil, you can probably snip its connector out of the wiring harness when you find the coil. The only problem is the connectors are usually brittle and old. We found a new connector on RockAuto for less than $7.
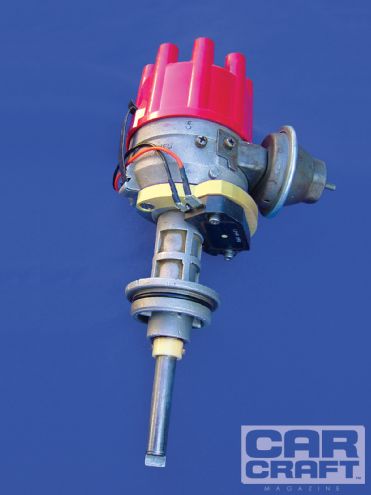 If you are converting a Chrysler distributor, Nathan Nuttall has designed this very clever aluminum mount that positions the four-pin HEI module directly to the distributor. It’s affordable and very space-efficient. You can find it on Designed2drive.com.