
In the past, taking on a chassis upgrade for your classic truck always seemed like a monumental task, only to be taken on when addressing a full build. It was something that Scott Roth, co-owner of The Auto Shoppe in South Burlington, Vermont, recently dealt with regarding a 1956 Ford F-100 they had completed for a client a couple of years ago. While it delivered everything a classic hauler should while motoring down the road on its slightly modified original spine, it left the owner wanting far more in the way of overall handling and stance. What if you could rewrite the book to bring your ride the ultimate in handling and performance by making a simple phone call? We're here to tell you firsthand that's exactly what happened after Roth reviewed his options for bringing the truck to the next level and contacted the Roadster Shop in Mundelein, Illinois, for one of their new REVO IFS complete chassis packages.
Well-known for injecting the ultimate performance handling into their chassis and related components, the Roadster Shop wanted to raise the bar and create a new standard for the future with all-new engineering. Starting with a fresh sheet of paper they moved forward utilizing the very latest in CAD development software and design processes. The results yielded the REVO IFS, which features controlled roll centers, eliminated bumpsteer, and CAD-optimized castor and camber curves to deliver razor-sharp handling through the entire range of steering and suspension motion for an extremely well-balanced feel. Couple this with a fully boxed frame fabricated from 10-gauge steel, exclusive X-Brace center section, CNC-located mounting points, large diameter parallel four-bar rear suspension, and 1-inch splined front and rear through-frame sway bars, and you have a recipe for success. The Roadster Shop allows you to custom order your chassis with a multitude of options, including your engine and trans combination and numerous brake and shock upgrades.
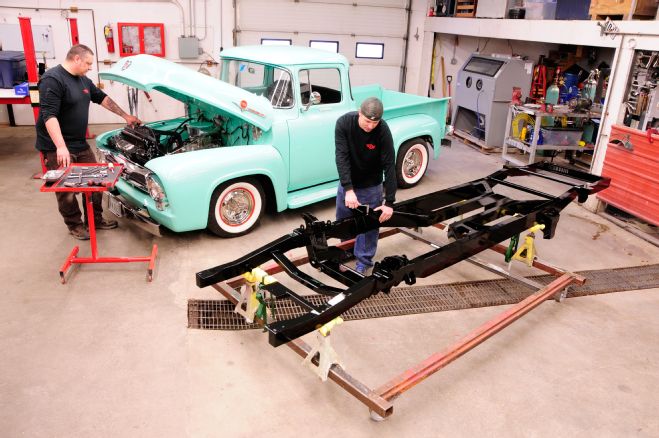
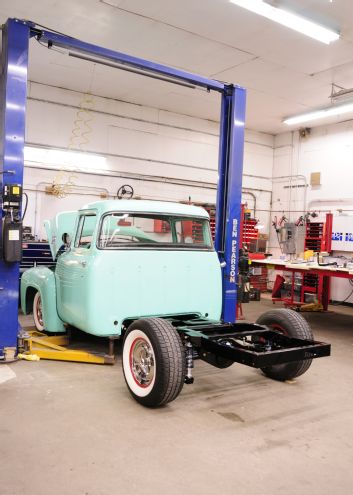
In preparing the Effie for transformation, Roth and his team methodically worked from front to back to make sure the chassis separation from the cab and bed would go off without a hitch. Under the hood there was plenty to do starting with disconnecting the battery and fuel lines. The team then drained the cooling system, removed all related hoses as well as the radiator, shroud, and supports, disconnected the throttle linkage, and all electrical-related underhood items. Inside the cab, the column shifter and steering column were then disconnected. Roth then raised the truck and continued on by unbolting the running boards, bed, disconnecting the pedals, and clamping the fuel tank line. The truck was then lowered where the team removed the bed followed by properly bracing the cab and front end (while up in the air) before separating them from the chassis. Of special note is that endless hours can be saved by keeping the nose and cab together; it just requires extra attention be paid so there is no panel movement.
Once the new chassis was received, the Auto Shoppe team disassembled it and prepared the frame and components for a fresh coating of gloss black. One of the many benefits of the Roadster Shop is that they include extensive reassembly information in print as well as online regarding their chassis and suspension assemblies. Seeing that the F-100 was rather unique with regard to the 292ci Ford Y-block V-8 and manual trans, the team fabricated custom crossmembers and mounts to perform with the Roadster Shop chassis. As they worked to complete the rolling chassis you could feel the electricity in the air knowing the truck would soon be ready for the street. Once the cab and nose were lowered back onto the new chassis and secured in place, the bed followed, accompanied by getting the driveline and electrical systems completed. Once the truck rolled off the lift you could immediately see the difference in the overall stance and attitude where it had a much more dramatic feel. Driving it confirmed everything the shop hoped for with a newfound connection to the road where handling and responsiveness were brought to a whole new level confirming that chassis swaps aren't just for full builds anymore. Dig it!
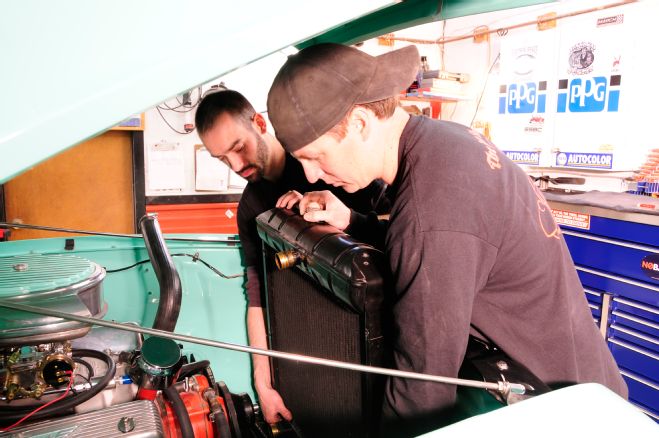
01 To get started for the chassis drop, team members Corey Campagna and Dylan King drained the cooling system and followed by removing the radiator and shroud plus all related hoses for cooling and heat.
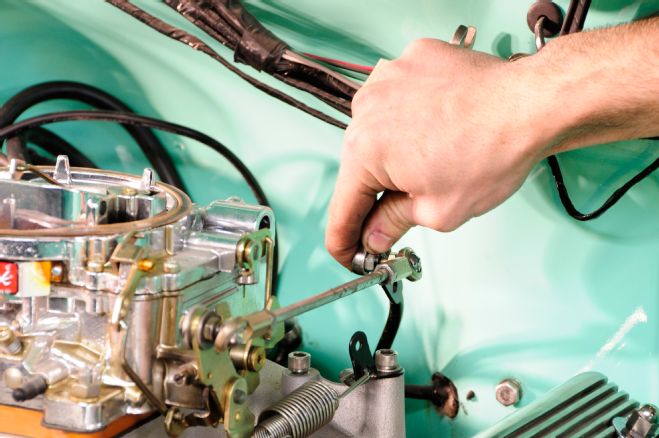
02 Under the hood they continued by disconnecting the throttle linkage, choke and fuel line, battery, engine harness, generator, various sending units, radiator supports, and horn.
03 Auto Shoppe co-owner Scott Roth got busy by first pre-soaking all under-body bolts with rust penetrant. He followed by removing the running boards using a 1/2-inch socket wrench and continued on removing all bed mounting bolts and disconnecting the taillights.
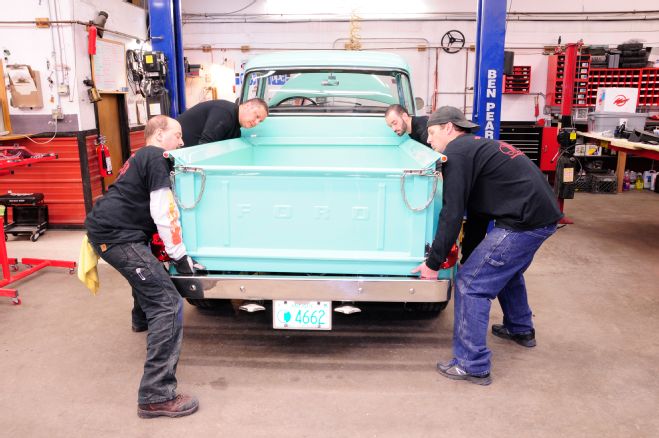
04 With all the mounting hardware gone, it took the team only seconds to remove the complete bed from the chassis.
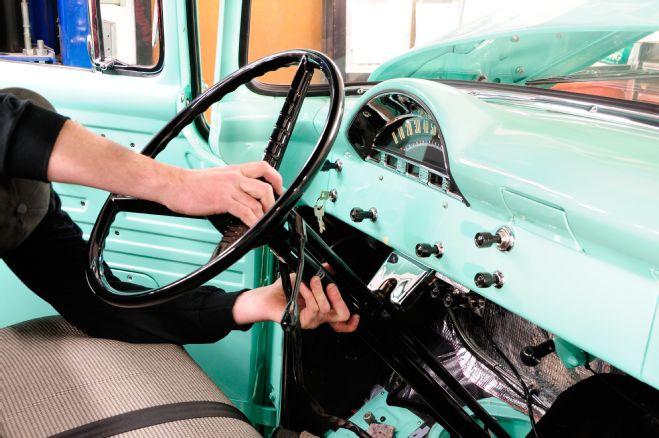
05 Focusing inside the cab, the steering column was disconnected along with the column shift linkage.
06 Underneath the brake and clutch pedals were loosened and removed using a 5/8-inch wrench.
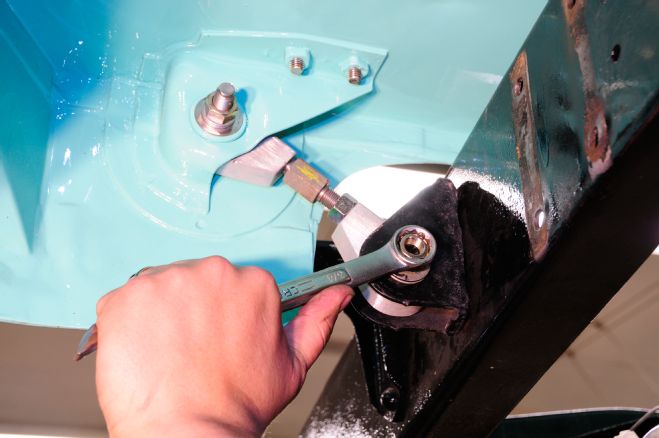
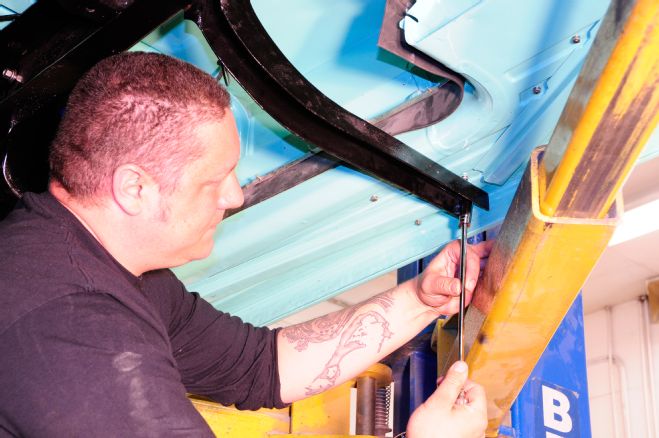
07 Next Roth followed by removing the four adjustable cab-mounting bolts using a 3/4-inch wrench.
08 The fuel line to the tank was then clamped and removed using a 3/4-inch wrench.
09 The cab was then separated from the chassis with the nose intact which will save quite a lot of time when reassembly comes. Proper bracing at the nose will maintain its perfect alignment once reassembly comes.
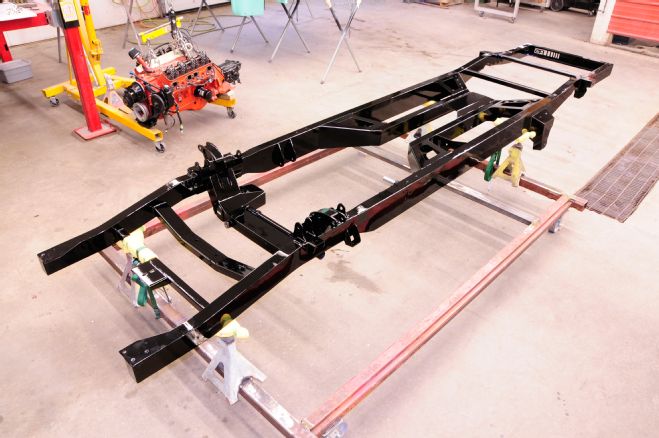
10 The new Roadster Shop REVO Stage III chassis arrived in bare metal. The Auto Shoppe disassembled it and gave it a fresh coating of black gloss to prepare it for final installation.
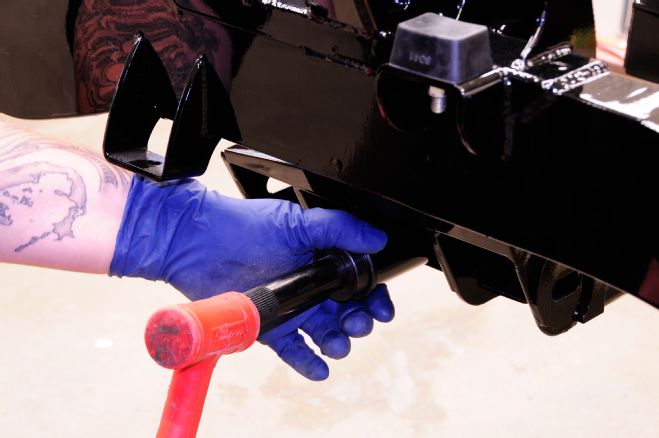
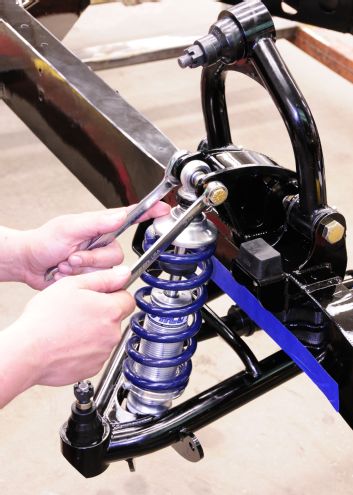
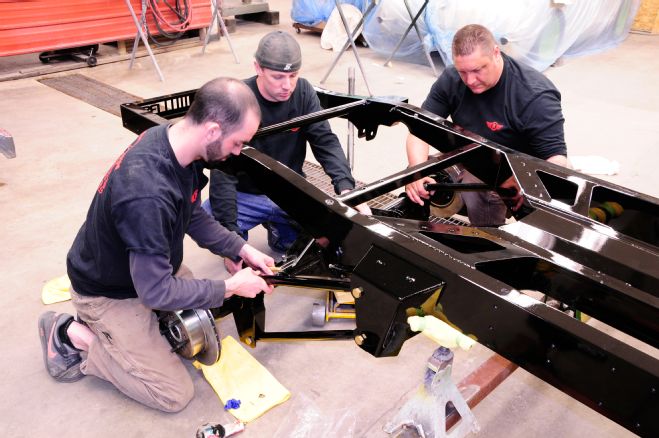
11 Starting the chassis reassembly, Roth first installed the upper and lower bump stops using the provided 3/8-inch Nyloc nuts. He then lubricated the inner surface of the Delrin bushing and slid the sway bar into place, once cleaned with lacquer thinner to remove any surface contaminants.
12 The other end bushing was lubricated and slid into place on the opposite sway bar end. The ends were then tapped to seat them in place. Finally the bar end collars were installed measuring equal side to side balance and secured at 10 lb-ft.
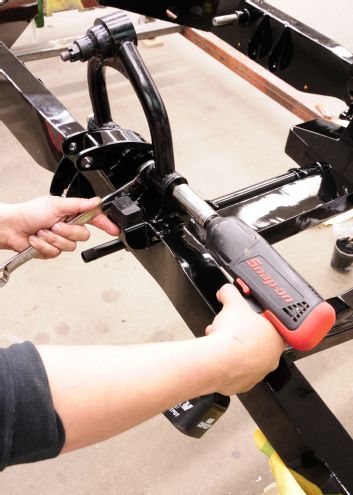
13 Once the Delrin bushings, A-arm shafts, and related hardware were installed to each unit, the upper control arm assemblies were secured in place to the frame.
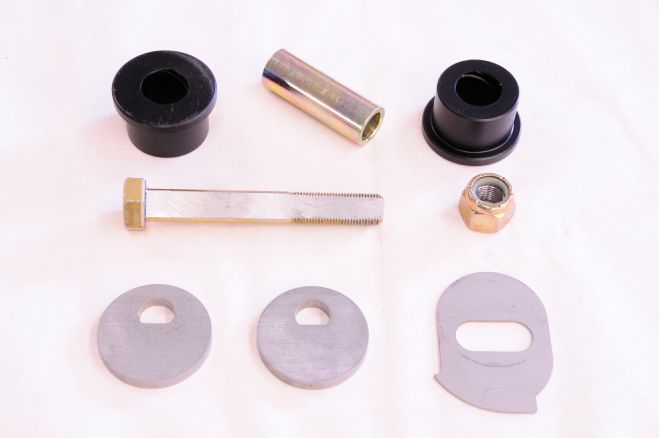
14 Here you can see the provided top-notch hardware for the installation of the lower control arms to the chassis.
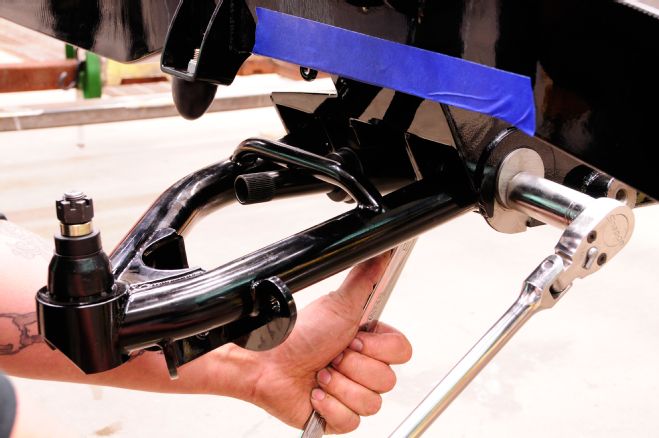
15 After installing the Delrin bushings, sleeves, ball joint boot, and grease zerks, the lower control arm is ready to be installed in place using the provided hardware and torqued to 100 lb-ft.
16 The Afco Pro-Touring single adjustable coilover shocks were assembled on the bench and then installed using the provided upper shock spacer and hardware. They were then torqued in place at 70 lb-ft.
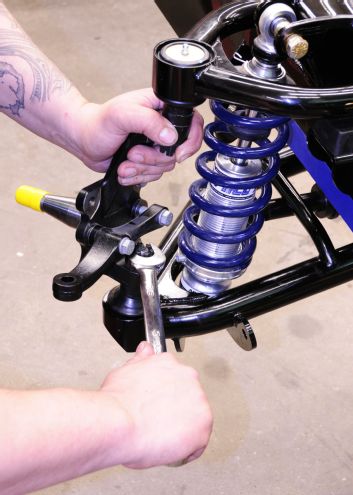
17 Roth then installed the new Wilwood forged Pro Spindles with steering arm into place using the provided castle nuts, cotter pins, and 7/8-inch wrench.
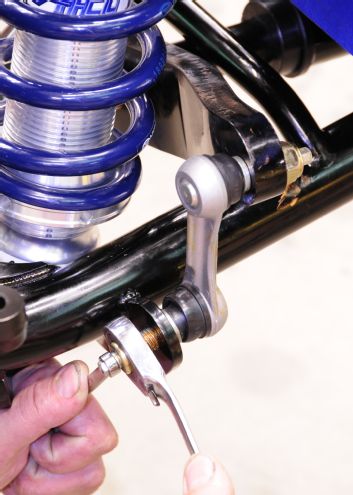
18 The sway bar end links were then set in place, making sure everything was properly aligned from side to side, and secured in place using 3/4-inch and 5/16-inch wrenches.
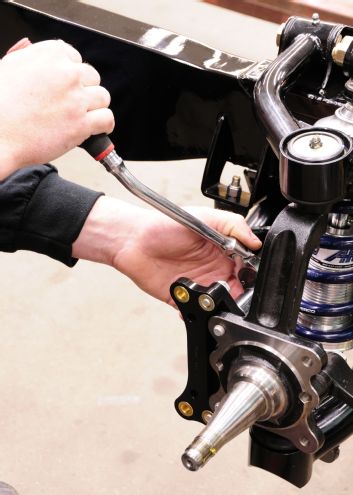
19 Wilwood caliper mounting brackets were then mounted to the spindle using a 5/8-inch ratchet.
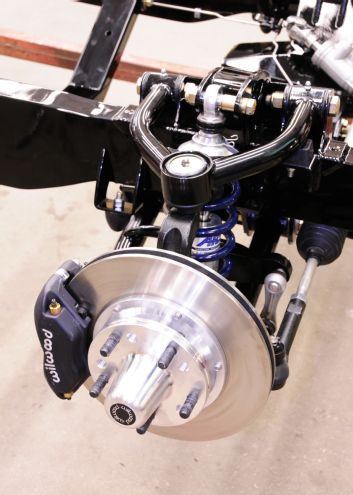
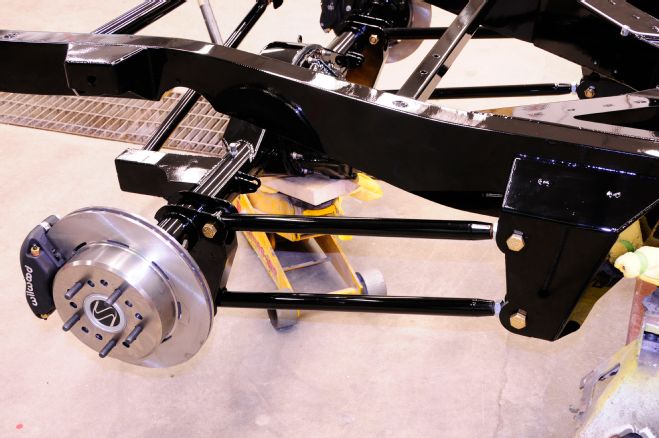
20 Here you can see the final installation of the Wilwood 11-inch solid disc brakes with four-piston calipers to complete the front independent suspension.
21 At the front of the chassis the power rack-and-pinion mounting bracket was installed using the provided hardware.
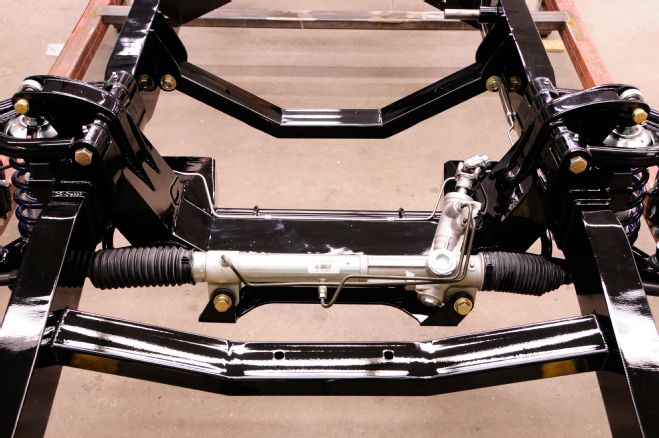
22 The custom mounting of the power rack-and-pinion not only looks great, it allows for perfect balance in operation.
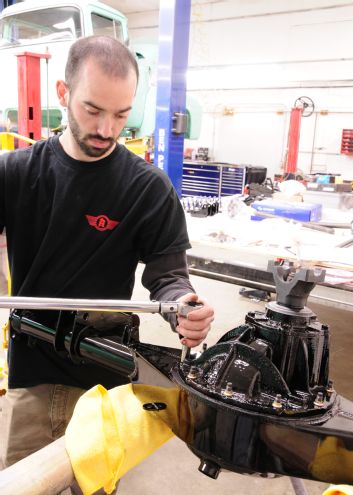
23 On the other side of the shop King was busy assembling the center section of the new 9-inch Ford rear with a 3.50:1 gear set. He followed by installing a pair of 31-spline axles.
24 Once the rearend assembly was completed the team secured it in place at the rear of the frame.

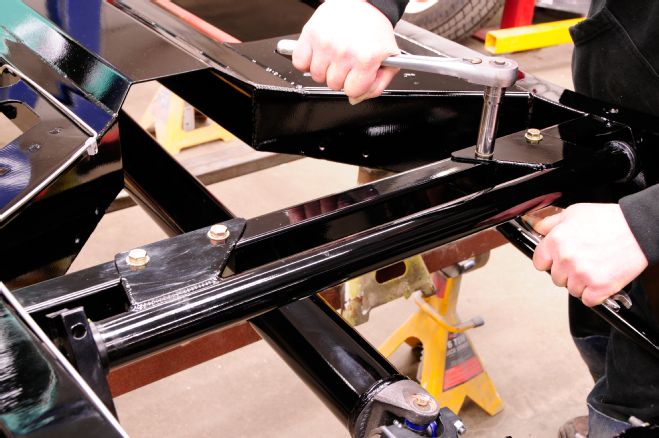
25 With the rearend and Panhard bar dialed in, Roth tightened the large diameter parallel four-bar rear suspension.
26 The Wilwood 11-inch rear disc brakes with four-piston calipers looks slick and will surely get a real workout once the truck hits the streets.

27 From this angle you can appreciate just how clean the installation of the Wilwood four-piston calipers look when combined with the Afco Pro-Touring single adjustable coilover shocks.
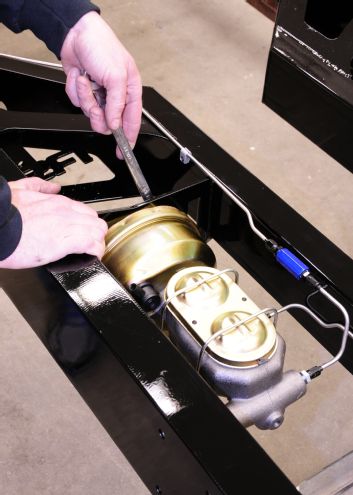
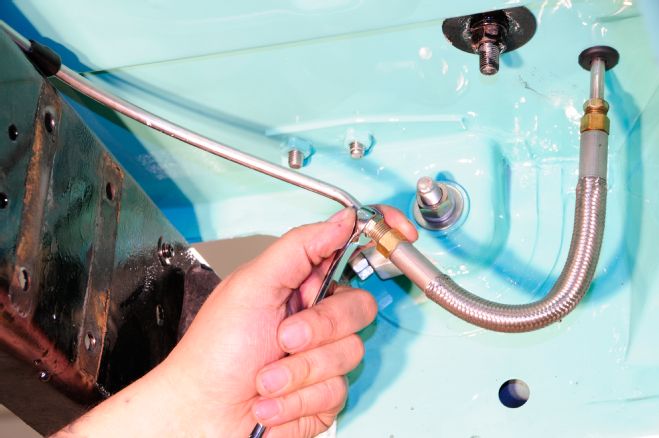
28 The installation of the twin-bowl power master was a snap, especially when combined with the optional pre-bent stainless brake lines and custom mounting hardware.
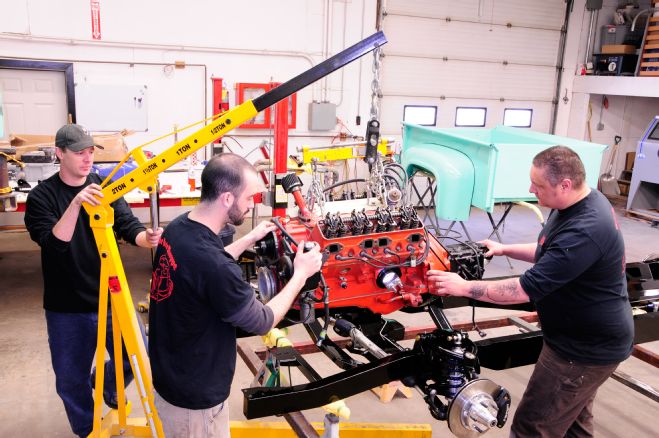
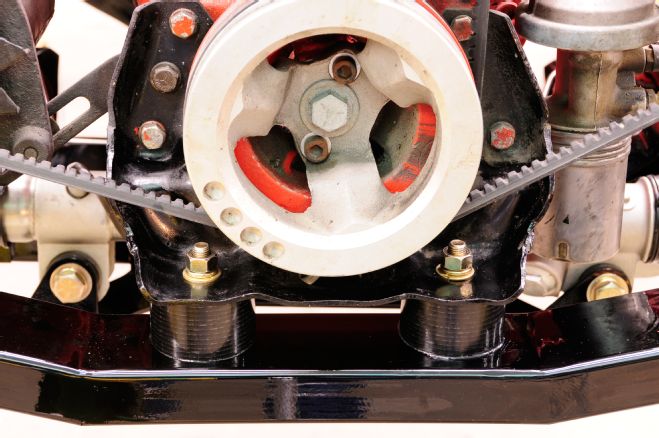
29 With the front chassis assembly completed, the team got busy installing the classic 292ci Ford Y-block V-8 into its new home. Note the engine was stripped down so as to make the installation a smooth transition.
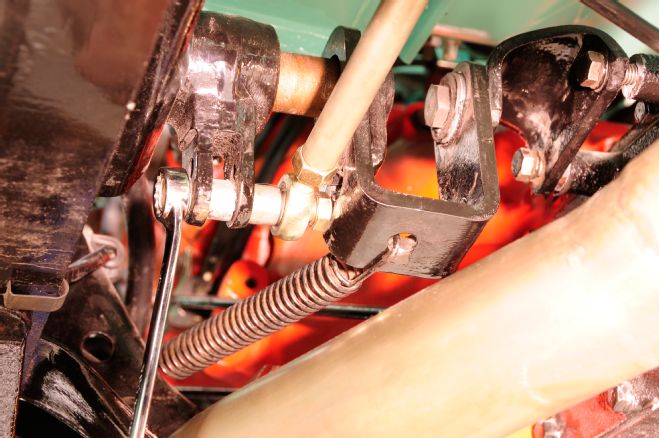
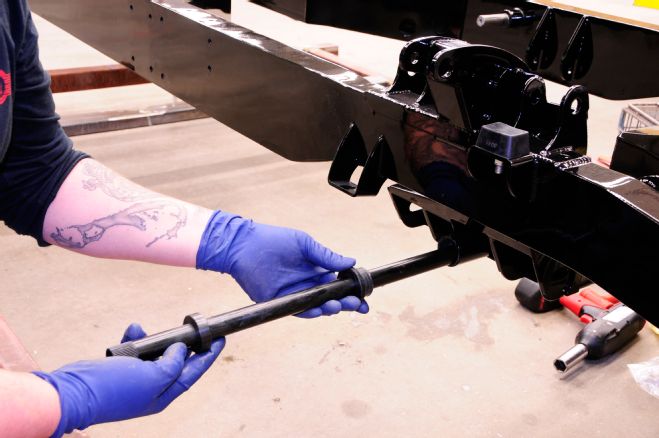
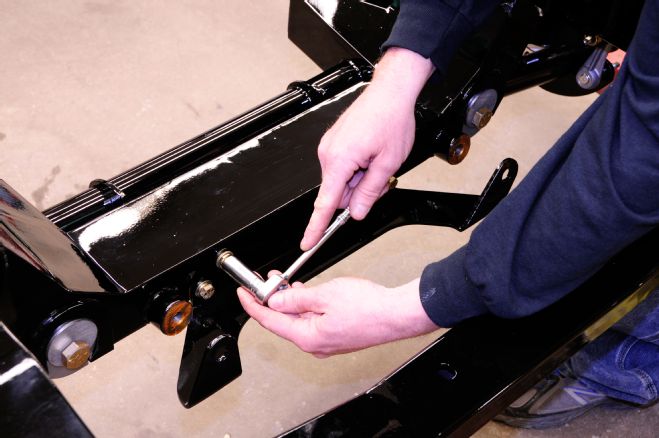
31 The mount for the rear 1-inch splined through-frame sway bar was secured to the frame using a 9/16-inch socket.
30 To support the Y-block in place, the Auto Shoppe fabricated custom engine and transmission crossmembers as well as a pair of one-off Delrin bushings.
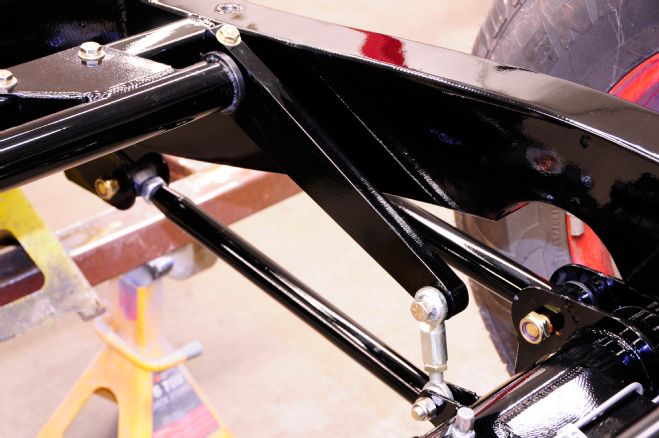
32 Assembled much like the front sway bar, here you can see the finished install complete with Delrin bushings, sway bar arms, and links installed.
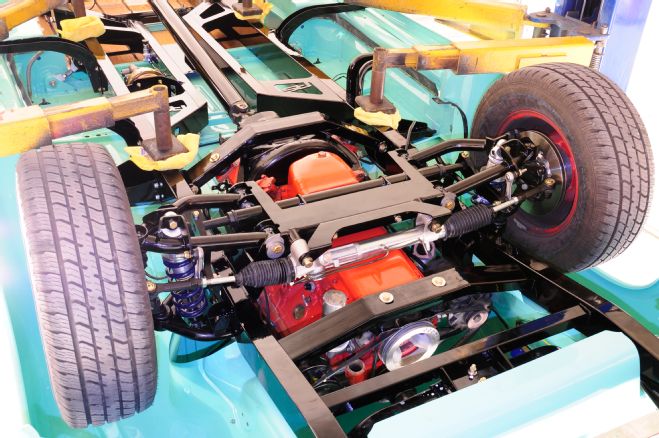
33 From this view you can see the great attention to detail in the overall construction of the chassis with perfect fitment to every area.
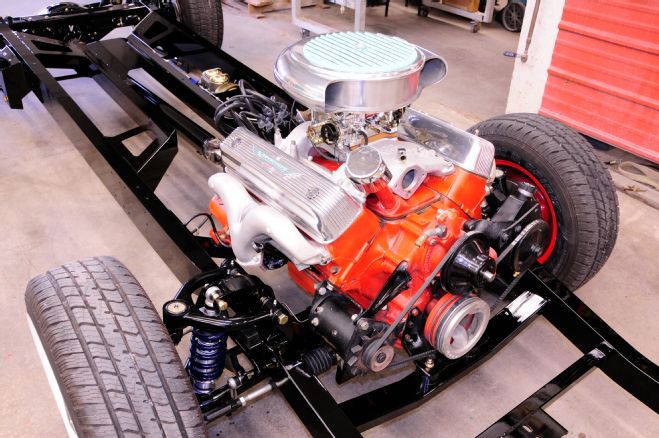
34 Up front the chassis was packed with a neatly detailed 292ci Ford Y-block V-8 that fit perfectly alongside the Roadster Shop's signature REVO IFS and power rack-and-pinion setup.
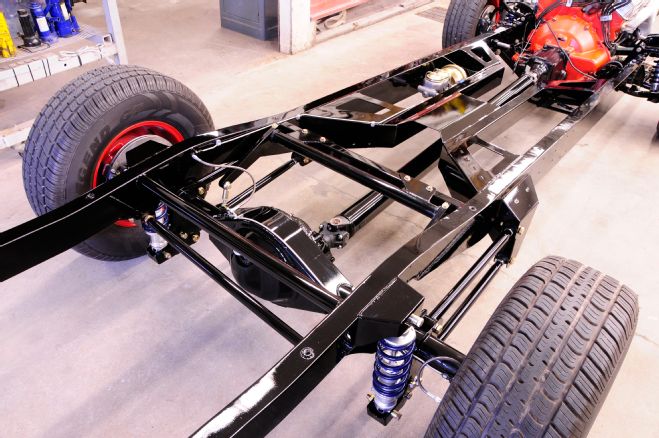
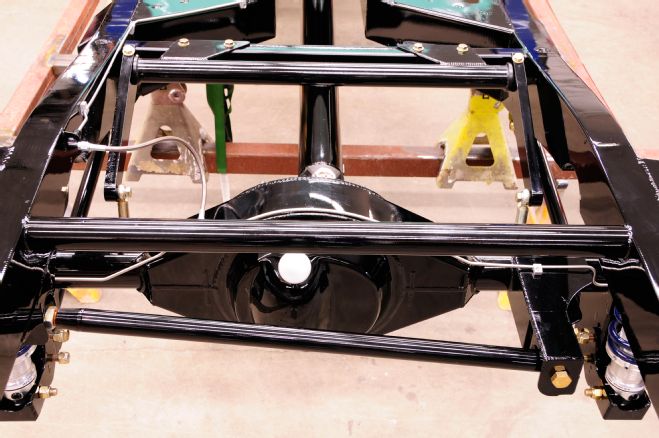
35 The rear of the chassis looks awesome, complete with the new 9-inch Ford rearend, Panhard bar, pre-bent stainless brake lines, sway bar, four-link, and coilovers all mounted in place.
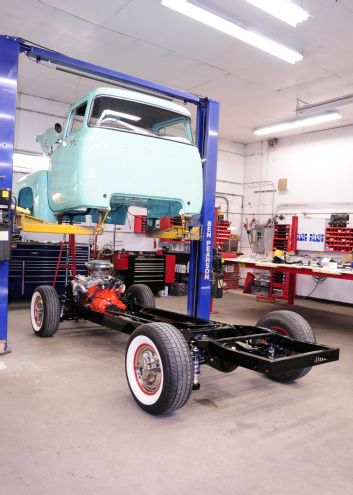
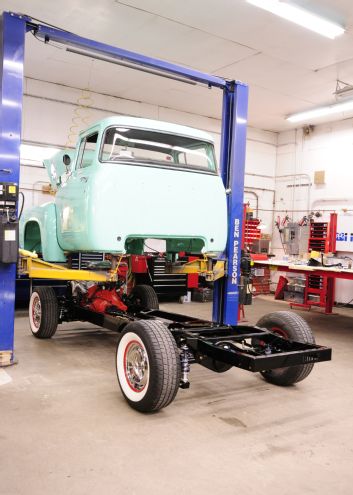
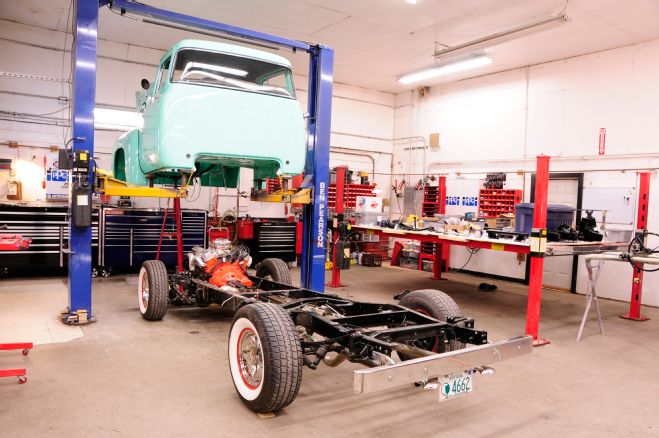
36-38 It wasn't long till the team rolled the new loaded chassis back under the F-100 to have the cab lowered back into place.
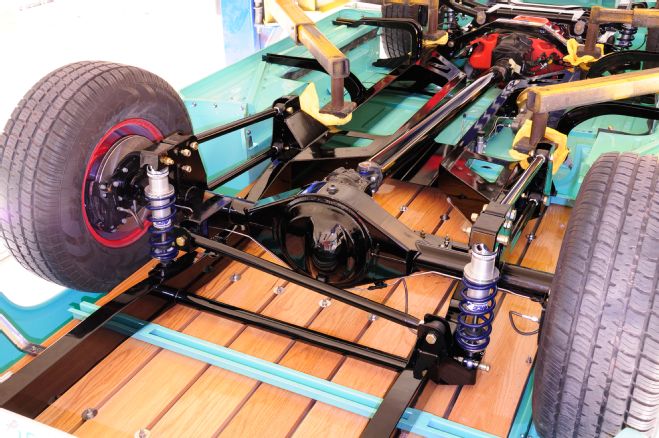
39 With the bed reinstalled the completed chassis looked bitchin' and we're sure the overall suspension improvements out back will bring the truck to a whole new level.
40 The overall quality and fit of the Roadster Shop chassis was outstanding and it's easy to see that the handling and performance the truck will now have will stand tall once it hits the streets.
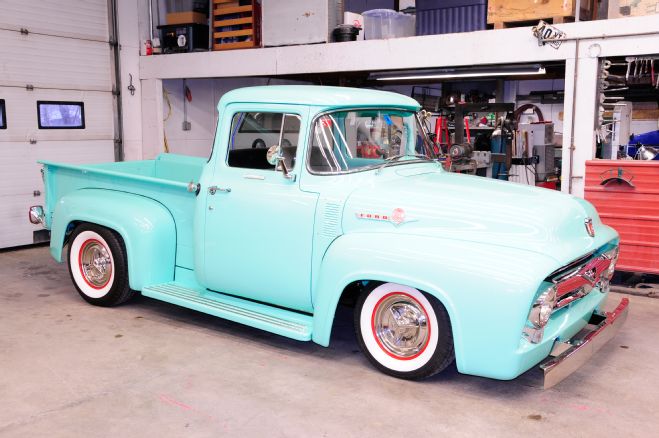
41 It was obvious seeing the truck back on the ground that the overall visual improvements to the stance and rake were just plain wicked proving you can inject plenty of newfound attitude into an existing build.